Table of Contents
Advertisement
Available languages
Available languages
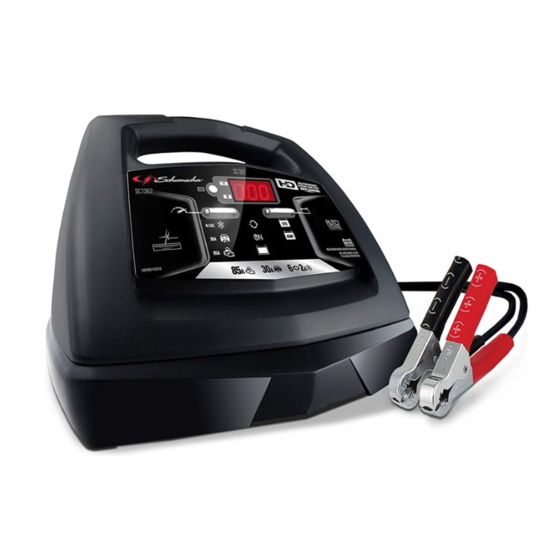
MODEL / MODELO / MODÈLE:
SC1362
Automatic Battery Charger
Cargador de baterías automático
Chargeur de batterie automatique
OWNERS MANUAL
MANUAL DEL USUARIO
MANUEL D'UTILISATION
PLEASE SAVE THIS OWNERS MANUAL AND READ BEFORE EACH USE.
This manual will explain how to use the battery charger safely and effectively.
Please read and follow these instructions and precautions carefully.
POR FAVOR CONSERVE ESTE MANUAL DEL USUARIO Y LEALO ANTES
DE CADA USO. En este manual le explica cómo utilizar el cargador de batería
de manera segura y confiable. Por favor, lea y siga las siguientes instrucciones
y precauciones.
GARDER LE MANUEL D'INSTRUCTION ET LISEZ LE AVANT CHAQUE
UTILISATION. Ce manuel explique comment utiliser le chargeur de batterie
d'une façon securitaire et efficace. S'il vous plaît lisez et suivez ces instructions
et precautions.
0099001888-00
Advertisement
Table of Contents

Related Manuals for Schumacher SC1362


Summary of Contents for Schumacher SC1362
- Page 1 MODEL / MODELO / MODÈLE: SC1362 Automatic Battery Charger Cargador de baterías automático Chargeur de batterie automatique OWNERS MANUAL MANUAL DEL USUARIO MANUEL D’UTILISATION PLEASE SAVE THIS OWNERS MANUAL AND READ BEFORE EACH USE. This manual will explain how to use the battery charger safely and effectively.
-
Page 2: Table Of Contents
CONTENTS IMPORTANT SAFETY INSTRUCTIONS ..................5 PERSONAL SAFETY PRECAUTIONS ..................5 PREPARING TO CHARGE ......................6 CHARGER LOCATION ......................... 6 DC CONNECTION PRECAUTIONS .................... 6 FOLLOW THESE STEPS WHEN BATTERY IS INSTALLED IN VEHICLE ........ 6 FOLLOW THESE STEPS WHEN BATTERY IS OUTSIDE VEHICLE ........7 GROUNDING AND AC POWER CORD CONNECTIONS ............ - Page 3 CONTENIDOS INSTRUCCIONES IMPORTANTES DE SEGURIDAD .............. 14 PRECAUCIONES DE SEGURIDAD PERSONAL ..............14 PREPARACIÓN PARA LA CARGA .................... 15 UBICACIÓN DEL CARGADOR ....................15 PRECAUCIONES DE CONEXIÓN EN CC ................15 SIGA ESTOS PASOS CUANDO LA BATERÍA ESTÉ COLOCADA EN EL VEHÍCULO ... 16 SIGA ESTOS PASOS CUANDO LA BATERÍA SE ENCUENTRE FUERA DEL VEHÍCULO ...
- Page 4 TABLE DES MATIÈRES CONSIGNES DE SÉCURITÉ IMPORTANTES ................25 MESURES DE SÉCURITÉ PERSONNELLE ................25 PRÉPARATION POUR LE CHARGEMENT ................26 EMPLACEMENT DU CHARGEUR..................... 26 PRÉCAUTIONS SUR LA CONNEXION C.C................26 ÉTAPES À SUIVRE QUAND LA BATTERIE EST INSTALLÉE DANS UN VÉHCULE ..... 26 ÉTAPES À...
-
Page 5: Important Safety Instructions
1.3 Do not expose the charger to rain or snow. a qualified serviceman when service or 1.4 Use of an attachment not recommended repair is required. Incorrect reassembly or sold by Schumacher Electric ® may result in a risk of electric shock or fire. -
Page 6: Preparing To Charge
3. PREPARING TO CHARGE 3.1 If necessary to remove battery from battery without removable cell caps, such vehicle to charge, always remove as valve regulated lead acid batteries, grounded terminal from battery first. Make carefully follow manufacturer’s recharging sure all accessories in the vehicle are off, instructions. -
Page 7: Follow These Steps When Battery Is Outside Vehicle
7. FOLLOW THESE STEPS WHEN BATTERY IS OUTSIDE VEHICLE WARNING: A SPARK NEAR THE connect NEGATIVE (BLACK) charger clip BATTERY MAY CAUSE A BATTERY to free end of cable. EXPLOSION. TO REDUCE THE RISK OF 7.5 Do not face battery when making final A SPARK NEAR THE BATTERY: connection. -
Page 8: Operating Instructions
RATE SELECTION BUTTON CHARGED/MAINTAINING (green) Use this button to select one of the following: LED lit: The battery is fully charged and the charger is in maintain mode. 6<>2A CHARGE/MAINTAIN – For charging small and large batteries. Not NOTE: See Operating Instructions for a complete description of the charger modes. - Page 9 MAINTAINING A BATTERY CHARGE/MAINTAIN MODE The SC1362 charges and maintains both To select this mode, press the Rate 6V and 12V batteries. Selection button until the yellow/orange NOTE: The maintain mode technology 6<>2A Charge/Maintain LED lights. The allows you to safely charge and maintain...
- Page 10 battery connections. When the Engine TESTER AND CHARGER Start output is enabled the display will When first turned on, the unit operates only as a tester, not as a charger. show “rdy”. Selecting a charge rate activates the 4. Crank the engine until it starts or 5 battery charger and deactivates the seconds pass.
-
Page 11: Maintenance And Care
12. MAINTENANCE AND CARE A minimal amount of care can keep your • Coil the input and output cords neatly battery charger working properly for years. when storing the charger. This will help prevent accidental damage to the cords • Clean the clamps each time you are and charger. -
Page 12: Before Returning For Repairs
1-800-621-5485 Monday-Friday 7:00 to 5:00 For REPAIR OR RETURN, contact Customer Service at 1-800-621-5485. DO NOT SHIP UNIT until you receive a RETURN MERCHANDISE AUTHORIZATION (RMA) number from Customer Service at Schumacher Electric Corporation. • 12 •... -
Page 13: Specifications
Manufacturer does not provide any warranty for any accessories used with this product that are not manufactured by Schumacher Electric Corporation and approved for use with this product. This Limited Warranty is void if the product is misused, subjected to careless handling, repaired, or modified by anyone other than Manufacturer or if this unit is resold through an unauthorized retailer. -
Page 14: Instrucciones Importantes De Seguridad
1.9 No desarme el cargador; hágalo revisar o a la nieve. por una persona capacitada que efectúe 1.4 El uso de un accesorio no recomendado reparaciones cuando necesite servicio o suministrado por Schumacher Electric ® de mantenimiento o una reparación. Corporation puede provocar riesgo de Volver a ensamblar el cargador en forma incendio, descarga eléctrica o lesiones a... -
Page 15: Preparación Para La Carga
ácido puede producir una corriente de un motor de arranque. No utilice este cortocircuito lo suficientemente elevada cargador de batería para cargar baterías como para soldar un anillo o provocar de pila seca que por lo general se utilizan efectos similares sobre el metal, con artefactos domésticos. -
Page 16: Siga Estos Pasos Cuando La Batería Esté Colocada En El Vehículo
6. SIGA ESTOS PASOS CUANDO LA BATERÍA ESTÉ COLOCADA EN EL VEHÍCULO ADVERTENCIA: POSITIVO (ROJO) del cargador de UNA CHISPA PROVOCADA CERCA batería al borne POSITIVO (POS, P, +) sin DE LA BATERÍA PUEDE CAUSAR LA descarga a tierra de la batería. Conecte EXPLOSIÓN DE LA BATERÍA. -
Page 17: Instrucciones De Montaje
ordenanzas y códigos. Los pasadores del 8.3 USO DE UN CABLE DE EXTENSIÓN enchufe deben adaptarse al receptáculo El uso de una extensión no se (tomacorriente). No utilizar con un sistema recomienda. Si debe usar una extensión, que no posea descarga a tierra. siga estas pautas: 8.2 PELIGRO: Nunca altere el cable o •... -
Page 18: Instrucciones De Operación
INDICADORES LED las clasifica como de “bajo mantenimiento” o “libre de mantenimiento”. Este tipo de LED PINZAS INVERTIDAS (rojo) baterías está diseñado para suministrar parpadea: Las conexiones están rápidas ráfagas de energía (tales como los inversas. arranques de motores) y poseen un mayor LED (amarillo/naranja) encendido: recuento en placa. - Page 19 Cuando MANTENIENDO UNA BATERÍA la batería esté completamente cargada, la El SC1362 carga y mantiene las baterías luz LED verde de Cargado/Mantenimiento de 6 y 12 voltios, manteniéndolas a carga se iluminará. Si no se puede completar completa.
- Page 20 1. Con el cargador desenchufado del UTILIZAR EL PROBADOR tomacorriente de CA, conecte el DE TENSIÓN DE BATERÍA cargador a la batería siguiendo las 1. Con el cargador desenchufado del instrucciones que figuran en la sección tomacorriente de CA, conecte el Carga de la Batería en el Vehículo.
-
Page 21: Mantenimiento Y Cuidado
UTILIZACIÓN DE UN PROBADOR encienda las luces delanteras u otros DE RENDIMIENTO DEL ALTERNADOR accesorios. 1. Con el cargador desenchufado del 4. Lea la tensión de la pantalla digital. tomacorriente de CA, conecte el Si usted obtiene una lectura de cargador a la batería siguiendo las entre 13,4 voltios y 14,6 voltios, instrucciones que figuran en las... - Page 22 Localización y Solución de Problemas PROBLEMA CAUSA POSIBLE SOLUCIÓN Las pinzas de la Este cargador está equipado No hay problema; es una condición batería no hacen corto con un auto-rectificador. Este normal. al juntarse una con no permitirá paso de corriente si otra.
-
Page 23: Antes De Devolver A Reparaciones
5:00 Para REPARACIÓN O DEVOLUCIÓN, comuníquese con Servicios al Cliente al 1-800-621-5485. NO ENVÍE LA UNIDAD hasta que usted reciba AUTORIZACIÓN DE DEVOLUCIÓN DE MERCANCÍA (RMA) de Servicios al Cliente de Schumacher Electric Corporation. 15. ESPECIFICACIONES Entrada ..........120V CA @ 60Hz, 4A continua / 19A intermitente Salida ...... -
Page 24: Garantía Limitada
El Fabricante no presta garantía por lo accesorios utilizados con este producto que no sean los fabricados por Schumacher Electric Corporation y que no estén aprobados para su uso con este producto. La presente Garantía Limitada será nula si el producto se utiliza en forma errónea, se trata de manera inadecuada, es reparado o modificado... -
Page 25: Consignes De Sécurité Importantes
1. CONSIGNES DE SÉCURITÉ IMPORTANTES CONSERVER CES INSTRUCTIONS. 1.1 CONSERVER CES INSTRUCTIONS – 1.8 Ne pas faire fonctionner le chargeur s’il a Ce manuel contient des instructions reçu un choc violent, est tombé par terre importantes concernant la sécurité et le ou a été... -
Page 26: Préparation Pour Le Chargement
12Ah (6V) et 22-59Ah (12V). Il n’est pas 2.9 NE JAMAIS charger une batterie gelée. conçu pour alimenter un système électrique 2.10 AVERTISSEMENT : Ce produit contient un à basse tension autre que dans une ou plusieurs produits chimiques reconnus application d’un démarreur. -
Page 27: Étapes À Suivre Quand La Batterie Est Installée Hors Du Véhicule
l’étape 6.5. Si la borne positive est N, –) non mise à la masse de la batterie. raccordée au châssis, voir l’étape 6.6. Raccorder la pince POSITIVE (ROUGE) au châssis du véhicule ou au moteur, 6.5 Si la borne négative est mise à la masse, loin de la batterie. -
Page 28: Directives D'assemblage
9. DIRECTIVES D’ASSEMBLAGE 9.1 Enlever tous les cordons dérouler sur rangement des câbles. Pour les installer, les câbles avant d’utiliser le chargeur de aligner les deux pieds avec les deux batterie. prises situées à l’arrière du chargeur et poussez jusqu’à ce que vous entendiez 9.2 Inclus avec votre chargeur sont deux un déclic. -
Page 29: Consignes D'utilisation
11. CONSIGNES D’UTILISATION AVERTISSEMENT : Une étincelle près de MODE BOOST la batterie peut provoquer une explosion. Pour choisir le mode Boost, appuyez sur bouton Sélection du Taux jusqu’à ce NOTE : Ce chargeur est équipé que le voyant DEL Boost jaune / orange d’une fonction automatique. - Page 30 MODE DE DÉSULFATATION UTILISER LA FONCTION L’écran affichera « SUL » lorsqu’une DEMARRAGE DU MOTEUR batterie sulfatée est détectée, puis le Votre chargeur de batterie peut être utilisé chargeur passera au mode désulfatation. pour démarrer votre voiture si la batterie Si la désulfatation n’est pas réussie est faible.
-
Page 31: Maintenance Et Entretien
5. Si le moteur ne démarre pas, utilisez le taux quand le voyant DEL Aide-Démarrage réglage 30A Boost pendant encore est allumé (sauf pendant les 180 5 minutes avant de démarrer le moteur secondes de refroidissement) vous de nouveau. arrêterez le chargeur et mettrez en marche le testeur. -
Page 32: Tableau De Dépannage Et Codes D'échec
13. TABLEAU DE DÉPANNAGE ET CODES D’ÉCHEC Codes d’échec CODE DESCRIPTION RAISON / SOLUTION La tension de batterie est toujours en La batterie pourrait être mauvaise; faites-la vérifier ou dessous de 10 V (pour une batterie remplacer. de 12V) or 5V (pour une batterie de 6V) après 2 heures de chargement. - Page 33 PROBLÈME CAUSE POSSIBLE SOLUTION Le démarrage du moteur Consomme plus de 85 A. Le temps de lancement varie avec ne fonctionne pas. le montant de courant consommé. Si le lancement consomme plus de le taux de Démarrage, le temps de lancement peut être inférieur à...
-
Page 34: Avant De Retourner Pour Les Réparations
ACHETEUR DE CE PRODUIT. CETTE GARANTIE LIMITÉE N’EST PAS TRANSFÉRABLES NI CESSIBLES. Schumacher Electric Corporation (le « Fabricant ») garantit ce unité pour deux (2) ans à compter de la date d’achat au détail contre les défauts de matériaux ou de fabrication qui peuvent se produire dans des conditions normales d’utilisation et de soins. -
Page 35: Warranty Card
ORIGINAL receipt because it will be required for any warranty claims. This warranty is not transferable. Send warranty card only. DO NOT SEND UNIT TO THIS ADDRESS FOR REPAIR. Mail this card to: Schumacher Electric Corporation 801 Business Center Drive Mount Prospect, IL 60056-2179 Name ______________________________________________________________... -
Page 36: Carte De Garantie
éventuelle réclamation au titre de la garantie. Cette garantie n’est pas transférable. Envoyer la carte de garantie seulement. NE PAS ENVOYER L’UNITÉ À CETTE ADRESSE POUR RÉPARATION. Envoyer cette carte à : Schumacher Electric Corporation 801 Business Center Drive Mount Prospect, IL 60056-2179 (É.-U ) Nom _______________________________________________________________...