Table of Contents
Advertisement
Quick Links
Download this manual
See also:
User Manual
Advertisement
Table of Contents

Related Manuals for HTC Touch Touch Pro


Summary of Contents for HTC Touch Touch Pro
- Page 1 Quick Start Guide...
-
Page 2: Please Read Before Proceeding
Without limiting the foregoing, it is further understood that HTC and its Providers are not responsible for Your use or misuse of the Weather Information, Data and/or Documentation or the results from such use. HTC and its Providers... -
Page 3: Limitation Of Damages
Limitation of Damages TO THE MAXIMUM EXTENT PERMITTED BY APPLICABLE LAW, IN NO EVENT SHALL HTC OR ITS PROVIDERS BE LIABLE TO USER OR ANY THIRD PARTY FOR ANY INDIRECT, SPECIAL, CONSEQUENTIAL, INCIDENTAL OR PUNITIVE DAMAGES OF ANY KIND, IN CONTRACT OR TORT, INCLUDING, BUT NOT LIMITED... -
Page 4: Table Of Contents
Table of Contents Contents 1. Welcome to the Touch Pro Quick Start Guide ...6 2. Inside the Box ...6 3. Getting to Know the Touch Phone ...7 4. Installing the SIM Card, Battery, and Storage Card ...8 5. Charging the Battery ... 10 6. - Page 5 Table of Contents 19. Keeping Track of Appointments ... 31 20. Keeping Track of Things to Do ... 32 21. Taking Photos and Shooting Videos ... 33 22. Viewing Photos and Videos ... 35 23. Synchronizing Your Device with Your PC... 37 24.
-
Page 6: Welcome To The Touch Pro Quick Start Guide
6 Quick Start Guide 1. Welcome to the Touch Pro Quick Start Guide Congratulations on your purchase of the Touch Pro device. This Quick Start Guide will help you get started with your Windows Mobile® 6.1 Professional powered Touch Phone. We’ve arranged this Quick Start Guide in a way that it starts from when you open the box and then it walks you through the features we feel that you want to know or use right away when... -
Page 7: Getting To Know The Touch Phone
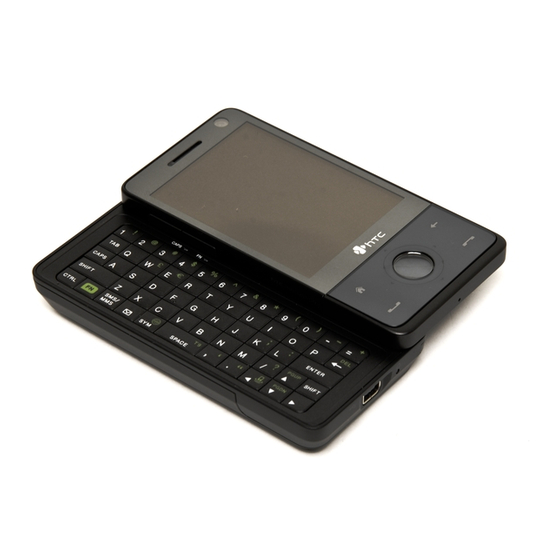
3. Getting to Know the Touch Phone Hardware Keyboard Second Camera BACK NAVIGATION CONTROL/ ENTER HOME TALK/SEND VOLUME UP VOLUME DOWN Speaker Earpiece Touch Screen POWER Sync Connector/Earphone Jack/TV Out Stylus Quick Start Guide 7 3.2 Megapixel Camera Flash Light Back Cover Strap Holder Microphone... -
Page 8: Installing The Sim Card, Battery, And Storage Card
8 Quick Start Guide 4. Installing the SIM Card, Battery, and Storage Card Make sure your device is turned off before installing the SIM card, battery, and storage card. You also need to remove the back cover before you can install these components. To remove the back cover Hold the device with both hands and the front panel facing down. - Page 9 To install the battery Align the battery’s exposed copper contacts with the battery connectors inside the battery compartment. Insert the contact’s side of the battery first and then gently push the battery into place. Replace the back cover. To install a microSD card Insert the microSD™...
-
Page 10: Charging The Battery
10 Quick Start Guide 5. Charging the Battery New batteries are shipped partially charged. Before you start using your device, it is recommended that you install and charge the battery. To charge the battery Connect the USB connector of the AC adapter to the sync connector on your device. - Page 11 Note After the device restarts, you may be prompted to set up an e-mail account. Configure data connection settings After the device restarts, you will be asked if you want to automatically configure your device’s data connections. By letting the device configure the data connection settings, you do not need to enter the settings for 3G/GPRS and WAP manually.
- Page 12 12 Quick Start Guide To automatically configure data connection settings When you see the Connection Setup notification message at the bottom of the screen, tap Yes. Connection Setup then starts to configure your device’s data connection settings. After the Connection Setup completes the configuration, tap Restart.
-
Page 13: The Home Screen
Quick Start Guide 13 7. The Home Screen After the device restarts from configuring your data connections, you are taken to the Home screen. The default home screen of the device is the TouchFLO™ 3D Home screen which allows finger-touch access to the most important functions such as contacts, text messages, e-mail, Internet, and more. -
Page 14: Single Hand Operation
14 Quick Start Guide 8. Single Hand Operation One hand, one touch makes it easy and quick to accomplish tasks on your device. Scroll through the tabs on the Home screen by touching the active tab and then dragging it. Finger-friendly keyboard makes one-... -
Page 15: Making Your First Call
9. Making Your First Call On the Home screen, tap Phone. Tap the keys on the keypad to enter the phone number. If you tapped a wrong number, digit of a number. To erase the entire number, tap and hold Press the TALK/SEND button to place the call. -
Page 16: Entering Information
16 Quick Start Guide 10. Entering Information When you need to enter text, you can use the hardware keyboard or choose one of the available onscreen input methods. To use the hardware keyboard Your device comes with a hardware QWERTY keyboard, which is similar to a standard computer keyboard. - Page 17 Here are some examples of onscreen input methods. Full QWERTY To enter characters, simply tap on the keys on the keyboard. Depending on the keyboard layout selected, you may need to tap the same key more than once to get to the character that you want to enter.
-
Page 18: Adding Contacts To Your Device
18 Quick Start Guide 11. Adding Contacts to Your Device Save the contact information of the people you stay in touch with on your device. To add a contact to your device On the Home screen, slide to the People tab and then tap All People. -
Page 19: Sending A Text Message
12. Sending a Text Message Create and send SMS messages from your device. On the Home screen, slide to the Messages tab and tap In the To field, enter the mobile phone number of the person you want to send the message to. You can also tap To to select a contact from your Contacts list. -
Page 20: Setting Up Wi-Fi
20 Quick Start Guide 14. Setting Up Wi-Fi Connect to a Wi-Fi hotspot to browse the Internet. To connect to an open Wi-Fi network On the Home screen, slide to the Settings tab. On the Settings screen, tap Communications > Wi-Fi to turn on Wi-Fi. -
Page 21: Setting Up An Internet E-Mail Account
15. Setting Up an Internet E-mail Account Set up your personal e-mail account such as Gmail or Yahoo! on your device. On the Home screen, slide to the Mail tab and tap New Account. Enter the E-mail Address and Password of your personal e-mail account and select the Save password checkbox. - Page 22 22 Quick Start Guide Enter Your name and the Account display name and then tap Next. Note The Account display name is the name you will see on the Mail tab on the Home screen. Select how often you want the device to check for new messages on the server in Automatic Send/Receive and then tap Finish.
-
Page 23: Mobile Internet
16. Mobile Internet Take advantage of hi-speed internet connection and improved browser features to experience desktop-like web surfing on your device. To open Opera Mobile and browse the web On the Home screen, slide to the Internet tab and then tap Browser. - Page 24 24 Quick Start Guide To zoom in on a web page Double-tap the area of the screen you want to zoom in to. While zoomed in, double-tap the screen to zoom out. To pan the web page Scroll the page by simply dragging your finger on the screen.
- Page 25 Quick Start Guide 25 Automatic text wrapping When you zoom in on a web page, the web page text automatically wraps to fit the screen. Watch YouTube™ videos Watch YouTube videos on your device. View, bookmark, view recent videos, or search for videos by simply touching the buttons at the bottom of the screen.
-
Page 26: Changing Phone Settings
26 Quick Start Guide 17. Changing Phone Settings Customize your phone settings to suit your personal preferences. To change the ringtone On the Home screen, slide to the Settings tab and then tap Sound. On the Sound screen, scroll down to Ringtone and tap it. On the Ringtones screen, tap the ringtone you want to use and tap Done. - Page 27 To enable device lock Enabling device lock requires you to enter a password to unlock the device after it has been left idle for a set period of time. On the Home screen, slide to the Settings tab and then tap All Settings.
- Page 28 28 Quick Start Guide To enable the SIM card PIN Enabling the SIM card PIN requires you to enter a password first before you can use the phone features of the device. On the Home screen, slide to the Settings tab and then tap All Settings.
-
Page 29: Bluetooth
18. Bluetooth Pair your device with other Bluetooth-enabled devices or a Bluetooth headset if you have one. To pair your device with a Bluetooth device On the Home screen, slide to the Settings tab and then tap Menu > Bluetooth Devices > Devices tab. Tap Add new device. - Page 30 30 Quick Start Guide To pair your device with a Bluetooth headset Make sure that both your device and the Bluetooth headset are turned on and within close range, and that the headset is visible. Refer to the manufacturer’s documentation to find out how to set the headset in visible mode.
-
Page 31: Keeping Track Of Appointments
19. Keeping Track of Appointments Use Calendar to help remind you of your upcoming appointments. To enter an appointment into your device On the Home screen Home tab, tap Calendar. On the Calendar screen, tap Menu > New Appointment. Use the onscreen keyboard to enter the appointment details. -
Page 32: Keeping Track Of Things To Do
32 Quick Start Guide 20. Keeping Track of Things to Do Use Tasks to help you remember things that you have to do. To create a to-do list Tap Start > Programs > Tasks. On the Tasks screen, tap Tap here to add a new task and then enter the task name. -
Page 33: Taking Photos And Shooting Videos
21. Taking Photos and Shooting Videos Use the 3.2 megapixel camera of the device to take photos and shoot videos. Auto-focus indicator To take a photo On the Home screen, slide to the Photos and Videos tab and then tap the camera icon ( automatically switches to landscape mode when you open the Camera program. - Page 34 34 Quick Start Guide To shoot video On the Home screen, slide to the Photos and Videos tab and then tap the video icon ( automatically switches to landscape mode when you open the Camera program. Aim the device at the subject. Touch (do not press) the ENTER button to activate auto- focus and then when focus is set, press the ENTER button to start capturing video.
-
Page 35: Viewing Photos And Videos
22. Viewing Photos and Videos Use Album to browse photos and play back video. Note Album can only display files in the BMP, GIF, PNG, JPG, Animated GIF, 3GP, MP4, and WMV formats. To view photos On the Home screen, slide to the Photos and Videos tab and tap Album. - Page 36 36 Quick Start Guide To rotate the image While viewing images, you can automatically rotate the image by simply turning your device sideways. To play back video On the Home screen, slide to the Photos and Videos tab and tap Album. Tap the video you want to playback.
-
Page 37: Synchronizing Your Device With Your Pc
23. Synchronizing Your Device with Your PC Synchronize information and files between your PC and device. Note You can refer to Chapter 5 of the User Manual to know which information and files you can synchronize. Set up synchronization software on your PC Depending on the Operating System of your PC, you will need either Microsoft ActiveSync®... - Page 38 38 Quick Start Guide Select whether or not to allow wireless data connections on your device while it is connected to the PC. Click Next. Click Finish. To synchronize your device with a Windows Vista PC Connect your device to your PC using the supplied USB cable.
-
Page 39: Copying Files To Your Device
24. Copying Files to Your Device You can install a microSD™ card into your device to have additional storage to store files. To copy files from the PC to the device’s storage card Connect your device to your PC using the supplied USB cable. -
Page 40: Synchronizing Music Files
40 Quick Start Guide 25. Synchronizing Music Files Synchronize music files on your PC and the device so you can listen to them while on the go. On your computer, open Windows Media® Player and then connect your device to your computer. On the Device Setup dialog box, enter a name for your device and click Finish. -
Page 41: Listening To Music On Your Device
26. Listening to Music on Your Device After synchronizing music files to your device, you can use the Music tab on the Home screen to play back music on your device. To listen to music On the Home screen, slide to the Music tab and then tap Library. -
Page 42: Resetting Your Device
42 Quick Start Guide 27. Resetting Your Device If you experience some sluggishness with your device, you can perform a reset to shut down all programs and restart your device. To perform a soft reset Pull out the stylus. Use the stylus to press the RESET button at the bottom of the device. -
Page 43: Important Health Information And Safety Precautions
Important Health Information and Safety Precautions When using this product, the safety precautions below must be taken to avoid possible legal liabilities and damages. Retain and follow all product safety and operating instructions. Observe all warnings in the operating instructions on the product. To reduce the risk of bodily injury, electric shock, fire, and damage to the equipment, observe the following precautions. - Page 44 44 Quick Start Guide local power company. For a product that operates from battery power or other sources, refer to the operating instructions that are included with the product. • Handle battery packs carefully This product contains a Li-ion battery. There is a risk of fire and burns if the battery pack is handled improperly.
- Page 45 • Always keep the battery out of the reach of babies and small children, to avoid swallowing of the battery. Consult the doctor immediately if the battery is swallowed. • If the battery leaks: • Do not allow the leaking fluid to come in contact with skin or clothing.
- Page 46 NF EN 50332-1:2000 and/or NF EN 50332-2:2003 standards as required by French Article L. 5232-1. • Earphone, manufactured by HTC, Model HS S300. SAFETY IN AIRCRAFT Due to the possible interference caused by this product to an aircraft’s navigation system and its communications network, using this device’s phone...
- Page 47 marked. These include fueling areas, below deck on boats, fuel or chemical transfer or storage facilities, and areas where the air contains chemicals or particles, such as grain, dust, or metal powders. ROAD SAFETY Vehicle drivers in motion are not permitted to use telephony services with handheld devices, except in the case of emergency.
- Page 48 48 Quick Start Guide HEARING AIDS Some digital wireless phones may interfere with some hearing aids. In the event of such interference, you may want to consult your service provider, or call the customer service line to discuss alternatives. NONIONIZING RADIATION Your device has an internal antenna.
-
Page 49: General Precautions
General Precautions • Avoid applying excessive pressure to the device Do not apply excessive pressure on the screen and the device to prevent damaging them and remove the device from your pants’ pocket before sitting down. It is also recommended that you store the device in a protective case and only use the device stylus or your finger when interacting with the touch screen. - Page 50 50 Quick Start Guide • Heed service markings Except as explained elsewhere in the Operating or Service documentation, do not service any product yourself. Service needed on components inside the device should be done by an authorized service technician or provider. •...
- Page 51 NOTICE: When taking the device from low-temperature conditions into a warmer environment or from high-temperature conditions into a cooler environment, allow the device to acclimate to room temperature before turning on power. • Avoid pushing objects into product Never push objects of any kind into cabinet slots or other openings in the product.
-
Page 52: Regulatory Agency Identifications
52 Quick Start Guide Regulatory Agency Identifications For regulatory identification purposes, your product is assigned a model number of RAPH100. To ensure continued reliable and safe operation of your device, use only the accessories listed below with your RAPH100. The Battery Pack has been assigned a model number of DIAM171. Note This product is intended for use with a certified Class 2 Limited Power Source, rated 5 Volts DC, maximum 1 Amp power supply unit. -
Page 53: Weee Notice
• Hearing Aids Some digital wireless phones may interfere with some hearing aids. In the event of such interference, you may want to consult your service provider, or call the customer service line to discuss alternatives. • Other Medical Devices If you use any other personal medical device, consult the manufacturer of your device to determine if they are adequately shielded from external RF energy. -
Page 54: Rohs Compliance
54 Quick Start Guide The WEEE logo (shown at the left) on the product or on its box indicates that this product must not be disposed of or dumped with your other household waste. You are liable to dispose of all your electronic or electrical waste equipment by relocating over to the specified collection point for recycling of such hazardous waste.