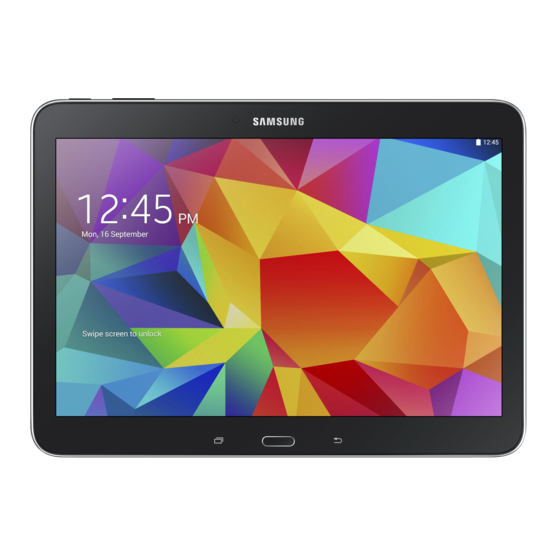
Samsung GALAXY tab4 User Manual
Android tablet
Hide thumbs
Also See for GALAXY tab4:
- User manual (228 pages) ,
- Important information manual (60 pages) ,
- Service manual (43 pages)

Related Manuals for Samsung GALAXY tab4


Summary of Contents for Samsung GALAXY tab4
- Page 1 A N D R O I D T A B L E T User Manual Please read this manual before operating your tablet, and keep it for future reference.
- Page 2 All Intellectual Property, as defined below, owned by or which is otherwise the property of Samsung or its respective suppliers relating to the SAMSUNG Galaxy Tab, including but not limited to, accessories, parts, or software relating there to (the “Galaxy Tab System”), is proprietary to Samsung and protected under federal laws, state laws, and international treaty provisions.
- Page 3 THERETO. NOTHING CONTAINED IN THE INSTRUCTION MANUAL SHALL BE CONSTRUED TO CREATE AN EXPRESS OR IMPLIED WARRANTY OF ANY KIND WHATSOEVER WITH RESPECT TO THE PRODUCT. IN ADDITION, SAMSUNG SHALL NOT BE LIABLE FOR ANY DAMAGES OF ANY KIND RESULTING FROM THE PURCHASE OR USE OF THE PRODUCT OR ARISING FROM THE BREACH OF THE EXPRESS WARRANTY, INCLUDING INCIDENTAL, SPECIAL OR CONSEQUENTIAL DAMAGES, OR LOSS OF ANTICIPATED PROFITS OR BENEFITS.
- Page 4 2014 Samsung Telecommunications America, LLC. Samsung is a registered trademark of Samsung Electronics Co., Ltd. Do you have questions about your Samsung Mobile tablet? For 24 hour information and assistance, we offer a new FAQ/ARS System (Automated Response System) at: http://www.samsung.com/us/support...
- Page 5 AT&T may collect certain types of information from your device when you use AT&T services to provide customer support and to improve its services. For more information on AT&T's Privacy Policy, visit http://www.att.com/privacy. Online Legal Information The online version of the Health/Safety and Warranty guide for your device can be found at: www.samsung.com.
-
Page 6: Table Of Contents
Folders ......28 Creating a Samsung Account ... . . 10 Wallpapers . - Page 7 Favorites ......50 Section 8: Applications ......92 Section 4: Messaging ....... 52 Managing Applications ....92 Types of Messages .
- Page 8 Gmail ......101 Samsung Apps ..... . .111 Google .
- Page 9 About Device ......155 Section 10: Samsung Product Font ....... 129 Notification Panel .
-
Page 10: Section 1: Getting Started
Section 1: Getting Started This section helps you to quickly start using your device. Note: Unless stated otherwise, instructions in this user manual Understanding This User Manual start with the device unlocked, at the Home screen. The sections of this manual generally follow the features of your device. -
Page 11: Battery
Battery Text Conventions This manual provides condensed information about how to Your device is powered by a rechargeable, standard Li-Ion use your device. To make this possible, the following text battery. A Wall/USB Charger (Charging Head and USB cable) conventions are used to represent often-used steps: are included with the device for charging the battery. - Page 12 Battery Indicator 1. Insert the USB cable into the Charging Head. The Battery icon in the Status Bar shows the battery power level. When battery power is 15% or less, your device prompts you to charge the battery. If you continue to operate the device without charging, the device powers off.
-
Page 13: Installing The Sim Card
3. Plug the Charging Head into a standard AC power Carefully slide the SIM card into the SIM card socket outlet. (as shown) until the card locks into place. The illustration shows the screen facing up. Warning! While the device is charging, if the touch screen •... -
Page 14: Turning Your Device On And Off
Turning Your Device On and Off Setting Up Your Device Turning Your Device On When you first turn on your device, you are asked to set up a few things. To do that, the following screens display. Some Press and hold the Power/Lock Key screens can be skipped (touch Skip) or re-displayed (touch Note: Your device’s internal Back). -
Page 15: Creating A Samsung Account
Samsung applications. If you did not create a need to create a Google Account when you first use your Samsung account when you first set up your tablet, follow device. With a Google Account, Google applications will these steps: always be in sync between your tablet and computer. -
Page 16: Memory Card
Memory Card Your device supports removable microSD or microSDHC memory cards with maximum capacities of 64 GB (depending on the memory card manufacturer and type). Memory cards are used to store music, photos, videos, and other files. Installing a Memory Card 1. Open the Memory Card Slot cover and turn to expose the slot. - Page 17 Removing a Memory Card Important! To prevent damage to information stored on the memory card, unmount the card before removing it from the device. 1. From a Home screen, touch Apps Settings Storage. 2. Under SD card, touch Unmount SD card and then touch OK.
-
Page 18: Locking And Unlocking The Touch Screen
Locking and Unlocking the Touch Troubleshooting Screen If your device has fatal errors, hangs up, or freezes, you may need to reset the device to regain functionality. 1. Press the Power/Lock Key • If your device is frozen and unresponsive, press and hold the 2. Press again to display the lock screen then Power/Lock Key and the Volume Down Key at the same time for... -
Page 19: Section 2: Understanding Your Device
• Preloaded applications such as Google Play Books, Google • Built-in Wi-Fi technology (802.11 a/b/g/n) Play Store, and Samsung Apps. For more information, refer to • 3 megapixel camera and camcorder plus 1.3 megapixel “Applications” on page 92. forward-facing camera •... -
Page 20: Front View
Front View The following items can be found on the front of your device as illustrated. 1. External Speakers: Used in music or video playback, notification tones, and for other sounds. 2. Front-facing Camera Lens: Used when taking photos or recording videos. -
Page 21: Back And Bottom Views
Back and Bottom Views Top View The following items can be found on the back and bottom of The following items can be found on the top your device. of your device. 1. Camera Lens: Used when taking photos or recording 1. Power/Lock Key: Press and hold to turn videos. -
Page 22: Navigating Your Device
Navigating Your Device Application Bar The Application Bar is the area along the top of various Use command buttons and the touch screen to navigate. Command Buttons application screens. It usually contains the Search and Menu icons, as well as other icons that are used to display options Context-Sensitive Menus and settings. - Page 23 Motion Control Swipe and Palm Swipe To swipe, lightly drag your finger vertically or horizontally Caution! Excessive shaking or impact to the device may cause across the screen. Use swipe when: unintended results. • Unlocking the screen • Scrolling through the Home screen or a menu To learn how to properly control motions: To palm swipe, swipe the side of your hand horizontally 1.
- Page 24 4. Touch the OFF / ON button to the right of each feature to Configure Smart Screen turn it ON To enable Smart screen features: For more information, refer to “Palm Motion” on page 138. From a Home screen, touch Apps Settings Smart Screen...
-
Page 25: Home Screen
Home Screen 6. Current screen indicator: Indicates which Home screen is being displayed. For more information, refer to The Home screen is the starting point for using your device. “Extended Home Screen” on page 21. Note: Unless stated otherwise, instructions in this user manual 7. - Page 26 Extended Home Screen 4. Under Add to Home screen touch: • Apps and widgets to add app or widget shortcuts on the The Home screen consists of the Home panel plus additional Home screen. panels that extend beyond the display width to provide more space for adding shortcuts and widgets.
- Page 27 Adding and Removing Home Screen Panels 2. Use these controls to configure panels: Your device comes with seven Home screen panels. You can Remove: Touch and drag a panel to the Trash customize the Home screen by removing or adding panels. Can to remove the panel from the Home screen.
-
Page 28: Notifications
Google Search Bar Notification Panel The Google Search Bar provides an onscreen Internet search To view the Notification Panel: engine powered by Google. 1. Swipe downward from the top of the screen. 1. From the main Home screen, swipe the screen to the 2. Scroll down the list to see additional notification left to bring up the next Home screen. - Page 29 Accessing Additional Panel Functions 3. Touch and locate the Notification Panel area at the bottom of the Notification Panel screen. In addition to notifications, the Notification Panel also • In a single motion, touch and hold a desired function, such as provides quick access to separate device functions.
-
Page 30: Status Bar
Status Bar Icons Notifications displays system notifications. Touch a notification entry to display the details. Touch Some common status and notification icons are shown below. to remove Notification Icons from the Status Bar. For more information, refer to “Notification Panel” on Connectivity Icons page 23. - Page 31 Device Status Icons Other Icons Alarm activated Battery full Airplane mode activated Battery charging Blocking mode activated Battery low Music is playing. Location A song is playing in the Music app. Touch the Vibrate mode enabled Status Details to see the song title and music player controls.
-
Page 32: Widgets
Widgets Removing Widgets When you first turn on your tablet, there are various widgets Touch and hold the Widget until the Remove icon on the main Home screen. They can also appear on the displays, then drag the widget to the Remove icon. Home screens to the left and right of the center Home screen. -
Page 33: App Shortcuts On The Home Screen
Folders 4. Touch and hold the application icon until the Home screen displays, then slide your finger where you want Place Folders on a Home screen to organize items together. to place the icon and release it. Adding Folders For more information, refer to “Apps Screen” on To create a folder on a Home page: page 33. -
Page 34: Wallpapers
Managing Folders Wallpapers To rename a folder: You can choose a picture to display on the Home Screen, Lock screen, or on both the Home and Lock screens. Choose Touch the folder, touch the current name, and use the from preloaded wallpaper images or select a photo you have keyboard to enter a new name for the folder. -
Page 35: Multi Window
Multi Window • Live wallpapers: Choose from pre-loaded interactive animated wallpapers. Touch a wallpaper to see an example. If available, This feature can be used to run multiple applications on the touch Settings to view options for the selection. Touch Set current screen at the same time. - Page 36 Using Multi Window 3. Press Home to return to the Home screen. 4. Press and hold Back to open the application You can use Multi Window to run multiple apps on the same screen. panel showing all the available Multi window apps. Any of the apps found within the Multi window panel can be Note: The application panel showing all available Multi run at the same time as a current onscreen app.
- Page 37 Window Controls Note: Once the two applications are running, the device Select an application window and touch in the middle of displays a split screen view containing both the initial the windows. Window controls display: Multi window app and the second Multi window app. Each application is still independent of the other.
-
Page 38: Apps Screen
Apps Screen Customizing Multi Window Control Panel To remove a Multi window app: The Apps screen displays all applications installed on your 1. Enable the Multi window feature and open the wireless device. Applications that you download and install Multi window control panel. from Google Play or from the web are also added to a Home screen. -
Page 39: Navigating Through The Home Screens
Navigating Through the Home Screens To view your downloaded applications: 1. From a Home screen, touch Apps. Your tablet originally has two home screens, but you can 2. Touch Downloaded apps to view downloaded apps. expand up to seven home screens. If you like, you can place different applications on each of the home screens. -
Page 40: Pop-Up Video
Pop-Up Video Mounting the SD Card To store additional photos, music, videos, and other Multitask with pop-up video by transforming your video applications, you must mount (install) the SD card prior to player into a pop-up window floating on the screen. The use. -
Page 41: Entering Text
There are three text input methods available: General Storage. • Samsung keyboard (default): Samsung’s onscreen 3. Touch Format SD card. QWERTY keyboard that can be used in both portrait and 4. At the Format SD card confirmation prompt, touch landscape orientation. - Page 42 To choose a text input method while entering text: In addition to the default QWERTY keyboard, there are two 1. Touch the top of the screen and swipe downward. other types of the Samsung keyboard: a Floating keyboard The Notification Panel displays. and a Split keyboard.
- Page 43 Entering Text Using the Samsung Keyboard Changing the Text Input Mode From a screen where you can enter text, rotate your phone There are two main keyboard layout keys that will change counterclockwise to a Landscape orientation. The onscreen the onscreen keys within the QWERTY keyboard.
- Page 44 Configuring the Samsung Keyboard uppercase until you touch the shift key again. Configure the Samsung keyboard to your preferences. While entering text, touch and hold Options, then select Settings in the pop-up menu. For more information, refer to “Samsung Keyboard” on page 134.
- Page 45 Touch and hold Options The handwriting pad displays. touch Settings The Samsung keyboard settings Use your finger tip to write out each character. You can screen displays. print or use cursive. Touch the OFF/ON button to turn Predictive text You can write out your entire message using the...
- Page 46 Using the Google Voice Typing Feature Entering Text Using Swype You can use your voice to enter text using the Google Voice Swype is a text input method that makes it possible to enter typing feature. a word by sliding your finger or stylus from letter to letter, lifting your finger between words.
- Page 47 Swype Tips • Double-tap on the word you want to change to correct a The following example shows how to enter the word “This”. misspelled word, then touch the delete key to erase one Put your finger down on the “T”, and without lifting, glide it character.
-
Page 48: Section 3: Contacts And Accounts
• Samsung account: Add your Samsung account. For more 2. Touch the account type. information, refer to “Signing In to Your Samsung Account” on 3. Follow the prompts to enter your account credentials to page 141. complete the set-up process. -
Page 49: Contacts
Contacts 4. Touch contact fields to display the keyboard and enter information: Store contact information for your friends, family, and • Some fields have preset values. Touch the field and touch the colleagues to quickly access information or to send a desired value. - Page 50 Updating Contacts Managing Photo IDs To update an existing contact: To remove or update a contact’s Photo ID: 1. Touch Contacts. 1. Touch Contacts. 2. Touch a contact in the Contacts list to view its 2. Touch a contact in the Contacts list to view its information.
- Page 51 Contacts Display Options Linked Contacts There are various ways to display your Contacts and general Your device can synchronize with multiple accounts, Contacts settings. including Google, Corporate Exchange, and other email providers. When you synchronize contacts from these Touch Contacts. accounts with your device, you may have multiple contacts Touch Groups, Favorites, or Contacts, above the for one person.
- Page 52 Separating Contacts Tip: Set up a contact record for yourself to share your 1. Touch Contacts. information with others. 2. Touch a contact in the Contacts list to view its information. 3. Touch Selected contact or Multiple contacts. 3. Touch Menu Separate contact.
-
Page 53: Groups
Groups Synchronize Contacts with Accounts To synchronize your contacts with an account: Assign contacts to Groups to make searching for contacts 1. Touch Contacts. faster or to quickly send messages to group members. Creating a New Group 2. Touch Menu Settings Accounts. - Page 54 Renaming a Group Adding Group Members To rename a group that you created: To add a contact to a group, just Edit a contact’s Group field. For more information, refer to “Updating Contacts” on 1. Touch Contacts. page 45. 2. Touch Groups and then touch the group you want to To add multiple contacts to a group: rename...
-
Page 55: Favorites
Favorites Removing Group Members To remove contacts from a group: Mark contact records with a gold star to identify them as 1. Touch Contacts. favorites. Adding Favorites 2. Touch Groups and then touch the group from which you want to remove members. To add a contact to the Favorites list: 3. Touch Menu... - Page 56 Accessing Favorites Removing Favorites You can view your favorites two ways for fast viewing or To remove one or more contacts from your favorites list: messaging. 1. Touch Contacts. To view your favorites list: 2. Touch Favorites above the Contacts List. 1. Touch Contacts.
-
Page 57: Section 4: Messaging
Section 4: Messaging Setting Up Your Gmail Account This section describes how to send and receive messages and other features associated with messaging. If you did not set up a Google account during the initial Types of Messages configuration, the first time you launch Gmail, your device prompts you to set up your Google account. - Page 58 Refreshing Your Gmail Account Composing and Sending Gmail 1. Touch Gmail. Refresh your account to update your device from the Gmail servers. 2. Touch Compose, then touch fields to compose 1. Touch Gmail. the message. While composing a message, touch 2.
-
Page 59: Email
Email 4. Touch Next to go to the next screen or touch Previous to go to the Apps screen. Use Email to view and manage all your email accounts in one application. Note: For Exchange ActiveSync accounts, the Activate device To access Email: administrator? screen may appear. - Page 60 Managing Your Email Accounts Email Settings You can view email you receive for all accounts in the Use the Email Settings to configure your Email preferences. Combined view screen or you can view email accounts Note: Available settings depend on the email provider. individually.
-
Page 61: Google
3. Touch an account to configure specific settings. 6. Touch Send to send the message. – or – Available options depend on the account. Composing and Sending Email Touch Save to save the email to the Drafts folder. Google+ 1. Touch Email. -
Page 62: Hangouts
Hangouts Messages Hangouts is a free, web-based application for instant AT&T Messages brings your texts, calls, and voicemail messaging offered by Google. You can connect with your messages together into a single conversation thread and is friends across computers and various Android devices. You accessible by phone or computer. -
Page 63: Section 5: Music
Section 5: Music Accessing Google Play Music This section explains how to use the music features of your device. From a Home screen, touch Apps Listening to Music Play Music. You can listen to music by using your device’s built-in The Play Music app searches your online library and speakers, through a wired headset, or through a wireless your device’s internal storage for music and playlists. -
Page 64: Music
Shopping for Music at the Play Store Music To visit the Google Play Store where you can find and buy music: The Music app plays songs stored on your tablet or an installed 1. From the main Home screen, touch Play Store memory card. - Page 65 Searching for Music • Settings: The following settings display: Player To find music in your library: – SoundAlive: Set a type of equalization. 1. Touch Music. – Adapt Sound: Enhance sound quality. 2. Touch Search and use the keyboard to type the –...
- Page 66 Managing Playlists Adding Songs to a Playlist 1. Touch the Playlists tab and, under My playlists, touch a To create, manage, or delete a playlist: playlist. Touch Add tracks. Touch Music. – or – Creating a Playlist Touch the Tracks tab and touch Menu 1.
- Page 67 Playing a Playlist Deleting a Playlist 1. Touch the Playlists tab. 1. Touch the Playlists tab. 2. Touch Favorites, Most played, Recently played, or 2. Touch Menu Delete. Recently added, or touch a playlist title that you 3. Touch each playlist you want to remove or touch created.
- Page 68 If you navigate away from the Music application and music is Streams the current music file to another playing, the Music notification icon is displayed in the device via Samsung Link. System Bar. Volume control and SoundAlive. You can change songs or easily return to Music: 1. Touch the top of the screen and swipe downward.
- Page 69 Options While Playing a Song Start the song after pausing. There are various options and controls available while a song is playing: Touch and hold to fast-forward the song. 1. Touch Music, touch a song or an album, and then Touch to go to next song.
-
Page 70: Section 6: Photos And Video
Section 6: Photos and Video This section explains how to use your device’s built-in 2. Touch OK to change the storage location to memory camera and camcorder, the Video Player app to view and card for storing photos and videos. manage videos, and the Gallery app to view, capture, and –... - Page 71 Camera Screen The following items can be found on the Camera screen: 1. Camera and Camcorder settings 2. Switch between the front and rear camera. 3. View more options. 4. Display current mode. 5. Switch between Camera and Camcorder 6. Camera button 7.
- Page 72 Taking Photos 5. You can also touch the screen to move the focus to the area you touch. Taking photos with your device’s built-in camera is as simple as choosing a subject, pointing the camera, then pressing 6. Press the Camera button until the shutter the Camera button.
- Page 73 Shooting Mode • Panorama: Take a photo composed of many photos strung together. Several photo effects are available. Some modes are not available when taking self-portraits. To get the best shot, follow these tips: Touch MODE, and then scroll up or down the screen at –...
- Page 74 Panoramic Photos 3. Before you record a video, use the Up and Down Volume keys to zoom in or out. You can magnify the A panoramic photo is a wide landscape image consisting of video up to four times (400 percent). multiple shots.
- Page 75 Recording Mode Share Shot Touch Options Recording mode to change Touch Options and select one of the the recording mode. following: • Normal: Use this mode for normal quality. • Share shot: Send a photo directly to another device via Wi-Fi Direct.
- Page 76 Configuring Settings for Camera Settings Touch to configure settings for Camera. Not all of • Location tag: Attach a GPS location tag to the photo. the following options are available in both still camera Note: To improve GPS signals, avoid shooting in locations and video camera modes.
- Page 77 Shortcuts • Brightness: Adjust the brightness level by moving the slider. Reorganize shortcuts for easy access to the camera’s various • Guidelines: Display viewfinder guides to help composition options. when selecting subjects. 1. Touch Options. • Voice control: Set the camera to take photos with voice 2.
- Page 78 Viewing Photos with the Image Viewer 6. Touch Menu Slideshow to display a slide show of the available pictures and videos. After taking a photo, use the Image Viewer to view, share, delete, or edit photos. 7. To delete the photo being displayed, touch Delete 1.
- Page 79 Viewing Videos with the Image Viewer Note: Videos are stored in the Device storage/DCIM/Camera After recording a video, use the Image Viewer to play, share, folder as mp4 files. For more information, refer to “My or delete your video. Files” on page 107. 1.
-
Page 80: Video
Video 6. While the video is playing, touch the Display Mode button on the right end of the control bar to change the Use the Video app to view and manage videos stored on your Display Mode: tablet. Full-screen in ratio view. The video is enlarged as 1. - Page 81 – 9. During playback, press Menu for options: Play speed: Check the box to display Play speed on the screen, • Trim: Trim the video being displayed. Use the sliders at the which defaults to 1.0x. Touch the Play speed and then touch bottom of the screen to trim the video.
-
Page 82: Gallery
Gallery 5. 5. Touch Menu to display the following options: • • Select album: Touch one or more albums or groups that you Use Gallery to view, capture, and manage photos and videos. want to share, stream to another device, or delete. Note: Photos and videos are stored in the Device storage/ •... - Page 83 Viewing Groups of Photos and Videos 5. Sweep across the screen to display the next or previous photo or video. Videos are indicated by the 1. From a Home screen, touch Apps Gallery. Play button. The current photo or video is outlined 2. Touch a category and then a group to view it.
- Page 84 • Copy to clipboard: Copy the current photo to the clipboard. • Settings: Touch to access various Gallery settings.For more information, refer to “Selecting Photos and Videos to View” on • Print: Print the current photo to a Samsung printer. page 77. • Rename: Enter an new file name.
- Page 85 Setting a Picture As Tip: To change wallpaper, see “Wallpapers” on page 29. You can use the photos you take as a contact’s photo or as Playing Videos wallpaper for the Home or Lock screen: From a Home screen, touch Apps Gallery.
- Page 86 Sharing Photos and Videos Share photos and videos with your friends. 1. From a Home screen, touch Apps Gallery. 2. Touch a category and then a group to display thumbnails. 3. Touch Menu Select item. 4. Touch one or more photos and videos to highlight them for sharing.
-
Page 87: Section 7: Connections
Section 7: Connections Turning Wi-Fi On This section describes the various connections your tablet can make including accessing Wi-Fi, Bluetooth, and By default, your device’s Wi-Fi feature is turned off. Turning Connecting your PC. Wi-Fi on makes your device able to discover and connect to Wi-Fi compatible in-range WAPs. - Page 88 Manually Add a New Network Connection Turning Wi-Fi Off 1. From a Home screen, touch Apps Settings 1. From a Home screen, touch Apps Settings Connections Wi-Fi. Connections Wi-Fi. 2. Touch Add Wi-Fi network. 2. Touch the OFF / ON button to turn Wi-Fi OFF 3. Enter the Network SSID.
- Page 89 Wi-Fi Status Indicators Wi-Fi Advanced Settings The following icons show your Wi-Fi connection status at a The Advanced Wi-Fi menu can be used to set up many of glance: your device’s advanced Wi-Fi services. Displays when Wi-Fi is connected, active, and To access the Advanced Wi-Fi menu: communicating with a Wireless Access Point 1.
- Page 90 Wi-Fi Direct 5. On your tablet, touch Scan. The device scans for other Wi-Fi Direct devices. Wi-Fi Direct allows device-to-device connections so you can transfer large amounts of data over a Wi-Fi connection. 6. Once the device you want to connect to displays, touch it.
-
Page 91: Bluetooth
Bluetooth Sharing Information with Connected Device About Bluetooth To share Videos, Photos, or other information with the connected device, follow these steps: Bluetooth is a short-range communications technology that 1. View the information that you want to share. For is used to connect wirelessly to a number of Bluetooth example, if you want to share a photo, find the photo in devices, such as headsets and hands-free car kits, and your camera viewer or My Files folder, then touch the... - Page 92 2. Touch the OFF / ON button to turn Bluetooth ON Bluetooth Status Indicators 3. Touch the checkbox next to SAMSUNG-SM-T537A, if you The following icons show your Bluetooth connection status at want your tablet to be visible to other Bluetooth a glance: devices.
- Page 93 Pairing Bluetooth Devices Make Your Device Visible To make your device visible: Use the Bluetooth pairing process to establish a trusted 1. From the Bluetooth settings screen, touch Menu connection between your device and another Bluetooth device. When you pair devices, they share a passkey, Visibility timeout.
- Page 94 3. Touch Rename to change the name of the paired Note: Pairing between two Bluetooth devices is a one-time device. process. Once a pairing has been created, the devices 4. Touch Unpair to unpair from the paired device. will continue to recognize their partnership and Sending Contacts with Bluetooth exchange information without having to re-enter a passcode again.
-
Page 95: Pc Connections
Kies conveniently syncs your life across all your devices. Note: To sync your device to a PC, it is highly recommended that you install Samsung Kies, which is available at samsung.com/us/kies (for Windows or Mac). Note: If you are a Windows XP user, ensure that you have Windows XP Service Pack 3 or higher installed on your computer. - Page 96 Connecting as a Storage Device You can connect your device to a PC as a removable disk and access the file directory. If you insert a memory card in the device, you can also access the files directory from the memory card by using the device as a memory card reader.
-
Page 97: Section 8: Applications
Section 8: Applications Updating Applications This section contains a description of each application that is available on the Apps screen, its function, and how to Once you have registered your device (see “Software navigate through that particular application. If the application Update”... - Page 98 Uninstalling Apps Apps Screen Options 1. From a Home screen, touch Apps. You can uninstall apps you download and install. Pre-loaded apps cannot be uninstalled. 2. Touch Menu for these options: 1. From a Home screen, touch Apps. • Edit: Touch and hold an app icon then drag it to the Create folder icon to create a new folder.
-
Page 99: Accessing Applications
3. To return to the main Home screen, touch Home Samsung: Alarm, Calculator, Memo, S Voice, and World Clock. Note: This manual only addresses applications that have been loaded on your device as of the date of purchase. -
Page 100: Alarm
Alarm Activating Alarms 1. Touch Alarm. Set alarms for reminders or for wake-up times. Adding and Configuring Alarms 2. Touch Turn alarm on to activate the alarm. A gray alarm means the alarm is deactivated. 1. Touch Alarm. 3. Touch an alarm to change any of its settings and then 2. -
Page 101: Amazon Kindle
AT&T FamilyMap Setting the Snooze Feature To activate the Snooze feature after an alarm sounds: AT&T FamilyMap provides peace of mind because you can use it to conveniently locate a family member on a map from Touch and slide to the left. Snooze must first be your wireless device. -
Page 102: At&T Locker
AT&T Ready2Go 5. At the AT&T FamilyMap Sign In screen, touch Get Started to create an account. AT&T Ready2Go allows you to quickly and easily setup your – or – tablet by using the web browser on your PC. You can set-up email accounts, import contacts, set wallpaper, configure Touch Sign In if you already have an account. -
Page 103: Calculator
Calculator Calendar The Calculator provides the basic arithmetic functions to Your device includes a powerful calendar to help you solve simple arithmetic problems and advanced operators to organize your schedules more conveniently and effectively. solve more complex problems. The Calculator also keeps a Learn to create and manage events and tasks, and set history of recent calculations. -
Page 104: Camera
Camera 4. To find an event or task, touch Search. Use the onscreen keyboard to enter a search term. Take photos and record video with your device’s built in Possible events display as you type. Camera. Touch on the keyboard to remove it. Touch Camera. -
Page 105: Device Help
Device Help 4. Follow the onscreen instructions to use Drive. 5. Touch Menu Settings to configure your Drive AT&T Device Help provides online information to help with preferences. your tablet questions. 1. Touch Device Help. 6. Touch Menu Help to display additional help information. -
Page 106: Gallery
Gallery Google Use Gallery to view, capture, and manage photos and videos. Search the internet using the Google search engine. Touch Gallery. Tip: The Google Search widget displays by default on the main For more information, refer to “Gallery” on page 77. Home screen. -
Page 107: Google Settings
Google+ 3. Touch a suggestion to search for that term. – or – Share updates and see what is going on around you with Touch on the keyboard to start the search. Google+ for mobile. Touch Google+. A browse r window displays the search results. For more information, refer to “Google+”... -
Page 108: Hangouts
Hangouts Command Keys Touch Back or to return to the previous page. Hangouts is a free web-based application for instant messaging offered by Google. You can connect with your Touch and hold Back to display browser History. friends across computers and various Android devices. You Touch Forward to go forward to a recent page. - Page 109 Entering a URL Selecting Items On a Page While browsing, use gestures and menus to navigate: Access a website quickly by entering the URL. • Touch an item to select it. 1. Touch Internet. • Touch a hyperlink to follow the link. 2. Touch the URL field at the top of the screen, then enter •...
-
Page 110: Keeper
2. To edit the memo, touch the content of the memo. 3. To delete the memo, touch Delete 4. To send the memo to others, touch Share via. 5. To send the memo to a Google or Samsung printer, touch Print. -
Page 111: Messages
Messages Composing a Memos Touch Create memo, enter a memo, and then The AT&T Messages app brings your texts, calls, and touch Save. voicemail messages together into a single conversation thread and is accessible by phone or computer. change the category, touch To insert an image into the memo, touch Touch Messages. -
Page 112: My Files
My Files 4. Touch Menu Select, and select a file or folder. Then select an option to share, delete, move, or copy a Use this application to access all kinds of files stored in the file, or select additional options. device, including images, videos, songs, and sound clips. -
Page 113: Myat&T
myAT&T Photos Use myAT&T to manage your own AT&T account. You can Automatically save every photo you take with your device to review and pay your bill, check minutes and data usage, your Google+ account. Then it is easy to view, organize, and upgrade to a new device, or change your rate plan. -
Page 114: Play Games
Play Games Play Movies & TV The Play Movies & TV app is a new application for select Discover hundreds of games for download and purchase Android devices. Any movie you rent from the Google through the Google Play Store. Play Store can be downloaded for offline viewing through Visit play.google.com/store/apps/category/GAME... -
Page 115: Play Newsstand
Note: This app requires a Google Account. S Voice. 1. Touch 2. Read the Samsung Disclaimer then touch Confirm to Touch Play Newsstand. continue. Play Store 3. Read the Terms of Service then touch Agree to continue. -
Page 116: Samsung Apps
Samsung Apps Video Connect to Samsung Apps and make your smart device even View and manage videos stored on your tablet. smarter. Simply and easily download an abundance of Touch Video. applications to your tablet such as games, news, reference, For more information, refer to “Video”... -
Page 117: Watchon
WatchON World Clock Use the Samsung WatchON application to use your tablet as View the date and time in any time zone. a remote control for your TV, set top box, DVR, Blu-Ray/DVD, 1. Touch World Clock. stereo or other device. -
Page 118: Youtube
YouTube To delete one or more cities: 1. Touch Menu Select. View and upload YouTube videos, right from your device. Touch the box next to each city you want to delete so Touch YouTube. that a check mark displays 3. Touch Delete. -
Page 119: Section 9: Settings
The Settings screen displays. Create and modify your accounts (such as, Email, Google Settings Tabs Account, Samsung Account, and so on). Manage security, The Settings are divided into four main groups. When the storage, Users, and other features of the device. For more Settings screen displays, the following four tabs are located information, refer to “General”... -
Page 120: Connections
The Settings Screen Advanced Wi-Fi Settings Some options are enabled or disabled by touching the The advanced Wi-Fi settings allow you to set up and manage OFF / ON button to turn the option ON wireless access points. OFF . For some options, you must touch the field, 1. -
Page 121: Bluetooth
• Rename device: Change the name of your device. Bluetooth field, to turn Bluetooth ON 5. Touch the check box next to SAMSUNG-SM-T537A to create a check mark, if you want your phone to be Note: When enabled, the Bluetooth icon displays in the visible to other Bluetooth devices. -
Page 122: Airplane Mode
Airplane Mode Note: When enabled, the Airplane mode icon displays in Use Airplane mode when you are in an airplane or in any the Status Bar. other area where making or receiving calls or data is Data Usage prohibited. When Airplane mode is active, you can still use many of your phone’s features, such as Camera, Games, From this screen you can view your Mobile data usage and and more. -
Page 123: Location
Location Note: Data is measured by your device. Your service provider You must enable location services on your device for apps, may account for data usage differently. such as Google Maps, to use your location. Touch Menu to display additional options. Touch to Note: Some apps may require one or more location services activate. - Page 124 Location Reporting My Places Google uses Location Reporting to store and use your You can save your favorite locations for use with services device’s most recent location data. Google apps, such as that require location information. This information can Google Maps, can use this data to improve your search improve your search results and other location-related results based on places that you have visited.
-
Page 125: More Networks
Printing. • Data roaming: Touch to create a check mark and activate the 2. Touch Samsung Print Service Plugin. feature. Data roaming causes your device to connect to your 3. Touch the OFF / ON button to turn Printing ON service provider’s partner networks and access data services... - Page 126 Default Setup Options • Network operators: Using this feature you can view the current network connection. You can also scan and select a Your phone default is set to Automatic, which causes your network operator manually, or set the network selection to phone to automatically search for an available network.
- Page 127 6. Enter the Server address and any other required fields that are dependent upon the Type you entered The VPN settings menu can be used to set up and manage previously. Virtual Private Networks (VPNs). 7. Touch the Show advanced options check box to display Before using VPN, you must first set up a screen unlock PIN or password.
-
Page 128: Nearby Devices
Options are: Always accept, Always ask, and Always reject. 3. Touch the OFF / ON button to turn Nearby devices , which activates file sharing. The device name displays under Device name. The default is the model number: SAMSUNG-SM-T537A. -
Page 129: Screen Mirroring
Screen Mirroring Sound Use the Screen Mirroring feature to share media files on your From this menu you can control the sounds on the phone. phone with an HDMI device, such as an HDMI TV. From the Settings screen, touch Device Sound. - Page 130 FEEDBACK SAMSUNG KEYBOARD Touch any of the following options to create a check mark Set the keyboard sounds. Touch either of the following and activate the feature: options to create a check mark and activate the feature: • Touch sounds: Makes a sound when you touch the screen.
-
Page 131: Display
Display Multi Window In this menu, you can change various settings for the display. Set the device to use Multi window. 1. From the Settings screen, touch Device From the Settings screen, touch Device Display. Multi window. The following options display: 2. Touch the OFF / ON button to turn Multi window •... -
Page 132: Lock Screen
Lock Screen Lock Screen Options The following options are available depending on the Choose settings for unlocking your screen. For more Screen Lock type that you have selected. information about using the lock and unlock features, see Swipe Options “Locking and Unlocking the Touch Screen” on page 13. Screen Lock The options available when Screen lock is set to Swipe are: •... - Page 133 Pattern Options PIN and Password Options These options are available when Screen lock is set to These options are available when Screen lock is set to Pin or Pattern: Password: • • Clock widget options: Set the size of the Clock widget that is Clock widget options: Set the size of the Clock widget that is displayed on your Home screens, and whether to show the date.
-
Page 134: Wallpaper
Wallpaper Notification Panel You can choose a picture to display on the Home Screen, Customize the Notification panel. Lock screen, or to both the Home and lock screens. Choose 1. From the Settings screen, touch Device from preloaded wallpaper images or select a photo you have Notification panel. -
Page 135: Accessibility
Accessibility • Speak passwords: Read out password information. • Single tap mode: Tap the screen once to stop/snooze alarms Accessibility services are special features to make using the and calendar events. device easier for those with certain physical disabilities. Use the Accessibility settings to activate these services. - Page 136 • Notification reminder: Play a beep when a notification for a options. call, message, and so on, has been missed. Touch the • Samsung subtitles (CC): Use Samsung subtitles with OFF / ON button to turn it ON multimedia files when available. Touch the OFF / ON button to •...
-
Page 137: Blocking Mode
Blocking Mode DEXTERITY • Assistant menu: allows you to improve the device When Blocking mode is enabled, notifications for selected features are disabled. You only receive notifications of accessibility for users with reduced dexterity. Touch the incoming calls from people on your allowed list. OFF / ON button to turn it ON . -
Page 138: Controls
1. From the Language and input screen, touch Default and select a keyboard. Use this menu to configure the language used to display text Select Samsung keyboard or Swype. on your phone. You can also set onscreen keyboard options. – or –... - Page 139 – Learn from Facebook: Log in to your Facebook account so your phone can learn your Facebook style. To configure the Samsung keyboard: – Learn from Gmail: Log in to your Gmail account so your phone From the Language and input screen, touch next to can learn your Gmail style.
- Page 140 • Auto capitalization: Automatically capitalize the first letter of KEY-TAP FEEDBACK the first word in each sentence (standard English style). Select one or more of the following: • Auto spacing: Automatically insert spaces between words. • Sound: Enable or disable auditory feedback when you touch an •...
- Page 141 Swype Google Voice Typing To configure Swype settings: To configure Google voice typing: From the Language and input screen, touch next From the Language and input screen, touch next to to Swype to display the following options: Google voice typing. •...
- Page 142 From the Language and input screen, touch Text-to-speech options and select the preferred TTS Voice search to configure the following: engine, Samsung text-to-speech engine or • Language: Choose a language for your voice input. Google Text-to-speech Engine. • “Ok Google” Hotword detection: Enable to being able to 2. Touch...
-
Page 143: Palm Motion
Mouse/Trackpad Palm Motion This option sets your Pointer speed for your mouse or Palm motion allows you to control your device by touching trackpad when you are using a keyboard dock accessory. your screen with the palm of your hand. 1. From the Language and input screen, touch 1. -
Page 144: Smart Screen
Your accounts are also Create and modify your accounts (such as, Email, Google displayed in the My accounts section of the main Account, Samsung Account, and so on). Manage security, Accounts menu. applications, storage, and other features of the device. - Page 145 Synchronizing Accounts Removing an Account Select the items you want to synchronize on your account Important! Removing an account also deletes all of its such as Books, Calendar, Contacts, and more. messages, contacts, and other data from the 1. From the Settings screen, touch General Accounts.
- Page 146 • ACCOUNTS: View Google accounts set up on your device. Samsung services that are available. Touch a Google account to configure syncing or to remove the 4. If you have a Samsung account, touch Sign in. account. – or –...
-
Page 147: Back Up And Reset
Back Up and Reset Tip: The password is for your Samsung account, not the The Back up and reset settings allow you to back up your password you use for the email address you are entering. data, back up accounts, automatically restore your phone, Plus, you can use only letters, numbers, !, @, $, %, &, ^,... -
Page 148: Date And Time
Factory Data Reset Date and Time From this menu you can reset your phone and sound settings To change the current time and date displayed: to the factory default settings. From the Settings screen, touch General 1. From the Settings screen, touch General Date and time. -
Page 149: Accessories
Accessories Browser Bar To select the Audio output mode when using a car or desk Use the Browser Bar option to set up your Browser Bar for dock: your web browser. 1. From the Settings screen, touch General From the Settings screen, touch General Browser Bar. - Page 150 Memory Usage 3. To switch the order of the lists displayed in the touch Downloaded tabs, Menu Sort by size or See how memory is being used by Downloaded or Running applications. Sort by name. 1. From the Settings screen, touch General touch 4.
- Page 151 SD Card Running Services Displays apps you have downloaded onto your SD card. View and control services running on your device. 1. From the Settings screen, touch General 1. From the Settings screen, touch General Application manager. Application manager. 2. Touch the SD CARD tab to view a list of all the 2. Touch the RUNNING tab.
-
Page 152: Default Applications
Default Applications 1. From the Settings screen, touch General Users Add user. Set and manage your default applications. 2. Follow the onscreen instructions to set up a new user 1. From the Settings screen, touch General profile. Default applications. To access the device with a user profile, select a profile at 2. Touch an app to set it as the default application. -
Page 153: Battery
Change User Account Nicknames and Photo IDs Battery Each user can set up their account nickname, which is See how much battery power is used for device activities. displayed on the Lock screen as their User ID. 1. From the Settings screen, touch General Battery. -
Page 154: Power Saving Mode
Power Saving Mode Storage Use Power saving mode to manage your phone to From this menu you can view the memory allocation for the conserve power. memory card and USB as well as mount or unmount the SD card. 1. From the Settings screen, touch General Device Memory Power saving mode. - Page 155 Mounting an SD Card Formatting an SD Card 1. Install an SD card. For more information, refer to When formatting an SD card you will want to backup your “Installing a Memory Card” on page 11. music and photo files that are stored on the card because formatting the SD card deletes all the stored data.
-
Page 156: Security
Security Set Up or Change Password Use this option to set up your password when one is first The Security settings allow you to determine the security required or change your current password. level for your phone. Encryption 1. From the Settings screen, touch General Security Set up/change password. - Page 157 3. When you receive the new PUK code from your Note: You must activate Lock SIM card before you can change AT&T Customer Service Representative, enter it in your SIM PIN code. the PUK code field. 4. Enter a new PIN code in the Enter a new PIN field and To change your SIM PIN code: touch OK.
- Page 158 Security. 3. Touch Send security reports to send security reports to 2. Touch Device administrators, to select a device Samsung, using Wi-Fi, for threat analysis. administrator, and follow the prompts. If no device administrators are listed, you can download them from the Play Store.
- Page 159 Credential Storage Caution! When you disable a system CA certificate, the If a certificate authority (CA) certificate gets compromised or Turn off button changes to Turn on, so you can for some other reason you do not trust it, you can disable or enable the certificate again, if necessary.
-
Page 160: About Device
About Device • Device name: Enter the name for your device. The default is the model number: SAMSUNG-SM-T537A. This menu contains legal information, system tutorial • Model number: Phone’s model number. information, and other phone information such as the model number, firmware version, baseband version, kernal version, •... - Page 161 Software Update 4. The phone automatically updates the software (if available), otherwise, when the Current software is up The AT&T Software Update feature enables you to use your to date prompt displays, touch OK. phone to connect to the network and upload any new phone software directly to your phone.
-
Page 162: Section 10: Samsung Product Registration
Section 10: Samsung Product Registration... -
Page 163: Index
Index uninstalling 93 Camera 65 AT&T AllAccess 96 Chrome 99 Abc Mode 39 AT&T Device Help 100 Contacts About Device 155 AT&T FamilyMap 96 creating 44 Accounts 139 AT&T Locker 97 display options 46 setting up 43 AT&T MicroCell 121 groups 48 Add Accounts 139 AT&T Ready2Go 97... - Page 164 Gestures Handwriting Feature 40 Overview 17 Hangouts 57 103 Email Gmail 101 Help 100 combined view 55 composing and sending 53 Home Button 17 composing and sending 56 refreshing your account 53 Home Screen 20 configuring accounts 54 setting up your account 52 adding widgets 27 refreshing your account 55 Google...
- Page 165 Location Services Settings 118 Multi Window Locations 118 activate/deactivate 30 Palm Motion Lock Screen customizing 33 activate 18 shortcuts 127 removing apps 33 PC Connections 90 restoring apps 33 Photo ID running multiple apps 31 Maps 105 setting 80 Multi Window Tray 30 Memo 105 Photos Music 106...
- Page 166 143 Locations 118 Synchronizing Accounts 140 Lock Screen 127 S Voice 110 Nearby Devices 123 Text Samsung Account Notification Panel 129 entering 36 signing in 141 Palm motion 138 input methods 36 Samsung Keyboard power saving mode 149...
- Page 167 Video 111 Videos Gallery 77 sharing 81 Voice Search 102 111 Volume 124 Volume Key 16 Widgets 27 Wi-Fi 82 Wi-Fi Direct 25 116 Wi-Fi Settings 115 World Clock 112 YouTube 113 YP (Yellowpages Mobile) 113...