HP P Class 733/800/866MHz / 1GHz Installation Manual
Graphics card and driver installation guide
Hide thumbs
Also See for P Class 733/800/866MHz / 1GHz:
- Administrator's manual (118 pages) ,
- Online manual (29 pages) ,
- Supplementary manual (8 pages)
Table of Contents
Advertisement
Advertisement
Table of Contents

Related Manuals for HP P Class 733/800/866MHz / 1GHz


Summary of Contents for HP P Class 733/800/866MHz / 1GHz
- Page 1 NVIDIA Graphics Card and Driver Installation Guide Version 2.0 November 4, 2000...
- Page 2 Published by NVIDIA Corporation 3535 Monroe Street Santa Clara, CA 95051 Copyright © 2000 NVIDIA Corporation. All rights reserved. This software may not, in whole or in part, be copied through any means, mechanical, electromechanical, or otherwise, without the express permission of NVIDIA Corporation. Information furnished is believed to be accurate and reliable.
-
Page 3: Table Of Contents
TABLE OF CONTENTS ABOUT THIS DOCUMENT ...3 SYSTEM REQUIREMENTS...3 ...3 ARDWARE ...4 OFTWARE 2.2.1 Operating System ...4 2.2.2 NVIDIA Driver Software ...4 ...4 EFORE EGIN 2.3.1 Safety Information ...4 2.3.2 Removing an Existing Graphics Card ...4 INSTALLING THE NVIDIA GRAPHICS CARD ...6 NSTALLING THE ARDWARE NSTALLING THE... -
Page 4: About This Document
NVIDIA Corporation 1 About this Document This Installation Guide is designed to help you install and configure your new NVIDIA graphics card and associated drivers (software) on an IBM computer compatible system running either Microsoft Windows NT 4.0 or Windows 2000. -
Page 5: Software
Removing an Existing Graphics Card: Windows NT 4.0 From the active Windows NT 4.0 desktop, click Start > Settings > Control Panel to display the Control Panel. Double-click the Add/Remove Programs icon to display the Add/Remove Programs Properties window. Any driver program that is installed on your computer is listed here. - Page 6 Installing the NVIDIA Graphics 2.3.2.2 Removing an Existing Graphics Card: Windows 2000 From your Windows 2000 desktop, right click on the desktop and select Properties. The Display Properties - Settings window appears. Click the Advanced button and then the Adapter tab.
-
Page 7: Installing The Nvidia Graphics Card
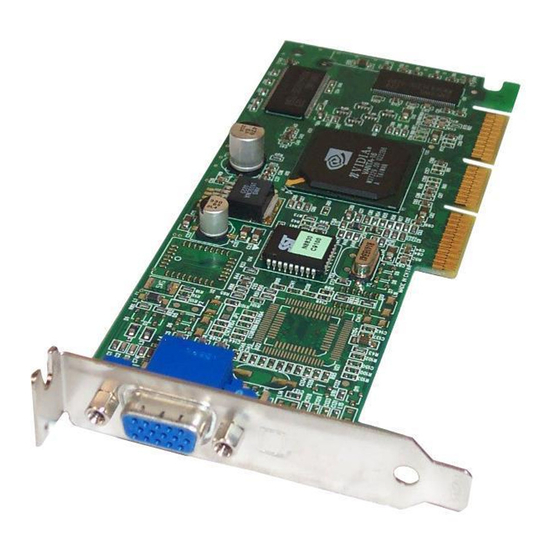
NVIDIA Corporation 3 Installing the NVIDIA Graphics Card 3.1 Installing the Hardware Your NVIDIA graphics card comes in an AGP version. To install the NVIDIA graphics card, follow these steps: Obtain the NVIDIA Graphics card that you want to install. If you followed the procedures in the previous section to remove an existing graphics card from your computer, continue to Step 5. - Page 8 NVIDIA Corporation After you computer starts up, the following window may appear on the Windows NT 4.0 desktop. If it does, click OK to close the window. Copy the folder (Disk 1) of NVIDIA Driver Installation files to your Windows NT 4.0 desktop.
- Page 9 NVIDIA Corporation Click Change to open the Change Display window. 10. In the above window, the (Standard display types) choice appears in the Manufacturers list and the VGA compatible display adapter choice appears in the Display list. If these choices do not appear or are not already highlighted, search for the choice, then click VGA compatible display adapter to highlight it.
- Page 10 NVIDIA Corporation 13. Highlight the Disk 1 folder and click Open to open the next Locate File window. 14. Make sure the NVHC.INF file is displayed on the Locate File window above, then click to highlight the file. Click Open to open the Install from Disk window. 15.
- Page 11 NVIDIA Corporation 16. Click the name of the NVIDIA card that you are installing. (In the above window, NVIDIA GeForce2 MX (HP Commercial) is selected as an example.) Click OK to open the Third-party Drivers window. 17. Click Yes to open the Insert Disk window.
- Page 12 NVIDIA Corporation 20. Make sure “Desktop” appears in the Look in: field, then highlight the Disk 1 folder and click Open to open the next Locate File window. 21. Make sure the NV4_mini.sys file appears; click to highlight the file, then click Open to open the Files Needed window.
-
Page 13: Installing Nvidia Drivers: Windows 2000
: Do not click Next or Cancel; leave the window open. Copy the folder (Disk 1) of NVIDIA Driver Installation files to your Windows 2000 desktop. 25. Right click on the Disk 1 folder and select Properties to open the Disk 1 Properties window shown below. - Page 14 NVIDIA drivers. 26. Click OK to close the Disk 1 Properties window. The Found New Hardware Wizard window should still appear on your desktop. 27. Click Next to open the Install Hardware Device Drivers window. Click the Display a list of the know drivers for this device . . . option, then click Next to open the Select a Device Driver window.
- Page 15 NVIDIA Corporation 10. Click Show all hardware of this device class option. A list of Manufacturers and associated Models appears as shown below. 11. From the above window, click NVIDIA in the Manufacturers list, then click the name of your installed NVIDIA card from the Models list.
- Page 16 NVIDIA Corporation 13. In the Look in: field, point to the path of your Disk 1 folder of NVIDIA Driver Installation files. Click on the NVHC.INF file and click Open to open the Install from Disk window. 14. Make sure the path to your Disk 1 folder is displayed correctly in the Install from Disk window. If the correct path doesn’t appear, click Browse and find the correct path.
- Page 17 NVIDIA Corporation NVIDIA Graphics Card & Driver Installation Guide 17. Click Next. 18. If the above Update Driver Warning message appears, click Yes to continue installing the drivers. The Start Device Driver Installation window appears. 19. Click Finish to complete the driver installation process...
- Page 18 NVIDIA Corporation NVIDIA Graphics Card & Driver Installation Guide 20. Important: Restart your computer for the changes to take effect. : Once Windows 2000 is up and running, to view the configuration and display properties of your new NVIDIA graphics card, go to Viewing Display Properties of the NVIDIA Card: Windows 2000.
-
Page 19: Viewing Display Properties Of The Nvidia Card
If you see the above message, click OK to close the window and open the Display Properties window. (If the Display Properties window doesn’t appear, right click on your Windows desktop and select Properties.) Click the Settings tab to open the Display Properties – Settings window. - Page 20 Click the down arrow in the Color Palette field and select 65536 Colors, which is equivalent to16-bit (High Color). If you want to increase the Desktop Area, move the Desktop Area slider to the right in the direction of More.
- Page 21 NVIDIA Corporation Click Cancel to close the above window and return to the Settings window. Click the NVIDIA product tab (for example, GeForce2 MX), which shows the name of the NVIDIA card you installed. The Driver Version Information box displays Filename, Description, and Version information about your installed NVIDIA drivers, as shown below.
-
Page 22: Viewing Display Properties Of The Nvidia Card: Windows 2000
4.2 Viewing Display Properties of the NVIDIA Card: Windows 2000 Follow these steps to view the display properties of your NVIDIA graphics card: Once your computer has restarted, right click on your Windows 2000 desktop and select Properties. The Display Properties – Settings window appears. - Page 23 NVIDIA Corporation Click the Driver tab. The Driver window displays basic information about the NVIDIA driver you installed. Click the Driver Details button to open the Driver File Details window, which lists the NVIDIA driver files installed on your computer. NVIDIA Graphics Card &...
- Page 24 NVIDIA Corporation Click OK to return to the Driver window, then click the Resources tab. The Resources window displays the resource settings of your NVIDIA card. Use the scroll bar to see the complete list of settings. Click OK to close the window. Click the NVIDIA product tab (e.g., GeForce2 MX), which shows the name of the NVIDIA card you installed.
- Page 25 NVIDIA Corporation NVIDIA Graphics Card & Driver Installation Guide...
-
Page 26: Uninstalling Nvidia Drivers
5 Uninstalling NVIDIA Drivers 5.1 Uninstalling NVIDIA Drivers: Windows NT 4.0 Be sure that your Windows NT 4.0 desktop is open. Click Start > Settings > Control Panel to display the Windows Control Panel. Double-click Add/Remove Programs to open the Add/Remove Program Properties window. -
Page 27: Uninstalling Nvidia Drivers: Windows 2000
Add/Remove Programs option available on the Windows Control Panel. Using this option is similar to the Add/Remove uninstallation process for Windows NT 4.0 discussed in the previous section. Right click on your Windows 2000 desktop and select Properties to open the Display Properties - Settings window.