
Related Manuals for Omega ECHO-4

Summary of Contents for Omega ECHO-4
- Page 1 Model: ECHO-4 LCD 2-way Upgrade Kit November 21, 2012 Operation & Installation guide...
-
Page 2: Table Of Contents
Table Of Contents Installing & Programming The ECHO System ........3 Controller Overview ................4 The 2-Way Controller ................4 System Operations ................4 LCD Screen Icons ................5 In-Range Indicator ................5 Screen Illumination ................5 Multi-Car Operation ................6 Selecting CAR #1 or CAR #2 ............6 Controller Options..................6 Parking Timer &... -
Page 3: Installing & Programming The Echo System
Installing & Programming The ECHO System The ECHO-4 communicates with a window-mounted base unit which is plugged directly into the host system’s module. The window-mount antenna should be mounted directly to the interior glass by utilizing the attached adhesive pad (clean the glass before adhering) for the best performance. -
Page 4: Controller Overview
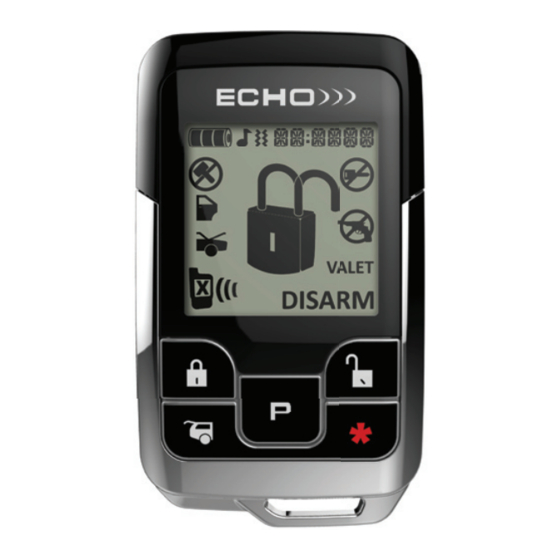
Controller Overview THE 2-WAY CONTrOLLEr Controller part number: 154-03 1) LCD Display: Displays all controller functions as well as the status of your system. 2) Control Buttons: Lock, Unlock, Trunk Re- lease, Remote Start / 3rd Channel 3) Programming Button: This confi gures the controller’s features. -
Page 5: Lcd Screen Icons
Controller Overview (cont’d) LCD SCrEEN ICONS Melody/Vibrate Battery Level Clock remote Start Sensor Trigger Shutdown Indicator Door Trigger Anti-Carjack Mode Activated Hood Trigger Valet Mode Indicator In range Alarm Status Indicator Lock/Unlock Status IN-rANgE INDICATOr All primary commands sent to the system have a confirmation response that is sent to the control- ler to indicate that the command was successful. -
Page 6: Multi-Car Operation
Multi-Car Operation When controlling 2 systems, the controller will receive all status updates on the currently selected vehicle and will receive only trigger alerts for the 2nd vehicle. Use these steps to change vehicles: SELECTINg CAr #1 Or CAr #2 Vehicle #1: Press the “P”... -
Page 7: Setting The Clock
Controller Options (cont’d) SETTINg THE CLOCK 1) Press the “P” button for 5 seconds to access the controller features. The controller will beep twice. 2) Press and release the “P“ button once to select the clock (hour digits will flash). 3) Press the “TRUNK“... - Page 8 This device complies with FCC Rules part 15. Operation is subject to the following two conditions, (1) This device may not cause harmful interference and, (2) This device must accept any interference that may be received, including interference that may cause undesired operation. The manufacturer is not responsible for any radio or TV interference caused by unauthorized modifi cations to this equipment.