Siemens XQG62-WS10K1601W Instruction Manual And Installation Instructions
Hide thumbs
Also See for XQG62-WS10K1601W:

Related Manuals for Siemens XQG62-WS10K1601W


Summary of Contents for Siemens XQG62-WS10K1601W
- Page 1 Washing machine XQG62-WS10K1601W XQG62-WS10K1R81W XQG80-WM10P1601W XQG80-WM12P1681W XQG80-WM10P1R81W XQG80-WM12P1C81W siemens-home.bsh-group.com/welcome Register your product online...
- Page 2 Your new washing machine Display rules : Warning! You have chosen a Siemens washing machine. This combination of symbol and signal word indicates a possibly dangerous Please take a few minutes to read and situation. Not heeding the warning can become familiar with the advantages of cause death or injuries.
-
Page 3: Table Of Contents
Contents e n I n s t r u c t i o n M a n u a l a n d I n s t a l l a t i o n I n s t r u c t i o n s Intended use. -
Page 4: Intended Use
Intended use Installing the appliance under/ Intended use between units ....33 Removing the transportation For use in the household only. protection devices ....33 ■... -
Page 5: Safety Instructions
Safety instructions If you reach into the rotating Safety instructions ■ drum, you may injure your hands. E lectrical safety Do not grip the rotating S a f e t y i n s t r u c t i o n s drum. -
Page 6: Protection Of The Environment
Protection of theb environment Destroy the lock on the door Protection of the ■ of the washing machine. environment Warning P ackaging/used appliance Danger of suffocation! P r o t e c t i o n o f t h e b e n v i r o n m e n t When playing, children may Dispose of packaging in an become entangled in the... -
Page 7: The Main Points In Brief
The main points in brief The main points in brief T h e m a i n p o i n t s i n b r i e f Insert mains plug. Open the washing Select the Max. load in display Turn the tap on. -
Page 8: Getting To Know Your Appliance
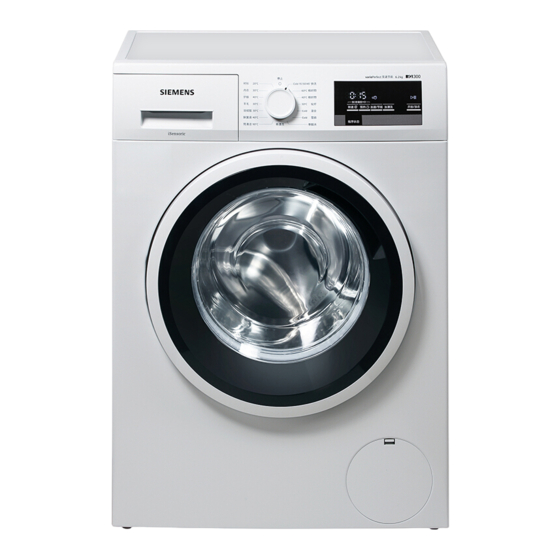
Getting to know your appliance -------- Getting to know your appliance A ppliance G e t t i n g t o k n o w y o u r a p p l i a n c e 9S Open the door Detergent dispenser 9T Close the door Control panel... -
Page 9: Control Panel
Getting to know your appliance Control panel Note: All buttons are sensitive, they only need to be touched gently. ( Select a programme. Rotating the @ Start wash programme. Select programme selector in either direction is I (Start/Pause) button to start, possible. -
Page 10: Laundry
Laundry Sorting laundry according to: Laundry Type of fabric/fibre ■ P rotecting the washing and Colour ■ L a u n d r y the machine: Follow manufacturer’s care ■ information. Notes Soiling ■ – light When dosing all detergents, ■... -
Page 11: Operating The Appliance
Operating the appliance Adjusting the washing Operating the programme appliance Turn the programme selector to the P reparing the appliance desired programme (eg. O p e r a t i n g t h e a p p l i a n c e (Cotton) 40°C programme). -
Page 12: Measure And Add Detergent And Care Products
Operating the appliance Notes Filling the dispensers Unfold and load presorted items ■ Pull out the detergent drawer. of washing. Mix large and small items. Washing items of different Warning size distribute themselves better Eye / skin irritation! during the spin cycle. Individual If the detergent drawer is opened items of washing may cause while the appliance is running,... -
Page 13: Start The Programme
Operating the appliance Release when the w symbol lights up. Measuring aid* for liquid detergent If button signal is on, an acoustic signal Position the measuring aid for will be heard. When the programme measuring the correct amount of liquid ends, End is displayed. -
Page 14: Changing The Programme
Operating the appliance Do not leave door open for If only the water is to be pumped out, ■ ■ a prolonged period – water could press the I (Start/ run out of the laundry. Pause) button again before the spinning starts. -
Page 15: Overview Of Programmes
Overview of programmes Overview of programmes P rogramme on the O v e r v i e w o f p r o g r a m m e s programme selector The presettings of the programmes are highlight- ed in bold. Programme/Type of washing Options/Information Name of the programme... - Page 16 Overview of programmes The presettings of the programmes are highlight- ed in bold. Programme/Type of washing Options/Information max. 6.2kg/4.0kg**(1) 40°C Standard washing program for hard-wearing textiles made of cotton max. 8.0kg/5.0kg**(2) or linen. - - - -, 400-1000 rpm (a) Note: ** Reduced load for (speed) additional function.
- Page 17 Overview of programmes The presettings of the programmes are highlight- ed in bold. Programme/Type of washing Options/Information max. 0.0kg 90°C Special program for drum hygiene or fluff removal 90°C = antibac- 1000*** rpm terial program, use no detergent 40°C = antibacterial program, spe- cial drum cleaning detergent can be used cold = fluff rinsing Possible program, to remove fluff accumulated in the tub.
-
Page 18: Soaking
Overview of programmes The presettings of the programmes are highlight- ed in bold. Programme/Type of washing Options/Information max. 1.0kg 30°C For delicate, washable underwear e.g. made of velvet, lace, Lycra, - - - -, 0-600*** rpm silk or satin. (speed/eco), (Rinse plus) Possible max. -
Page 19: Individual Settings
Individual settings Individual settings 0 (Spin speed) I n d i v i d u a l s e t t i n g s 0: The spin speed can be changed before and during the programme (in rpm, revolutions per minute) depending on the progress of the programme. -
Page 20: Additional Options
Additional options Additional options (speed/eco) A d d i t i o n a l o p t i o n s For washing in a shorter time with a washing result comparable to that of the standard programme. (Rinse plus) Additional rinse cycle. -
Page 21: Signal
Signal Signal S i g n a l Setting signal volume Activate setting mode for signal volume 1 step clock- 1 step clockwise Release Turn to $ Press wise (Off) (Start/Pause) and hold and a) Set volume for information signals Press the Set to $ (Off), setting... -
Page 22: Cleaning And Maintenance
Cleaning and maintenance Descaling Cleaning and Not required if detergent dosed maintenance correctly. However, if this does occur, follow the instructions of the descaling Warning agent manufacturer. C l e a n i n g a n d m a i n t e n a n c e Risk of death! There is a risk of electric shock if touch Cleaning the detergent... -
Page 23: Drain Pump Blocked
Cleaning and maintenance Clean the measuring aid and cover Remove cover flap, drain water into with water and brush. a suitable receptacle. Press on cover flap and insert drainage hose into the holder. Install the cover back to the measuring aid. Pay attention to the assemble mark, and press the cover Residual water may run out. -
Page 24: Drainage Hose On The Siphon Blocked
Cleaning and maintenance Drainage hose on the siphon and/or: blocked Turn the programme selector to (Off). Pull out the mains plug. Residual water may run out! Note: Remove hose from the rear of the appliance. Take out filter with pliers and clean. Connect the hose and check for leaks. -
Page 25: Faults And What To Do About
Faults and what to do about them Faults and what to do about them E mergency release, e.g. if a F a u l t s a n d w h a t t o d o a b o u t t h e m power failure occurs The programme continues running when the power supply is restored. -
Page 26: Information On The Display Panel
Faults and what to do about them Information on the display panel Display Cause/Remedy è flashes Please close the door immediately because of rising water level; in pause sta- tus, è flashes fast and sound an alarm. Please close the door; Door cannot be locked/unlocked due to high temperature of the door lock coil. - Page 27 Faults and what to do about them Faults Cause/Remedy Water is not drained. - - - -(Rinse stop= without final spin) selected? ■ Clean the drain pump. ~ Page 23 ■ Clean outlet pipe and/or drainage hose. ■ Water not visible in the Not a fault –...
-
Page 28: Customer Service
Customer service Customer service I f you cannot rectify the fault yourself, C u s t o m e r s e r v i c e Faults, what to do?~ Page 26 Please contact our customer service. We will always finds a suitable solution to avoid unnecessary visits by technicians. -
Page 29: Consumption Values
Consumption values Consumption values C o n s u m p t i o n v a l u e s Model: WS10K1601W WS10K1R81W Grade* Power 0.49 consumption (Kwh/cycle) Water consumption (L/cycle) Washing efficiency 1.03 Noise value** Maximum Spin 72 dB(A) value Maximum Wash 46 dB(A) -
Page 30: Technical Specifications
Technical specifications Technical specifications T e c h n i c a l s p e c i f i c a t i o n s Dimensions a= 598 mm b= 446 mm (WS10K1601W/ WS10K1R81W) b= 590 mm (WM10P1601W/ WM10P1R81W/WM12P1681W/WM12P1C81W) c= 848 mm Weight... -
Page 31: Installation And Connection
Installation and connection Installation and connection S tandard accessories I n s t a l l a t i o n a n d c o n n e c t i o n Note: A hose clip Ø 24–40 mm (specialist store) is also required for connection to a siphon. -
Page 32: Installation
Installation and connection Hose and cable lengths Available from dealer/customer Caution! service: The appliance may be damaged. Extension for cold water inlet hose. Frozen hoses may tear/burst. ■ ■ Qualified tap. Do not install the washing machine ■ in an area where there is a risk of Installation frost or outdoors. -
Page 33: Installing The Appliance On A Base Or On A Wooden Joist Ceiling
Installation and connection Installing the appliance on Removing the transportation a base or on a wooden joist protection devices ceiling Caution! The appliance may be damaged! Warning Transit bolts which have not been The appliance may be damaged! removed may damage e.g. the drum The washing machine may wander while the washing machine is running. -
Page 34: Connecting The Water
Installation and connection Water supply Take the power cord out of the holders. Remove sleeves. Water inlet hose: do not kink, Note: crush, modify or sever (strength is no longer guaranteed). Optimum water pressure in the mains: 100–1000 kPa (1–10 bar) When the tap is turned on, the water ■... -
Page 35: Water Drainage
Installation and connection Water drainage Installing the drainage hose: Notes Do not kink or protract the water ■ drainage hose. Height difference between the ■ placement area and drainage point: Minimum 0 cm – maximum 100 cm Drainage into a wash basin Drainage into a siphon Warning The connection point must be secured... -
Page 36: Alignment
Installation and connection Alignment The mains voltage and voltage ■ specifications on the washing machine (appliance rating plate) Loosen lock nut in a clockwise must match. direction with a wrench. Connected load as well as required Check alignment of the washing ■... -
Page 37: Transportation
Installation and connection Add standard detergent to Before switching on the appliance: dispenser II according Notes to manufacturer’s instructions for Always remove the transportation light soiling. ■ protection devices! To prevent frothing, use only Note: To prevent unused detergent from half the recommended amount ■... - Page 40 You can find the contact information for all countries in the attached after-sales service directory. BSH Hausgeräte GmbH Carl-Wery-Straße 34 81739 München GERMANY siemens-home.bsh-group.com Manufactured by BSH ELECTRICAL APPLIANCES (JIANGSU) CO., LTD. under Trademark License of Siemens AG *9000963906* 9000963906 (9801)