Table of Contents
Advertisement
Available languages
Available languages
Quick Links
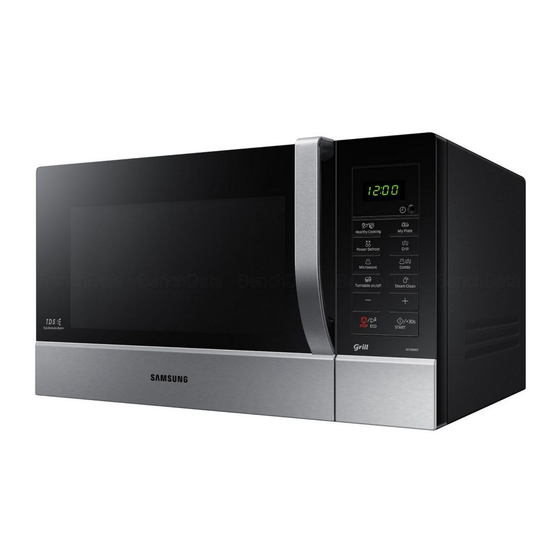
GE109MST1
فرن امليكروويف
هائلة
إمكانات
إرشادات ودليل الطهي للمالك
.Samsung نشكرك على شرائك هذا املنتج من
ال يغطي اتصاالت اخلدمة اخلاصة بشرح تشغيل املنتج أو تصحيحSamsung يرجى العلم بأن ضمان
.التركيب غير السليم أو تنفيذ عمليات الصيانة أو التنظيف العادية
GE109MST1_SUT_DE68-04292A-02_AR.indd 1
2015-02-03
11:55:26
Advertisement
Chapters
Table of Contents

Related Manuals for Samsung GE109MST1


Summary of Contents for Samsung GE109MST1
- Page 1 إمكانات إرشادات ودليل الطهي للمالك .Samsung نشكرك على شرائك هذا املنتج من ال يغطي اتصاالت اخلدمة اخلاصة بشرح تشغيل املنتج أو تصحيحSamsung يرجى العلم بأن ضمان .التركيب غير السليم أو تنفيذ عمليات الصيانة أو التنظيف العادية GE109MST1_SUT_DE68-04292A-02_AR.indd 1 2015-02-03...
- Page 2 معلومات السالمة احملتويات 2 ................................معلومات السالمة استخدام كتيب اإلرشادات 11 .................................دليل البحث السريع . تتضمن إرشادات املالك معلومات قيمة تتعلق بالطهيSAMSUNG لقد حصلت اآلن على فرن ميكروويف 12 ..................................ميزات الفرن :باستخدام فرن امليكروويف 12 ....................................الفرن احتياطات السالمة • 12 ................................لوحة التحكم...
- Page 3 إرشادات هامة تتعلق بالسالمة حتذير: ي ُ كن استخدام هذا اجلهاز من ق ِ بل األطفال البالغني من العمر 8 سنوات أو أكثر أو األشخاص الذين .اقرأ اإلرشادات بعناية واحتفظ بها كمرجع في املستقبل لديهم قدرات عقلية أو حسية أو جسدية ضعيفة أو من .تأكد...
- Page 4 هذا اجلهاز غير مخصص الستخدامه بواسطة أشخاص في حالة تصاعد دخان، قم بإيقاف تشغيل الفرن أو فصله يعانون من إعاقات جسدية أو حسية أو ذهنية (مبا في عن التيار الكهربي واجعل باب الفرن مغلقً ا إلخماد أي ذلك األطفال) أو ممن لديهم نقص في اخلبرة واملعلومات .اشتعال...
- Page 5 حتذير: ي ُ صبح اجلهاز واألجزاء التي يكن الوصول إليها إذا أصدر الفرن ضجة غريبة أو رائحة حريق أو دخان، افصل .ساخنة أثناء االستخدام .مأخذ الكهرباء على الفور واتصل بأقرب مركز خدمة ومن ثم ّ ، يتعني عليك توخي احلذر لتج ن ّ ب ملس األجزاء يجب...
- Page 6 إذا تعرض سلك التيار الكهربي للتلف، يجب استبداله من ال تستخدم منظفات كاشطة خشنة أو أدوات كشط قبل الشركة املص ن ّ عة أو مسؤول الصيانة التابع لها أو معدنية حادة لتنظيف زجاج باب الفرن ألنها قد تؤدي إلى .أشخاص مؤهلني بنفس الكفاءة لتجنب التعرض للمخاطر .خدش...
- Page 7 نظ ّ ف جتويف فرن امليكروويف بعد كل مرة تستخدمه فيها تأكد “دوم ً ا” من نظافة قفلي الباب ومن إغالق الباب مبحلول تنظيف، ولكن اترك فرن امليكروويف فترة كافية .بإحكام .ليبرد قبل التنظيف لتجنب حدوث أي إصابة ي ُ كن أن يؤدي اإلهمال في تنظيف الفرن إلى تدهور حالة سطحه...
- Page 8 .الكهربي ونقاط االتصال باستخدام قطعة قماش جافة بصفة دورية .السالمة ال تقم بسحب سلك التيار الكهربي أو ثنيه بشكل مفرط أو تضع أشياء معتمدSamsung الرجاء االتصال بأقرب مركز خدمة عمالء .ثقيلة عليه .لالستعانة مبهندس مؤهل الستبدال املصباح عند تسرب الغاز (مثل غاز البروبان أو الغاز النفطي املسال أو غيره من...
- Page 9 حتذير: قد ينتج عن تسخني املشروبات باستخدام فرن امليكروويف حدوث .ال تضع اجلهاز فوق سطح قابل للكسر، مثل حوض املاء أو سطح زجاجي فوران شديد عند غليانها، لذا يجب توخي احلذر عند التعامل مع األواني؛ ملنع حدوث مثل هذا املوقف، انتظر "دوم ً ا" ملدة تبلغ 02 ثانية على األقل ال...
- Page 10 ،ال تقم بتشغيل فرن امليكروويف عندما يكون فارغ ً ا. وعند حدوث ذلك تنبيه سيتم إيقاف تشغيل فرن امليكروويف ملدة 03 دقيقة للحفاظ على سالمتك. ومن ثم َّ ، فإننا نوصي بوضع كوب ماء داخل الفرن بشكل دائم .المتصاص طاقة امليكروويف في حالة تشغيل الفرن بشكل غير مقصود "استخدم...
- Page 11 دليل البحث السريع بفرض رسوم مقابل استبدال أ ي ّ أجزاء ملحقة أو إصالح أ ي ّ عيب جتميلي في حالة تلف الوحدة و/أوSamsung ستقوم :تلف األجزاء امللحقة أو فقدها بسبب العميل. العناصر التي يغطيها هذا الشرط .(أ) وجود نتوء أو كشط أو كسر في الباب أو املقبض أو اللوحة اخلارجية أو لوحة التحكم...
- Page 12 ميزات الفرن لوحة التحكم الفرن 7. قفال الباب 1. مقبض الباب 8. الصينية الدوارة 2. الباب 9. أداة التدوير 3. فتحات التهوية 01. احللقة الدوارة 4. جزء التسخني 11. فتحتا قفل األمان 5. اإلضاءة 21. لوحة التحكم 6. حامل إناء املاء 7.
- Page 13 استخدام الفرن األدوات اإلضافية طريقة عمل فرن امليكروويف نوفر لك العديد من األدوات اإلضافية التي يكنك استخدامها بطرق متعددة وفقً ا للطراز الذي قمت إن أشعة امليكروويف عبارة عن موجات كهرومغناطيسية عالية التردد، تعمل الطاقة املنبعثة منها على .بشرائه .طهي الطعام أو إعادة تسخينه دون التأثير على شكله أو لونه .1.
- Page 14 التأكد من أن الفرن يعمل بشكل صحيح يتيح لك اإلجراء البسيط التالي التأكد من أن الفرن يعمل بشكل صحيح طول الوقت. إذا ساورتك .32الشكوك، فراجع القسم "استكشاف املشكالت وحلها" في الصفحتني 13 و .) (تشغيل/+03 ثانيةSTART/+30s 4. اضغط على الزر .يجب...
- Page 15 ضبط مدة الطهي (تشغيل/+03 ثانية) مرة واحدة لكل 03 ثانيةSTART/+30s يكنك زيادة مدة الطهي بالضغط على الزر 5. عند عرض الوقت الصحيح، اضغط على زر الساعة لبدء تشغيل .الساعة .ترغب في إضافتها .يظهر الوقت أثناء عدم استخدام فرن امليكروويف :النتيجة...
- Page 16 إعداد وضع توفير الطاقة يوضح اجلدول التالي الكميات وإرشادات الطهي املناسبة اخلاصة بخيارات الطهي االثنى عشر املبرمجة .يتميز الفرن بوضع توفير الطاقة .مسبقً ا .) (إيقاف/توفير الطاقةSTOP/ECO اضغط على الزر • .استخدم قفازات الفرن أثناء إخراج الطعام منه :النتيجة .إيقاف تشغيل الشاشة حجم...
- Page 17 استخدام ميزات طبقي حجم .حتتوي ميزات طبقي على مدتني زمنيتني للطهي مبرمجة مسبقً ا اإلرشادات الكود/الطعام الوجبة .فهي ال حتتاج إلى ضبط وقت الطهي أو مستوى الطاقة اغسل القطع وضعها على طبق خزفي. ثم قم بتغطيتها 003 جرام .ضع الطعام أو ال ً في منتصف الصينية الدوارة، وأغلق الباب .بطبقة...
- Page 18 استخدام ميزات فك التجميد السريع يبني اجلدول التالي برامج إذابة الثلج السريع املتعددة والكميات التي يكن فك جتميدها واإلرشادات مت ك ّنك ميزات فك التجميد السريع من فك جتميد اللحوم والدواجن واألسماك واخلبز والكعك. يتم ضبط .املناسبة .مدة فك التجميد ومستوى الطاقة تلقائي ً ا. ما عليك سوى حتديد البرنامج والوزن قم...
- Page 19 الطهي باستخدام أشعة امليكروويف والشواية مع ً ا عملية الشواء يكنك أيض ً ا الطهي باستخدام امليكروويف والشواية مع ً ا وذلك للطهي والتحمير في نفس الوقت بشكل .متكنك الشواية من تسخني الطعام وحتميره بشكل سريع دون استخدام أشعة امليكروويف .سريع...
- Page 20 استخدام طبق التحمير .قم بتنظيف طبق التحمير باملاء الدافئ ومادة منظفة وقم بشطفه باملاء يسمح طبق التحمير ليس فقط بتحمير الطبقة العلوية من الطعام باستخدام الشواية، لكنه أيض ً ا يجعل الطبقة السفلية هشة ومحمرة بفضل احلرارة العالية لطبق التحمير. يحتوي اجلدول املوجود في ال...
- Page 21 استخدام ميزة التنظيف بالبخار )مدة الطهي (بالدقيقة الطاقة حجم الوجبة الطعام 12-11 054 واط + الشواية 003 إلى 053 جم البيتزا .يغلف البخار الذي يصدر من نظام التنظيف بالبخار سطح جتويف الفرن )(مجمدة .بعد استخدام وظيفة التنظيف بالبخار، يكنك تنظيف جتويف الفرن بسهولة اإلرشادات...
- Page 22 استخدام ميزات تشغيل/إيقاف تشغيل الصينية الدوارة يتيح لك الزر تشغيل/إيقاف تشغيل الصينية الدوارة استخدام أطباق كبيرة متأل الفرن بالكامل عن طريق .) (التنظيف بالبخارSteam Clean 4. اضغط على الزر قد يبدو لك الفرن من الداخل ملي ئ ً ا ببخار املاء أثناء عملية التنظيف .)إيقاف...
- Page 23 دليل أواني الطهي مسموح للطهي باستخدام فرن امليكروويف، يجب أن تتمكن أشعة امليكروويف من اختراق الطعام دون أن تنعكس على األطباق تعليقات باستخدامها أوعية الطهي أو متتصها األطباق املستخدمة. لذا، يجب احلرص عند اختيار أدوات الطهي. إذا كان وعاء الطهي يحمل عالمة مسموح مع...
- Page 24 دليل طهي اخلضروات اجملمدة دليل الطهي استخدم أوعية مناسبة مصنوعة من البيركس لها غطاء. قم بطهي الطعام مع وضع الغطاء مدة احلد .األدنى – راجع اجلدول. تابع الطهي حتى حتصل على النتيجة املطلوبة أشعة امليكروويف قلب الطعام مرتني أثناء الطهي ومرة بعد الطهي. أضف امللح أو التوابل أو الزبد بعد الطهي. اترك الطعام .مغطى...
- Page 25 دليل طهي اخلضروات الطازجة )الوقت (بالدقيقة الطاقة حجم الوجبة الطعام استخدم أوعية مناسبة مصنوعة من البيركس لها غطاء. أضف من 03 إلى 54 مل من املاء البارد (من ملعقتني إلى ثالث مالعق كبيرة) لكل 052 جرام ما لم يوصى بكمية أخرى من املاء – راجع اجلدول. قم 4-3.5 009 واط...
- Page 26 إعادة التسخني دليل طهي األرز واملعجنات يقوم فرن امليكروويف بتسخني الطعام في وقت أقل من الوقت الذي يستغرقه درج إعادة التسخني اخلاص استخدم إنا ء ً كبير ً ا من البايركس له غطاء، مع مراعاة أن حجم األرز يتضاعف أثناء :األرز...
- Page 27 إعادة تسخني طعام األطفال طعام األطفال: قم بتفريغه في طبق خزفي عميق. قم بتغطيته بغطاء بالستيكي. يقلب جي د ً ا بعد إعادة )الوقت (بالدقيقة الطاقة حجم الوجبة الطعام .التسخني! اتركه في الفرن ملدة من دقيقتني إلى 3 دقائق قبل التقدمي. قلبه مرة أخرى وتأكد من درجة حرارته 5.5-4.5 006 واط...
- Page 28 فك التجميد تسخني طعام ولنب األطفال .استخدم مستويات الطاقة ومدد التسخني املوجودة في اجلدول التالي كإرشادات إلعادة لتسخني تعد أشعة امليكروويف أسلو ب ً ا ممتا ز ً ا في إذابة التجميد عن الطعام. تقوم أشعة امليكروويف بإذابة التجميد عن الطعام برفق خالل فترة زمنية قصيرة. ويفيد ذلك بشكل كبير في حالة استقبال ضيوف بشكل الوقت...
- Page 29 الشواية يوجد جزء التسخني اخلاص بالشواية حتت سقف جتويف الفرن. وتعمل الشواية أثناء غلق الباب ودوران )الوقت (بالدقيقة الطاقة حجم الوجبة الطعام الصينية الدوارة. يؤدي دوران الصينية الدوارة إلى حتمير الطعام بشكل متساو ٍ . ويؤدي التسخني املسبق السمك .للشواية ملدة 3 إلى 5 دقائق إلى إمتام عملية حتمير الطعام بشكل أسرع 081 واط...
- Page 30 دليل شي األطعمة الطازجة واجملمدة املرحلة الثانية املرحلة األولى الطعام .قم بتسخني الشواية ملدة 3 دقائق عند استخدام وظيفة الشواء الطاقة حجم الوجبة )(دقيقة )(دقيقة الطازج .استخدم مستويات الطاقة ومدد التسخني املوجودة في اجلدول التالي كإرشادات للشواء .استخدم قفازات الفرن أثناء إخراجها 10-8 003 واط...
- Page 31 • حتميص قطع اللوز .، لكي يرسلوا إليك مهندس ً ا محتر ف ًا الستبدال املصباحSamsung معتمد من .ضع 03 جم من اللوز املقطع بالتساوي في طبق خزفي متوسط احلجم .يتسبب الفرن في حدوث تشويش على أجهزة الراديو أو التلفزيون...
- Page 32 82 لتر ً ا تنظيف املفاتيح والتحقق مما إذا كان هناك ماء على السطح حول املفتاح. قم بإيقاف تشغيل فرن • . احملليSamsung امليكروويف وحاول ضبطه مرة ثانية. في حال ظهورها ثانية، اتصل مبركز خدمة عمالء الوزن الصافي 61 كجم تقري ب ً ا...
- Page 33 مذكرة مذكرة GE109MST1_SUT_DE68-04292A-02_AR.indd 33 2015-02-03 11:55:37...
- Page 34 مذكرة مذكرة GE109MST1_SUT_DE68-04292A-02_AR.indd 34 2015-02-03 11:55:37...
- Page 35 مذكرة مذكرة GE109MST1_SUT_DE68-04292A-02_AR.indd 35 2015-02-03 11:55:37...
- Page 36 800-SAMSUNG (800 - 726 7864) U.A.E 800-SAMSUNG (800 - 726 7864) OMAN www.samsung.com/ae/support (English) 183-CALL (183-2255) KUWAIT www.samsung.com/ae_ar/support (Arabic) 8000-GSAM (8000-4726) BAHRAIN 800-CALL (800-2255) QATAR 08000-726786 www.samsung.com/eg/support EGYPT 16580 www.samsung.com/n_africa/support 021 36 11 00 ALGERIA 0800-Samsung (72678) PAKISTAN www.samsung.com/pk/support www.samsung.com/n_africa/support...
- Page 37 Nous vous remercions d'avoir choisi ce produit Samsung. Mode d'emploi et guide de cuisson Veuillez noter que la garantie Samsung n'inclut pas les déplacements du service après-vente pour expliquer le fonctionnement de l'appareil, corriger une installation non correcte ou exécuter des travaux de nettoyage ou d'entretien réguliers.
-
Page 38: Table Of Contents
Consignes de sécurité ................2 UTILISATION DU MANUEL D’UTILISATION Présentation rapide ..................11 Vous venez d’acquérir un four micro-ondes SAMSUNG. Ce manuel contient Fonctionnalités du four ................12 de nombreux conseils et instructions sur son utilisation : Four ......................12 • Consignes de sécurité... - Page 39 CONSIGNES DE SÉCURITÉ IMPORTANTES AVERTISSEMENT : n'autorisez un enfant à utiliser le four sans surveillance que si vous LISEZ ATTENTIVEMENT CE MANUEL ET lui avez donné les instructions appropriées CONSERVEZ-LE PRÉCIEUSEMENT EN lui permettant de se servir de l'appareil en VUE D’UNE CONSULTATION ULTÉRIEURE. toute sécurité...
- Page 40 Ce four micro-ondes est prévu pour faire En négligeant la propreté de votre four, vous chauffer des aliments et des liquides. Le risquez d'en détériorer les surfaces et par séchage des aliments ou de vêtements et conséquent, d'en réduire la durée de vie et de le chauffage de compresses chauffantes, créer des situations dangereuses.
- Page 41 Ce four doit être positionné dans une direction Cet appareil devient très chaud pendant son appropriée et à une hauteur permettant utilisation. Prenez garde à ne pas toucher les un accès facile à la zone intérieure et aux éléments chauffants situés à l'intérieur du four. commandes. AVERTISSEMENT : les parties accessibles Avant d'utiliser votre four pour la première fois, peuvent devenir très chaudes pendant...
- Page 42 INSTALLATION DU FOUR MICRO-ONDES Cet appareil peut être utilisé par des enfants Placez le four sur une surface plane située à à partir de 8 ans et des personnes ayant des 85 cm au-dessus du sol. Cette surface doit être capacités physiques, sensorielles ou mentales suffisamment résistante pour supporter le poids réduites ou un manque d'expérience et de du four en toute sécurité.
- Page 43 N’installez pas le four dans un environnement 1. Nettoyez l’extérieur avec un chiffon doux et de chaud ou humide (ex. : à côté d’un radiateur l’eau savonneuse tiède. Rincez et séchez. ou d’un four traditionnel). Respectez les 2. Éliminez les traces de projections situées sur les caractéristiques électriques du four ; si vous surfaces intérieures du four à l’aide d’un chiffon utilisez une rallonge, celle-ci doit correspondre aux imbibé d’eau savonneuse. Rincez et séchez.
- Page 44 Pour le rangement ou la réparation de votre four Veuillez contacter le service d’assistance micro-ondes, vous devez respecter quelques Samsung le plus proche afin qu’un ingénieur précautions simples. qualifié remplace l’ampoule. N’utilisez pas le four si la porte ou ses joints sont endommagés :...
- Page 45 Ne tirez pas sur le cordon d'alimentation et faites en sorte de N'entreposez aucun produit inflammable dans le four. Soyez ne jamais le plier à l'excès ou poser d'objets lourds dessus. particulièrement vigilant lors du réchauffage de plats de service ou de boissons contenant de l'alcool ; en cas de contact En cas de fuite de gaz (propane, GPL, etc.), aérez avec une partie chaude du four, les vapeurs risquent de immédiatement la pièce sans toucher la prise d'alimentation.
- Page 46 Ne faites jamais fonctionner le four à vide. Le four micro-ondes ATTENTION s'arrête automatiquement pendant 30 minutes pour des raisons de sécurité. Nous vous recommandons de laisser en Seuls les ustensiles qui sont adaptés aux fours micro- ondes peuvent être utilisés. N'utilisez JAMAIS de récipients permanence un verre d'eau à l'intérieur du four ; ainsi, si vous métalliques, de vaisselle comportant des ornements dorés ou le mettez en marche par inadvertance alors qu'il est vide, l'eau absorbera les micro-ondes.
-
Page 47: Présentation Rapide
Samsung facturera les travaux de réparation lorsqu’un accessoire doit être réparé ou un défaut esthétique corrigé, si l’endommagement de l’appareil et/ou l’endommagement ou la perte de l’accessoire a été occasionné(e) par le client. Les Si vous souhaitez faire cuire des aliments. -
Page 48: Fonctionnalités Du Four
fonctionnalités du four FOUR TABLEAU DE COMMANDE 1. POIGNÉE 7. LOQUETS DE LA PORTE 2. PORTE 8. PLATEAU TOURNANT 3. ORIFICES DE VENTILATION 9. COUPLEUR 4. ÉLÉMENT CHAUFFANT 10. ANNEAU DE GUIDAGE 5. ÉCLAIRAGE 11. ORIFICES DU SYSTÈME DE VERROUILLAGE DE SÉCURITÉ 6. SUPPORT DU RÉSERVOIR À EAU 1. BOUTON HORLOGE 8. BOUTON MARCHE/ARRÊT DU 12. TABLEAU DE COMMANDE PLATEAU TOURNANT 2. -
Page 49: Accessoires
utilisation du four ACCESSOIRES FONCTIONNEMENT D'UN FOUR MICRO-ONDES Selon le modèle de votre four micro-ondes, vous disposez de plusieurs accessoires à Les micro-ondes sont des ondes électromagnétiques à haute fréquence. L'énergie fonctionnalités multiples. qu'elles dégagent permet de faire cuire ou réchauffer les aliments sans en altérer la forme ni la couleur. 1. Anneau de guidage : à placer au centre du four. Vous pouvez utiliser votre four à... -
Page 50: Vérification Du Bon Fonctionnement De Votre Four
VÉRIFICATION DU BON FONCTIONNEMENT DE VOTRE FOUR La procédure suivante vous permet de vérifier à tout moment que votre four fonctionne 3. Réglez le temps de cuisson en appuyant sur le bouton correctement. En cas de doute, reportez-vous à la section intitulée « Dépannage » située Haut(+)/Bas(-). en pages 31 et 32. Résultat : le temps de cuisson s'affiche. -
Page 51: Niveaux De Puissance Et Variations De Temps
RÉGLAGE DU TEMPS DE CUISSON Vous pouvez augmenter le temps de cuisson en appuyant sur le bouton START/+30s 4. Appuyez sur les boutons Haut(+)/Bas(-) pour régler les (DÉPART/+30s) autant de fois que vous souhaitez ajouter de tranches de 30 secondes. minutes. • Pour surveiller la progression de la cuisson, il vous suffit d'ouvrir la porte ;... -
Page 52: Réglage Du Mode D'économie D'énergie
RÉGLAGE DU MODE D'ÉCONOMIE D'ÉNERGIE Le four possède un mode d'économie d'énergie. Le tableau suivant répertorie les quantités et instructions appropriées au sujet des 12 options de cuisson pré-programmées. • Appuyez sur le bouton STOP/ECO (ARRÊT/ÉCO). Utilisez des maniques pour sortir votre plat du four. Résultat : affichage désactivé. -
Page 53: Fonctionnalités Mon Plat
FONCTIONNALITÉS MON PLAT La fonction Mon plat propose 2 programmes de cuisson. Vous n'avez donc besoin de Taille de Code/Aliment Consignes régler ni le temps de cuisson, ni la puissance. la portion Placez le plat au centre du plateau tournant, puis refermez la porte. 300g Rincez les morceaux et placez-les sur une assiette (2 parts) -
Page 54: Utilisation Des Fonctions De Décongélation
UTILISATION DES FONCTIONS DE DÉCONGÉLATION Le mode Décongélation permet de faire décongeler de la viande, de la volaille, du Le tableau suivant répertorie les divers programmes de Décongélation, les quantités et poisson, du pain ou des gâteaux. Le temps de décongélation et la puissance se règlent les instructions appropriées. -
Page 55: Faire Griller
FAIRE GRILLER COMBINAISON MICRO-ONDES ET GRIL Le gril permet de faire chauffer et dorer des aliments rapidement, sans utiliser la cuisson Vous pouvez également combiner la cuisson par micro-ondes et la cuisson au gril afin de par micro-ondes. faire cuire et dorer rapidement, en une seule fois. • Les récipients étant très chauds, veillez à toujours porter des maniques lorsque Utilisez TOUJOURS des ustensiles adaptés à la cuisson aux micro-ondes et au four vous devez les manipuler. -
Page 56: Utilisation Du Plat Croustilleur
UTILISATION DU PLAT CROUSTILLEUR Ce plat croustilleur vous permet de faire dorer les aliments en surface en faisant appel à N'utilisez ni grattoir ni éponge métallique ; ils risqueraient d'endommager le la puissance du gril ; qui plus est, la température élevée qu'atteint le plat permet de dorer revêtement du plat. -
Page 57: Utilisation Du Nettoyage Vapeur
Aliment Taille de la portion Puissance Temps de cuisson (min) Aliment Taille de la portion Puissance Temps de cuisson (min) Pizza (surgelée) 300 à 350 g 450 W + Gril 11-12 Pommes de 250 g 600 W + Gril 500 g terre au four Consignes Faites préchauffer le plat croustilleur pendant 3 minutes. Placez la pizza Consignes surgelée sur le plat croustilleur. -
Page 58: Utilisation Des Fonctions Sécurité Enfants
UTILISATION DES FONCTIONS MARCHE/ARRÊT DU PLATEAU 4. Appuyez sur le bouton Steam Clean (Nettoyage vapeur). Le bouton Turntable on/off (Marche/Arrêt du plateau tournant) permet d'arrêter Vous pouvez constater la présence de BUÉE pendant le la rotation de celui-ci (uniquement en mode de cuisson manuel) afin que vous puissiez nettoyage vapeur ;... -
Page 59: Guide Des Récipients
guide des récipients Pour faire cuire des aliments dans le four micro-ondes, il est nécessaire que les micro-ondes pénètrent Adapté à la dans les aliments sans être réfléchies ou absorbées par le plat utilisé. Le choix du type de récipient est Récipient cuisson aux Remarques... -
Page 60: Guide De Cuisson
guide de cuisson Guide de cuisson pour les légumes surgelés Utilisez une cocotte en Pyrex avec couvercle adaptée à la cuisson au four. Couvrez le tout pendant la durée minimale de cuisson (reportez-vous au tableau). Poursuivez la MICRO-ONDES cuisson selon votre goût. Les micro-ondes sont d'abord attirées puis absorbées par l'eau, la graisse et le sucre Remuez deux fois pendant la cuisson et une fois après. Ajoutez du sel, des herbes ou du contenus dans les aliments. - Page 61 Guide de cuisson pour les légumes frais Utilisez une cocotte en Pyrex avec couvercle adaptée à la cuisson au four. Ajoutez 30 à Aliment Taille de la portion Puissance Temps (min) 45 ml d’eau froide (2 à 3 cuillerées à soupe) par tranche de 250 g sauf contre-indication Aubergines 250 g 900 W...
- Page 62 Guide de cuisson pour le riz et les pâtes FAIRE RÉCHAUFFER Riz : Utilisez une grande cocotte en Pyrex avec couvercle, car le riz double de Votre four micro-ondes permet de faire réchauffer les aliments bien plus rapidement que le four volume pendant la cuisson. Faites cuire à couvert. Une fois le temps de traditionnel ou la table de cuisson. Reportez-vous aux puissances et temps de cuisson figurant cuisson écoulé, remuez avant de laisser reposer puis salez ou ajoutez des dans le tableau ci-dessous. Le calcul des temps de réchauffage dans le tableau est basé sur une herbes et du beurre.
- Page 63 FAIRE RÉCHAUFFER DES ALIMENTS POUR BÉBÉ ALIMENTS POUR BÉBÉ : Versez les aliments dans une assiette creuse en céramique. Recouvrez Aliment Taille de la portion Puissance Temps (min) le récipient d'un couvercle en plastique. Remuez bien après le réchauffage ! Laissez reposer pendant Plat mijoté 350 g 600 W 4½-5½ 2 à 3 minutes avant de servir. Remuez de nouveau et vérifiez la température. Température de service (réfrigéré) Consignes recommandée : entre 30 et 40 °C. Placez le plat mijoté dans une assiette creuse en céramique. Recouvrez le LAIT POUR BÉBÉ : Versez le lait dans un biberon en verre stérilisé. Faites réchauffer sans couvrir. récipient d'un couvercle en plastique. Remuez de temps en temps pendant le Ne faites jamais chauffer un biberon encore muni de sa tétine, car il pourrait exploser en cas de réchauffage, puis de nouveau avant de laisser reposer et de servir.
- Page 64 Faire réchauffer des aliments et du lait pour bébé FAIRE DÉCONGELER Reportez-vous aux puissances et temps de cuisson figurant dans ce tableau pour Les micro-ondes constituent un excellent moyen de décongeler les aliments. Elles connaître les temps de chauffe adaptés à chaque type d'aliment. permettent de faire décongeler progressivement les aliments en un temps record. Cela peut se révéler fort utile si vous recevez du monde à l'improviste. Aliment Taille de la portion Puissance...
- Page 65 GRIL L'élément chauffant du gril est situé sous la paroi supérieure du four. Il fonctionne lorsque Aliment Taille de la portion Puissance Temps (min) la porte est fermée et que le plateau tourne. La rotation du plateau permet de dorer Volaille uniformément les aliments. Le préchauffage du gril pendant 3 à 5 minutes permet de Morceaux de 500 g (2 unités). 180 W 14-15 dorer les aliments plus rapidement. poulet Ustensiles pour la cuisson au gril : Les ustensiles doivent résister aux flammes ;...
- Page 66 Guide de cuisson au gril pour les aliments frais et surgelés Faites préchauffer le gril (fonction Gril) pendant 3 minutes. Aliments frais Taille de la portion Puissance 1 étape (min) 2 étape (min) Reportez-vous aux puissances et aux temps de cuisson figurant dans ce tableau pour connaître les consignes relatives à la cuisson au gril. Pommes au four 2 pommes (env. 400 g) 300 W + Gril Utilisez des maniques pour sortir votre plat du four.
-
Page 67: Dépannage Et Code D'erreur
Couvrez et faites cuire pendant 6 minutes 30 à 7 minutes 30 à • Vous ne devez pas remplacer vous-même l'ampoule pour des raisons de sécurité. 900 W. Veuillez contacter le service d'assistance Samsung le plus proche afin qu'un Remuez plusieurs fois en cours de cuisson. ingénieur qualifié remplace l'ampoule. -
Page 68: Code D'erreur
• Les détails concernant votre garantie • Une description claire du dysfonctionnement Extérieures 517 x 297 x 436 mm Intérieures 357 x 255 x 357 mm Contactez ensuite votre revendeur local ou le service après-vente SAMSUNG. Capacité 28 litres CODE D'ERREUR Le message « SE » s'affiche. Poids • Nettoyez les touches et assurez-vous de l'absence d'eau sur la surface entourant la 16,0 kg env. - Page 69 MÉMO MÉMO GE109MST1_SUT_DE68-04292A-02_FR.indd 33 20/12/2014 9:53:27...
- Page 70 MÉMO MÉMO GE109MST1_SUT_DE68-04292A-02_FR.indd 34 20/12/2014 9:53:27...
- Page 71 MÉMO MÉMO GE109MST1_SUT_DE68-04292A-02_FR.indd 35 20/12/2014 9:53:27...
- Page 72 U.A.E 800-SAMSUNG (800 - 726 7864) OMAN 800-SAMSUNG (800 - 726 7864) www.samsung.com/ae/support (English) KUWAIT 183-CALL (183-2255) www.samsung.com/ae_ar/support (Arabic) BAHRAIN 8000-GSAM (8000-4726) QATAR 800-CALL (800-2255) 08000-726786 EGYPT www.samsung.com/eg/support 16580 ALGERIA 021 36 11 00 www.samsung.com/n_africa/support PAKISTAN 0800-Samsung (72678) www.samsung.com/pk/support www.samsung.com/n_africa/support...
- Page 73 Thank you for purchasing this Samsung product. Owner’s instructions & Cooking guide Please be advised that the Samsung warranty does NOT cover service calls to explain product operation, correct improper installation, or perform normal cleaning or maintenance. GE109MST1_SUT_DE68-04292A-02_EN.indd 1...
-
Page 74: Safety Information
Safety information ..................2 USING THIS INSTRUCTION BOOKLET Quick look-up guide ..................11 You have just purchased a SAMSUNG microwave oven. Your Owner’s Oven features ....................12 Instructions contains valuable information on cooking with your microwave Oven ......................12 oven: Control panel .................... - Page 75 IMPORTANT SAFETY INSTRUCTIONS WARNING: Only allow children to use READ CAREFULLY AND KEEP FOR the oven without supervision when FUTURE REFERENCE. adequate instructions have been given Make sure that these safety precautions are so that the child is able to use the oven obeyed at all times.
- Page 76 The microwave oven is intended for Failure to maintain the oven in a clean heating food and beverages. Drying of condition could lead to deterioration of food or clothing and heating of warming the surface that could adversely affect pads, slippers, sponges, damp cloth and the life of the appliance and possibly similar may lead to risk of injury, ignition result in a hazardous situation.
- Page 77 The appliance should not be cleaned During use the appliance becomes hot. with a water jet. Care should be taken to avoid touching heating elements inside the oven. This oven should be positioned proper direction and height permitting easy WARNING: Accessible parts may access to cavity and control area. become hot during use.
- Page 78 INSTALLING YOUR MICROWAVE OVEN This appliance can be used by Place the oven on a flat level surface 85 cm children aged from 8 years and above and persons with reduced physical, above the floor. The surface should be strong sensory or mental capabilities or lack of enough to safety bear the weight of the oven.
- Page 79 Do not install the microwave oven in hot or 1. Clean the outside surfaces with a soft cloth damp surroundings like next to a traditional and warm, soapy water. Rinse and dry. oven or radiator. The power supply 2. Remove any splashes or stains on the specifications of the oven must be respected inside surfaces of oven with a soapy cloth. and any extension cable used must be Rinse and dry.
- Page 80 Please contact nearest authorised serviced. Samsung customer care centre to arrange The oven must not be used if the door or for a qualified engineer to replace the bulb. door seals are damaged: WARNING • Broken hinge...
- Page 81 Do not pull or excessively bend or place heavy Do not pour or directly spray water onto the oven. objecton the power cord. Do not place objects on the oven, inside or on the In the event of a gas leak (such as propane gas, LP door of the oven.
- Page 82 Do not operate the microwave oven when it is CAUTION empty. The microwave oven will automatically Only use utensils that are suitable for use in shut down for 30 minutes for safety purposes. We recommend placing a glass of water inside the oven microwave ovens;...
-
Page 83: Quick Look-Up Guide
Samsung will charge a repair fee for replacing an accessory or repairing a cosmetic defect if the damage to the unit and/or damage to or loss of the accessory was caused by the customer. Items this stipulation covers If you want to cook some food. include: 1. Place the food in the oven. Press the START/+30s button. -
Page 84: Oven Features
oven features OVEN CONTROL PANEL 1. DOOR HANDLE 7. DOOR LATCHES 2. DOOR 8. TURNTABLE 3. VENTILATION HOLES 9. COUPLER 4. HEATING ELEMENT 10. ROLLER RING 5. LIGHT 11. S AFETY INTERLOCK HOLES 6. WATER BOWL HOLDER 12. C ONTROL PANEL 1. CLOCK BUTTON 8. TURNTABLE ON/OFF BUTTON 2. HEALTHY COOKING BUTTON 9. STEAM CLEAN BUTTON 3. MY PLATE BUTTON 10. -
Page 85: Accessories
oven use ACCESSORIES HOW A MICROWAVE OVEN WORKS Depending on the model that you have purchased, you are supplied with several Microwaves are high-frequency electromagnetic waves; the energy released enables accessories that can be used in a variety of ways. food to be cooked or reheated without changing either the form or the colour. -
Page 86: Checking That Your Oven Is Operating Correctly
CHECKING THAT YOUR OVEN IS OPERATING CORRECTLY The following simple procedure enables you to check that your oven is working correctly 3. Set the cooking time by press the Up(+)/Down(-) button. at all times. If you are in doubt, refer to the section entitled “Troubleshooting” on the Result: The cooking time is displayed. -
Page 87: Power Levels And Time Variations
ADJUSTING THE COOKING TIME You can increase the cooking time by pressing the START/+30s button once for each 4. Press the Up(+)/Down(-) button to set the minute. 30 seconds to be added. • Check how cooking is progressing at any time simply by opening the door • Increase the remaining cooking time 5. When the right time is displayed, press the Clock button to start the clock. -
Page 88: Setting The Energy Save Mode
SETTING THE ENERGY SAVE MODE The oven has an energy save mode. The following table presents quantities and appropriate instructions about 12 pre- programmed cooking options. • Press the STOP/ECO button. Use oven gloves when taking out food. Result: Display off. Serving • To remove energy save mode, open the door or press the Code/Food... -
Page 89: Using The My Plate Features
USING THE MY PLATE FEATURES The My Plate features has 2 pre-programmed cooking times. You do not need to set Serving Code/Food Instructions either the cooking times or the power level. Size First, place the food in the centre of the turntable and close the door. 300g Rinse pieces and put on a ceramic plate. -
Page 90: Using The Power Defrost Features
USING THE POWER DEFROST FEATURES The Power Defrost features enable you to defrost meat, poultry, fish, bread and cake. The following table presents the various Power Defrost programmes, quantities and The defrost time and power level are set automatically. You simply select the programme appropriate instructions. -
Page 91: Grilling
GRILLING COMBINING MICROWAVES AND GRILL The grill enables you to heat and brown food quickly, without using microwaves. You can also combine microwave cooking with the grill, to cook quickly and brown at the • Always use oven gloves when touching the recipients in the oven, as they will be same time. -
Page 92: Using The Crusty Plate
USING THE CRUSTY PLATE This crusty plate allows you to brown food not only on the top with the grill, but also the Clean the crusty plate with warm water and detergent and rinse off with clean water. bottom of the food turns crispy and brown due to the high temperature of the crusty Do not use a scrubbing brush or a hard sponge otherwise the top layer will be plate. -
Page 93: Using The Steam Cleaning
Cooking time Cooking time Food Serving Size Power Food Serving Size Power (min.) (min.) Pizza (Frozen) 300-350 g 450 W+Grill 11-12 Baked Potatoes 250 g 600 W + Grill 500 g Instructions Preheat the crust plate for 3 minutes. Put the frozen pizza Instructions on the crust plate. -
Page 94: Using The Child Lock Features
5. Open the door and please clean cavity of oven with dried U.A.E 800-SAMSUNG (800 - 726 7864) OMAN 800-SAMSUNG (800 - 726 7864) Never operate the turntable without food in the oven. -
Page 95: Cookware Guide
cookware guide To cook food in the microwave oven, the microwaves must be able to penetrate the food, Microwave- Cookware Comments without being reflected or absorbed by the dish used. safe Care must therefore be taken when choosing the cookware. If the cookware is marked Glassware microwave-safe, you do not need to worry. The following table lists various types of cookware and indicates whether and how they • Oven-to- Can be used, unless decorated with a metal... -
Page 96: Cooking Guide
cooking guide Cooking Guide for frozen vegetables Use a suitable glass pyrex bowl with lid. Cook covered for the minimum time – see table. Continue cooking to get the result you prefer. MICROWAVES Stir twice during cooking and once after cooking. Add salt, herbs or butter after cooking. Microwave energy actually penetrates food, attracted and absorbed by its water, fat and Cover during standing time. sugar content. The microwaves cause the molecules in the food to move rapidly. - Page 97 Cooking Guide for fresh vegetables Use a suitable glass pyrex bowl with lid. Add 30-45 ml cold water (2-3 tbsp) for every Food Serving Size Power Time (min.) 250 g unless another water quantity is recommended – see table. Cook covered for the Leeks 250 g 900 W 4-4½ minimum time – see table. Continue cooking to get the result you prefer. Stir once during Instructions and once after cooking. Add salt, herbs or butter after cooking. Cover during a standing time of 3 minutes. Cut leeks into thick slices. Stand for 3 minutes.
- Page 98 Cooking Guide for rice and pasta REHEATING Rice: Use a large glass pyrex bowl with lid – rice doubles in volume during Your microwave oven will reheat food in a fraction of the time that conventional ovens cooking. Cook covered. hobs normally take. After the cooking time is over, stir before standing time and salt or add Use the power levels and reheating times in the following chart as a guide.
- Page 99 REHEATING BABY FOOD BABY FOOD: Food Serving Size Power Time (min.) Empty into a deep ceramic plate. Cover with plastic lid. Stir well after reheating! Let stand Stew (Chilled) 350 g 600 W 4½-5½ for 2-3 minutes before serving. Stir again and check the temperature. Recommended serving temperature: between 30-40 °C. Instructions BABY MILK: Put stew in a deep ceramic plate. Cover with plastic lid. Pour milk into a sterilised glass bottle. Reheat uncovered. Never heat a baby’s bottle with Stir occasionally during reheating and again before standing and teat on, as the bottle may explode if overheated. Shake well before standing time and serving.
- Page 100 Reheating Baby Food and Milk DEFROSTING Use the power levels and times in this table as guide lines for reheating. Microwaves are an excellent way of defrosting frozen food. Microwaves gently defrost frozen food in a short period of time. This can be of great advantage, if unexpected Food Serving Size Power...
- Page 101 GRILL The grill-heating element is located underneath the ceiling of the cavity. It operates while Food Serving Size Power Time (min.) the door is closed and the turntable is rotating. The turntable’s rotation makes the food Poultry brown more evenly. Preheating the grill for 3-5 minutes will make the food brown more Chicken Pieces 500 g (2 pcs) 180 W...
- Page 102 Grill Guide for fresh and frozen foods Preheat the grill with the grill-function for 3 minutes. Serving Use the power levels and times in this table as guide lines for grilling. Fresh Food Power 1 step (min.) 2 step (min.) Size Use oven gloves when taking out.
-
Page 103: Troubleshooting And Error Code
6½ to 7½ minutes using 900 W. • The Light bulb should not be replaced in person for safety reasons. Please contact Stir several times well during cooking. nearest authorised Samsung customer care, to arrange for a qualified engineer to replace the bulb. BROWNING ALMOND SLICES Spread 30 g sliced almonds evenly on a medium sized ceramic plate. -
Page 104: Error Code
Sparking and cracking occur inside the oven (arcing). SAMSUNG strives to improve its products at all times. Both the design specifications and • Have you used a dish with metal trimmings? these user instructions are thus subject to change without notice. - Page 105 MEMO MEMO GE109MST1_SUT_DE68-04292A-02_EN.indd 33 20/12/2014 9:47:37...
- Page 106 MEMO MEMO GE109MST1_SUT_DE68-04292A-02_EN.indd 34 20/12/2014 9:47:38...
- Page 107 MEMO MEMO GE109MST1_SUT_DE68-04292A-02_EN.indd 35 20/12/2014 9:47:38...
- Page 108 U.A.E 800-SAMSUNG (800 - 726 7864) OMAN 800-SAMSUNG (800 - 726 7864) www.samsung.com/ae/support (English) KUWAIT 183-CALL (183-2255) www.samsung.com/ae_ar/support (Arabic) BAHRAIN 8000-GSAM (8000-4726) QATAR 800-CALL (800-2255) 08000-726786 EGYPT www.samsung.com/eg/support 16580 ALGERIA 021 36 11 00 www.samsung.com/n_africa/support PAKISTAN 0800-Samsung (72678) www.samsung.com/pk/support www.samsung.com/n_africa/support...
Need help?
Do you have a question about the GE109MST1 and is the answer not in the manual?
Questions and answers