Table of Contents
Advertisement
Available languages
Available languages
Quick Links
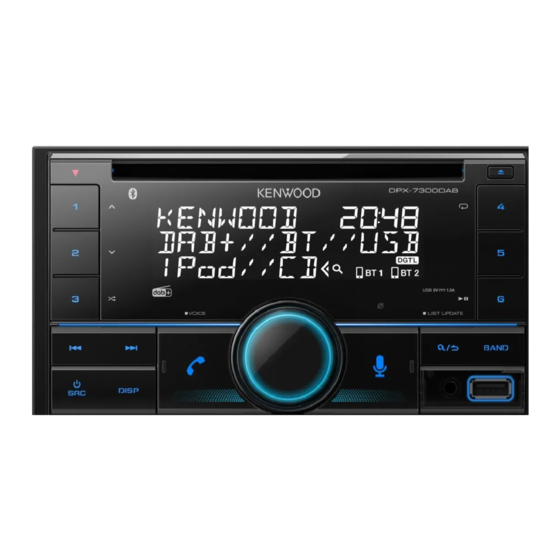
DPX-7300DAB
DUAL DIN SIZED CD RECEIVER
Quick Start Guide
RECEPTEUR CD FORMAT DUAL DIN
Guide de démarrage rapide
DUALER DIN-GENORMTER CD-RECEIVER
Schnellstartanleitung
CD-ONTVANGER VAN DUBBEL DIN-FORMAAT
Snelstartgids
SINTOLETTORE CD DI DIMENSIONI DUE DIN
Guida di avvio rapido
RECEPTOR DUAL DE CD TAMAÑO DIN
Guía de inicio rápido
© 2022 JVCKENWOOD Corporation
For detailed operations and information, refer to the INSTRUCTION MANUAL on the following website:
Pour les opérations et les informations détaillées, reportez-vous au MODE D'EMPLOI sur le site web suivant:
Für detaillierte Bedienungen und Informationen siehe BEDIENUNGSANLEITUNG auf der folgenden Website:
Raadpleeg de GEBRUIKSAANWIJZING op de volgende website voor gedetailleerde informatie over de
bediening:
Per le operazioni e le informazioni dettagliate, fare riferimento al ISTRUZIONI PER L'USO nel seguente sito web:
Para obtener más información y detalles sobre las operaciones, consulte el MANUAL DE INSTRUCCIONES en el
siguiente sitio web:
<https://www.kenwood.com/cs/ce/>
ENGLISH
FRANÇAIS
DEUTSCH
NEDERLANDS
ITALIANO
ESPAÑOL
B5K-0897-00 [EN]
Advertisement
Table of Contents

Related Manuals for Kenwood DPX-7300DAB


Summary of Contents for Kenwood DPX-7300DAB
- Page 1 DEUTSCH NEDERLANDS ITALIANO ESPAÑOL DPX-7300DAB DUAL DIN SIZED CD RECEIVER For detailed operations and information, refer to the INSTRUCTION MANUAL on the following website: Quick Start Guide Pour les opérations et les informations détaillées, reportez-vous au MODE D’EMPLOI sur le site web suivant: RECEPTEUR CD FORMAT DUAL DIN Für detaillierte Bedienungen und Informationen siehe BEDIENUNGSANLEITUNG auf der folgenden Website:...
- Page 2 Informatie over het weggooien van elektrische en elektronische apparatuur en batterijen (particulieren) Dit symbool geeft aan dat gebruikte elektrische, elektronische producten en batterijen niet bij het normale huishoudelijke afval mogen. Lever deze producten in bij de aangewezen inzamelingspunten, waar ze gratis worden geaccepteerd en op de juiste manier worden verwerkt, teruggewonnen en hergebruikt.
- Page 3 Declaration of Conformity with regard to the RE Directive 2014/53/EU Declaration of Conformity with regard to the RoHS Directive 2011/65/EU The marking of products using lasers Manufacturer: The label is attached to the chassis/case and says that the component uses laser beams that have been JVCKENWOOD Corporation classified as Class 1.
- Page 4 Par la présente, JVCKENWOOD déclare que Português Dichiarazione di conformità alla Direttiva RE 2014/53/EU l’équipement radio « DPX-7300DAB » est conforme Deste modo, a JVCKENWOOD declara que o Dichiarazione di conformità relativa alla direttiva RoHS 2011/65/EU à la directive 2014/53/UE.
- Page 5 S tem JVCKENWOOD izjavlja, da je radijska oprema „DPX-7300DAB” atbilst direktīvas 2014/53/ES радиооборудването на “DPX-7300DAB” е в Equipment Regulations 2012 » DPX-7300DAB « v skladu z Direktivo 2014/53/EU. prasībām. съответствие с Директива 2014/53/ЕС. (S.I. 2012/3032) Celotno besedilo direktive EU o skladnosti je Pilns ES atbilstības deklarācijas teksts ir pieejams...
-
Page 6: Software License Agreement
SOFTWARE LICENSE AGREEMENT Article 4 Right pertaining to the Licensed Software The software embedded in the Product (hereinafter the "Licensed Software") provided by Licensor is Any and all copyrights and other rights pertaining to the Licensed Software and related documents copyrighted to or sublicensable by the Licensor, and this Agreement provides for the terms and conditions shall belong to the Licensor or the original holder of the right who granted to the Licensor the license or which Users shall follow in order to use the Licensed Software. -
Page 7: Important Notice Concerning The Software
Important Notice concerning the Software Article 9 Destruction of the Licensed Software If this Agreement is terminated pursuant to the provision of Article 8, the User shall destroy the Licensed -jansson Software, any related documents and copies thereof within two (2) weeks from such date of termination. Copyright (c) 2009-2012 Petri Lehtinen <petri@digip.org>... - Page 8 -CMP sha2 AUTHOR: Aaron D. Gifford - http://www.aarongifford.com/ The MIT License (MIT) Copyright (c) 2014 Charles Gunyon Copyright (c) 2000-2001, Aaron D. Gifford All rights reserved. Permission is hereby granted, free of charge, to any person obtaining a copy of this software and associated documentation files (the "Software"), to deal in the Software without restriction, including without You may obtain a copy of the license at limitation the rights to use, copy, modify, merge, publish, distribute, sublicense, and/or sell copies of the...
- Page 9 Copyright (c) 1995, 1996 Carnegie-Mellon University. All rights reserved. T-Kernel 2.0 This product uses the source code of T-Kernel 2.0 under T-License 2.0 granted by T-Engine Forum Author: Chris G. Demetriou (www.tron.org) Permission to use, copy, modify and distribute this software and its documentation is hereby granted, BSD-3-Clause provided that both the copyright notice and this permission notice appear in all copies of the software, Copyright (c) 2000-2001, Aaron D.
-
Page 10: Basic Procedure
Installation/Connection Basic procedure Remove the key from the ignition switch, then disconnect the terminal of the car battery. This section is for the professional installer. Install the DAB antenna. See “Installing the DAB antenna” on For safety’s sake, leave wiring and mounting to professionals. Consult the page 4. -
Page 11: Wiring Connection
Part list (supplied) Removing the unit (A) Mounting sleeve (×1) (B) Trim plate (×1) (C) Wiring harness (×1) (D) Extraction key (×2) Wiring connection DAB antenna jack a Light blue/yellow: To the steering wheel remote control adapter b Blue/white: To the power control terminal when using the optional power amplifier or to the antenna control terminal in the vehicle c Brown: Connect to the device equipped with muting feature to mute this unit Antenna terminal... - Page 12 Installing the DAB antenna Part list (supplied) Connect the supplied DAB antenna to the DAB antenna jack. (Page 3) (E) Film antenna (×1) For details, see the following. (F) Amplifier unit (cable with booster, 3.5 m) (×1) (G) Cable clamper (×3) (H) Cleaner (×1) CAUTION •...
-
Page 13: Antenna Installation
Antenna installation CAUTION Remove the front pillar cover of your car. When installing the antenna cable inside the front pillar with the air bag installed Front pillar • The front pillar cover is secured with a special clip which may need to be replaced when it is removed. - Page 14 Rub the film antenna gently onto the Set the position of the protrusion of the Remove the film covering the earth sheet amplifier unit (F) with the K mark on the windscreen in the direction of the arrow and paste the earth sheet on the metal part shown to allow it to stick firmly.
-
Page 15: Before Use
Before Use Basics IMPORTANT Faceplate • To ensure proper use, please read through this Guide before using this product. It is especially important that you read and observe Warnings and Cautions in this Guide. • Please keep the Guide in a safe and accessible place for future reference. WARNING Do not operate any function that takes your attention away from safe driving. -
Page 16: Getting Started
To adjust the clock On the faceplate Turn the volume knob to select [CLOCK ADJUST], then press the knob. Turn on the power Press B SRC. Turn the volume knob to make the settings, then press the knob. • Press and hold to turn off the power. Set the time in the order of “Hour” ... -
Page 17: Digital Radio
Default: [XX] Press and hold (LIST UPDATE) to start the Service List update. “UPDATED” appears when update completes. [SYSTEM] [KEY BEEP] [ON]: Activates the keypress tone. ; [OFF]: Deactivates. Search for an ensemble Press B SRC repeatedly to select DIGITAL AUDIO. [FACTORY RESET] [YES]: Resets the settings to default (except the stored station). -
Page 18: Start Playback
To return to the previous setting item, press Bluetooth RF Output Power (E.I.R.P.): +4 dBm (MAX), Power Class 2 • Refer to the INSTRUCTION MANUAL on the following website for the Speaker Impedance: detailed explanation of each item: <https://www.kenwood.com/cs/ce/> 4 Ω — 8 Ω Operating Voltage: 12 V DC car battery... -
Page 19: Connect The Microphone
Pair and connect a Bluetooth device for the first time Reverse/Fast-forward Press and hold Press B SRC to turn on the unit. Search and select the name of your receiver (“DPX-7300DAB”) on the Repeat play Press 4 repeatedly. Bluetooth device. -
Page 20: Procédure De Base
Installation/Connexion Procédure de base Retirez la clé de contact, puis déconnectez la borne de la batterie de la voiture. Cette section est réservée aux installateurs professionnels. Installez l’antenne DAB. Reportez-vous à “Installation de l’antenne DAB” à Pour des raison de sécurité, laissez le travail de câblage et de montage des la page 4. - Page 21 Liste de pièces (fourni) Retrait de l’appareil (A) Manchon de montage (×1) (B) Plaque de garniture (×1) (C) Faisceau de fils (×1) (D) Clé d’extraction (×2) Connexions Prise d’antenne DAB Bleu clair/jaune: À l’adaptateur de télécommande volant Bleu/blanc: À la borne de commande d’alimentation lorsque vous utilisez l’amplificateur de puissance en option, soit à...
- Page 22 Installation de l’antenne DAB Liste de pièces (fourni) Connectez l’antenne DAB fournie à la prise d’antenne DAB. (Page 3) (E) Antenne film (×1) Pour les détails, reportez-vous à ce qui suit. (F) Amplificateur (câble avec amplificateur, 3,5 m) (×1) (G) Serre-câble (×3) (H) Nettoyant (×1) AVERTISSEMENT •...
-
Page 23: Installation De L'antenne
Installation de l’antenne AVERTISSEMENT Retirez le couvercle du pilier avant de votre voiture. Lors de l’installation du câble d’antenne à l’intérieur du pilier avant avec un coussin de sécurité installé Pilier avant • Le couvercle du pilier avant est fixé avec une attache spéciale qui peut avoir besoin d’être remplacée lorsqu’elle est retirée. - Page 24 Positionnez la protubérance de Frotter l’antenne film doucement sur le pare- Retirez le film recouvrant la feuille de masse brise dans la direction de la flèche pour qu’elle et collez la feuille de masse sur la partie l’amplificateur (F) sur la marque K de colle fermement.
-
Page 25: Avant L'utilisation
Avant l’utilisation Fonctionnement de base IMPORTANTES Façade • Pour utiliser correctement l’appareil, veuillez lire ce Guide complément avant de l’utiliser. Il est particulièrement important que vous lisiez et acceptiez les avertissements et les précautions de ce Guide. • Veuillez garder ce Guide dans un endroit sûr et accessible pour une utilisation future. -
Page 26: Prise En Main
Pour ajuster l’horloge Pour Sur la façade Tournez le bouton de volume pour choisir [CLOCK ADJUST] , puis appuyez sur Mettez l’appareil sous tension le bouton. Appuyez sur SRC. Tournez le bouton de volume pour faire les réglages, puis appuyez sur le •... -
Page 27: Radio Numérique
[XX] Défaut: Maintenez enfoncée (LIST UPDATE) pour démarrer la mise à jour de la Liste des services. [SYSTEM] “UPDATED” apparaît quand la mise à jour est terminée. [KEY BEEP] [ON] [OFF] : Met en service la tonalité des touches. ; : Met hors service la Recherche d’un ensemble fonction. -
Page 28: Réglages Des Fonctions
+4 dBm (MAX), Classe d’alimentation 2 Pour retourner à l’option de réglage précédente, appuyez sur Impédance d’enceinte: 4 Ω — 8 Ω • Reportez-vous au MODE D’EMPLOI sur les sites web suivant pour une Tension de fonctionnement: explication détaillée de chaque élément: <https://www.kenwood.com/cs/ce/> Batterie de voiture 12 V CC... -
Page 29: Répondre À Un Appel
Bluetooth pour la première fois l’avant Appuyez sur SRC pour mettre l’appareil sous tension. Recherche rapide vers l’arrière/ Maintenez enfoncée Recherchez et sélectionnez le nom de votre récepteur (“DPX-7300DAB”) vers l’avant sur le périphérique Bluetooth. “PAIRING” “PASS XXXXXX” “Nom du périphérique”... -
Page 30: Grundlegendes Verfahren
Einbau/Anschluss Grundlegendes Verfahren Ziehen Sie den Schlüssel aus dem Zündschloss, und trennen Sie dann den -Klemme der Autobatterie ab. Dieser Abschnitt ist für den professionellen Einbautechniker gedacht. Installieren Sie die DAB-Antenne. Siehe “Installieren Sie die DAB-Antenne” Überlassen Sie aus Sicherheitsgründen die Arbeiten zur Montage auf Seite 4. - Page 31 Teileliste (mitgeliefert) Entfernen der Einheit (A) Einbauhalterung (×1) (B) Frontrahmen (×1) (C) Kabelbaum (×1) (D) Ausziehschlüssel (×2) Verdrahtungsanschluss DAB-Antennenbuchse Hellblau/Gelb: Zum Lenkrad-Fernbedienungsadapter Blau/weiß: Bei Verwendung des optionalen Leistungsverstärkers entweder einen Anschluss an den Stromsteuerungsanschluss oder an den Antennensteuerungsanschluss des Fahrzeugs durchführen Braun: Verbinden Sie dies mit dem Gerät mit Stummschaltfunktion, um diese Einheit Antennenanschluss stummzuschalten...
- Page 32 Installieren Sie die DAB-Antenne Teileliste (mitgeliefert) Schließen Sie die mitgelieferte DAB-Antenne an die DAB-Antennenbuchse an. (E) Folienantenne (×1) (Seite 3) (F) Verstärkereinheit (Kabel mit Booster, 3,5 m) (×1) Einzelheiten siehe Folgendes. (G) Kabelklemme (×3) (H) Reiniger (×1) ACHTUNG • Die Folienantenne (E) ist ausschließlich zur Verwendung im Inneren des Fahrzeugs gedacht.
- Page 33 Antenneneinbau ACHTUNG Entfernen Sie die Frontsäulenabdeckung an Ihrem Fahrzeug. Beim Installieren des Antennenkabels im Inneren der Frontsäule bei eingebautem Airbag Frontsäule • Die Frontsäulenabdeckung wird mit einem speziellen Clip gesichert, der beim Ausbau möglicherweise ausgetauscht werden muss. Wenden Sie sich an Ihren Fahrzeughändler für Einzelheiten zum Entfernen der Clip Frontsäulenabdeckung und zur Bestellung...
- Page 34 Reiben Sie die Folienantenne vorsichtig auf Richten Sie die Position des Vorsprungs an der Entfernen Sie die Folie, die das Erdungsblatt der Windschutzscheibe in Pfeilrichtung, um Verstärkereinheit (F) mit der K-Markierung an abdeckt, und kleben Sie das Erdungsblatt auf sicheres Anhaften zu erzielen. der Folienantenne (E) aus und kleben auf.
-
Page 35: Vor Der Inbetriebnahme
Vor der Inbetriebnahme Grundlagen WICHTIG Frontblende • Um richtige Verwendung sicherzustellen, lesen Sie die Anleitung vor der Verwendung des Produkts sorgfältig durch. Es ist besonders wichtig, dass Sie die Warnungen und Vorsichtshinweise in dieser Anleitung lesen und beachten. • Bitte bewahren Sie die Anleitung an sicherer Stelle und griffbereit zum Nachschlagen auf. -
Page 36: Erste Schritte
Zum Einstellen der Uhr Auf der Frontblende Drehen Sie den Lautstärke-Regler zum Wählen von [CLOCK ADJUST] , und Einschalten drücken Sie dann den Regler. Drücken Sie SRC. Drehen Sie den Lautstärke-Regler, um die Einstellungen vorzunehmen, • Zum Ausschalten halten Sie die Taste und drücken Sie dann den Regler. - Page 37 [XX] Standard: Halten Sie (LIST UPDATE) gedrückt, um die Aktualisierung der Dienstliste zu starten. [SYSTEM] “UPDATED” erscheint, wenn die Aktualisierung fertig ist. [KEY BEEP] [ON] [OFF] : Aktiviert den Tastenberührungston. ; : Deaktiviert. Suchen Sie nach einem Ensemble [FACTORY RESET] [YES] : Setzt die Einstellungen auf Standardwerte zurück (ausgenommen Drücken Sie SRC wiederholt, um DIGITAL AUDIO zu wählen.
-
Page 38: Andere Informationen
Wiederholen Sie Schritt 2, bis der gewünschte Gegenstand gewählt oder 4 Ω — 8 Ω aktiviert ist. Betriebsspannung: Halten Sie zum Beenden gedrückt. 12-V-DC-Fahrzeugbatterie Zum Zurückschalten zum vorherigen Einstellelement drücken Sie • Siehe BEDIENUNGSANLEITUNG auf der folgenden Seite für detaillierte Erklärungen jedes Elements: <https://www.kenwood.com/cs/ce/>... - Page 39 Zum erstmaligen Registrieren und Anschließen eines den Ordner Bluetooth-Geräts Rückwärts-Sprung/Vorwärts- Drücken Sie Drücken Sie SRC, um die Einheit einzuschalten. Sprung Suchen und wählen Sie den Namen Ihres Receivers (“DPX-7300DAB”) auf Vorspulen/Rückspule Halten Sie gedrückt. dem Bluetooth-Gerät. “PAIRING” “PASS XXXXXX” “Gerätename”...
- Page 40 Installeren/Verbinden Basisprocedure Haal de sleutel uit het contactslot en ontkoppel vervolgens de aansluiting van de auto-accu. Dit gedeelte is voor de professionele installateur. Installeer de DAB-antenne. Zie “Installeren van de DAB-antenne” op Laat het monteren en verbinden voor de veiligheid door een vakman pagina 4.
- Page 41 Onderdelenlijst (bijgeleverd) Verwijderen van het toestel (A) Bevestigingshuls (×1) (B) Sierplaat (×1) (C) Bedradingsbundel (×1) (D) Verwijdersleutel (×2) Verbinden van draden DAB-antenne-aansluiting Lichtblauw/geel: Naar de stuur-afstandsbedieningsadapter Blauw/wit: Naar de spanningsaansluiting wanneer u een los verkrijgbare eindversterker gebruikt, ofwel naar de antenne-aansluiting van de auto Bruin: Verbind met het apparaat dat is uitgerust met de dempingsfunctie om dit toestel Antenne-aansluiting te dempen...
- Page 42 Installeren van de DAB-antenne Onderdelenlijst (bijgeleverd) Verbind de bijgeleverde DAB-antenne met de DAB-antenne-aansluiting. (E) Stripantenne (×1) (Pagina 3) (F) Versterkerunit (kabel met booster, 3,5 m) (×1) Zie voor meer informatie het volgende. (G) Kabelklem (×3) (H) Reiniger (×1) VOORZORGEN • De stripantenne (E) is uitsluitend voor gebruik in de auto. •...
- Page 43 Installeren van antenne VOORZORGEN Verwijder de afdekking van de voorpilaar van de auto. Indien de antennekabel in de voorpilaar wordt geplaatst en een airbag is gemonteerd Voorpilaar • De afdekking van de voorpilaar is vastgezet met een speciale klem die u mogelijk na het verwijderen moet vervangen.
- Page 44 Wrijf voorzichtig over de stripantenne op het Plaats de positie van de uitsparing van de Verwijder de strook die het aardingsvel bedekt voorruit in de richting van de aangegeven pijl versterkerunit (F) op de K-markering op de en plak het vel op een metalen gedeelte van de zodat de antenne goed vast zit.
-
Page 45: Alvorens Gebruik
Alvorens gebruik Basispunten BELANGRIJK Voorpaneel • Lees alvorens dit product in gebruik te nemen deze handleiding door voor een juist gebruik. Het is vooral belangrijk dat u de Waarschuwingen en Voorzorgsmaatregelen in deze handleiding goed doorleest en opvolgt. • Bewaar deze handleiding ter referentie op een veilige en toegankelijke plaats. WAARSCHUWING Bedien of gebruik geen functies die uw aandacht van de verkeersveiligheid af zou kunnen leiden. - Page 46 Instellen van de klok Voor het Op het voorpaneel Draai de volumeknop om [CLOCK ADJUST] te kiezen en druk vervolgens op Inschakelen van de stroom de knop. Druk op SRC. Draai de volumeknop om de instellingen te maken en druk vervolgens op •...
-
Page 47: Analoge Radio
[XX] Basisinstelling: Houd (LIST UPDATE) even ingedrukt om de servicelijst bij te werken. “UPDATED” verschijnt zodra de update is voltooid. [SYSTEM] Opzoeken van een ensemble [KEY BEEP] [ON] [OFF] : Activeren van de toetsdruktoon. ; : Uitschakelen. Druk herhaaldelijk op SRC om DIGITAL AUDIO te kiezen. [FACTORY RESET] [YES] : Stelt de instellingen naar de standaardinstellingen terug... -
Page 48: Andere Informatie
Herhaal stap 2 totdat het gewenste onderdeel is gekozen of geactiveerd. Luidsprekerimpedantie: Houd even ingedrukt om te voltooien. 4 Ω — 8 Ω Druk op om naar het voorgaande instelonderdeel terug te keren. Bedrijfsvoltage: 12 V gelijkstroom-autoaccu • Raadpleeg de GEBRUIKSAANWIJZING op de volgende website voor een gedetailleerde uitleg over elk item: <https://www.kenwood.com/cs/ce/>... - Page 49 Druk op verbinden Voorwaarts verspringen Druk op SRC om het toestel in te schakelen. Snel achterwaarts/Snel Houd even ingedrukt. Zoek en selecteer de naam van uw receiver (“DPX-7300DAB”) op het voorwaarts Bluetooth-apparaat. “PAIRING” “PASS XXXXXX” “Naam van toestel” “PRESS” “VOLUME...
-
Page 50: Installazione E Collegamenti
Installazione e collegamenti Procedura di base Sfilare la chiave di accensione e scollegare la presa della batteria del veicolo. Questa sezione è destinata agli installatori. Installare l’antenna DAB. Vedere la sezione “Installazione dell’antenna DAB” Per motivi di sicurezza si raccomanda di affidare l’installazione e i collegamenti a pagina 4. - Page 51 Elenco delle parti (in dotazione) Rimozione dell’apparecchio (A) Supporto di montaggio (×1) (B) Mascherina (×1) (C) Fascio dei cavi (×1) (D) Chiavetta di estrazione (×2) Collegamento dei cavi Presa d’antenna DAB Azzurro/giallo: All’adattatore per telecomando da volante Blu/bianco: Alla presa di alimentazione in caso d’uso dell’amplificatore di potenza opzionale, oppure alla presa dell’antenna del veicolo Marrone: Collegarsi al dispositivo dotato di funzione di silenziamento per silenziare Presa d’antenna...
- Page 52 Installazione dell’antenna DAB Elenco delle parti (in dotazione) Collegare l’antenna DAB, fornita in dotazione, all’apposita presa d’ingresso DAB. (E) Antenna a pellicola (×1) (Pagina 3) (F) Amplificatore (cavo da 3,5 m con booster) (×1) Per maggiori dettagli si prega di vedere più oltre. (G) Fermacavo (×3) (H) Salviettina detergente (×1) ATTENZIONE...
-
Page 53: Installazione Dell'antenna
Installazione dell’antenna ATTENZIONE Rimuovere il coprimontante. Passaggio del cavo d’antenna nel montante del veicolo quando vi è installato l’airbag Montante anteriore • Il coprimontante è fissato in posizione con una speciale graffetta che potrebbe tuttavia essere necessario sostituire una volta rimossa. - Page 54 Strofinandola premere delicatamente Allineare la sporgenza dell’amplificatore (F) al Rimuovere la pellicola protettiva dalla l’antenna contro il parabrezza nel senso della contrassegno K ubicato sull’antenna (E) e farlo lamina di collegamento a massa e applicare freccia in modo che vi aderisca perfettamente. aderire al vetro.
-
Page 55: Prima Dell'uso
Prima dell’uso Fondamenti IMPORTANTE Frontalino • Prima di usare l’apparecchio, e per usarlo in modo corretto, si raccomanda di leggere a fondo questa Guida. È particolarmente importante leggere e osservare gli avvisi e le note di attenzione nella Guida. • Tenere la Guida in un luogo sicuro e prontamente accessibile per ogni necessità futura. -
Page 56: Operazioni Preliminari
Per regolare l’ora Dal frontalino Ruotare la manopola del volume sino a selezionare [CLOCK ADJUST] e quindi Accendere l’impianto premerla. Premere SRC. Ruotando la manopola del volume eseguire le varie impostazioni e quindi • Premere a lungo per spegnere l’impianto. premerla. Regolare il volume Ruotare la manopola del volume. -
Page 57: Radio Digitale
[XX] Impostazione predefinita: Premere a lungo (LIST UPDATE) per avviare l’aggiornamento dell’elenco dei servizi. [SYSTEM] Al termine dell’aggiornamento appare “UPDATED”. [KEY BEEP] [ON] [OFF] : attiva il tono alla pressione dei tasti. ; : disattiva il tono. Ricerca di gruppi di servizi [FACTORY RESET] [YES] : ripristina le impostazioni di fabbrica (a eccezione di quelle salvate Premere quante volte necessario... -
Page 58: Impostazione Delle Funzioni
Ripetere il passo 2 sino a selezionare o attivare l’elemento d’interesse. Tensione operativa: Premere a lungo per uscire. Batteria auto 12 V CC Per ritornare all’impostazione precedente premere • Fare riferimento al ISTRUZIONI PER L’USO disponibile nel seguente sito web per la spiegazione dettagliata di ciascuna voce: <https://www.kenwood.com/cs/ce/>... -
Page 59: Rispondere A Una Chiamata
Premere Bluetooth Avanzare o retrocedere Premere a lungo Premere SRC per accendere l’apparecchio. rapidamente Cercare e selezionare il nome del proprio ricevitore (“DPX-7300DAB”) sul dispositivo Bluetooth. Ripetizione Premere 4 quante volte necessario. Sul display appare “PAIRING” “PASS XXXXXX” “Nome della periferica”... -
Page 60: Procedimiento Básico
Instalación/Conexión Procedimiento básico Quite la llave del interruptor de encendido; después, desconecte el terminal de la batería del automóvil. Esta sección es para los instaladores profesionales. Instale la antena DAB. Consulte “Instalación de la antena DAB” en la Para fines de seguridad, deje que un profesional realice el cableado y página 4. - Page 61 Lista de piezas (suministradas) Desmontaje de la unidad (A) Manguito de montaje (×1) (B) Placa embellecedora (×1) (C) Mazo de conductores (×1) (D) Herramienta de extracción (×2) Conexión del cableado Toma de antena DAB Luz azul/amarilla: Al adaptador del mando a distancia del volante de la dirección Azul/blanco: Al terminal de control de potencia, cuando utiliza el amplificador de potencia opcional, o al terminal de control de la antena en el vehículo Marrón: Conecte al dispositivo equipado con la función de silenciamiento para silenciar...
- Page 62 Instalación de la antena DAB Lista de piezas (suministradas) Conecte la antena DAB suministrada a la toma de antena DAB. (Página 3) (E) Antena tipo película (×1) Para obtener información, consulte lo siguiente. (F) Amplificador (cable con amplificador, 3,5 m) (×1) (G) Abrazadera para cables (×3) (H) Limpiador (×1) PRECAUCIÓN...
-
Page 63: Instalación De La Antena
Instalación de la antena PRECAUCIÓN Retire la cubierta del montante delantero de su vehículo. Cuando pase el cable de la antena por el interior del montante delantero con el airbag instalado Montante delantero • La cubierta del montante delantero está fijada con una grapa especial que puede ser necesario sustituir si se la extrae. - Page 64 Frote suavemente la antena de película sobre Alinee la posición del saliente del amplificador Retire la película que cubre la hoja de conexión el parabrisas en la dirección de la flecha para (F) con la marca K de la antena tipo película (E) a tierra y pegue la hoja en la parte metálica del adherirla firmemente.
-
Page 65: Antes Del Uso
Antes del uso Puntos básicos IMPORTANTE Placa frontal • Antes de utilizar este producto y para asegurar su uso correcto, lea esta guía por completo. En especial, lea y observe las Advertencias y Precauciones incluidas en esta guía. • Guarde la guía en un lugar seguro y accesible para futuras consultas. ADVERTENCIA No utilice ninguna función que pueda desviar su atención mientras está... -
Page 66: Procedimientos Iniciales
Para ajustar el reloj Para En la placa frontal Gire la rueda de volumen para seleccionar [CLOCK ADJUST] y, a continuación, Encender la unidad pulse la rueda. Pulse SRC. Gire la rueda de volumen para realizar los ajustes y, a continuación, pulse la •... -
Page 67: Radio Digital
[XX] Predeterminado: Pulse y mantenga pulsado (LIST UPDATE) para iniciar la actualización de la lista de servicios. [SYSTEM] Una vez completada la actualización, aparece “UPDATED”. [KEY BEEP] [ON] [OFF] : Activa el tono de pulsación de teclas. ; : Se desactiva. Búsqueda de un ensemble [FACTORY RESET] [YES] : Se restablecen los ajustes predeterminados (excepto la emisora... -
Page 68: Otras Informaciones
Para volver al elemento de ajuste anterior, pulse Voltaje de trabajo: Batería de 12 V CC para vehículos • Para obtener más detalles sobre cada una de las opciones, consulte el MANUAL DE INSTRUCCIONES en el siguiente sitio web: <https://www.kenwood.com/cs/ce/>... -
Page 69: Contestar Una Llamada
Bluetooth Retroceder/avanzar Pulse y mantenga pulsado Pulse SRC para encender la unidad. rápidamente Busque y seleccione el nombre de su receptor (“DPX-7300DAB”) en el dispositivo Bluetooth. Repetir reproducción Pulse 4 repetidamente. En la pantalla aparece los mensajes “PAIRING” “PASS XXXXXX”... - Page 72 • Windows Media is a registered trademark or trademark of Microsoft Corporation in the United States and/or other countries. This product is protected by certain intellectual property rights of Microsoft. Use or distribution of such technology outside of this product is prohibited without a license from Microsoft. •...