Table of Contents
Advertisement
Available languages
Available languages
Quick Links
FM/AM
Compact Disc
Player
To cancel the demonstration (DEMO) display, see page 9.
To switch the FM/AM tuning step, see page 5.
For the connection/installation, see page 15.
Para cancelar la pantalla de demostración (DEMO), consulte
la página 9.
Para cambiar el paso de sintonización de FM/AM, consulte la
página 6.
Para la conexión/instalación, consulte la página 16.
CDX-G1170U/CXS-G11769U/CXS-G1174SU/CXS-G11716U
4-576-653-11(1)
Operating Instructions
Manual de instrucciones
GB
ES
Advertisement
Chapters
Table of Contents

Related Manuals for Sony CDX-G1170U


Summary of Contents for Sony CDX-G1170U
- Page 1 To switch the FM/AM tuning step, see page 5. For the connection/installation, see page 15. Para cancelar la pantalla de demostración (DEMO), consulte la página 9. Para cambiar el paso de sintonización de FM/AM, consulte la página 6. Para la conexión/instalación, consulte la página 16. CDX-G1170U/CXS-G11769U/CXS-G1174SU/CXS-G11716U...
- Page 2 OFF until the display disappears each time you turn the ignition off. Disclaimer regarding services offered by third parties Services offered by third parties may be changed, suspended, or terminated without prior notice. Sony does not bear any responsibility in these sorts of situations.
-
Page 3: Table Of Contents
Table of Contents Guide to Parts and Controls ....4 Getting Started Detaching the Front Panel....5 Switching the FM/AM Tuning Step . -
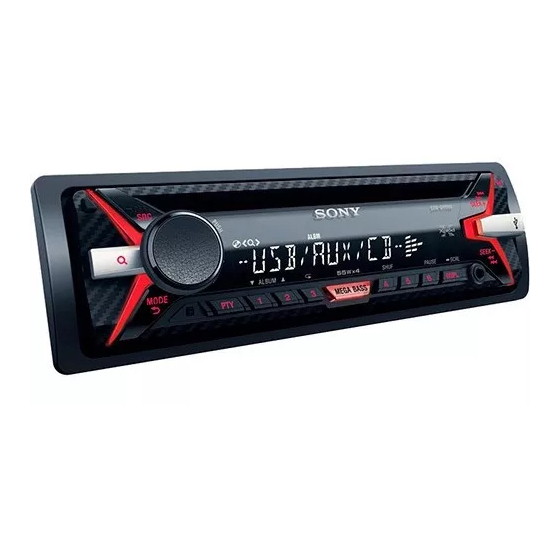
Page 4: Guide To Parts And Controls
Guide to Parts and Controls Main unit Front panel release button (back) Return to the previous display. SRC (source) MODE (page 7) Turn on the power. Change the source. Receptor for the remote commander PTY (program type) Press and hold for 1 second to turn the source Select PTY in RDS. -
Page 5: Getting Started
RM-X211 Remote commander Getting Started Detaching the Front Panel You can detach the front panel of this unit to prevent theft. Press and hold OFF until the unit turns off, press the front panel release button , then pull the panel towards you to remove. -
Page 6: Setting The Clock
Press SRC to select [AUX]. Setting the Clock To match the volume level of the connected device to other sources Press MENU, rotate the control dial to Start playback of the portable audio device at a select [SET GENERAL], then press it. moderate volume, and set your usual listening volume on the unit. -
Page 7: Listening To The Radio
Using Radio Data System (RDS) Listening to the Radio Selecting program types (PTY) Listening to the Radio Press PTY during FM reception. Tuning step setting is required (page 5). To listen to the radio, press SRC to select [TUNER]. Rotate the control dial until the desired program type appears, then press it. -
Page 8: Playback
Searching and Playing Tracks Playback Repeat play and shuffle play Playing a Disc During playback, press (repeat) or Insert the disc (label side up). (shuffle) repeatedly to select the desired play mode. Playback in the selected play mode may take time to start. -
Page 9: Settings
AUTO OFF Shuts off automatically after a desired time Settings when the unit is turned off: [NO], [30S] (30 seconds), [30M] (30 minutes), [60M] (60 Canceling the DEMO Mode minutes). AUX-A (AUX audio) You can cancel the demonstration display which Activates the AUX source display: [ON], [OFF]. -
Page 10: Display Setup (Display)
AUX VOL (AUX volume level) Adjusts the volume level for each connected Additional Information auxiliary device: [+18 dB] – [0 dB] – [-8 dB]. This setting negates the need to adjust the Precautions volume level between sources. Cool off the unit beforehand if your car has been parked in direct sunlight. -
Page 11: Maintenance
Never touch the connectors directly with your fingers If you have any questions or problems concerning or with any metal device. your unit that are not covered in this manual, consult your nearest Sony dealer. Specifications Maintenance Tuner section... -
Page 12: Troubleshooting
CD Player section Copyrights Signal-to-noise ratio: 95 dB Frequency response: 10 – 20,000 Hz Windows Media is either a registered trademark or Wow and flutter: Below measurable limit trademark of Microsoft Corporation in the United The maximum number of: (CD-R/CD-RW only) States and/or other countries. - Page 13 CD playback During playback or reception, the demonstration mode starts. The disc does not play. If no operation is performed for 5 minutes with Defective or dirty disc. [DEMO-ON] set, the demonstration mode starts. The CD-R/CD-RW is not for audio use (page 10). ...
- Page 14 : The character cannot be displayed. If these solutions do not help improve the situation, consult your nearest Sony dealer. If you take the unit to be repaired because of CD playback trouble, bring the disc that was used at...
-
Page 15: Connection/Installation
Parts List for Installation Connection/Installation Cautions Run all ground (earth) leads to a common ground (earth) point. × 2 Do not get the leads trapped under a screw, or caught in moving parts (e.g., seat railing). ... -
Page 16: Connection
Connection Subwoofer* Power amplifier* White White/black striped Front speaker* Gray Gray/black striped Green Green/black striped Rear speaker *1*2 Purple Purple/black striped Black Yellow For details, see “Making connections” (page 17). Blue/white striped (MAX 0.4A) from a wired remote control (not supplied)* from a car antenna (aerial) *1 Not supplied... -
Page 17: Installation
Making connections Installation To a common ground (earth) point First connect the black ground (earth) lead, then Removing the protection collar and the connect the yellow and red power supply leads. bracket To the +12 V power terminal which is energized at all times Before installing the unit, remove the protection Be sure to first connect the black ground (earth) - Page 18 In such a case, Make sure the 4 catches on the protection collar consult your nearest Sony dealer. are properly engaged in the slots of the unit. Mounting the unit in a Japanese car You may not be able to install this unit in some makes of Japanese cars.
- Page 20 Exención de responsabilidad sobre los servicios prestados por otros proveedores Los servicios prestados por otros proveedores están sujetos a cambios, anulaciones o interrupciones sin previo aviso. Sony no asume responsabilidad alguna en estas situaciones.
- Page 21 Tabla de contenidos Guía para las partes y los controles ... . 4 Procedimientos iniciales Extracción del panel frontal....5 Cambio del paso de sintonización de FM/AM .
-
Page 22: Guía Para Las Partes Y Los Controles
Guía para las partes y los controles Unidad principal Botón de desbloqueo del panel frontal (volver) Para volver a la pantalla anterior. SRC (fuente) MODE (página 7) Para encender la unidad. Para cambiar la fuente. Receptor para el control remoto ... -
Page 23: Procedimientos Iniciales
Control remoto RM-X211 Procedimientos iniciales Extracción del panel frontal Es posible extraer el panel frontal de la unidad para evitar que la roben. Mantenga presionado OFF hasta que la unidad se apague, presione el botón de desbloqueo del panel frontal , luego deslice el panel hacia usted para quitarlo. -
Page 24: Cambio Del Paso De Sintonización De Fm/Am
Cambio del paso de Conectar un dispositivo USB sintonización de FM/AM Baje el volumen de la unidad. Configure el paso de sintonización de FM/AM de su Conecte el dispositivo USB a la unidad. país. Esta configuración aparece solamente mientras la fuente esté apagada y se muestre el reloj. -
Page 25: Escuchar La Radio
Usar el RDS (Sistema de datos Escuchar la radio de radio) Escuchar la radio Selección de tipos de programa (PTY) Se necesita el ajuste del paso de sintonización (página 6). Presione PTY durante la recepción FM. Para escuchar una estación de radio, presione SRC para seleccionar [TUNER]. -
Page 26: Reproducción
Búsqueda y reproducción de Reproducción pistas Reproducción de un disco Reproducción repetida y aleatoria Inserte el disco (etiqueta hacia arriba). Durante la reproducción, presione (repetir) o (aleatoria) repetidamente para seleccionar el modo de reproducción deseado. La reproducción en el modo de reproducción seleccionado puede tardar en comenzar. -
Page 27: Ajustes
Presione ENTER para volver al modo Quick-BrowZer. Ajustes Aparecerá el elemento seleccionado. Gire el selector de control para Cancelación del modo DEMO seleccionar el elemento deseado y, a continuación, presiónelo. Puede cancelar la pantalla de muestra que aparece Se inicia la reproducción. cuando la fuente está... -
Page 28: Configuración General (General)
BASE Configuración general Selecciona una curva del ecualizador predeterminada como base para otra (GENERAL) personalización: [BAND1] (frecuencia baja), [BAND2] (frecuencia baja-media), [BAND3] (frecuencia media), [BAND4] (frecuencia media- CLOCK-ADJ (ajuste del reloj) (página 6) alta), [BAND5] (frecuencia alta). TUNER-STP (paso de sintonización) (página 6) El nivel del volumen se ajusta en pasos de 1 dB, (Disponible solamente mientras la fuente esté... -
Page 29: Información Complementaria
No este manual, póngase en contacto con el utilice disolventes como distribuidor Sony más cercano. bencina, diluyentes ni productos de limpieza disponibles en el mercado. Esta unidad se diseñó para reproducir discos que cumplen con el estándar... -
Page 30: Mantenimiento
Mantenimiento Especificaciones Sección del sintonizador Sustitución de la pila de litio del control remoto Bajo condiciones normales, la batería durará Rango de sintonización: aproximadamente 1 año. (La vida útil puede ser 87,5 – 108,0 MHz (a paso de 50 kHz) más corta, dependiendo de las condiciones de 87,5 –... -
Page 31: Solución De Problemas
Generales Solución de problemas Salidas: Terminal de salidas de audio (posterior, sub) La siguiente lista de comprobación le ayudará a Antena de alimentación/Terminal de control del solucionar los problemas que puedan producirse amplificador de potencia (REM OUT) con la unidad. Entradas: Antes de consultarla, revise los procedimientos de Terminal de entrada del control remoto... - Page 32 Reproducción de CD Las indicaciones desaparecen del visualizador o no aparecen en él. No se inicia la reproducción. El atenuador está ajustado en [DIM-ON] Disco defectuoso o sucio. (página 10). Los discos CD-R/CD-RW no son para audio ...
- Page 33 : El carácter no puede visualizarse. Si estas soluciones no ayudan a solucionar el problema, póngase en contacto con el distribuidor Sony más cercano. Si entrega la unidad para su reparación a causa de problemas en la reproducción de CD, lleve el disco...
-
Page 34: Conexión/Instalación
Lista de componentes para la Conexión/Instalación instalación Advertencias Haga funcionar todos los conductores a tierra hacia un punto de puesta a tierra. No deje que los conductores queden atrapados debajo de un tornillo o que se enganchen en ×... -
Page 35: Conexión
Conexión Subwoofer* Amplificador de potencia* Blanco Blanco/negro a rayas Altavoz delantero* Gris Gris/negro a rayas Verde Verde/negro a rayas Altavoz trasero *1*2 Púrpura Púrpura/negro a rayas Negro Amarillo Para obtener más información, Rojo consulte “Hacer conexiones” (página 18). Azul/blanco a rayas (MAX 0.4A) desde un control remoto conectado (no suministrado)* desde la antena de un auto... - Page 36 Conexión del altavoz Hacer conexiones Antes de conectar los altavoces, apague la Para un punto de puesta a tierra unidad. Utilice los altavoces con una impedancia de 4 a Primero conecte el conector a tierra, luego 8 Ω, y con capacidades para el manejo de la conecte los cables amarillo y rojo del sistema de potencia adecuadas para evitar daños.
-
Page 37: Instalación
Montar la unidad en un auto japonés la unidad para separar. Tal vez no pueda instalar esta unidad en algunas marcas de autos japoneses. En dicho caso, consulte con su distribuidor Sony. TOYOTA para panel/consola central Coloque el gancho hacia adentro. - Page 38 Si el fusible se quema, verifique la conexión eléctrica y reemplace el fusible. Si el fusible se quema nuevamente después de reemplazarlo, puede haber un mal funcionamiento interno. En dicho caso, consulte con su distribuidor Sony más cercano.
- Page 40 Web: the web site below: Customers in Latin America/Clientes en Latinoamérica: http://esupport.sony.com/ES/LA/ Customers in Asia Pacific/Clientes en Asia-Pacífico: http://www.sony-asia.com/section/support http://www.sony-asia.com/caraudio/ http://www.sony.net/ ©2015 Sony Corporation Printed in Thailand...