Table of Contents
Advertisement
Quick Links
INSTALLATION & OPERATION MANUAL
HEAVY DUTY GAS GRIDDLES
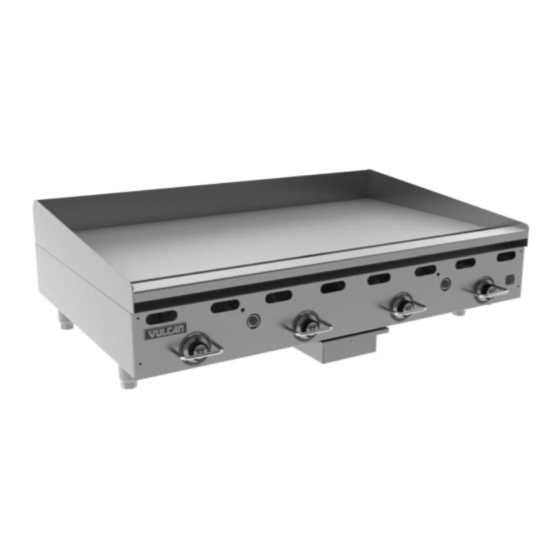
948RX
MSA48
AGM48
For additional information on Vulcan or to locate an authorized parts and
service provider in your area, visit our website at www.vulcanequipment.com
©ITW Food Equipment Group, LLC
3600 North Point Blvd.
Baltimore, MD 21222
MODELS
924RX
936RX
948RX
960RX
972RX
MSA24
MSA36
MSA48
MSA60
MSA72
AGM24
AGM36
AGM48
AGM60
AGM72
RETAIN THIS MANUAL FOR FUTURE USE
FORM F-38315 (rev. 07-16)
ASA24
ASA36
ASA48
ASA60
ASA72
Advertisement
Table of Contents

Related Manuals for Vulcan-Hart 900RX Series


Summary of Contents for Vulcan-Hart 900RX Series
- Page 1 INSTALLATION & OPERATION MANUAL HEAVY DUTY GAS GRIDDLES MODELS 924RX 936RX 948RX 960RX 972RX 948RX MSA24 ASA24 MSA36 ASA36 MSA48 ASA48 MSA60 ASA60 MSA72 ASA72 MSA48 AGM24 AGM36 AGM48 AGM60 AGM72 AGM48 For additional information on Vulcan or to locate an authorized parts and service provider in your area, visit our website at www.vulcanequipment.com RETAIN THIS MANUAL FOR FUTURE USE ©ITW Food Equipment Group, LLC...
- Page 2 IMPORTANT FOR YOUR SAFETY THIS MANUAL HAS BEEN PREPARED FOR PERSONNEL QUALIFIED TO INSTALL GAS EQUIPMENT, WHO SHOULD PERFORM THE INITIAL FIELD START-UP AND ADJUSTMENTS OF THE EQUIPMENT COVERED BY THIS MANUAL. POST IN A PROMINENT LOCATION THE INSTRUCTIONS TO BE FOLLOWED IN THE EVENT THE SMELL OF GAS IS DETECTED.
-
Page 3: Table Of Contents
TABLE OF CONTENTS GENERAL…………………………………………………………………………………………...…...… Specifications……………………………………………………………………………………..INSTALLATION……………………………………………………………………………………………. Unpacking………………………………………………………………………………………………. Location…………………………………………………………………………………………………. Installation Codes and Standards……………………………………………………………………. Griddle Mounted On Stands with Casters…………………………………………………………… Flue Connections………………………………………………………………………………………. Stands…………………………………………………………………………………………………… Gas Connections……………………………………………………………………………………….. Testing the Gas Supply System……………………………………………………………………… Gas Pressure Regulator Installation…………………………………………………………………. Electrical Connection – 900RX Models……………………………………………………………… OPERATION……………………………………………………………………………………………….. Before First Use………………………………………………………………………………………… Seasoning the Griddle…………………………………………………………………………………. -
Page 4: General
INSTALLATION, OPERATION AND CARE OF HEAVY DUTY GAS GRIDDLES GENERAL Heavy Duty Gas Griddles are produced with quality workmanship and materials. P roper installation, usage and maintenance of your griddle will result in many years of satisfactory performance. Thoroughly read this entire manual and carefully follow all of the instructions provided BTU/hr Input Model Number of Burners... -
Page 5: Location
LOCATION The installation location must be kept free and clear of combustibles. W hen installing, never enclose the bottom of the griddle with a raised curb or other constructions that would obstruct flow of air into or out of the griddle. Adequate clearance for air openings into the combustion chamber must be provided. -
Page 6: Griddle Mounted On Stands With Casters
GRIDDLES MOUNTED ON STANDS WITH CASTERS Griddles mounted on stands with casters must use a flexible connector (not supplied) that complies with the Standard for Connectors for Movable Gas Appliances ANSI Z21.69•CSA6.16, and a quick -disconnect device that complies with Gas Fuel, ANSI Z21.3•CSA6.9. In addition, adequate means must be provided to limit movement of the appliance without depending on the connector and the quick-disconnect device (or its... -
Page 7: Gas Pressure Regulator Installation
After checking for leaks all lines receiving gas should be fully purged to remove air. TESTING THE GAS SUPPLY SYSTEM When the gas supply pressure exceeds ½ psig (3.45 kPa), the griddle and its individual shutoff valve must be disconnected from the gas supply piping system. When the gas supply pressure is ½... -
Page 8: Operation
OPERATION The griddle and its parts are hot. Use care when operating, cleaning or servicing the griddle. BEFORE FIRST USE Remove all packing material and protective plastic from the surface s of the unit. Before leaving the factory the griddle is coated with vegetable oil as a rust inhibitor. Remove this film when the griddle plate is being cleaned prior to its first cooking use. - Page 9 This model features an electric ignition system that is controlled by a momentary power switch. The power switch turns the electric ignition system o ff and on only and will only supply power to the igniters when held down in the ON position. The burners and pilots will continue to work with power switch in the OFF position until the gas supply to the unit is cut off or the griddle gas shut -off valve is turned to the OFF position (Fig.
-
Page 10: Controls - Msa And Asa Models
CONTROLS – MSA AND ASA MODELS pilot adjustment screw pilot and burner sight holes thermostat knob Fig. 7 pilot safety valve push button This model features a standing pilot that mus t be manually lit with an outside ignition source (such as a lit taper, etc). The pilot is monitored by a thermocouple and pilot safety valve. -
Page 11: Controls - Agm Models
CONTROLS – AGM MODELS burner and pilot sight holes burner control knob Fig. 8 pilot adjustment screw The model is equipped with standing pilots. Gas will flow from the pilots as soon as the main gas supply to the unit is turned on. The pilots are lit with the use of an outside ignition source (such as a lit taper, etc). -
Page 12: Pilot Lighting Procedure - 900Rx Models
PILOT LIGHTING PROCEDURE – 900RX MODELS 1. Turn the griddle shut-off valve to the OFF position (See Fig.6 on page 9). Wait 5 minutes to allow any gas that may have accumulated in the burner compartment to escape. 2. Turn the griddle shut-off valve to the ON position (See Fig. 5 on page 9). 3. -
Page 13: Pilot Lighting Procedure- Msa And Asa Models
PILOT LIGHTING PROCEDURE- MSA AND ASA MODELS 1. Turn the main gas shut-off valve to the OFF position. Wait 5 minutes to allow any gas that may have accumulated in the burner compartment to escape. 2. Turn the main gas shut-off valve ON. 3. -
Page 14: Pilot Lighting Procedure - Agm Models
PILOT LIGHTING PROCEDURE – AGM MODELS 1. Turn the main gas shut-off valve and all burner control knobs to the OFF position. Wait 5 minutes to allow any gas that may have accumulated in the burner compartment to escape. 2. Turn the main gas shut-off valve ON. 3. -
Page 15: Using The Griddle
USING THE GRIDDLE To preheat, turn the burners on about 20-25 minutes before cooking. A uniform and systematic approach to loading the griddle will produce the most consistent product results. The griddle plate is steel, but the surface is relatively soft and can be scored or dented by careless use of a spatula or scraper. -
Page 16: Cleaning The Griddle
CLEANING THE GRIDDLE Empty the grease drawer as needed throughout the day and regularly clean at least once daily. Clean the griddle regularly. A clean griddle always looks better, lasts longer and performs better. To produce evenly cooked, perfectly browned griddle products keep the griddle plate clean and free of carbonized grease. - Page 17 CLEANING THE OPTIONAL CHROME GRIDDLE PLAT E COOKING SURFACE AFTER EACH USE Clean the griddle cooking surface regularly with a palmetto brush and a bladed griddle scraper during the work shift. Never use an abrasive scouring pad or griddle brick on a chrome plate surface. The chrome surface can be damaged by careless use of a spatula or scraper.
-
Page 18: Adjustments
ADJUSTMENTS CALIBRATION-900RX AND MSA MODELS 1. Each thermostat controls a 12” zone of the griddle. Using a Surface Probe temperature measurement device, observe the temperatures at the center points of the cooking zones. These points are located by starting 6” from the side splash (left or right) and every 12”... -
Page 19: Leveling
LEVELING The griddle must be level (side-to-side and front-to-back) during operation to ensure proper performance. Improper leveling can result in uneven temperature distribution, cold spots, and possibly damage electrical components. 1. Place a level on the griddle. 2. Adjust legs by turning the bullet feet at the bottom of each leg. Using pliers or a crescent wrench, turn the feet counter-clockwise to increase height, and clockwise to decrease height until leveling is achieved. -
Page 20: Shutdown Of Griddle With Electric Ignition System - 900Rx Models
SHUTDOWN OF GRIDDLE – MSA AND ASA MODELS 1. Turn thermostats to the OFF position to cut off burners. 2. The pilots will remain lit and monitored by the safe ty valve as long as the main gas supply is on. SHUTDOWN OF GRIDDLE WITH STANDING PILOT SYSTEM –... -
Page 21: Maintenance
MAINTENANCE The griddle and its parts are hot. Use care when operating, cleaning or servicing the griddle. LUBRICATION All valves must be checked and lubricated periodically. Check with your service ag ency for details. VENT Daily, when the griddle is cool, check the flue and clear any obstructions. SERVICE AND PARTS INFORMATION Contact the Service Contractor in your area to obtain service and parts information. -
Page 22: Troubleshooting
TROUBLESHOOTING PROBLEM POSSIBLE CAUSES 1. Problem with thermostat or burner valve. (Call for service) Heat does not come on 2. Pilot burner not lit. when the thermostat or 3. Griddle shut-off valve not in ON position. burner valve is turned on 4. -
Page 23: Accessory Installation
ACCESSORY INSTALLATION The griddle and its parts are hot. Use care when operating, cleaning or servicing the griddle. SIDE VIEW... - Page 24 SIDE VIEW FRONT VIEW...
- Page 25 NOTES...