
Related Manuals for Samsung HW-J6060


Summary of Contents for Samsung HW-J6060
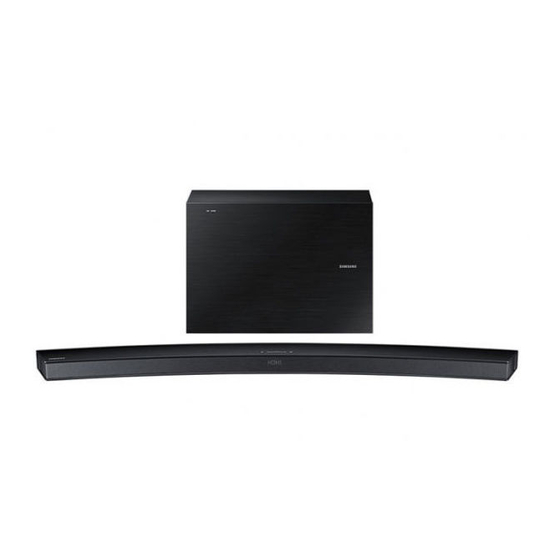
- Page 1 HW-J6060 User manual Curved Soundbar Imagine the possibilities Thank you for purchasing this Samsung product. To receive more complete service, please register your product at www.samsung.com/register...
-
Page 2: Getting Started
Control your Soundbar in the palm of your hand with the You can connect a Bluetooth device to the Soundbar Samsung Audio Remote App*. This convenient app is a and enjoy music with high quality stereo sound, all control hub for basic controls like power, volume, and... -
Page 3: Safety Information
GETTING STARTED SAFETY INFORMATION SAFETY WARNINGS TO REDUCE THE RISK OF ELECTRIC SHOCK, DO NOT REMOVE THE COVER (OR BACK). NO USER-SERVICEABLE PARTS ARE INSIDE. REFER SERVICING TO QUALIFIED SERVICE PERSONNEL. This symbol indicates “dangerous voltage” inside the product that presents a risk of electric CAUTION shock or personal injury. - Page 4 GETTING STARTED PRECAUTIONS 68.6 mm 99.1mm 99.1mm 99.1mm Ensure that the AC power supply in your house complies with the power requirements listed on the identification sticker located on the back of your product. Install your product horizontally, on a suitable base (furniture), with enough space around it for ventilation (7~10 cm).
-
Page 5: Table Of Contents
GETTING STARTED CONTENTS GETTING STARTED 23 FUNCTIONS Features Input Mode Safety Information Bluetooth What’s Included Software Update DESCRIPTIONS 28 TROUBLESHOOTING Top / Front Panel Troubleshooting Rear / Bottom Panel 29 APPENDIX Remote Control Specifications 11 INSTALLATION Installing the Soundbar Installing the Wall Mount Attaching the Soundbar to your TV's Stand Figures and illustrations in this User Manual are provided for reference only and may differ from... -
Page 6: What's Included
GETTING STARTED WHAT’S INCLUDED BEFORE READING THE USER’S MANUAL Note the following terms before reading the user manual. + Icons used in this manual Icon Term Definition Caution Indicates a situation where a function does not operate or settings may be cancelled. Note Indicates tips or instructions on the page that help you operate a function. -
Page 7: Descriptions
DESCRIPTIONS DESCRIPTIONS TOP / FRONT PANEL VOL. - / + Controls the volume level. (Power) Button The numeric value of the volume level Turns the power on and off. appears in the front panel display. (Source) Button Display Selects the D.IN, AUX, HDMI, BT, TV, or Displays the current mode. -
Page 8: Rear / Bottom Panel
DESCRIPTIONS REAR / BOTTOM PANEL AUX IN HDMI IN Connect to the Analogue output of an Inputs digital video and audio external device. signals simultaneously using an HDMI cable. Use when connecting a supported external device. OPTICAL IN (D.IN) HDMI OUT (TV-ARC) Connect to the digital Outputs digital video and (optical) output of an... -
Page 9: Remote Control
(Default : Auto Power Link OFF, ON - ANYNET+ / OFF - POWER LINK or OFF - ANYNET+ / ON - POWER LINK). The Anynet+ function lets you control the Soundbar with the remote from an Anynet+ compatible Samsung TV. The Soundbar must be connected to the TV via an HDMI cable. - Page 10 DESCRIPTIONS Power Turns the Soundbar on and off. Volume Adjusts the volume level of the unit. Play / Pause Press the & button to pause a file temporarily. Press the & button again to play the selected file. Skip Back If there is more than one file on the device you are playing, and you press the # button, the previous file is selected.
-
Page 11: Installation
INSTALLATION INSTALLATION INSTALLING THE SOUNDBAR INSTALLING THE WALL MOUNT + Installation Precautions ● Install on a vertical wall only. ● For the installation, avoid a location with high temperature or humidity, or a wall that cannot sustain the weight of the set. - Page 12 INSTALLATION Center Line Center Line 2. Mark the location where the screws will go through on the wall, and then remove the installation guide. Next, drill holes for the screws using an appropriately sized drill bit. 3. Fasten the Bracket-Wall (2EA) and screws to the marked locations. 4.
- Page 13 INSTALLATION 5. Insert and fasten Holder-Fix Mount into each hole on the product’s bottom side. The product is fixed to the Bracket-Wall. ● Do not hang onto the installed unit and avoid striking or dropping the unit. ● Secure the unit firmly to the wall so that it does not fall off. If the unit falls off, it may cause an injury or damage the product.
-
Page 14: Attaching The Soundbar To Your Tv's Stand
INSTALLATION ATTACHING THE SOUNDBAR TO YOUR TV'S STAND You can attach the Soundbar to your TV's stand if you have a Samsung TV that has a stand that is compatible with this Soundbar. ● This Soundbar is compatible with model JU6700, JU6500 and JU7500, 48 inch, 55 inch and 65 inch, JU6610 - 48 inch and 55 inch, 2015 Samsung curved TVs. -
Page 15: Connections
CONNECTIONS CONNECTIONS ● Do not connect the power cord of this product or your TV to a wall outlet until all connections between components are complete. ● Before moving or installing this product, be sure to turn off the power and disconnect the power cord. CONNECTING THE SUBWOOFER CONNECTING TO THE SUBWOOFER AUTOMATICALLY The main unit and subwoofer should link (connect wirelessly) automatically when the main unit and subwoofer are... - Page 16 CONNECTIONS ● Before moving or installing the product, be sure to turn off the power and disconnect the power cord. ● If the main unit is powered off, the wireless subwoofer will be in standby mode and the STANDBY LED on the upper side will come on after the Link indicator (Blue LED) blinks for 30 seconds.
-
Page 17: Connecting To A Tv
CONNECTIONS CONNECTING TO A TV CONNECTIONS WITH TV USING HDMI (DIGITAL) CABLE HDMI Cable HDMI IN HDMI OUT (TV-ARC) HDMI OUT (TV-ARC) DC 14V HDMI IN AUX IN 5V 0.5A OPTICAL IN HDMI OUT (TV-ARC) 1. Connect an HDMI cable from the HDMI OUT (TV-ARC) jack on the back of the product to the HDMI IN jack on your TV. -
Page 18: Tv Soundconnect
3. Press the AUTO POWER button on the remote control to toggle the Auto Power Link function on and off. ● Depending on the connected device, Auto Power Link may not function. TV SOUNDCONNECT You can enjoy TV sound through your Soundbar when it is connected to a Samsung TV that supports the TV SoundConnect function. Connect 1. - Page 19 ● Terminate the connection to the existing TV, and then press the & button on the remote control for 5 seconds to connect to another TV. ● The TV SoundConnect (SoundShare) function is supported by some Samsung TVs released from 2012 on. Check whether your TV supports the TV SoundConnect (SoundShare) function before you begin. (For further information, refer to the TV’s user manual.).
-
Page 20: Connections With External Device
CONNECTIONS CONNECTIONS WITH EXTERNAL DEVICE HDMI CABLE HDMI is the standard digital interface for connecting to TVs, projectors, DVD players, Blu-ray players, set top boxes, and more. HDMI prevents any degradation to the signal due to conversion to analogue and maintains the video and audio quality of the original digital source. -
Page 21: Usb
CONNECTIONS + AUX Cable 1. Connect AUX IN (Audio) on the main unit to the AUDIO OUT jack of the Source Device. 2. Press the (Source) button on the top panel of Soundbar or the SOURCE button on remote control to select the AUX mode. - Page 22 CONNECTIONS ● Digital camera PTP protocols are not supported. ● Do not remove the USB device while it is transferring files. ● DRM-protected music files (MP3, WMA) from commercial web sites cannot be played. ● External HDDs are not supported. ●...
-
Page 23: Functions
FUNCTIONS FUNCTIONS INPUT MODE Press the (Source) button on the main unit’s top panel or the SOURCE button on the remote control to select the mode you want. Input mode Display Optical Digital input D.IN ARC (HDMI OUT) input AUX input HDMI input HDMI BLUETOOTH mode... -
Page 24: Bluetooth
The device name can only be displayed in English. An underline " _ " will be displayed if the name is not in English. • If the Bluetooth device has failed to pair with the Soundbar, delete the previous "[Samsung] Soundbar J-Series" found by the Bluetooth device and have it search for the Soundbar again. 4. Play music on the connected device. - Page 25 ● You cannot connect the Soundbar to a Bluetooth device that supports only the HF (Hands Free) function. ● Once you have paired the Soundbar to a Bluetooth device, selecting "[Samsung] Soundbar J-Series" from the device's scanned devices list will automatically change the Soundbar to BT mode.
- Page 26 USING SAMSUNG AUDIO REMOTE APP + Install Samsung Audio Remote App To control the product with your Smart Device and the Samsung Audio Remote app, download the Samsung Audio Remote App through Google Play store. Market search : Samsung Audio Remote...
-
Page 27: Software Update
Note that if there are multiple update files, you must load them onto the USB device singly and use them to update the firmware one file at a time. Please visit samsung.com or contact the Samsung call centre to receive more information about downloading updates files. -
Page 28: Troubleshooting
• Is the distance between the remote control and main unit too far? The TV SoundConnect (TV pairing) failed. TV SoundConnect is supported by some Samsung • Does your TV support TV SoundConnect? TVs released from 2012 on. Check your TV to see if it supports TV SoundConnect. -
Page 29: Appendix
S/N ratio, distortion, separation, and usable sensitivity are based on measurements using AES (Audio Engineering Society) guidelines. Nominal specification Samsung Electronics Co., Ltd reserves the right to change the specifications without notice. Weight and dimensions are approximate. For the power supply and Power Consumption, refer to the label attached to the product. - Page 30 HW-J6060 ﺩﻓﺗﺭﭼﻪ ﺭﺍﻫﻧﻣﺎ Curved Soundbar ﻓﺭﺻﺕ ﻫﺎ ﺭﺍ ﻣﺟﺳﻡ ﮐﻧﻳﺩ . ﺍﺯ ﺷﻣﺎ ﻣﻣﻧﻭﻧﻳﻡSamsung ﺑﺎﺑﺕ ﺧﺭﻳﺩ ﺍﻳﻥ ﺩﺳﺗﮕﺎﻩ ﺑﺭﺍی ﺩﺭﻳﺎﻓﺕ ﺧﺩﻣﺎﺕ ﮐﺎﻣﻝ ﺗﺭ، ﻟﻁﻔ ﺎ ً ﻣﺣﺻﻭﻝ ﺧﻭﺩ ﺭﺍ ﺩﺭ ﺍﻳﻥ ﻧﺷﺎﻧﯽ ﺛﺑﺕ ﻧﻣﺎﻳﻳﺩ www.samsung.com/register AH68-02868D-00 AH68-02868D-00...
- Page 31 Samsung Remote ﺑﺭﻧﺎﻣﻪ ﺭﺍ ﺑﺭﺍی ﻟﺫﺕ ﺑﺭﺩﻥ ﺍﺯ ﻣﻭﺳﻳﻘﯽ ﺑﺎ ﮐﻳﻔﻳﺕBluetooth ﺷﻣﺎ ﻣﯽ ﺗﻭﺍﻧﻳﺩ ﻭﺳﺎﻳﻝ ﺧﻭﺩ ﺭﺍSoundbar * ﻣﯽ ﺗﻭﺍﻧﻳﺩSamsung Audio Remote ﺑﺎ ﺑﺭﻧﺎﻣﻪ ﻣﺗﺻﻝ ﻭ ﺍﺳﺗﻔﺎﺩﻩSoundbar ﺻﺩﺍی ﺑﺎﻻی ﺍﺳﺗﺭﻳﻭ، ﺑﺩﻭﻥ ﻧﻳﺎﺯ ﺑﻪ ﺳﻳﻡ ﺑﻪ ﺑﺭﺍﺣﺗﯽ ﮐﻧﺗﺭﻝ ﮐﻧﻳﺩ. ﺍﻳﻥ ﺑﺭﻧﺎﻣﻪ ﮐﺎﺭﺑﺭﺩی ﻣﻔﻳﺩ ﺩﺭ ﻭﺍﻗﻊ ﻳﮏ ﭘﺎﻳﮕﺎﻩ ﮐﻧﺗﺭﻟﯽ...
- Page 32 ﺁﻏﺎﺯ ﺑﻪ ﮐﺎﺭ ﺍﻁﻼﻋﺎﺕ ﺍﻳﻣﻧﯽ ﻫﺷﺩﺍﺭﻫﺎی ﺍﻳﻣﻧﯽ .ﺟﻬﺕ ﮐﺎﻫﺵ ﺧﻁﺭ ﺑﺭﻕ ﮔﺭﻓﺗﮕﯽ، ﺍﺯ ﺑﺭﺩﺍﺷﺗﻥ ﺩﺭﭘﻭﺵ )ﻳﺎ ﭘﺷﺕ( ﺩﺳﺗﮕﺎﻩ ﺧﻭﺩﺩﺍﺭی ﮐﻧﻳﺩ .ﻫﻳﭻ ﻗﻁﻌﻪ ﺍی ﺩﺭ ﺩﺍﺧﻝ ﺩﺳﺗﮕﺎﻩ ﻭﺟﻭﺩ ﻧﺩﺍﺭﺩ ﮐﻪ ﻣﺻﺭﻑ ﮐﻧﻧﺩﮔﺎﻥ ﺑﺗﻭﺍﻧﻧﺩ ﺁﻧﻬﺎ ﺭﺍ ﺗﻌﻣﻳﺭ ﮐﻧﻧﺩ. ﺟﻬﺕ ﺗﻌﻣﻳﺭﺍﺕ ﺑﻪ ﭘﺭﺳﻧﻝ ﺧﺩﻣﺎﺗﯽ ﻭﺍﺟﺩ ﺷﺭﺍﻳﻁ ﻣﺭﺍﺟﻌﻪ ﻧﻣﺎﻳﻳﺩ ﺍﻳﻥ...
- Page 33 ﺁﻏﺎﺯ ﺑﻪ ﮐﺎﺭ ﻧﮑﺎﺕ ﺍﺣﺗﻳﺎﻁﯽ 6,86 ﻣﻳﻠﻳﻣﺗﺭ 68.6 mm 1,99 ﻣﻳﻠﻳﻣﺗﺭ 99.1mm 1,99 ﻣﻳﻠﻳﻣﺗﺭ 99.1mm 1,99 ﻣﻳﻠﻳﻣﺗﺭ 99.1mm ﻣﻁﻣﺋﻥ ﺷﻭﻳﺩ ﮐﻪ ﻣﻧﺑﻊ ﺑﺭﻕ ﻣﺗﻧﺎﻭﺏ ﺧﺎﻧﻪ ﺷﻣﺎ ﺑﺎ ﺍﻟﺯﺍﻣﺎﺕ ﺗﻭﺍﻥ ﺫﮐﺭ ﺷﺩﻩ ﺩﺭ ﺑﺭﭼﺳﺏ ﻣﺷﺧﺻﺎﺕ ﭘﺷﺕ ﺩﺳﺗﮕﺎﻩ ﻣﻁﺎﺑﻘﺕ ﺩﺍﺷﺗﻪ ﺑﺎﺷﺩ. ﺩﺳﺗﮕﺎﻩ ﺧﻭﺩ ﺭﺍ ﺑﻪ ﺻﻭﺭﺕ ﺍﻓﻘﯽ ﻭ...
- Page 34 ﺁﻏﺎﺯ ﺑﻪ ﮐﺎﺭ ﻓﻬﺭﺳﺕ ﻣﻁﺎﻟﺏ 32 ﻗﺎﺑﻠﻳﺕ ﻫﺎ ﺁﻏﺎﺯ ﺑﻪ ﮐﺎﺭ ﺣﺎﻟﺕ ﻭﺭﻭﺩی ﻭﻳژﮔﯽ ﻫﺎ Bluetooth ﺍﻁﻼﻋﺎﺕ ﺍﻳﻣﻧﯽ ﺑﺭﻭﺯﺭﺳﺎﻧﯽ ﻧﺭﻡ ﺍﻓﺯﺍﺭ ﺁﻧﭼﻪ ﻫﻣﺭﺍﻩ ﺩﺳﺗﮕﺎﻩ ﺍﺳﺕ 82 ﻋﻳﺏ ﻳﺎﺑﯽ ﺷﺭﺡ ﻋﻳﺏ ﻳﺎﺑﯽ ﭘﺎﻧﻝ ﺑﺎﻻ/ﺟﻠﻭ ﭘﺎﻧﻝ ﭘﺷﺕ / ﭘﺎﻳﻳﻥ 92 ﺿﻣﻳﻣﻪ ﮐﻧﺗﺭﻝ ﺍﺯ ﺭﺍﻩ ﺩﻭﺭ ﻣﺷﺧﺻﺎﺕ...
- Page 35 ﺁﻏﺎﺯ ﺑﻪ ﮐﺎﺭ ﺁﻧﭼﻪ ﻫﻣﺭﺍﻩ ﺩﺳﺗﮕﺎﻩ ﺍﺳﺕ ﻗﺑﻝ ﺍﺯ ﺧﻭﺍﻧﺩﻥ ﺩﻓﺗﺭﭼﻪ ﺭﺍﻫﻧﻣﺎ .ﻗﺑﻝ ﺍﺯ ﺧﻭﺍﻧﺩﻥ ﺩﻓﺗﺭﭼﻪ ﺭﺍﻫﻧﻣﺎ، ﺣﺗﻣ ﺎ ً ﺑﻪ ﺍﺻﻁﻼﺣﺎﺕ ﺯﻳﺭ ﺗﻭﺟﻪ ﮐﻧﻳﺩ ﻧﻣﺎﺩﻫﺎی ﺍﺳﺗﻔﺎﺩﻩ ﺷﺩﻩ ﺩﺭ ﺍﻳﻥ ﺭﺍﻫﻧﻣﺎ ﺗﻌﺭﻳﻑ ﺍﺻﻁﻼﺡ ﻧﻣﺎﺩ .ﺑﻳﺎﻧﮕﺭ ﻣﻭﺍﺭﺩی ﺍﺳﺕ ﮐﻪ ﻗﺎﺑﻠﻳﺗﯽ ﮐﺎﺭ ﻧﻣﯽ ﮐﻧﺩ ﻳﺎ ﺗﻧﻅﻳﻣﺎﺕ ﻟﻐﻭ ﻣﯽ ﺷﻭﻧﺩ ﺍﺣﺗﻳﺎﻁ...
- Page 36 ﺷﺭﺡ ﺷﺭﺡ ﭘﺎﻧﻝ ﺑﺎﻻ/ﺟﻠﻭ VOL. -/+ .ﻣﻳﺯﺍﻥ ﺻﺩﺍ ﺭﺍ ﮐﻧﺗﺭﻝ ﻣﯽ ﮐﻧﺩ (ﺩﮐﻣﻪ )ﺭﻭﺷﻥ/ﺧﺎﻣﻭﺵ ﻣﻘﺩﺍﺭ ﻋﺩﺩی ﻣﻳﺯﺍﻥ ﺻﺩﺍ ﺭﻭی ﻧﻣﺎﻳﺷﮕﺭ ﭘﺎﻧﻝ ﺟﻠﻭ ﺩﻳﺩﻩ . ﺭﺍ ﺭﻭﺷﻥ ﻭ ﺧﺎﻣﻭﺵ ﻣﯽ ﮐﻧﺩSoundbar .ﻣﯽ ﺷﻭﺩ ﺻﻔﺣﻪ ﻧﻣﺎﻳﺵ (ﺩﮐﻣﻪ )ﻣﻧﺑﻊ .ﺣﺎﻟﺕ ﮐﻧﻭﻧﯽ ﺭﺍ ﻧﻣﺎﻳﺵ ﻣﯽ ﺩﻫﺩ ،...
- Page 37 ﺷﺭﺡ ﭘﺎﻧﻝ ﭘﺷﺕ / ﭘﺎﻳﻳﻥ AUX IN HDMI IN .ﺧﺭﻭﺟﯽ ﺁﻧﺎﻟﻭگ ﻭﺳﻳﻠﻪ ﺑﻳﺭﻭﻧﯽ ﺭﺍ ﺑﻪ ﺁﻥ ﻭﺻﻝ ﮐﻧﻳﺩ ﺳﻳﮕﻧﺎﻟﻬﺎی ﻭﻳﺩﻳﻭﻳﯽ ﻭ ﺻﻭﺗﯽ ﺩﻳﺟﻳﺗﺎﻝ ﺭﺍ ﺑﻪ ﻁﻭﺭ ﻭﺍﺭﺩ ﻣﯽHDMI ﻫﻡ ﺯﻣﺎﻥ ﺑﺎ ﺍﺳﺗﻔﺎﺩﻩ ﺍﺯ ﻳﮏ ﮐﺎﺑﻝ ﮐﻧﺩ. ﻫﻧﮕﺎﻡ ﺍﺗﺻﺎﻝ ﻳﮏ ﺩﺳﺗﮕﺎﻩ ﺧﺎﺭﺟﯽ ﭘﺷﺗﻳﺑﺎﻧﯽ .ﺷﺩﻩ...
- Page 38 .(ON - POWER LINK / OFF - ANYNET+ ﺳﺎﺯﮔﺎﺭ ﺑﺎAnynet+ ﺭﺍ ﺑﺎ ﺍﺳﺗﻔﺎﺩﻩ ﺍﺯ ﮐﻧﺗﺭﻝ ﺍﺯ ﺭﺍﻩ ﺩﻭﺭSoundbar ﺍﻣﮑﺎﻥ ﮐﻧﺗﺭﻝAnynet+ ﻋﻣﻠﮑﺭﺩ ﺑﻪ ﺗﻠﻭﻳﺯﻳﻭﻥHDMI ﺑﺎﻳﺩ ﺑﻪ ﻭﺳﻳﻠﻪ ﻳﮏ ﮐﺎﺑﻝSoundbar . ﺑﺭﺍی ﺷﻣﺎ ﻓﺭﺍﻫﻡ ﻣﯽ ﺳﺎﺯﺩSamsung ﺗﻠﻭﻳﺯﻳﻭﻥ .ﻭﺻﻝ ﺷﺩﻩ ﺑﺎﺷﺩ...
- Page 39 ﺷﺭﺡ ﺭﻭﺷﻥ/ﺧﺎﻣﻭﺵ . ﺭﺍ ﺭﻭﺷﻥ ﻭ ﺧﺎﻣﻭﺵ ﻣﯽ ﮐﻧﺩSoundbar ﻣﻳﺯﺍﻥ ﺻﺩﺍ .ﺑﺭﺍی ﺗﻧﻅﻳﻡ ﻣﻳﺯﺍﻥ ﺻﺩﺍی ﺩﺳﺗﮕﺎﻩ ﺑﻪ ﮐﺎﺭ ﺑﺭﺩﻩ ﻣﯽ ﺷﻭﺩ ﭘﺧﺵ/ﻣﮑﺙ .ﺑﺭﺍی ﻣﮑﺙ ﺩﺭ ﭘﺧﺵ ﻓﺎﻳﻝ ﺑﻪ ﻁﻭﺭ ﻣﻭﻗﺕ، ﺩﮐﻣﻪ & ﺭﺍ ﻓﺷﺎﺭ ﺩﻫﻳﺩ .ﺑﺭﺍی ﭘﺧﺵ ﻣﺟﺩﺩ ﻓﺎﻳﻝ ﺍﻧﺗﺧﺎﺑﯽ، ﺩﮐﻣﻪ & ﺭﺍ ﺩﻭﺑﺎﺭﻩ ﻓﺷﺎﺭ ﺩﻫﻳﺩ ﺭﺩ...
- Page 40 ﻧﺻﺏ SOUNDBAR ﻧﺻﺏ ﻧﺻﺏ ﻧﮕﻬﺩﺍﺭﻧﺩﻩ ﺩﻳﻭﺍﺭی ﻧﮑﺎﺕ ﺍﺣﺗﻳﺎﻁﯽ ﻧﺻﺏ .ﻓﻘﻁ ﺭﻭی ﻳﮏ ﺩﻳﻭﺍﺭ ﻋﻣﻭﺩی ﻧﺻﺏ ﮐﻧﻳﺩ ● .ﻧﺑﺎﻳﺩ ﺩﺭ ﻣﺣﻳﻁ ﻫﺎﻳﯽ ﺑﺎ ﺩﻣﺎ ﻭ ﺭﻁﻭﺑﺕ ﺑﺎﻻ ﻳﺎ ﺭﻭی ﺩﻳﻭﺍﺭی ﮐﻪ ﻗﺎﺩﺭ ﺑﻪ ﺗﺣﻣﻝ ﻭﺯﻥ ﺩﺳﺗﮕﺎﻩ ﻧﻳﺳﺕ ﻧﺻﺏ ﺷﻭﺩ ● ﻗﺩﺭﺕ ﺗﺣﻣﻝ ﺩﻳﻭﺍﺭ ﺭﺍ ﮐﻧﺗﺭﻝ ﮐﻧﻳﺩ. ﺍﮔﺭ ﺩﻳﻭﺍﺭ ﺑﺭﺍی ﺗﺣﻣﻝ ﻭﺯﻥ ﺩﺳﺗﮕﺎﻩ ﺑﻪ ﺍﻧﺩﺍﺯﻩ ﮐﺎﻓﯽ ﻗﺩﺭﺕ ﻧﺩﺍﺭﺩ، ﺩﻳﻭﺍﺭ ﺭﺍ ﺗﻘﻭﻳﺕ ﮐﺭﺩﻩ ﻭ ﻳﺎ ﺩﺳﺗﮕﺎﻩ ﺭﺍ ﺭﻭی ﺩﻳﻭﺍﺭی ﺩﻳﮕﺭ ●...
- Page 41 ﻧﺻﺏ Center Line Center Line ﻣﺣﻝ ﭘﻳﭻ ﻫﺎ ﺭﺍ ﺑﺎ ﻗﻠﻡ ﺭﻭی ﺩﻳﻭﺍﺭ ﻋﻼﻣﺗﮕﺫﺍﺭی ﮐﻧﻳﺩ ﻭ ﺳﺩﺱ ﺭﺍﻫﻧﻣﺎی ﻧﺻﺏ ﺭﺍ ﺑﺭﺩﺍﺭﻳﺩ. ﺳﭘﺱ ﺑﺎ ﺍﺳﺗﻔﺎﺩﻩ ﺍﺯ ﻳﮏ ﺳﺭﻣﺗﻪ ﺑﺎ ﺍﻧﺩﺍﺯﻩ ﻣﻧﺎﺳﺏ، ﺳﻭﺭﺍﺥ ﻫﺎﺋﯽ ﺑﺭﺍی .ﭘﻳﭻ ﻫﺎ ﺩﺭﻳﻝ ﮐﻧﻳﺩ .ﻧﮕﻬﺩﺍﺭﻧﺩﻩ ﺩﻳﻭﺍﺭی )2 ﻋﺩﺩ( ﻭ ﭘﻳﭻ ﻫﺎ ﺭﺍ ﺑﻪ ﻣﺣﻝ ﻫﺎی ﻋﻼﻣﺕ ﮔﺫﺍﺭی ﺷﺩﻩ ﻣﺣﮑﻡ ﮐﻧﻳﺩ .ﺑﻌﺩ...
- Page 42 ﻧﺻﺏ .ﭘﺎﻳﻪ ﺛﺎﺑﺕ ﻧﺻﺏ ﻧﮕﻬﺩﺍﺭﻧﺩﻩ ﺭﺍ ﺩﺭ ﻫﺭﻳﮏ ﺍﺯ ﺳﻭﺭﺍﺥ ﻫﺎی ﺯﻳﺭ ﺩﺳﺗﮕﺎﻩ ﻗﺭﺍﺭ ﺩﺍﺩﻩ ﻭ ﻣﺣﮑﻡ ﮐﻧﻳﺩ. ﺩﺳﺗﮕﺎﻩ ﺑﻪ ﻧﮕﻬﺩﺍﺭﻧﺩﻩ ﺩﻳﻭﺍﺭی ﻣﺣﮑﻡ ﻣﯽ ﺷﻭﺩ .ﺑﻪ ﺩﺳﺗﮕﺎﻩ ﻧﺻﺏ ﺷﺩﻩ ﺁﻭﻳﺯ ﻧﺷﻭﻳﺩ ﻭ ﺍﺯ ﺿﺭﺑﻪ ﺯﺩﻥ ﻳﺎ ﺍﻧﺩﺍﺧﺗﻥ ﺩﺳﺗﮕﺎﻩ ﺧﻭﺩﺩﺍﺭی ﮐﻧﻳﺩ ●...
- Page 43 ﺑﻪ ﭘﺎﻳﻪ ﺗﻠﻭﻳﺯﻳﻭﻥ ﺷﻣﺎSOUNDBAR ﻭﺻﻝ ﮐﺭﺩﻥ . ﺭﺍ ﺑﻪ ﭘﺎﻳﻪ ﺗﻠﻭﻳﺯﻳﻭﻥ ﺧﻭﺩ ﻭﺻﻝ ﮐﻧﻳﺩSoundbar ﺳﺎﺯﮔﺎﺭ ﺑﺎﺷﺩ ﻣﯽ ﺗﻭﺍﻧﻳﺩSoundbar ﺩﺍﺷﺗﻪ ﺑﺎﺷﻳﺩ ﮐﻪ ﺑﺎ ﺍﻳﻥSamsung ﺍﮔﺭ ﻳﮏ ﺗﻠﻭﻳﺯﻳﻭﻥ ﺍﻳﻧﭻ ﻭ 55 ﺍﻳﻧﭻ، ﺗﻠﻭﻳﺯﻳﻭﻥJU6610 - 48 ، ﺍﻳﻧﭻ، 55 ﺍﻳﻧﭻ ﻭ 56 ﺍﻳﻧﭻJU6700، JU6500، JU7500، 48 ﺑﺎ ﻣﺩﻝ ﻫﺎیSoundbar ﺍﻳﻥ...
- Page 44 ﺍﺗﺻﺎﻻﺕ ﺍﺗﺻﺎﻻﺕ .ﻗﺑﻝ ﺍﺯ ﺍﻳﻧﮑﻪ ﺗﻣﺎﻡ ﺍﺗﺻﺎﻻﺕ ﺑﻳﻥ ﺍﺟﺯﺍ ﺭﺍ ﺑﺭﻗﺭﺍﺭ ﻧﮑﺭﺩﻩ ﺍﻳﺩ، ﺳﻳﻡ ﺑﺭﻕ ﺩﺳﺗﮕﺎﻩ ﻳﺎ ﺗﻠﻭﻳﺯﻳﻭﻥ ﺭﺍ ﺑﻪ ﭘﺭﻳﺯ ﺑﺭﻕ ﻭﺻﻝ ﻧﮑﻧﻳﺩ ● .ﭘﻳﺵ ﺍﺯ ﺟﺎﺑﺟﺎﮐﺭﺩﻥ ﻳﺎ ﻧﺻﺏ ﮐﺭﺩﻥ ﺩﺳﺗﮕﺎﻩ، ﺣﺗﻣ ﺎ ً ﺩﺳﺗﮕﺎﻩ ﺭﺍ ﺧﺎﻣﻭﺵ ﮐﺭﺩﻩ ﻭ ﺳﻳﻡ ﺑﺭﻕ ﺭﺍ ﻗﻁﻊ ﮐﻧﻳﺩ ●...
- Page 45 ﺍﺗﺻﺎﻻﺕ .ﭘﻳﺵ ﺍﺯ ﺟﺎﺑﺟﺎ ﮐﺭﺩﻥ ﻳﺎ ﻧﺻﺏ ﺩﺳﺗﮕﺎﻩ، ﺣﺗﻣ ﺎ ً ﺁﻧﺭﺍ ﺭﺍ ﺧﺎﻣﻭﺵ ﮐﺭﺩﻩ ﻭ ﺳﻳﻡ ﺑﺭﻕ ﺭﺍ ﻗﻁﻊ ﮐﻧﻳﺩ ● ﺁﺑﯽ ﺭﻧﮓ( ﺑﺭﺍی 03 ﺛﺎﻧﻳﻪLED) ﺍﮔﺭ ﺩﺳﺗﮕﺎﻩ ﺍﺻﻠﯽ ﺧﺎﻣﻭﺵ ﺷﻭﺩ، ﺳﺎﺏ ﻭﻭﻓﺭ ﺩﺭ ﺣﺎﻟﺕ ﺁﻣﺎﺩﻩ ﺑﮑﺎﺭ ﺧﻭﺍﻫﺩ ﺑﻭﺩ ﻭ ﭘﺱ ﺍﺯ ﺍﻳﻧﮑﻪ ﻧﺷﺎﻧﮕﺭ ﻟﻳﻧﮏ ●...
- Page 46 ﺍﺗﺻﺎﻻﺕ ﻭﺻﻝ ﮐﺭﺩﻥ ﺑﻪ ﺗﻠﻭﻳﺯﻳﻭﻥ ( )ﺩﻳﺟﻳﺗﺎﻝHDMI ﺍﺗﺻﺎﻝ ﻫﺎ ﺑﻪ ﺗﻠﻭﻳﺯﻳﻭﻥ ﺑﺎ ﺍﺳﺗﻔﺎﺩﻩ ﺍﺯ ﮐﺎﺑﻝ HDMI ﮐﺎﺑﻝ HDMI IN HDMI OUT (TV-ARC) HDMI OUT (TV-ARC) DC 14V HDMI IN AUX IN HDMI OUT 5V 0.5A OPTICAL IN (TV-ARC) . ﺭﻭی ﺗﻠﻭﻳﺯﻳﻭﻥ ﺧﻭﺩ ﻭﺻﻝ ﮐﻧﻳﺩHDMI IN ﭘﺷﺕ ﺩﺳﺗﮕﺎﻩ ﺑﻪ ﻓﻳﺵHDMI OUT (TV-ARC) ﺭﺍ ﺍﺯ ﻓﻳﺵ ﻭﺭﻭﺩیHDMI ﻳﮏ ﮐﺎﺑﻝ ....
- Page 47 .ﺑﺳﺗﻪ ﺑﻪ ﻭﺳﻳﻠﻪ ﻭﺻﻝ ﺷﺩﻩ ﻣﻣﮑﻥ ﺍﺳﺕ ﻟﻳﻧﮏ ﺗﻭﺍﻥ ﺧﻭﺩﮐﺎﺭ ﮐﺎﺭ ﻧﮑﻧﺩ ● TV SOUNDCONNECT ﭘﺷﺗﻳﺑﺎﻧﯽ ﻣﯽTV SoundConnect ﮐﻪ ﺍﺯ ﻋﻣﻠﮑﺭﺩSamsung TV ﺑﺷﻧﻭﻳﺩ، ﺍﻟﺑﺗﻪ ﺩﺭ ﺻﻭﺭﺗﯽ ﮐﻪ ﺑﻪ ﻳﮏSoundbar ﻣﯽ ﺗﻭﺍﻧﻳﺩ ﺻﺩﺍی ﺗﻠﻭﻳﺯﻳﻭﻥ ﺭﺍ ﺍﺯ .ﮐﻧﺩ ﺍﺗﺻﺎﻝ...
- Page 48 . ﻓﻘﻁ ﺧﺎﻣﻭﺵ ﻣﯽ ﺷﻭﺩSoundbar ، : ﻭﻗﺗﯽ ﺗﻠﻭﻳﺯﻳﻭﻥ ﺭﺍ ﺧﺎﻣﻭﺵ ﻣﯽ ﮐﻧﻳﺩOFF - BLUETOOTH POWER • . ﮐﻪ ﺍﺯ ﺳﺎﻝ 3102 ﺑﻪ ﺑﻌﺩ ﺑﻪ ﺑﺎﺯﺍﺭ ﻋﺭﺿﻪ ﺷﺩﻩ ﺍﻧﺩ، ﭘﺷﺗﻳﺑﺎﻧﯽ ﻣﯽ ﺷﻭﺩSamsung ﺍﻳﻥ ﻋﻣﻠﮑﺭﺩ ﺩﺭ ﺑﻌﺿﯽ ﺍﺯ ﺗﻠﻭﻳﺯﻳﻭﻥ ﻫﺎی ●...
- Page 49 ﺍﺗﺻﺎﻻﺕ ﺍﺗﺻﺎﻻﺕ ﺑﺎ ﺩﺳﺗﮕﺎﻩ ﻫﺎی ﺑﻳﺭﻭﻧﯽ HDMI ﮐﺎﺑﻝ ، ﺳﺕ ﺗﺎپBlu-ray ، ﺩﺳﺗﮕﺎﻩ ﻫﺎی ﭘﺧﺵDVD ﺭﺍﺑﻁ ﺩﻳﺟﻳﺗﺎﻟﯽ ﺍﺳﺗﺎﻧﺩﺍﺭﺩ ﺑﺭﺍی ﺍﺗﺻﺎﻝ ﺍﻳﻥ ﻧﻭﻉ ﺗﻠﻭﻳﺯﻳﻭﻥ ﻫﺎ، ﭘﺭﻭژﮐﺗﻭﺭﻫﺎ، ﺩﺳﺗﮕﺎﻩ ﻫﺎی ﭘﺧﺵHDMI .ﺑﺎﮐﺱ ﻫﺎ ﻭ ﺍﺯ ﺍﻳﻥ ﻗﺑﻳﻝ ﺍﺳﺕ . ﺍﺯ ﺍﻓﺕ ﺳﻳﮕﻧﺎﻝ ﻧﺎﺷﯽ ﺍﺯ ﺗﺑﺩﻳﻝ ﺑﻪ ﺁﻧﺎﻟﻭگ ﺟﻠﻭﮔﻳﺭی ﮐﺭﺩﻩ ﻭ ﮐﻳﻔﻳﺕ ﺻﺩﺍ ﻭ ﺗﺻﻭﻳﺭ ﻣﻧﺑﻊ ﺩﻳﺟﻳﺗﺎﻝ ﺍﺻﻠﯽ ﺭﺍ ﺣﻔﻅ ﻣﯽ ﮐﻧﺩHDMI HDMI ﮐﺎﺑﻝ...
- Page 50 ﺍﺗﺻﺎﻻﺕ AUX ﮐﺎﺑﻝ . ﺩﺳﺗﮕﺎﻩ ﻣﻧﺑﻊ ﻭﺻﻝ ﮐﻧﻳﺩAUDIO OUT )ﺻﺩﺍ( ﺩﺳﺗﮕﺎﻩ ﺍﺻﻠﯽ ﺭﺍ ﺑﻪ ﺟﺎی ﻓﻳﺵAUX IN . ﺍﻧﺗﺧﺎﺏ ﺷﻭﺩAUX ﺭﻭی ﮐﻧﺗﺭﻝ ﺍﺯ ﺭﺍﻩ ﺩﻭﺭ ﺭﺍ ﻓﺷﺎﺭ ﺩﻫﻳﺩ ﺗﺎ ﺣﺎﻟﺕSOURCE )ﻣﻧﺑﻊ( ﺭﻭی ﺻﻔﺣﻪ ﺑﺎﻻی ﺩﺳﺗﮕﺎﻩ ﺍﺻﻠﯽ ﻳﺎ ﺩﮐﻣﻪ ﺩﮐﻣﻪ...
- Page 51 ﺍﺗﺻﺎﻻﺕ . ﺩﻭﺭﺑﻳﻥ ﻫﺎی ﺩﻳﺟﻳﺗﺎﻝ ﭘﺷﺗﻳﺑﺎﻧﯽ ﻧﻣﯽ ﺷﻭﻧﺩPTP ﭘﺭﻭﺗﮑﻝ ﻫﺎی ● . ﺩﺭ ﺣﺎﻝ ﺍﻧﺗﻘﺎﻝ ﻓﺎﻳﻝ ﺍﺳﺕ، ﺁﻥ ﺭﺍ ﺑﺭﻧﺩﺍﺭﻳﺩUSB ﻭﻗﺗﯽ ﺩﺳﺗﮕﺎﻩ ● .( ﺍﺯ ﻭﺏ ﺳﺎﻳﺕ ﻫﺎی ﺗﺟﺎﺭی ﺭﺍ ﻧﻣﯽ ﺗﻭﺍﻥ ﭘﺧﺵ ﮐﺭﺩWMA ، MP3) DRM ﻓﺎﻳﻝ ﻫﺎی ﻣﻭﺳﻳﻘﯽ ﻣﺣﺎﻓﻅﺕ ﺷﺩﻩ ﺗﻭﺳﻁ ●...
- Page 52 ﻗﺎﺑﻠﻳﺕ ﻫﺎ ﻗﺎﺑﻠﻳﺕ ﻫﺎ ﺣﺎﻟﺕ ﻭﺭﻭﺩی . ﺭﻭی ﮐﻧﺗﺭﻝ ﺍﺯ ﺭﺍﻩ ﺩﻭﺭ ﺭﺍ ﻓﺷﺎﺭ ﺩﻫﻳﺩSOURCE )ﻣﻧﺑﻊ( ﺭﻭی ﺻﻔﺣﻪ ﺑﺎﻻی ﺩﺳﺗﮕﺎﻩ ﺍﺻﻠﯽ ﻳﺎ ﺩﮐﻣﻪ ﺑﺭﺍی ﺍﻧﺗﺧﺎﺏ ﺣﺎﻟﺕ ﺩﻟﺧﻭﺍﻩ، ﺩﮐﻣﻪ ﺻﻔﺣﻪ ﻧﻣﺎﻳﺵ ﺣﺎﻟﺕ ﻭﺭﻭﺩی ﻭﺭﻭﺩی ﺩﻳﺟﻳﺗﺎﻝ ﻧﻭﺭی D.IN ARC (HDMI OUT) ﻭﺭﻭﺩی AUX ﻭﺭﻭﺩی...
- Page 53 .ﻧﺎﻡ ﺩﺳﺗﮕﺎﻩ ﻓﻘﻁ ﺑﻪ ﺍﻧﮕﻠﻳﺳﯽ ﻧﻣﺎﻳﺵ ﺩﺍﺩﻩ ﻣﯽ ﺷﻭﺩ. ﺍﮔﺭ ﻧﺎﻡ ﺑﻪ ﺍﻧﮕﻠﻳﺳﯽ ﻧﺑﺎﺷﺩ، ﻳﮏ " _ " ﻧﻣﺎﻳﺵ ﺩﺍﺩﻩ ﺧﻭﺍﻫﺩ ﺷﺩ • [" ﻗﺑﻠﯽ ﻳﺎﻓﺕ ﺷﺩﻩ ﺗﻭﺳﻁ ﻭﺳﻳﻠﻪSamsung] Soundbar J-Series" ، ﺍﻧﺟﺎﻡ ﻧﺷﺩSoundbar ﺑﺎBluetooth ﺍﮔﺭ ﺟﻔﺕ ﺳﺎﺯی ﻭﺳﻳﻠﻪ •...
- Page 54 . )ﻫﻧﺩﺯﻓﺭی( ﭘﺷﺗﻳﺑﺎﻧﯽ ﻣﯽ ﮐﻧﻧﺩ ﻭﺻﻝ ﮐﻧﻳﺩHF ﮐﻪ ﻓﻘﻁ ﺍﺯ ﻋﻣﻠﮑﺭﺩBluetooth ﺭﺍ ﻧﻣﯽ ﺗﻭﺍﻧﻳﺩ ﺑﻪ ﺩﺳﺗﮕﺎﻩ ﻫﺎیSoundbar ● [" ﺍﺯ ﻓﻬﺭﺳﺕSamsung] Soundbar J-Series" ﺟﻔﺕ ﮐﺭﺩﻳﺩ، ﺍﻧﺗﺧﺎﺏ ﮔﺯﻳﻧﻪBluetooth ﺭﺍ ﺑﺎ ﻳﮏ ﻭﺳﻳﻠﻪSoundbar ﺑﻌﺩ ﺍﺯ ﺍﻳﻧﮑﻪ ● . ﺗﻐﻳﻳﺭ ﺧﻭﺍﻫﺩ ﺩﺍﺩBT ﺭﺍ ﺑﻪ ﺣﺎﻟﺕSoundbar ﻭﺳﻳﻠﻪ ﻫﺎی ﺍﺳﮑﻥ ﺷﺩﻩ ﺑﻁﻭﺭ ﺧﻭﺩﮐﺎﺭ...
- Page 55 SAMSUNG AUDIO REMOTE ﺍﺳﺗﻔﺎﺩﻩ ﺍﺯ ﺑﺭﻧﺎﻣﻪ Samsung Audio Remote ﻧﺻﺏ ﺑﺭﻧﺎﻣﻪ ﺭﺍ ﺍﺯSamsung Audio Remote ﺑﺎﻳﺩ ﺑﺭﻧﺎﻣﻪSamsung Audio Remote ﺑﺭﺍی ﮐﻧﺗﺭﻝ ﺩﺳﺗﮕﺎﻩ ﺑﺎ ﻭﺳﻳﻠﻪ ﻫﻭﺷﻣﻧﺩ ﺧﻭﺩ ﻭ ﺑﺭﻧﺎﻣﻪ . ﺩﺍﻧﻠﻭﺩ ﮐﻧﻳﺩGoogle Play Store Samsung Audio Remote : ﺟﺳﺗﺟﻭی ﺑﺎﺯﺍﺭ...
- Page 56 .ﺭﻭﺯﺭﺳﺎﻧﯽ ﺛﺎﺑﺕ ﺍﻓﺯﺍﺭ ﺍﺳﺗﻔﺎﺩﻩ ﮐﻧﻳﺩ . ﺗﻣﺎﺱ ﺑﮕﻳﺭﻳﺩSamsung ﻣﺭﺍﺟﻌﻪ ﮐﺭﺩﻩ ﻳﺎ ﺑﺎ ﻣﺭﮐﺯ ﺗﻣﺎﺱSamsung.com ﺟﻬﺕ ﮐﺳﺏ ﺍﻁﻼﻋﺎﺕ ﺑﻳﺷﺗﺭ ﺩﺭﺑﺎﺭﻩ ﺩﺍﻧﻠﻭﺩ ﻓﺎﻳﻝ ﻫﺎی ﺑﻪ ﺭﻭﺯﺭﺳﺎﻧﯽ، ﻟﻁﻔ ﺎ ً ﺑﻪ . ﺩﺳﺗﮕﺎﻩ ﺍﺻﻠﯽ ﻭﺻﻝ ﮐﻧﻳﺩUSB ﺣﺎﻭی ﺑﻪ ﺭﻭﺯﺭﺳﺎﻧﯽ ﺛﺎﺑﺕ ﺍﻓﺯﺍﺭ ﺭﺍ ﺑﻪ ﭘﻭﺭﺕUSB ﺩﺳﺗﮕﺎﻩ...
- Page 57 • . )ﺟﻔﺕ ﺳﺎﺯی ﺗﻠﻭﻳﺯﻳﻭﻥ( ﺍﻧﺟﺎﻡ ﻧﺷﺩTV SoundConnect ﮐﻪSamsung ﺩﺭ ﺑﻌﺿﯽ ﺍﺯ ﺗﻠﻭﻳﺯﻳﻭﻥ ﻫﺎیTV SoundConnect ﭘﺷﺗﻳﺑﺎﻧﯽ ﻣﯽ ﮐﻧﺩ؟TV SoundConnect ﺁﻳﺎ ﺗﻠﻭﻳﺯﻳﻭﻥ ﺷﻣﺎ ﺍﺯ • .ﺍﺯ ﺳﺎﻝ 2102 ﺑﻪ ﺑﻌﺩ ﺑﻪ ﺑﺎﺯﺍﺭ ﻋﺭﺿﻪ ﺷﺩﻩ ﺍﻧﺩ، ﭘﺷﺗﻳﺑﺎﻧﯽ ﻣﯽ ﺷﻭﺩ...
- Page 58 .ﻭﺯﻥ ﻭ ﺍﺑﻌﺎﺩ ﺩﺳﺗﮕﺎﻩ ﺗﻘﺭﻳﺑﯽ ﻫﺳﺗﻧﺩ .ﺑﺭﺍی ﺁﮔﺎﻫﯽ ﺍﺯ ﻣﺷﺧﺻﺎﺕ ﻣﻧﺑﻊ ﺗﻐﺫﻳﻪ ﻭ ﺗﻭﺍﻥ ﻣﺻﺭﻓﯽ ﺑﻪ ﺑﺭﭼﺳﺏ ﺩﺳﺗﮕﺎﻩ ﻣﺭﺍﺟﻌﻪ ﮐﻧﻳﺩ ﺍﻁﻼﻋﻳﻪ ﻣﺟﻭﺯ ﮐﺩ ﺑﺎﺯ ( ﺑﺎoss.request@samsung.com) ﺑﺭﺍی ﺍﺭﺳﺎﻝ ﺳﺅﺍﻻﺕ ﻭ ﺩﺭﺧﻭﺍﺳﺕ ﻫﺎی ﻣﺭﺑﻭﻁ ﺑﻪ ﮐﺩﻫﺎی ﺑﺎﺯ، ﺍﺯ ﻁﺭﻳﻕ ﺍﻳﻣﻳﻝ ﺑﻪ ﺁﺩﺭﺱ . ﺗﻣﺎﺱ ﺑﮕﻳﺭﻳﺩSamsung...
- Page 59 .ﻠ ﻪ ﺣﻘﻮﻕ ﻣﺤﻔﻮﻅ ﺍﺳﺖ .Samsung Electronics Co.,Ltd 2015© ﺩﺭ ﺳﺭﺍﺳﺭ ﺩﻧﻳﺎSAMSUNG ﺗﻣﺎﺱ ﺑﺎ . ﺗﻣﺎﺱ ﺑﮕﻳﺭﻳﺩSAMSUNG ﺩﺍﺭﻳﺩ، ﻟﻁﻔ ﺎ ً ﺑﺎ ﻣﺭﮐﺯ ﺧﺩﻣﺎﺕ ﻣﺷﺗﺭﻳﺎﻥSamsung ﺍﮔﺭ ﻫﺭﮔﻭﻧﻪ ﭘﺭﺳﺵ ﻳﺎ ﻧﻅﺭی ﺩﺭ ﺭﺍﺑﻁﻪ ﺑﺎ ﻣﺣﺻﻭﻻﺕ Contact Centre Contact Centre...