Table of Contents
Advertisement
Quick Links
Advertisement
Table of Contents

Related Manuals for LG CM4545


Summary of Contents for LG CM4545
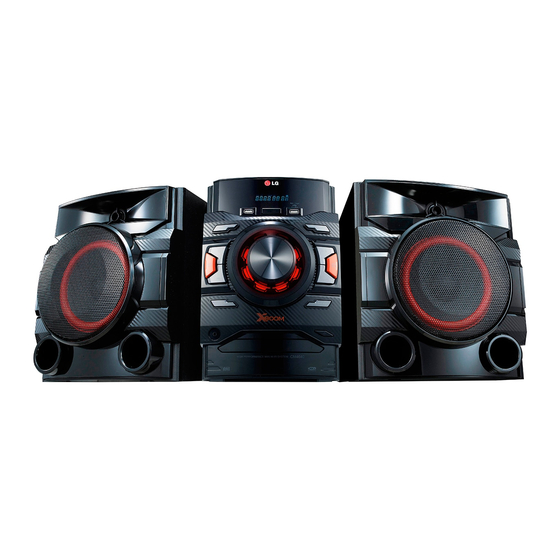
- Page 1 OWNER’S MANUAL Mini Hi-Fi System Please read this manual carefully before operating your set and retain it for future reference. CM4545 (CM4545, CMS4540F, CMS4540W) CM4445 (CM4445, CMS4540F) CM4345 (CM4345, CMS4340F) CM4540-FB_DRUSLLK_ENG_6554.indd 1 2014-02-25 4:16:56...
- Page 2 Getting Started Getting Started Safety Information CAUTION CAUTION: This product employs a Laser System. RISK OF ELECTRIC SHOCK DO NOT OPEN To ensure proper use of this product, please read CAUTION: TO REDUCE THE RISK OF ELECTRIC this owner’s manual carefully and retain it for future reference.
- Page 3 Getting Started Disposal of waste batteries/accumulators This device is equipped with a portable battery or accumulator. 1. When this crossed-out wheeled Safety way to remove the battery or the bin symbol is attached to batteries/ battery from the equipment: Remove the accumulators of Your product old battery or battery pack, follow the steps it means they are covered by...
-
Page 4: Table Of Contents
– USB device requirement – AUTO DJ playback Remote Control Radio Operations Front Panel – Listening to the radio Rear Panel (CM4545) – Presetting the Radio Stations Rear Panel (CM4445, CM4345) – Deleting all the saved stations – Improving poor FM reception Connecting Sound adjustment –... - Page 5 Table of Contents Troubleshooting Troubleshooting Appendix General specifications Speaker specifications Maintenance – Handling the Unit – Notes on Discs Trademarks and Licenses CM4540-FB_DRUSLLK_ENG_6554.indd 5 2014-02-25 4:16:57...
-
Page 6: Getting Started
Bluetooth. This unit and your device must be paired for Bluetooth. Visit “Google Android Market FM Antenna (1) (Google Play Store)” or use the QR code shown below to search for “LG Bluetooth Remote” app. For detailed information, refer to page 25- 26. (Android OS) CM4540-FB_DRUSLLK_ENG_6554.indd 6... -
Page 7: Playable File Requirement
This unit is not supported when the total discs. When setting the option to Live File number of files is 1,000 or more. System, you cannot use it on LG players. (Mastered/Live File System : Disc format system y External HDD, Card readers, Locked devices, or hard type USB devices are not supported. -
Page 8: Remote Control
Getting Started Remote Control Z ENTER : • • • • • • a • • • • • • - Stops playback. 1 (Power) : Switches the unit ON - Cancels DELETE function. or OFF. d/M (Play/Pause) : B (Open/Close) : Opens and - Starts or pauses playback. -
Page 9: Front Panel
Getting Started Front Panel CM4540-FB_DRUSLLK_ENG_6554.indd 9 2014-02-25 4:16:58... - Page 10 USB 1/ USB 2 Plays the audio files by connecting the USB - Starts or pauses playback. device. - Selects Stereo/Mono. c 1/! (Power) l LG EQ Switches the unit ON or OFF. Chooses sound impressions. d I(Stop) Stops playback. m U (Skip/Search) - Searches forward.
-
Page 11: Rear Panel (Cm4545)
Getting Started Rear Panel (CM4545) a POWER IN b ANTENNA (FM) c AUX IN (L/R) connectors d Cooling fan e SPEAKERS terminal/cord CM4540-FB_DRUSLLK_ENG_6554.indd 11 2014-02-25 4:16:58... -
Page 12: Rear Panel (Cm4445, Cm4345)
Getting Started Rear Panel (CM4445, CM4345) a POWER IN b ANTENNA (FM) c AUX IN (L/R) connectors d SPEAKERS terminal CM4540-FB_DRUSLLK_ENG_6554.indd 12 2014-02-25 4:16:59... -
Page 13: Connecting
Connecting Connecting to Attaching the subwoofer to the unit (CM4545) speakers Connect a woofer cord to the player. When connecting a woofer cord to the player, insert the connector until it clicks. Attaching the speakers to the unit To connect the cable to the unit, press each plastic finger pad to open the connection terminals on the unit. -
Page 14: Antenna Connection
Connecting Antenna Connection Optional Equipment Connection Connect the antenna to the antenna port on the back of the unit. Be sure to extend the FM wire antenna fully. USB Connection Connect the USB device (or MP3 player, etc.) to the USB port on the unit. -
Page 15: Aux In Connection
Connecting AUX IN Connection PORT. IN Connection Connect an output of auxiliary device(Camcoder, Connect an output (earphone or line out) of TV, Player, etc) to the AUX IN(L/R) connector. portable device (MP3 or PMP etc) to the PORT. IN connector. If your device has only one output for audio(mono), connect it to the left (white) audio jack on the unit. -
Page 16: Operating
Operating Basic Operations Auto Play AUDIO/MP3/WMA CD is played automatically after tray is open & closed. CD/USB Operations Automatically switches to the CD function if tray is open & closed when there is no disc in tray. 1. Insert the disc by pressing B on the remote Note control or R on the unit. -
Page 17: Other Operations
Operating Note Other Operations y Programmed list is cleared in the case below. - Removing the disc or the USB device. Programmed Playback - Deleting music files in the USB device. y Program is switched off in the case below. The program function enables you to store your - Changing the function to the others. -
Page 18: Deleting An Mp3/Wma File
Operating Note - DEL FILE : Deletes file. - DEL DIR : Deletes folder. y Folders or Files on a CD or a USB are - FORMAT : Formats USB. recognized as below. 2. To delete file/folder or format, press d/M on the remote control or T on the unit. -
Page 19: Auto Dj Playback
Operating Note AUTO DJ playback y Searching for a section within a track/file Auto DJ blends the end of one song into the or playing repeatedly or randomly is not beginning of another for seamless playback. It supported on the AUTO DJ mode. equalizes volume across tracks for uninterrupted y During AUTO DJ mode, it is not available to playback. -
Page 20: Radio Operations
Operating Radio Operations Presetting the Radio Stations You can preset 50 stations for FM. Before tuning, make sure to turn down the volume. Be sure that FM antenna is connected. (Refer to page 14) 1. Press FUNCTION until FM appears in the display window. -
Page 21: Sound Adjustment
Operating Note Sound adjustment y On some speakers, sound may not be heard or heard in low sound depending on the sound mode. Setting the surround mode y Maybe you need to reset the surround This system has a number of pre-set surround mode, after switching the input, sometimes even after the sound track changed. -
Page 22: Setting The Clock
Operating Setting the Clock Sleep Timer Setting Press SLEEP repeatedly to select delay time between 10 and 180 minutes. After the delay time, 1. Turn the unit on. the unit will be turned off. 2. Press and hold CLOCK. To cancel the sleep function, press SLEEP 3. -
Page 23: Advanced Operations
Operating Advanced Operations Listening to the sound from your external device The unit can be used to play the sound from many types of external device. (Refer to page 15) 1. Connect the external device to the AUX IN(L/R) or PORT. IN connector of the unit. 2. -
Page 24: Using A Bluetooth Wireless Technology
Bluetooth® wireless technology display depending on the type of Bluetooth can be operated via the Cascade if the connection device.Your unit appears as “LG MINI (XX:XX)”. was made via Bluetooth® wireless technology. Note Available Devices : Mobile phone, MP3, Laptop, XX:XX means the last four digits of BT address. -
Page 25: Using Bluetooth App
About “LG Bluetooth Remote” App - There is a device using same frequency “LG Bluetooth Remote” app brings a suite of new with Bluetooth® technology such as a features to this unit. medical equipment, a microwave or a To enjoy more features, you are recommended to wireless LAN device. - Page 26 Store)” icon. 1. Tap “LG Bluetooth Remote” app icon on the home screen to open “LG Bluetooth Remote” 2. In the search bar, type in the “LG Bluetooth app, and go to the main menu. Remote” and search it. 2. Tap [Setting] and select the unit you want.
-
Page 27: Troubleshooting
Troubleshooting Troubleshooting Problem Cause & Correction y The power cord is not plugged in. Plug in the power cord. y Check whether electricity failed. Check the condition by operating other No Power. electronic devices. y Check whether you select right function. Press FUNCTION and check the selected function. -
Page 28: Appendix
Appendix General specifications General Model CM4545 CM4445 CM4345 Power requirements Refer to the main label. Power consumption Refer to the main label. Dimensions (W x H x D) (206 x 308 x 284) mm Net Weight (Approx.) 3.0 kg 3.0 kg 3.0 kg... -
Page 29: Speaker Specifications
220 W Net Dimensions (W x H x D) (266 x 306 x 263) mm (200 x 306 x 200) mm Net Weight 3.1 kg 2.2 kg Subwoofer speaker (CM4545) Model CMS4540W Type 1 Way 1 Speaker Impedance 3 Ω... -
Page 30: Maintenance
The Bluetooth® word mark and logos are owned For details, please contact your nearest authorized by the Bluetooth® SIG, Inc. and any use of such service center. marks by LG Electronics is under license. Other trademarks and trade names are those of their respective owners. CM4540-FB_DRUSLLK_ENG_6554.indd 30... - Page 31 CM4540-FB_DRUSLLK_ENG_6554.indd 31 2014-02-25 4:17:05...
- Page 32 Символ Кедендік одақтың 005/2011 Символ «не для пищевой продукции» применяется техникалық регламентіне сәйкес в соответствие с техническим регламентом қолданылады және осы өнімнің қаптамасын Таможенного союза «О безопасности упаковки» екінші рет пайдалануға арналмағанын және 005/2011 и указывает на то, что упаковка данного жоюға...