
Related Manuals for LG GSL545PVYV


Summary of Contents for LG GSL545PVYV
- Page 1 OWNER’S MANUAL REFRIGERATOR Please read this owner's manual thoroughly before operating and keep it handy for reference at all times. www.lg.com P/No.
- Page 2 Electrical Connections (In the UK Only) Important The wires in this mains lead are coloured in accordance with the following code: GREEN AND YELLOW : EARTH BLUE : NEUTRAL BROWN : LIVE This appliance must be earthed. Green and Yellow(Earth) Brown(Live) Fuse Blue(Neutral)
-
Page 4: Important Safety Instructions
Introduction Entry The model and serial numbers are found on the inner case on the back or one side of the refrigerator compartment of this unit. These numbers are unique to this unit and are not available to others. You should record requested information here and retain this guide as a permanent record of your purchase. - Page 5 Introduction Don’t use an It is advised that this appliance should be connected through an independent power extension cord socket to prevent it and other appliances from overloading the circuit and causing a power outage. Accessibility of The appliance should be positioned so that the supply plug is easily accessible for quick Supply Plug disconnection should an accident occur.
- Page 6 Introduction WARNING Keep ventilation openings in the room where the appliance is installed clear of obstruction. Do not use mechanical devices or other means to accelerate the defrosting process, other than those recommended by the manufacturer. Do not damage the refrigerant circuit. Do not use electrical appliances inside the food storage compartments of the appliance, unless they are of the type recommended by the manufacturer.
-
Page 7: Identification Of Parts
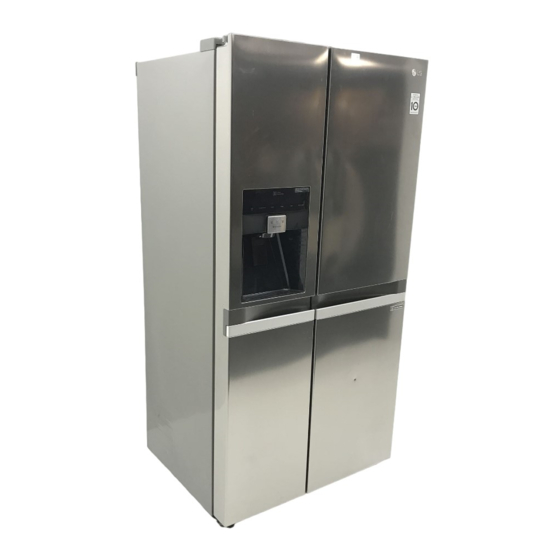
Introduction Identification of parts Model: GSL54*****, GSP54*****, GWL31****, GWP31**** Freezer Refrigerator Compartment Compartment Dairy Corner Extra door rack (Optional) LED Lamp Shelf Automatic Icemaker Wine rack (Optional) Door Rack Shelf Refreshment center LED Lamp (Optional) Shelf Process of freezing occurs the fastest on the marked shelf No Plumbing Ice &... -
Page 8: Where To Install
If the appliance generates a strange noise, a burning or smell or smoke, unplug the power plug immediately and contact your nearest service center. If any dust or water is in refrigerator, pull out power plug and contact your LG Electronics service center. - Page 9 Installation Door removal Electric Shock Hazard Disconnect electrical supply to refrigerator before installing. Failure to do so could result in death or serious injury. If your front door is too narrow to get the refrigerator into the house, remove the refrigerator doors and pass the appliance through laterally.
-
Page 10: Door Replacement
Installation Upper hinge Keeper 2) Remove keeper by rotating it clockwise (|) and then remove the upper hinge by lifting it up (~). 3) Remove the refrigerator compartment door by lifting it up. Lower hinge Pass the Pass the refrigerator laterally through the refrigerator access door as illustrated to the right. -
Page 11: Door Height Adjustment
Installation Door Height adjustment Model: GSL54*****, GSP54*****, GWL31****, GWP31**** - Method 1 is recommended. - Use spanner for freezer. Method 1 (recommended) Open the door and adjust the level by using a nut of height adjusting screw on the lower side of a door with a spanner. Raising Raising Door Up... - Page 12 Installation Door Height adjustment Model: GSL32*****, GSP32*****, GWL27****, GWP27**** If the freezer compartment door is lower than the refrigerator compartment door Height Left height adjustment screw If the freezer compartment door is higher than the refrigerator compartment door Height Right height adjustment screw After levelling The refrigerator doors will close smoothly by adjusting the front side using the...
-
Page 13: Adjusting The Temperatures And Functions
Operation Starting When your refrigerator is first installed, allow it to stabilize at normal operating temperatures for 2-3 hours prior to filling it with fresh or frozen foods. If operation is interrupted, wait 5 minutes before restarting. NOTE Allow the appliance to stand for 2 hours after installation. Adjusting the temperatures and functions Model: GSL54*****, GSP54*****, GWL31****, GWP31**** Function display board... - Page 14 Operation Adjusting the temperatures and functions Model: GSL32*****, GSP32*****, GWL27****, GWP27**** Refreshment Centre button (Optional) Water/Ice output Dispenser push switch Refreshment Centre (Optional) Option Function display board Type-1 Type-2 NOTE Your model may not include every option. The control display is touch operated. Excessive moisture on the display panel may result in its malfunction.
- Page 15 Operation You can adjust temperature of the fridge and freezer compartments Freezer Compartment temperature adjustment Setting temperature Model: GSL54*****, GSP54*****, GWL31****, GWP31**** Model: GSL32*****, GSP32*****, GWL27****, GWP27**** How to adjust Refrigerator Compartment temperature adjustment the temperature in the Setting refrigerator temperature compartment Model: GSL54*****, GSP54*****, GWL31****, GWP31****...
- Page 16 Operation Dispenser use Choose from crushed ice, water, and cubed ice and depress the dispenser switch with (on some model) a glass or other container. Cubed Ice Water Crushed Ice Select cubed ice by Select water by pressing Select crushed ice by pressing the selection the selection button, which pressing the selection...
- Page 17 Operation Precautions To get cold water when using the The dispensed water will not be icy cold, but just cool or cold. If you want colder water, dispenser dispense ice before dispensing water. (on some model) If you have difficulty in replacing the ice storage bin Rotate the rotary gear in 1/4 cycle as shown in the illustration and then push it back.
- Page 18 Operation When ice maker Ice is lumped together does not When ice is lumped together, take the ice lumps out of the ice storage bin, break them operate into small pieces, and place them back into the ice storage bin. smoothly When the ice maker produces small or lumped together ice, the amount of water supplied to the ice maker may need to be adjusted.
- Page 19 Operation How ice/cold Water is cooled while stored in the water tank in the refrigerator compartment, and then water is sent to the dispenser. Ice is made in the automatic ice maker and is then sent to the supplied dispenser as either crushed or cubed ice. NOTE It is normal that at first the water is not very cold.
- Page 20 Operation Lock This button locks the other buttons Locking or Release is repeated whenever the is pressed for more than 3 seconds. If you use the lock button, none of the other buttons will work until you unlock them. LOCK UNLOCK Express Please select this function for fast freezing.
-
Page 21: Refreshment Centre(Applicable To Some Models Only)
Operation Refreshment centre(Applicable to some models only) How to use Open the minibar door. You can access the minibar without opening the refrigerator door, thus saving electricity. Inner lamp is lit in the refrigerator compartment when the minibar door opens, making it easy to identify the contents. Use the minibar Never use the minibar door as a chopping board and take door as a stand... -
Page 22: Dairy Corner
Operation Shelf How to use You can store side dish or refrigerated food on the shelf with sufficient space in between the containers. How to 1. Hold the rear part of the shelf slightly up and pull disassemble it forward. 2. -
Page 23: Deodorizer (Applicable To Some Models Only)
Operation Deodorizer (Applicable to some models only) This system efficiently absorbs strong Fresh Air Filter odours by using an optical catalyst. Deodorizing system This system does not have any affect Vegetable on stored food. compartment Opti Temp (Optional)/ Fresh compartment (Optional) The deodorizer is located behind the vegetable compartment. -
Page 26: Location Of Foods
Suggestion on food storage Location of foods (Refer to identification of parts) Wine holder Store wine. Snack drawer Store small foods such as bread, snacks, etc.. Freezer Store various frozen foods such as meat, fish, ice compartment cream, frozen snacks, etc.. shelf Freezer Store small packed frozen food. -
Page 27: Storing Foods
Suggestion on food storage Storing foods Store fresh food in the refrigerator compartment. How food is frozen and thawed is an CAUTION important factor in maintaining its freshness and flavour. Do not store food which goes bad easily at low temperatures, such as bananas, and melons. -
Page 28: General Information
Care and maintenance General information Vacation time During average length vacations, you will probably find it best to leave the refrigerator in operation. Place freezable items in freezer for longer life. When you plan not to operate, remove all food, disconnect the power cord, clean the interior thoroughly, and leave each door OPEN to prevent odour formation. -
Page 29: Suggestion For Energy Saving
Care and maintenance Suggestion for energy saving Please do not keep the door open for a long time, close door in the shortest time. Storing too much food is not recommended. Sufficient space should be left to ensure proper air circulation. Do not set the temperature of fridge freezer lower than needed. - Page 30 Care and maintenance Cleaning the water dispenser and the water tank. (Applicable to some models only) Frequency of cleaning: every 2 months or when is needed. Procedure: 1. Before cleaning pour out water from the water tank. 2. Mix 0.5 of water with proper amount of dispenser cleaning product (and then pour it into the water tank).
-
Page 31: Smart Diagnosis
If you experience problems with your refrigerator, call to the LG service center. Only use the Smart Diagnosis feature when instructed to do so by the LG call center agent. The transmission sounds that you will hear are normal and sound similar to a fax machine. -
Page 32: Troubleshooting
Care and maintenance Trouble shooting Before calling for service, review this list. It may save you both time and expense.This list includes common occurrences that are not the result of defective workmanship or materials in this appliance. Occurrence Possible cause Solution Running of refrigerator... - Page 33 Care and maintenance Occurrence Possible cause Solution Refrigerator Thermostat is keeping the refrigerator Set refrigerator control. See setting the controls. compressor does at a constant temperature. not run Temperatures are too cold Temperature in the Freezer control is set too cold. Set freezer control to a warmer setting until the freezer is too cold freezer temperature is satisfactory.
- Page 34 Care and maintenance Occurrence Possible cause Solution Sound and noise Louder sound Today’s refrigerators have increased It is normal for sound levels to be higher. levels when storage capacity and maintain more refrigerator is on. even temperatures. Louder sound Refrigerator operates at higher This is normal.
- Page 35 Care and maintenance Occurrence Possible cause Solution Odours in refrigerator Interior needs to be cleaned. Clean interior with sponge,warm water and baking soda. Food with strong odour is in the Cover food completely. refrigerator. Some containers and wrapping Use a different container or brand of wrapping materials produce odours.
- Page 36 Care and maintenance Occurrence Possible cause Solution Dispenser will Ice has melted and frozen around Remove ice storage bin, and thaw and the not dispense ice. auger due to infrequent use, contents. Clean bin, wipe dry and replace in temperature fluctuations and/or proper position.
- Page 37 Care and maintenance DISPOSAL OF YOUR OLD APPLIANCE 1. When this crossed-out wheeled bin symbol is attached to a product it means the product is covered by the European Directive 2002/96/EC. 2. All electrical and electronic products should be disposed of separately from the municipal waste stream via designated collection facilities appointed by the government or the local authorities.