Table of Contents
Advertisement
Quick Links
Advertisement
Table of Contents

Related Manuals for Electrolux EW6F4842AB


Summary of Contents for Electrolux EW6F4842AB
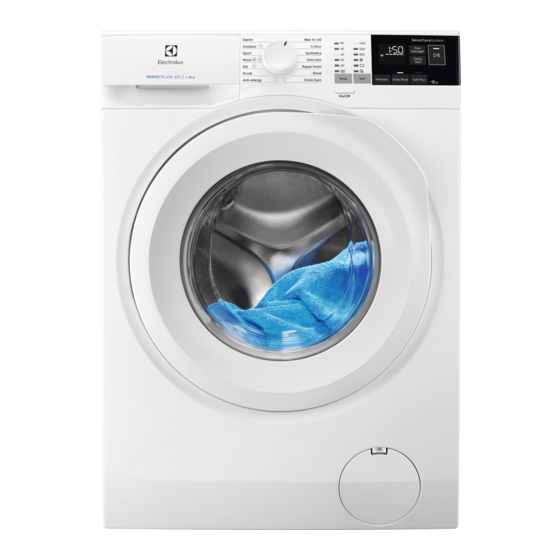
- Page 1 EW6F4842AB Washing Machine User Manual...
-
Page 2: Table Of Contents
16. ACCESSORIES....................33 WE’RE THINKING OF YOU Thank you for purchasing an Electrolux appliance. You’ve chosen a product that brings with it decades of professional experience and innovation. Ingenious and stylish, it has been designed with you in mind. So whenever you use it, you can be safe in the knowledge that you’ll get great results every time. -
Page 3: Safety Information
ENGLISH SAFETY INFORMATION Before the installation and use of the appliance, carefully read the supplied instructions. The manufacturer is not responsible for any injuries or damages that are the result of incorrect installation or usage. Always keep the instructions in a safe and accessible location for future reference. -
Page 4: Safety Instructions
The operating water pressure at the water entry point • from the outlet connection must be between 0.5 bar (0.05 MPa) and 8 bar (0.8 MPa). The ventilation opening in the base must not be • covered by a carpet, mat, or any floor covering. - Page 5 ENGLISH Service Centre to ensure which service centre for the replacement of accessories can be used. the inlet hose. • You can extend the drain hose to 2.2 Electrical connection maximum 400 cm. Contact the service centre for the other drain hose WARNING! and the extension.
-
Page 6: Installation
Waste Electrical and Electronic Equipment (WEEE). 3. INSTALLATION WARNING! Refer to Safety chapters. 3.1 Unpacking 1. Remove the external film. If necessary, 2. Remove the cardboard top and the use a cutter. polystyrene packaging materials. - Page 7 ENGLISH 7. Remove the three transit bolts and pull out 8. Put the plastic caps, that you find in the the plastic spacers. user manual bag, in the holes. We recommend that you WARNING! keep the packaging and Do not put cardboard, wood the transit bolts for any or equivalent materials transport of the appliance.
- Page 8 3. If necessary, loosen the ring nut to set directly into the stand pipe. it in the correct position. 4. Connect the water inlet hose to the cold water tap with 3/4'' thread. 3. Water drainage The drain hose should stay at a height of no less than 60 cm and not more than 100 cm.
-
Page 9: Product Description
ENGLISH 6. Position the hose directly to a built-in To limit vibration we recommend placing drain pipe in the room wall and tighten a waterproof wooden panel, at least 15 it with a clamp. mm thick, under the appliance. It should be screwed to at least 2 floor beams and should extend beyond the front feet. -
Page 10: Control Panel
5. CONTROL PANEL 5.1 Special features • The SensiCare System automatically adjusts the programme duration to the Your new washing machine meets all laundry in the drum to achieve perfect modern requirements for an effective washing results in the minimum treatment of laundry with low water, possible time. - Page 11 ENGLISH 5.3 Display Door locked indicator. Delay start indicator. The digital indicator can show: • Programme duration (e. g. • Delay time (e. g. • Cycle end ( • Warning code (e.g. Time Manager bars level indicator. Drum clean indicator. Child safety lock indicator.
-
Page 12: Dial And Buttons
6. DIAL AND BUTTONS 6.1 Introduction washing programme. Set this option for very delicate fabrics. The rinse The options/functions are phase uses more water for some not available with all washing programmes washing programmes. • Rinse Hold . The related indicator Check the compatibility comes on. - Page 13 ENGLISH 6.9 Time Manager containing sand, dust, mud and other solid particles. With this option you can reduce the These options can increase programme duration depending on the the programme duration. load size and the degree of soiling. When you set a washing programme, the 6.6 Permanent Extra Rinse display shows the default duration and With this option you can add a few rinses...
-
Page 14: Programmes
7. PROGRAMMES 7.1 Programme Chart Programme Maximum Maxi‐ Programme description Default tem‐ spin (Type of load and soil level) perature speed load Temperature Spin range speed range [rpm ] Cotton 1400 rpm 8 kg White cotton and coloured cotton. Normal 40 °C... - Page 15 ENGLISH Programme Maximum Maxi‐ Programme description Default tem‐ spin (Type of load and soil level) perature speed load Temperature Spin range speed range [rpm ] Duvet 800 rpm 3 kg Single synthetic blanket, padded clothes, 40 °C (800 - 800) duvets, down jackets and similar items.
- Page 16 Programme Maximum Maxi‐ Programme description Default tem‐ spin (Type of load and soil level) perature speed load Temperature Spin range speed range [rpm ] 1200 rpm Outdoor Do not use fabric softener and (1200- 30 °C make sure that there is no soften‐...
- Page 17 ENGLISH Programme Maximum Maxi‐ Programme description Default tem‐ spin (Type of load and soil level) perature speed load Temperature Spin range speed range [rpm ] Denim 1200 rpm 3 kg Special programme for Denim clothing 30 °C (1200 - with delicate washing phase to minimize 40 °C - Cold 800) colour fading and marks.
-
Page 18: Settings
Programme ■ ■ ■ ■ Wool Sport ■ ■ ■ ■ ■ ■ ■ ■ ■ ■ ■ Outdoor Denim ■ ■ ■ ■ ■ ■ ■ 7.2 Woolmark Apparel Care - Blue The wool wash cycle of this machine has been approved by The Woolmark Compa‐... -
Page 19: Before First Use
ENGLISH The Child Lock function may not be available for a few seconds after switching the appliance on. 9. BEFORE FIRST USE 1. Make sure that the electrical power is This removes all possible dirt from the available and the water tap is open. drum and the tub. - Page 20 10.3 Filling the detergent and additives Compartment for prewash phase, soak programme or stain remover. Compartment for washing phase. Compartment for liquid additives (fabric conditioner, starch). Maximum level for quantity of liq‐ uid additives. Flap for powder or liquid deter‐...
- Page 21 ENGLISH desired delay time. On the display the indicator shows 2. Touch the Start/Pause button. The appliance door locks and starts the countdown of the delay start. The display shows the indicator When the countdown is completed, the programme starts automatically. Cancelling the delay start after the countdown has started Make sure that the flap does not cause a...
- Page 22 10.11 Opening the door - 2. After about 15-20 minutes the Time Manager bars disappear and new Adding garments cycle duration is displayed. The appliance automatically adjusts If the temperature and level the programme duration to the load of the water in the drum are...
-
Page 23: Hints And Tips
ENGLISH 10.13 Draining water out after 4. Press the On/Off button for a few end of cycle seconds to deactivate the appliance. 10.14 Stand-by option If you have chosen a programme or an option that does not empty out the water The Stand-by function automatically of the last rinse, the programme is deactivates the appliance to reduce the... -
Page 24: Care And Cleaning
• Follow the instructions that you find open the door (refer to "Daily on packaging of the detergents or Use" chapter); other treatments without exceeding b. manually redistribute the load so the indicated maximum level ( that the items are spaced evenly •... - Page 25 ENGLISH 12.2 Descaling Always follow the instructions that you find on If the water hardness in your the packaging of the area is high or moderate, we product. recommend that you use a water descaling product for For a thorough clean: washing machines.
- Page 26 4. Insert the detergent drawer into the guide rails and close it. Run the rinsing programme without any clothes in the drum. 3. Make sure that all detergent residue is removed from the upper and lower part of the recess. Use a small brush to clean the recess.
- Page 27 ENGLISH Proceed as follows to clean the pump: 180˚ WARNING! Make sure that the impeller of the pump can rotate. If it does not rotate, contact the Authorised Service Centre. Make sure also that you tighten the filter correctly to prevent leakages.
-
Page 28: Troubleshooting
12.8 Cleaning the inlet hose and the valve filter 45° 20° 12.9 Emergency drain 3. Put the two ends of the inlet hose in a container and let the water flow out If the appliance cannot drain the water, of the hose. - Page 29 ENGLISH Pause button may flash • - The mains supply is unstable. continuously: Wait until the mains supply is stable. • - No communication between • - The appliance does not fill electronic elements of the appliance. with water properly. Start the Switch it off and switch on again.
- Page 30 Problem Possible solution • Make sure that the water tap is open. • Make sure that the pressure of the water supply is not too low. For this information, contact your local water authority. • Make sure that the water tap is not clogged.
-
Page 31: Consumption Values
ENGLISH Problem Possible solution • Make sure the levelling of the appliance is correct. Refer to "Installation instruction". The appliance makes • Make sure that the packaging and/or the transit bolts an unusual noise and are removed. Refer to "Installation instruction". vibrates. -
Page 32: Technical Data
Programmes Load Energy Water Approxi‐ Remain‐ (kg) con‐ con‐ mate pro‐ ing mois‐ sumption sumption gramme ture (%) (kWh) (litre) duration (minutes) Cotton 60°C 1,35 Cotton 40°C 0,87 Synthetics 40°C 0,60 Delicates 40°C 0,55 Wool 30°C 0,45 Standard cotton programmes 0,96 Standard 60°C cotton... -
Page 33: Accessories
To raise your appliance and make using the correct stacking kit loading and unloading laundry easier. manufactured and approved by The drawer can be used for laundry ELECTROLUX. storage e.g.: towels, cleaning products and more. Verify the compatible stacking kit by checking the Read carefully the instructions supplied depth of your appliances. - Page 34 16.4 Available in www.electrolux.com/shop or from authorised dealer Only appropriate accessories approved by ELECTROLUX ensure the safety standards of the appliance. If unapproved parts are used, any claims will be invalidated. 17. ENVIRONMENTAL CONCERNS appliances marked with the symbol Recycle materials with the symbol with the household waste.
- Page 35 ENGLISH...
- Page 36 www.electrolux.com/shop...