
Related Manuals for KitchenAid KSM15 Series


Summary of Contents for KitchenAid KSM15 Series
- Page 1 Manual de Usuario Batidora KSM15 Series KSM150PS Series KSM175PS Series KSM180RP Series KSM180RC Series KSM185PS Series W11256121A.indd 1 14/06/2018 15:29:21...
- Page 2 W11256121A.indd 2 14/06/2018 15:29:21...
-
Page 3: Table Of Contents
TABLE OF CONTENTS PARTS AND FEATURES ..................4 Parts and accessories ..................4 STAND MIXER SAFETY ..................5 Important safeguards ..................5 Electrical requirements ...................8 Electrical equipment waste disposal ..............8 USING THE STAND MIXER ...................9 Speed control guide ..................9 Accessory guide ...................10 Attaching/removing the bowl...............10 Lifting/lowering the motor head ..............11 Attaching/removing the flat beater, Flex Edge beater*, wire whip, or dough hook ................11... -
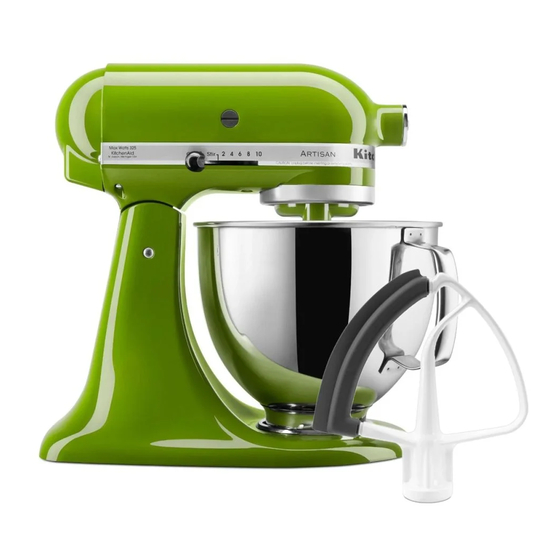
Page 4: Parts And Features
PARTS AND FEATURES PARTS AND ACCESSORIES Attachment hub Attachment knob Pouring shield* Motor head Motor head locking lever (not shown) Speed control lever Beater shaft 2.8 L stainless steel bowl* Beater height adjustment screw (not shown) Dough hook Bowl** Bowl clamping plate Flex Edge beater* Wire whip Flat beater... -
Page 5: Stand Mixer Safety
STAND MIXER SAFETY IMPORTANT SAFEGUARDS When using electrical appliances, basic safety precautions should always be followed, including the following: 1. Read all instructions. Misuse of appliance may result in personal injury. 2. This appliance is not intended for use by persons, including children, with reduced physical, sensory, or mental capabilities, or lack of experience and knowledge, unless they have been given supervision... - Page 6 STAND MIXER SAFETY 3. Children should be supervised to ensure that they do not play with the appliance. 4. If the supply cord is damaged, it must be replaced by the manufacturer, its service agent, or similarly qualified persons in order to avoid a hazard. 5.
- Page 7 10. Do not let the cord hang over edge of table or counter. 11. The use of attachments not recommended or sold by KitchenAid may cause fire, electric shock, or injury. 12. Do not use the Stand Mixer outdoors. 13. Remove flat beater, wire whip, or dough hook from Stand Mixer before washing.
-
Page 8: Electrical Requirements
STAND MIXER SAFETY ELECTRICAL REQUIREMENTS Voltage: 220-240 V~ Frequency: 50-60 Hz Wattage: 300 W NOTE: To reduce the risk of electrical shock, this plug will fit in an outlet only one way. If the plug does not fit in the outlet, contact a qualified electrician. -
Page 9: Using The Stand Mixer
USING THE STAND MIXER SPEED CONTROL GUIDE SPEED ACTION ATTACHMENT DESCRIPTION STIR For slow stirring, combining, mashing, starting all mixing procedures. Use to add flour and dry ingredients to batter, and to add liquids to dry ingredients. Do not use Speed 1 to mix or knead yeast doughs. -
Page 10: Accessory Guide
USING THE STAND MIXER ACCESSORY GUIDE ACCESSORY USES Flat beater and Cakes, creamed frostings, Flex Edge beater* candies, cookies, pie pastry, for normal to heavy biscuits, meat loaf, mixtures: mashed potatoes Wire whip for Eggs, egg whites, heavy cream, mixtures that need boiled frostings, sponge cakes, air incorporated: mayonnaise, some candies... -
Page 11: Lifting/Lowering The Motor Head
USING THE STAND MIXER LIFTING/LOWERING THE MOTOR HEAD To lower motor head: Push the To lift motor head: Push the locking locking lever to unlock and gently lever to the unlock position and lift bring the head down. The locking the head. - Page 12 USING THE STAND MIXER Slip accessory onto beater shaft and Hold the locking lever in the unlock press upward as far as possible. Then, position and tilt motor head back. turn accessory to the right, hooking accessory over the pin on the shaft. To remove accessory: Repeat steps 1 and 2.
-
Page 13: Beater To Bowl Clearance
USING THE STAND MIXER BEATER TO BOWL CLEARANCE Your Stand Mixer is adjusted at the factory so the flat beater just clears the bottom of the bowl. If for any reason the flat beater hits the bottom of the bowl or is too far away from the bowl, you can correct the clearance easily. -
Page 14: Using The Pouring Shield
USING THE STAND MIXER To remove pouring shield: Lift the front of the pouring shield Turn speed control to “0”. clear of the bowl rim and pull forward. Unplug Stand Mixer. Remove attachment and bowl. USING THE POURING SHIELD* Use the pouring shield to avoid having ingredients splashing out of the bowl when mixing, as well as to easily pour ingredients into the bowl while mixing. -
Page 15: Operating The Speed Control
“Speed control guide” chart. sufficient. OPTIONAL ATTACHMENTS KitchenAid offers a wide range of optional attachments such as food grinders or pasta makers. They may be attached to the Stand Mixer attachment power shaft, as shown here. Loosen attachment knob by turning To attach: Turn speed control it counterclockwise. - Page 16 USING THE STAND MIXER Insert attachment shaft housing into attachment hub, making certain that attachment power shaft fits into square attachment hub socket. It may Tighten attachment knob by turning be necessary to rotate attachment clockwise until attachment is back and forth. When attachment completely secured to Stand Mixer.
-
Page 17: Tips For Great Results
200 mL (3/4 cup) GRADUALLY to 8 Whipping stages Watch cream closely during whipping. Because your KitchenAid Stand Mixer whips so quickly, there are just a few seconds between whipping stages. TIPS FOR GREAT RESULTS | 17 W11256121A.indd 17... -
Page 18: Mixing Tips
TIPS FOR GREAT RESULTS MIXING TIPS Mixing time Cake mixes Your KitchenAid Stand Mixer will mix When preparing packaged cake mixes, use faster and more thoroughly than most Speed 4 for medium speed and Speed 6 other electric mixers. Therefore, the for high speed. -
Page 19: Care And Cleaning
CARE AND CLEANING Electrical Shock Hazard Always be sure to unplug Stand Mixer Plug into an earthed outlet. before cleaning. Wipe Stand Mixer Do not remove earth prong. with a soft, damp cloth. Do not use household/commercial cleaners. Wipe Do not use an adapter. off beater shaft frequently, removing any residue that may accumulate. -
Page 20: Troubleshooting
TROUBLESHOOTING Please read the following before calling your service centre. 1. The Stand Mixer may warm up during use. Under heavy loads with extended mixing time periods, you may not be able to comfortably touch the top of the unit. This is normal. 2. - Page 21 ©2018 All rights reserved. KITCHENAID and the design of the stand mixer are trademarks in the U.S. and elsewhere. ©2018 Todos los derechos reservados. KITCHENAID y el diseño de la batidora son marcas comerciales en Estados Unidos y otros lugares.