Table of Contents
Advertisement
Quick Links
Advertisement
Table of Contents

Related Manuals for Lenovo AX201


Summary of Contents for Lenovo AX201
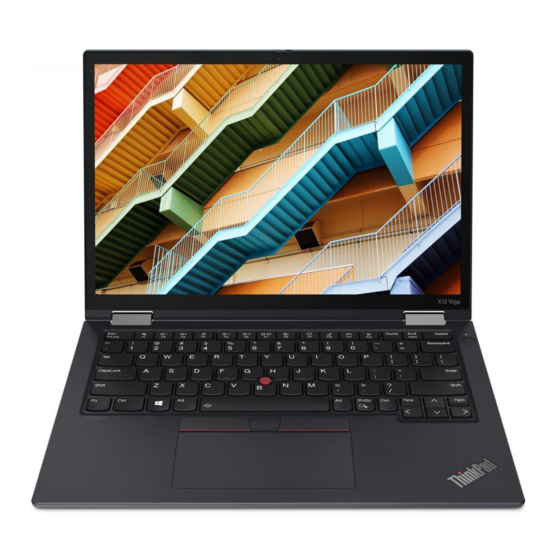
- Page 1 ThinkPad X13 Yoga Gen 2 User Guide...
- Page 2 Generic Safety and Compliance Notices First Edition (April 2021) © Copyright Lenovo 2021. LIMITED AND RESTRICTED RIGHTS NOTICE: If data or software is delivered pursuant to a General Services Administration “GSA” contract, use, reproduction, or disclosure is subject to restrictions set forth in Contract No. GS-...
-
Page 3: Table Of Contents
CRU list ....Lenovo apps ....Disable Fast Startup and the built-in battery .. - Page 4 Appendix B. Compliance Appendix C. Notices and information ....51 trademarks ....55 ThinkPad X13 Yoga Gen 2 User Guide...
-
Page 5: Discover Your Lenovo Notebook
Discover your Lenovo notebook Thank you for choosing a Lenovo notebook! We are dedicated to delivering the best solution to you. Before starting your tour, please read the following information: • Illustrations in this documentation might look different from your product. - Page 6 ThinkPad X13 Yoga Gen 2 User Guide...
-
Page 7: Chapter 1. Meet Your Computer
Chapter 1. Meet your computer Front view ThinkShutter (Camera cover) IR Camera*/Camera* Microphone Touch screen Power button with or without fingerprint ® TrackPoint pointing stick reader Trackpad NFC mark* TrackPoint buttons © Copyright Lenovo 2021... - Page 8 * for selected models ThinkShutter (Camera cover) Slide ThinkShutter to cover or uncover the camera lens. It is designed to protect your privacy. Related topics • “Log in with your face ID (for selected models)” on page 24 • “Use the touch screen ” on page 12 •...
-
Page 9: Side View
• “Connect to a cellular network (for selected models)” on page 7 • “Lock the computer” on page 23 • “Use a smart card (for selected models)” on page 21 • “Use Lenovo Integrated Pen (for selected models)” on page 15 Chapter 1 Meet your computer... -
Page 10: Bottom View
3. Connect your computer to ac power and then turn on your computer. Specifications For detailed specifications of your computer, go to https://psref.lenovo.com. USB specifications Note: Depending on the model, some USB connectors might not be available on your computer. - Page 11 • Connect to USB-C accessories to help expand your computer • USB-C (3.2 Gen 1) connector functionality. To purchase USB-C accessories, go to https:// • USB-C (3.2 Gen 2) connector www.lenovo.com/accessories • Thunderbolt 3 connector (USB-C) • Thunderbolt 4 connector (USB-C)
- Page 12 ThinkPad X13 Yoga Gen 2 User Guide...
-
Page 13: Chapter 2. Get Started With Your Computer
Connect to the wired Ethernet To connect your computer to a local network, you need a Lenovo USB-C to Ethernet Adapter. Lenovo USB- C to Ethernet Adapter is available as an option and shipped with some computer models. You can purchase one from Lenovo at https://www.lenovo.com/accessories. -
Page 14: Turn On The Airplane Mode
Note: The cellular service is provided by authorized mobile service carriers in some countries or regions. You must have a cellular plan from a service carrier to connect to the cellular network. To establish a cellular connection: 1. Turn off the computer. 2. - Page 15 Darken display Brighten display Manage external displays Enable / disable wireless Open / collapse notification center Answer incoming calls This function only works with some apps, such as Skype for Business 2016 and Microsoft Teams 1.0. By default, the function works with Skype for Business 2016. You can change the default setting on the Vantage app.
-
Page 16: Use The Trackpoint Pointing Device
Go to beginning Go to end Use the TrackPoint pointing device The TrackPoint pointing device enables you to perform all the functions of a traditional mouse, such as pointing, clicking, and scrolling. Use the TrackPoint pointing device TrackPoint pointing stick Use your finger to apply pressure to the pointing-stick nonslip cap in any direction parallel to the keyboard. -
Page 17: Use The Trackpad
Replace the pointing-stick nonslip cap Note: Ensure that the new cap has grooves Use the trackpad You can use the trackpad to perform all the pointing, clicking, and scrolling functions of a traditional mouse. Use the trackpad Right-click zone Left-click zone Chapter 2 Get started with your computer... -
Page 18: Use The Touch Screen
Use the touch gestures Tap once to select or open an item. Tap twice quickly to display a shortcut menu. Two-finger zoom in or zoom out. Scroll through items. Open the task view to see all open windows. Show the desktop. Notes: •... - Page 19 Tap once to single click Tap twice quickly to double-click Tap and hold to right-click Slide to scroll through items Zoom out Zoom in Swipe from the right: open action center Swipe from the left: view all open windows Drag Swipe downwards shortly: show title bar Swipe downwards: close the current app Chapter 2...
-
Page 20: Connect To An External Display
Maintenance tips: • Turn off the computer before cleaning the touch screen. • Use a dry, soft, and lint-free cloth or a piece of absorbent cotton to remove fingerprints or dust from the touch screen. Do not apply solvents to the cloth. •... -
Page 21: Get To Know Yoga Modes
Otherwise the computer display or hinges might get damaged. Notebook mode Stand mode Tent mode Tablet mode Use Lenovo Integrated Pen (for selected models) The Lenovo Integrated Pen enables a more precise and easier way of writing and sketching. Chapter 2 Get started with your computer... - Page 22 Eraser button Click button Lenovo Integrated Pen is not waterproof. Keep the pen away from water and excessive moisture. To purchase Lenovo Integrated Pen, go to https://www.lenovo.com/accessories. Charge Lenovo Integrated Pen 1. Ensure that your computer is on or in sleep mode.
-
Page 23: Chapter 3. Explore Your Computer
The description of features might be different from that on your actual user interface. Lenovo Quick Clean Depending on the model, your computer might support the Lenovo Quick Clean feature. The preinstalled Lenovo Quick Clean enables you to temporarily disable the keyboard, screen, trackpad, and TrackPoint pointing device for cleaning. -
Page 24: Manage Power
Manual mode • Quiet mode: the least fan noise • Balanced mode: balanced performance and fan noise • Performance mode: the highest performance and normal fan noise on ac power on battery power Do the following to select the preferred mode: 1. -
Page 25: Charge The Computer
Use P-to-P 2.0 (Peer to Peer 2.0) charging function Both Thunderbolt 4 connectors (USB-C) on the computer feature the Lenovo-unique P-to-P 2.0 charging function. To use the function, ensure that Always On USB and Charge in Battery Mode are enabled in UEFI BIOS of your computers, so that the function works even when the computers are off or in hibernation mode. -
Page 26: Change The Power Settings
Change the power settings ® For ENERGY STAR compliant computers, the following power plan takes effect when your computer has been idle for a specified duration: • Turn off the display: After 10 minutes • Put the computer to sleep: After 10 minutes To reset the power plan: 1. -
Page 27: Use A Smart Card (For Selected Models)
By using NFC, you can simply tap and connect your computer and another NFC-enabled device over a few centimeters or inches. To pair with an NFC card or smartphone: Note: Ensure that the NFC card is in NFC Data Exchange Format (NDEF), otherwise the card cannot be detected. -
Page 28: Accessories
Purchase accessories Lenovo has a number of hardware accessories and upgrades to help expand the functionalities of your computer. Options include memory modules, storage devices, network cards, port replicators or docking stations, batteries, power adapters, keyboards, mice, and more. -
Page 29: Chapter 4. Secure Your Computer And Information
Note: The slot supports cable locks that conform to the Kensington NanoSaver lock standards using Cleat™ locking technology. You are responsible for evaluating, selecting, and implementing the locking device and security feature. Lenovo is not responsible for the locking device and security feature. You can purchase the cable locks at https://smartfind.lenovo.com Log in with your fingerprint (for selected models) Enroll your fingerprints and unlock computer by scanning your fingerprints on the fingerprint reader. -
Page 30: Log In With Your Face Id (For Selected Models)
Log in with your face ID (for selected models) Create your face ID and unlock your computer by scanning your face: 1. Open the Start menu and click Settings ➙ Accounts ➙ Sign-in options. 2. Locate the Password section and click Add to create a password. 3. -
Page 31: Detect Human Presence (For Selected Models)
• Your computer uses a human presence sensor to detect your presence and the IR camera to recognize your face. Lenovo does not collect any personal data. For some countries or regions, the human presence sensor is disabled according to local regulations. -
Page 32: Uefi Bios Passwords
PLP function enables your computer data to be saved timely. However, there is no guarantee that all data is saved in any situation. To check the type of your M.2 solid-state drive: 1. Restart the computer. When the logo screen is displayed, press F10 to enter the Lenovo diagnostics window. -
Page 33: Set, Change, Or Remove A Password
5. In the Changes have been saved window, press Enter. 6. Press F10 to save changes and exit the UEFI BIOS menu. • If you have not set a supervisor password or a system management password, contact a Lenovo authorized service provider to have the power-on password removed. -
Page 34: Associate Your Fingerprints With Passwords (For Selected Models)
5. In the Changes have been saved window, press Enter. 6. Press F10 to save changes and exit the UEFI BIOS menu. • If you have not set a supervisor password, contact a Lenovo authorized service provider to have the system management password removed. -
Page 35: Chapter 5. Configure Advanced Settings
2. Select the device that you want the computer to start from and press Enter. Update UEFI BIOS When you install a new program, device driver, or hardware component, you might need to update UEFI BIOS. © Copyright Lenovo 2021... -
Page 36: Recovery
• Go to and select the entry for your computer. Then, follow the on-screen https://pcsupport.lenovo.com instructions to download and install the latest UEFI BIOS update package. To know more about UEFI BIOS, visit Knowledge Base of your computer at https://pcsupport.lenovo.com... -
Page 37: Create And Use A Recovery Usb Device
Windows recovery programs are damaged. If you did not create a recovery USB drive as a precautionary measure, you can contact Lenovo Customer Support Center and purchase one from Lenovo. For a list of the Lenovo Support phone numbers for your country or region, go to: https://pcsupport.lenovo.com/supportphonelist Create a recovery USB drive Attention: The creation process deletes anything stored on the USB drive. - Page 38 • Go to and select the entry for your computer. Then, follow the on-screen https://pcsupport.lenovo.com instructions to download and install necessary drivers and software. ThinkPad X13 Yoga Gen 2 User Guide...
-
Page 39: Chapter 6. Cru Replacement
If you intend on installing a CRU, Lenovo will ship the CRU to you. CRU information and replacement instructions are shipped with your product and are available from Lenovo at any time upon request. You might be required to return the defective part that is replaced by the CRU. -
Page 40: Replace A Cru
To disable the built-in battery: 1. Restart your computer. When the logo screen is displayed, immediately press F1 to enter the UEFI BIOS menu. 2. Select Config ➙ Power. The Power submenu is displayed. 3. Select Disable Built-in Battery and press Enter. 4. -
Page 41: Wireless Wan Card (For Selected Models)
The following information is only for the computer with user-installable modules. Ensure that you use only a Lenovo-authorized wireless module specifically tested for this computer model. Otherwise, the computer will generate an error-code beep sequence when you turn on the computer. -
Page 42: M.2 2280 Solid-State Drive
• If your computer is installed with a hybrid solid-state drive (with Intel Optane memory), go to https:// to know the details on how to replace it. support.lenovo.com/docs/tg_ssd The M.2 solid-state drive is sensitive. Inappropriate handling might cause damage and permanent loss of data. - Page 43 Removal procedure Type one: Type two: Chapter 6 CRU replacement...
- Page 44 ThinkPad X13 Yoga Gen 2 User Guide...
-
Page 45: Chapter 7. Help And Support
• From the Vantage app. See “Install Windows 10 and drivers” on page 31 and Where can I get the latest device “Update UEFI BIOS” on page 29. drivers and UEFI BIOS? • Download from Lenovo Support Web site at https://pcsupport.lenovo.com © Copyright Lenovo 2021... -
Page 46: Error Messages
Error messages If you see a message that is not included in the following table, record the error message first, then shut down the computer and call Lenovo for help. See “Lenovo Customer Support Center” on page 44. Message Solution The computer turned off because the battery power is low. -
Page 47: Beep Errors
Beep errors Lenovo SmartBeep technology enables you to decode beep errors with your smartphone when a black screen occurs with beeps from your computer. To decode the beep error with Lenovo SmartBeep technology: 1. Go to or scan the following QR Code. -
Page 48: Self-Help Resources
• Setup Guide want. • This User Guide • Regulatory Notice Lenovo Support Web site with the latest support information of the following: • Drivers and software • Diagnostic solutions https://pcsupport.lenovo.com • Product and service warranty •... -
Page 49: Call Lenovo
In some cases, an earlier Windows version might be preinstalled under the terms of the Windows 10 Pro license downgrade rights. Call Lenovo If you have tried to correct the problem yourself and still need help, you can call Lenovo Customer Support Center. Before you contact Lenovo Prepare the following before you contact Lenovo: 1. -
Page 50: Lenovo Customer Support Center
• Lenovo hardware repair - If the problem is determined to be caused by Lenovo hardware under warranty, trained service personnel are available to provide the applicable level of service. -
Page 51: Purchase Additional Services
• https://www.lenovo.com/warranty/llw_02 • https://pcsupport.lenovo.com/warrantylookup Purchase additional services During and after the warranty period, you can purchase additional services from Lenovo at https:// www.lenovo.com/services Service availability and service name might vary by country or region. Chapter 7 Help and support... - Page 52 ThinkPad X13 Yoga Gen 2 User Guide...
-
Page 53: Appendix A. Accessibility And Ergonomic Information
This chapter provides information about accessibility and ergonomics. Accessibility information Lenovo is committed to providing users who have hearing, vision, and mobility limitations with greater access to information and technology. This section provides information about the ways these users can get the most out of their computer experience. - Page 54 keyboard with all the standard keys. You can select keys using the mouse or another pointing device, or you can tap to select the keys if your computer supports multi-touch screen. • High Contrast High Contrast is a feature that heightens the color contrast of some text and images on your screen. As a result, those items are more distinct and easier to identify.
- Page 55 Your computer provides industry-standard connectors that enable you to connect assistive devices. Documentation in accessible formats Lenovo provides electronic documentation in accessible formats, such as properly tagged PDF files or HyperText Markup Language (HTML) files. Lenovo electronic documentation is developed to ensure that visually impaired users can read the documentation through a screen reader.
- Page 56 Many product solutions are available to help you modify and expand your computer to best suit your needs. You can find some of these options at https://www.lenovo.com/accessories Explore your options for docking solutions and external products that provide the adjustability and features that you want.
- Page 57 Machine types: 20W8 and 20W9 The latest compliance information is available at: https://www.lenovo.com/compliance * for India only Locate the UltraConnect wireless antennas Your computer has an UltraConnect™ wireless antenna system. You can enable wireless communication wherever you are. © Copyright Lenovo 2021...
- Page 58 The following illustration shows the antenna locations on your computer: Wireless LAN antenna (main) Wireless LAN antenna (auxiliary) Wireless WAN antenna (auxiliary, for selected models) Wireless WAN antenna (main, for selected models) Federal Communications Commission (FCC) Supplier’s Declaration of Conformity The following information refers to ThinkPad X13 Yoga Gen 2, machine types: 20W8 and 20W9.
- Page 59 • Connect the equipment into an outlet on a circuit different from that to which the receiver is connected. • Consult an authorized dealer or service representative for help. Lenovo is not responsible for any radio or television interference caused by using other than recommended cables and connectors or by unauthorized changes or modifications to this equipment. Unauthorized changes or modifications could void the user’s authority to operate the equipment.
- Page 60 Temperature • Operating: 5°C to 35°C (41°F to 95°F) • Storage and transportation in original shipping packaging: -20°C to 60°C (-4°F to 140°F) • Storage without packaging: 5°C to 43°C (41°F to 109°F) Note: When you charge the battery, its temperature must be no lower than 10°C (50°F). Relative humidity •...
- Page 61 Lenovo representative for information on the products and services currently available in your area. Any reference to a Lenovo product, program, or service is not intended to state or imply that only that Lenovo product, program, or service may be used. Any functionally equivalent product, program, or service that does not infringe any Lenovo intellectual property right may be used instead.
- Page 62 Furthermore, some measurements may have been estimated through extrapolation. Actual results may vary. Users of this document should verify the applicable data for their specific environment. This document is copyrighted by Lenovo and is not covered by any open source license, including any ® Linux agreement(s) which may accompany software included with this product.