
Related Manuals for Motorola i740

Summary of Contents for Motorola i740
- Page 1 Motorola iDEN Digital Multi-service Data-capable Phone i 740 Phone User’s Guide FIRST DRAFT @NNTN6014A@...
- Page 3 2000 series. For more information on SIM card compatibility, go to www.motorola.com/iden/support. Defects or damage to your Motorola phone that result from the use of non-Motorola branded or certified Accessories, including but not limited to replacement housings and or other peripheral accessories, are excluded from warranty coverage.
-
Page 5: Table Of Contents
Contents Using Speakerphone........20 Using Mute ............21 Making Emergency Phone Calls .....21 Getting Started........... 1 Battery ...............3 TM ............22 MOTOtalk Activating Service..........6 Channels and Codes........23 Powering On and Off.........6 Private MOTOtalk Calls........25 Enabling Over-the-Air Security......6 Emergency Calls Using MOTOtalk ....26 Phone Programming .........7 Setup Options ..........26 Finding Your Phone Number......7... - Page 6 Editing Entries ..........36 Using Your Phone as a Modem ......46 Deleting Entries ..........36 Making TTY Calls ..........47 Checking Capacity ..........36 Group Calls and Selective Dynamic Group Creating Pauses and Waits......36 Calls ............49 International Numbers ........37 Group Calls .............49 Accessing Contacts with GSM Phones ...37 Emergency Group Calls ........50 Selective Dynamic Group (SDG) Calls ...52 Call Forwarding........
- Page 7 Using Numeric Mode........63 Editing Events ..........75 Using Symbols Mode ........63 Deleting Events ..........75 Receiving Reminders ........76 Messages ..........64 Making Calls From Datebook ......77 Message Notifications ........64 Customizing Datebook Setup......77 Message Center ..........65 Java Applications ........79 Voice Mail Messages ....... 66 Installing Applications........79 Receiving a Message ........66 Running Applications ........79...
- Page 8 Updating Satellite Almanac Data.....89 Temporary Profiles ........103 Setting Privacy Options ........89 Creating Profiles..........104 Using GPS with Map Software ......91 Editing Profiles ..........104 Deleting Profiles ..........104 Voice Records.......... 93 Setting Call Filtering ........105 Creating Voice Records ........93 Playing Voice Records ........93 Shortcuts..........107 Labeling Voice Records ........93 Creating a Shortcut ........107...
- Page 9 Operational Warnings........117 Operational Cautions........118 Accessory Safety Information......119 MOTOROLA LIMITED WARRANTY ..121 Limited Warranty Motorola Communication Products (International) ........125 Patent and Trademark Information ..129 Index ............130 Driving Safety Tips ........ 136...
- Page 10 Responsible Party Name: Motorola, Inc. communications. However, there is no guarantee that interference will not occur Address: 8000 West Sunrise Boulevard in a particular installation.
-
Page 13: Getting Started
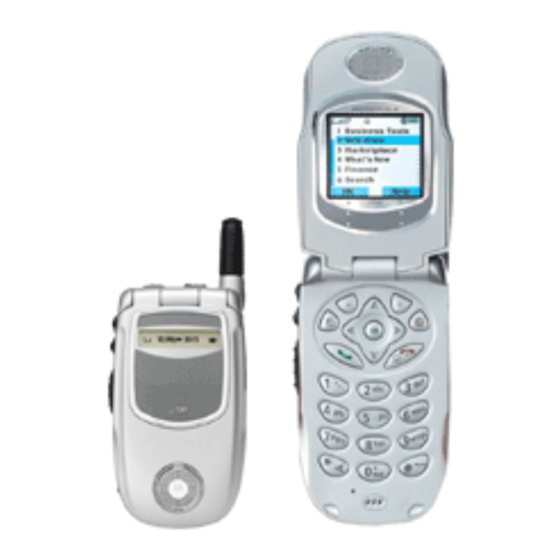
Getting Started retractable ear piece antenna Emergency Group call button volume controls Push-To-Talk (PTT) button audio jack speaker (in back) light sensor microphone accessory connector... - Page 14 Getting Started Power button. Acts like s when the flip is closed; turns speaker on; used with voice names and Navigation key — press the arrows to voice records. scroll through menus and lists. Press and hold for 3 seconds to make an Emergency Group Call.
-
Page 15: Battery
Battery Battery 3 Allow the battery door to pop up, slide it forward, and remove it from the back of your phone. Removing the Battery Door 1 Make sure the phone is powered off. See “Powering On and Off” on page 6. 2 Slide the release button back until it releases the battery door. - Page 16 Getting Started 3 Replace the battery door and press it gently until 3 Plug the other end of the charger into the you hear a click. accessory connector. Charging the Battery Your phone comes with a rapid travel charger. Charger Attached appears on the full-sized display.
- Page 17 Battery Use and Maintenance High 2 hours 4 hours Capacity • The Motorola iDEN Approved Lithium Ion Lithium Ion chargers provide optimum performance. Other chargers may not fully charge the iDEN Lithium For best results, charge the batteries within the Ion battery or may yield a reduced number of temperature range of 50°F to 104°F (10°C to...
-
Page 18: Activating Service
Getting Started Activating Service As your phone connects to the network, you will see a welcome message and a connecting The first time you power on your phone, you must message. When the idle screen appears, the be in your local calling area. This activates your phone is ready to use. -
Page 19: Phone Programming
Phone Programming Note: If you press A under Later, you will be 5 Press e to return to the idle screen. prompted to enable security each time Finding Your Phone Number you power on your phone until you press A under Ok. My Info lets you view your phone number, Private 2 Press A under Ok. -
Page 20: Phone Basics
Getting Started • Circuit Data— Your circuit data number is the The screen shown is the idle screen. The text that number you use if you want to use your phone appears on your idle screen depends on your to transfer circuit data. See “Using Your service provider. - Page 21 Phone Basics 3 Scroll to Security. Main Menu 4 Press O to see the Security screen. All your phone’s features can be accessed through the main menu. You can set the main menu to Quick Access to Main Menu Items appear as a list or as large icons.
- Page 22 Getting Started Status Icons Messages Access messages. See page 53. Status icons appear at the top of the display. Some appear at all times. Others appear only when your Call Forward Set call forwarding phone is engaged in certain activities or when you options.
-
Page 23: Locating Your Sim Card
Locating Your SIM Card Active Phone Line — 1 indicates TTY — You are ready to use your phone line 1 is ready to make calls; phone to make calls using a 2 indicates phone line 2 is ready to teletypewriter device. -
Page 24: Sim Card Security
Getting Started If your SIM card is not in the SIM card holder, it When you receive your phone, the SIM PIN is may be in the box your phone came in, attached to 0000. Change your PIN to prevent fraudulent use a piece of white plastic about the size of a credit of the SIM card. - Page 25 SIM Card Security Turning the PIN Requirement On and Important: If you unsuccessfully enter the PUK code 10 times, your SIM card is permanently blocked and must be When the SIM PIN requirement is on, you are replaced. If this happens, all data is prompted to enter your PIN each time you turn on lost.
- Page 26 Getting Started Inserting and Removing Your SIM Inserting Your SIM Card Card 1 With your phone powered off, remove the battery door and battery. Important: Do not touch the gold-colored areas of 2 Hold your SIM card as shown. your SIM card. Switching SIM Cards Moving your SIM card from one phone to another moves all your Contacts information, but erases...
-
Page 27: Antenna
Accessories To order accessories, log on to our Web site at www.motorola.com/store/iden or contact your Note: Protect your SIM card as you would any Motorola Authorized Retailer. delicate object. Store it carefully. For More Information... -
Page 28: Making Calls
Making Calls Making Calls With the Flip Closed 1 Select the number you want to call from the recent calls list and press t (see “From the Your i 740 phone makes two types of calls: digital cellular phone calls and Private calls. With Private Recent Calls List”... -
Page 29: Receiving Calls
Receiving Calls Receiving Calls Ending If the flip is closed, press .. -or- Phone Calls Press e. -or- When you receive a phone call, your phone rings, Close the flip. vibrates, or lights up its backlight. Private Calls Answering If the flip is closed, press t. -or- When you receive a Private call, your phone emits a chirping sound or vibrates. - Page 30 Making Calls You can call the number displayed by pressing t • Use a TTY device — see “Making TTY Calls” on page 47 on the top of your phone. From the Keypad From Contacts To enter the number you want to call, press the If you have numbers stored in Contacts, you can numbers on the keypad.
- Page 31 Ways to Enter Calls • If the Contacts type displayed is not a phone Using a Voice Name number and you have more than one phone If you have created a voice name in Contacts for number stored in the Contacts entry, your phone the number you want to call, say the voice name prompts you to select the phone number you into your phone to enter the number.
-
Page 32: Missed Phone Calls
Making Calls Speed Dial If you want to view the missed call on the recent calls list, press A under View. 1 From the idle screen, use the keypad to enter the Speed Dial number assigned to the phone With the Flip Closed number you want to call. -
Page 33: Using Mute
Using Mute Using Mute response center has the equipment to process location information. See “GPS Enabled” on page Muting calls lets you listen to incoming sound 84, and particularly “IMPORTANT: Things to Keep without transmitting sound. Mute is available in Mind” on page 84 and “Making an Emergency whenever you are on an active call. -
Page 34: Mototalk Tm
MOTOtalk MOTOtalk • Call forwarding • Messages MOTOtalk allows direct two-way phone-to-phone • Call Timers communications between two or more phones • Call alerts equipped for MOTOtalk. You can make and receive MOTOtalk calls even when network service • Voice records is not available. -
Page 35: Channels And Codes
Channels and Codes Exiting MOTOtalk To have a conversation, all parties must be on the same channel and code. For private MOTOtalk To set your phone to network mode when calls, the person you are calling must be in MOTOtalk is active: MOTOtalk and set to the same channel to receive 1 From the MOTOtalk idle screen, press m. - Page 36 MOTOtalk Making and Receiving Code Calls in Receive All MOTOtalk You can set your phone to receive MOTOtalk transmissions from any phone that is set to the To make a code call in MOTOtalk: same channel, regardless of the code (1-15), by 1 Press and hold the PTT button.
-
Page 37: Private Mototalk Calls
Private MOTOtalk Calls Private MOTOtalk Calls To set the code to Private Only: 1 From the MOTOtalk idle screen, press A under You can have a private conversation with another Edit. person using MOTOtalk. When on a private 2 Scroll to Code. MOTOtalk call, no other parties can hear your 3 Press A under Edit. -
Page 38: Emergency Calls Using Mototalk
MOTOtalk Ending a Private MOTOtalk Call To access Setup Options in MOTOtalk: 1 From the main menu, select MT Options. A private MOTOtalk call will end if there is no communication for 6 seconds. 2 Select Setup. Note: A private MOTOtalk call may be You can set your phone to: interrupted during the 6 second idle time •... - Page 39 Setup Options To turn off Direct Launch: 1 From the Setup screen, scroll to Direct Launch and press A under Change. 2 Select Off. Your phone now displays MT Options when you select MOTOtalk from the main menu. Using State Tone To set your phone to notify you with a tone that you are in MOTOtalk: 1 From the Setup screen, scroll to State Tone and...
-
Page 40: Call Alerts
Call Alerts Call Alerts Receiving Call Alerts When you receive a call alert, you must answer, Sending a call alert lets the recipient know you queue, or clear it. You cannot receive phone calls want to talk to him or her on a Private call. or Private calls until you do. - Page 41 Using the Call Alert Queue Viewing Call Alerts 4 Press the PTT button until Alert Successful appears on the display. 1 From the main menu, select Call Alert. Deleting Call Alerts 2 Scroll through the list. To delete a call alert from the queue: Viewing Date and Time 1 From the call alert queue, scroll to the call alert To view the date and time a call alert was received:...
-
Page 42: Recent Calls
Recent Calls Recent Calls Viewing Recent Calls With the Flip Open The recent calls list stores the numbers of the 20 most recent calls you have made and received. 1 From the main menu, select Recent Calls. 2 Scroll through the list. If the number of a recent call is stored in Contacts, the name associated with the number appears on To get more information on a recent call:... -
Page 43: Deleting Recent Calls
Deleting Recent Calls 2 Press A under Store. -or- 3 Press O or press A under Yes to confirm. If Store is not one of your options: Press m. To delete all calls: Select Store. 1 From the recent calls list, press m. Tip: If Store is not on this menu, the number is 2 Select Delete All. -
Page 44: Contacts
Contacts Contacts • A Contacts type — Each number or address stored must be assigned a Contacts type: Contacts stores up to 600 numbers or addresses. Mobile phone number Each Contacts entry can store several numbers or addresses. Private Private ID Information stored in Contacts is saved on your SIM card. -
Page 45: Viewing Contacts
Viewing Contacts • A number or address — Each Contacts entry 2 If an entry has more than one number or <> must contain a number or address. This may be address stored, surrounds the Contacts type any type of phone number, Private ID, Talkgroup icon. -
Page 46: Creating Entries
Contacts 2 Select Filter. Select Name. 3 Set this option to Show Prvt/Grp/Hub. Enter the name. When you are finished, press To set Contacts to show all entries: Tip: Press A under Browse to select a name 1 From the Contacts list, press m. already in Contacts. -
Page 47: Storing Numbers From The Idle Screen
Storing Numbers From the Idle Screen When you are finished, press O. When you are finished, press O. 6 If you want to assign more options to the 3 If you want to create a voice name for a phone number, select [Options]. -
Page 48: Editing Entries
Contacts Editing Entries 2 Scroll left or right to display the Contacts type for the number you want to delete. 1 From the Contacts list, scroll to the entry you 3 Press m. want to edit. 4 Select Delete Number. 2 Press A under Edit. -
Page 49: International Numbers
GSM phone, download iDEN Phonebook Manager. Press A under Yes to dial the last 4 digits. Go to idenphones.motorola.com/iden/support for Tip: You can create pauses and waits while more information. -
Page 50: Call Forwarding
Call Forwarding Call Forwarding Phone line 2 is active; calls to phone lines 1 and 2 are being forwarded. Call forwarding sends calls to the phone numbers you specify. You can forward all calls to one To forward all calls: number or forward missed calls to different 1 From the main menu, select Call Forward >... -
Page 51: Turning Off Call Forwarding
Turning Off Call Forwarding Turning Off Call Forwarding Note: If you want a type of missed call sent to voice mail, the call forwarding number for If you don’t want all your calls forwarded, turn the that type of missed call must be your feature off: voice mail access number. -
Page 52: Viewing Call Forwarding Settings
Call Forwarding Viewing Call Forwarding Settings 1 From the main menu, select Call Forward > Forward > All Calls. 2 With To highlighted, press A under Status. -
Page 53: Advanced Calling Features
Call Waiting Advanced Calling Turn Off Call Waiting To turn off Call Waiting during a call: Features 1 Press m. 2 Select In Call Setup > Call Waiting. Call Waiting 3 Set this option to Off. Call Waiting lets you receive a second call while on Tip: To turn Call Waiting back on while still on an active call. -
Page 54: Putting A Call On Hold
Advanced Calling Features Putting a Call on Hold Merging 2 Calls into a 3-Way Call 1 While on an active call, press m. After you put a call on hold and place a second call, you can combine these calls into a 3-way call: 2 Select Hold. -
Page 55: Creating Pauses And Waits While Dialing
Creating Pauses and Waits While Dialing Creating Pauses and Waits Making International Calls While Dialing Note: This feature may not be offered by your service provider. You can enter a pause or wait while dialing a number. For information on using pauses and Plus Dialing lets you place an international call to waits, see “Creating Pauses and Waits”... -
Page 56: Setting Flip Actions
Advanced Calling Features Setting Flip Actions To set your phone to call a Private ID or SDG list you choose: For Answering Calls 1 From the main menu, select Settings > 2-Way Radio > One Touch PTT > Assigned Number. To set your phone to answer calls when you open 2 To enter the Private ID or SDG list number you the flip:... -
Page 57: Call Timers
Call Timers Note: If you are using your phone with a • Kbytes Reset — keeps a running total of the headset, and you have the Flip to End number of Kilobytes sent and received by your option set to On, closing your flip sends phone, until you reset it. -
Page 58: Using Your Phone As A Modem
Advanced Calling Features Using Your Phone as a Modem 2 With the phone’s display facing up, insert a data cable’s connector into the accessory connector, Note: This feature may not be offered by your until you hear a click. service provider. To use your phone as a modem with a laptop, handheld device, or desktop computer: 1 Open the connector cover. -
Page 59: Making Tty Calls
Making TTY Calls To use these services, you must install the iDEN TTY device features such as Turbo-Code, Wireless Data Services software (available High-Speed, and Interruption are not supported by separately). For more information on setting up your phone. These features must be turned off or your computer and your i 740 phone for packet and disabled to use your TTY device with your phone. - Page 60 Advanced Calling Features When you make a TTY call, the call begins in the To change the TTY baud rate: TTY mode you last selected. 1 From the main menu, select Settings > Phone To change mode during a call using your phone: Calls >...
-
Page 61: Group Calls And Selective Dynamic Group Calls
Group Calls Group Calls and Selective Dynamic Group Calls SDG Calls Set-up Predefined, via Dynamically, Group Calls your service via your phone provider Your phone gives you 2 ways to call more than one administrator Private ID at once: using Group Management •... -
Page 62: Emergency Group Calls
Group Calls and Selective Dynamic Group Calls Joining a Talkgroup Receiving Group Calls Your sales representative or your service provider To answer a group call: establishes Talkgroups for you and assigns each Proceed as if answering a Private call. Only one Talkgroup a Talkgroup number. - Page 63 Emergency Group Calls When you make an Emergency Group call, a group 3 Release the PTT button to listen. call is made using a designated emergency Hub or To end an Emergency Group call: the Hub you currently belong to. Press and hold .
-
Page 64: Selective Dynamic Group (Sdg) Calls
Group Calls and Selective Dynamic Group Calls Selective Dynamic Group 4 Add Private IDs. See “Adding Private Numbers”. 5 If you want to create a voice name for the SDG (SDG) Calls list, select [Options] > Voice Name. As directed by the screen prompts, say and repeat the voice A SDG call is similar to a Private call, but is made name you want to assign to the SDG list. - Page 65 Selective Dynamic Group (SDG) Calls 2 Select the members you want from the list. 2 Enter the number using the keypad. 3 Press A under Done. 3 Press O. From Recent Calls Moving Between Contacts, Recent Calls, and Memo 1 While creating a SDG list, select [Add Member]. -or- While adding members or numbers to a SDG list, you can press m to access Contacts, Recent Calls,...
- Page 66 Group Calls and Selective Dynamic Group Calls Storing SDG Lists Faster Enter or select a Private ID and add more Private IDs. See “Starting a SDG Call with a From Recent Calls Private ID” on page 54. 1 From the recent calls list, select the SDG list you 2 Press the PTT button.
- Page 67 Selective Dynamic Group (SDG) Calls 2 Press m. SDG Call Details 3 Select Call SDG. During a SDG call, you can view details about the 4 Add more Private IDs. See “Adding Private other SDG list members, such as their name or Numbers”...
- Page 68 Group Calls and Selective Dynamic Group Calls From the recent calls list, scroll to or select the SDG list you want. 2 Press m. 3 Select Send Group Connect Plus via PTT. 4 To include yourself in the list, press A under Yes.
-
Page 69: Memo
Memo To store the memo number to Contacts: 1 From the main menu, select Memo. Memo lets you store a number, make a call to that 2 Press m. number, and save it to Contacts. 3 Select Store to Cntcs. To create a memo: 4 To store the number as a new entry, select [New Contact]. -
Page 70: Ring Tones
Ring Tones Ring Tones 2 Set this option to On. Tip: Pressing the volume controls to turn down To set the ring tone your phone makes when you the volume as far as possible sets VibeAll receive phone calls, message notifications, or call to On. -
Page 71: Ring And Vibrate
If you want to use other ring tones, you can Contacts download them into your phone for a fee. Go to www.motorola.com/idenupdate for a selection of You can set the ring tone your phone makes when custom ring tones and downloading instructions. -
Page 72: Managing Memory
Ring Tones Managing Memory To view the amount of memory available for custom ring tones: 1 From the main menu, select Ring Tones. 2 Make sure VibeAll is set to Off. 3 Highlight any ring tone. 4 Press m. 5 Select Memory Usage. Deleting custom ring tones frees memory. -
Page 73: Entering Text
Using Alpha Mode Entering Text 2 Select the text input mode you want to use. A checkmark appears next to the current mode. You can enter text into your phone using the Using Alpha Mode traditional method of pressing a key several times for each character, or by pressing a key once for •... -
Page 74: Special Function Keys
Entering Text 2 Type a word by pressing one key for each letter. Choosing a Language For example, to type “test” press 8 3 7 To change the language of the database: 1 At a screen that requires you to enter text, press The displayed word may change as you type it. -
Page 75: Using Numeric Mode
Using Numeric Mode When neither of these icons appear, letters typed are lowercase. Scrolling up after typing a letter makes that letter uppercase. Note: Your phone automatically makes the first letter of a sentence uppercase. Punctuation Press 1 or 0 to insert punctuation. Continue to press the key to view the list of symbols available through that key. -
Page 76: Messages
Messages Messages If you dismiss the notification, the message is not deleted. It can be accessed through the message center. You can receive the following types of messages on your phone: If you are not on a phone call when you receive a message, your phone sounds a notification tone •... -
Page 77: Message Center
Message Center Message Center The message center manages your messages. All your messages are stored in the message center. The message center shows how many messages you have of each type. To access your messages through the message center: 1 From the main menu, select Messages. 2 Scroll to the type of message you want to access. -
Page 78: Voice Mail Messages
Voice Mail Messages Voice Mail Messages Sending Unanswered Calls to Voice Mail Note: To receive voice mail messages, you must first set up a voice mail account with your To send a phone call to voice mail instead of service provider. answering it: If the flip is closed, press .. -
Page 79: Mosms Messages
Setting Up MOSMS Messages This is the amount of time messages you send are saved at the service center if they cannot be delivered. After this period, they are discarded. Mobile originated text messages (MOSMS) lets you send and receive SMS messages to and from Scroll to select the number of days you want other phones that are using MOSMS. -
Page 80: Reading From The Message Center
MOSMS Messages If your phone is powered off when you receive a storing the sender’s number in Contacts, press text message, your phone notifies you the next time you power it on. If you are out of your Creating and Sending coverage area, your phone alerts you when you return to your coverage area. - Page 81 Creating and Sending Messages To use a quick note: Press A under Browse. Beginning Messages From the Idle Scroll to the quick note you want. For more Screen information on quick notes, see “Using Quick 1 Using the keypad, enter the number you want to Notes”.
- Page 82 MOSMS Messages Using Drafts Deleting Sent Messages When you save a message as a draft, it is saved in To delete a sent message: the drafts folder. 1 From the main menu, select Messages > Text To edit a draft: Outbox.
-
Page 83: Sorting Messages
Sorting Messages 4 Select Lock. The text inbox holds 20 messages. If the text inbox is full, you cannot receive messages until you Unlocking a Message delete some. 1 From the main menu, select Messages > Text The outbox and drafts folder share memory space. Outbox. -
Page 84: Datebook
Datebook Datebook • A repeat — lets you store the event as a recurring event. Datebook stores up to 250 events. You can store • A reminder — If an event has a start time, you events over a 13 month period — 12 months after can set Datebook to remind you that the event is and 1 month before the current date. -
Page 85: Creating Events
Creating Events Creating Events To view an event: 1 Select the day the event occurs. Every Datebook event must have a subject and be 2 Select the event. stored to a date. Other information is optional. To change the current view: You may enter the information in any order by 1 While viewing Datebook, press m. - Page 86 Datebook 3 If you want to assign a location to the event: 7 If you want to make the event a recurring event: Select Location. Select Repeat. Enter the location. -or- Select the repeat cycle you want. Enter a phone number, Private ID, or Talkgroup If the event occurs more than once a week: number.
-
Page 87: Editing Events
Editing Events Editing Events Assigning More Options To assign more options before storing an event: To change the details of an event: 1 If you have created a reminder for the event and 1 Select the day the event occurs. want to set the ring tone for that reminder: 2 Select the event. -
Page 88: Receiving Reminders
Datebook 5 If the event is not a recurring event, press O or For Events with Java Applications press A under Yes to confirm. -or- If you assigned a Java application to start when the If the event is a recurring event: event starts, you can start the application when you get the reminder. -
Page 89: Making Calls From Datebook
Making Calls From Datebook Making Calls From Datebook To send a call alert: Press m. Select Alert # in Event. If you stored a phone number, Private ID, or Talkgroup number in the Subject or Location field Customizing Datebook Setup of a Datebook event, you can call or send a call alert to that number from Datebook. - Page 90 Datebook • Time Shift — lets you shift the times of all Datebook events. This is useful if you are traveling to a different time zone. • Alert Timeout — sets the amount of time a tone continues to sound when you receive a message notification, call alert, or Datebook reminder.
-
Page 91: Java Applications
Installing Applications Java Applications 2 If you have selected a suite of applications, select the application you want to run. Your phone arrives with Java applications loaded To run an application that does not have a shortcut and ready to install. You can download and install on the main menu: more Java applications. -
Page 92: Resuming Applications
1 From the Java menu, select Suspended Apps. If you want to run more Java applications, you can 2 Select the application you want to resume. download them into your phone. Go to www.motorola.com/idenupdate for a Ending Applications selection of Java applications and downloading instructions. -
Page 93: Managing Memory
Managing Memory 5 Press O or press A under Yes to confirm. To create a shortcut to an application that is already installed: Managing Memory 1 From the main menu, select Settings > Personalize > Menu Options > Add/Remove To view the amount of memory available for Java Apps. -
Page 94: Java Applications And Gps Enabled
Java Applications 4 Press O. • Unrestricted — All Java applications may 5 Press A under Done. access the location of your phone, without notifying you. Java Applications and GPS • By Permission — When a Java application attempts to access the location of your phone, Enabled you are prompted to give permission. - Page 95 Java Applications and GPS Enabled 2 Select the denying option you want: Setting Privacy for Each Java • Always — If the application requests access Application to the location of your phone again, the After a given Java application requests access to request is denied without notifying you.
-
Page 96: Gps Enabled
GPS Enabled GPS Enabled Java applications loaded on your phone can also request your location. If your phone is connected to a laptop computer or similar device, software Your phone’s GPS Enabled feature uses running on that device can request your location. information from Global Positioning System (GPS) To protect your privacy, you can control whether satellites orbiting the Earth to determine the... -
Page 97: Making An Emergency Call
Making an Emergency Call • When your GPS antenna is covered (for information and the time needed to obtain it will example, by your hand or other object) or vary depending on circumstances, particularly the facing the ground ability to receive signals from adequate numbers of satellites. -
Page 98: Viewing Your Approximate Location
GPS Enabled GPS satellite signals and network assist data, it If your phone does not have adequate access to may take 30 seconds or more to determine the GPS satellites signals, the location of the nearest approximate location. This time will increase where cell tower in contact with your phone is there is reduced access to satellite signals. -
Page 99: Enhancing Gps Performance
Enhancing GPS Performance • The number of satellites used to calculate the If you received a phone call or alert while location. In general, more satellites make for attempting to determine your location, the Position better accuracy. screen will disappear, but your phone will continue attempting to determine its location. - Page 100 GPS Enabled To improve accuracy and increase your chances of • Hold your phone to enhance reception. Signals a successful calculation, do the following while from GPS satellites are transmitted to your GPS your phone is determining your approximate antenna, which is in your phone antenna. Hold location: your phone away from your body, giving the antenna clear access to satellite signals.
-
Page 101: Updating Satellite Almanac Data
Updating Satellite Almanac Data • In a car. When using the GPS Enabled feature in The almanac contains information about the a car, position your phone so that the GPS location of satellites, their operational status, and antenna has good access to GPS signals other satellite information. - Page 102 GPS Enabled To set your GPS privacy options: When you receive your phone, the GPS security feature is turned off, so you do not have to enter a 1 From the main menu, select GPS > Privacy. GPS PIN to access your GPS privacy options. If 2 If your GPS PIN security feature is enabled, you turn this feature on, you will be required to enter your GPS PIN.
-
Page 103: Using Gps With Map Software
Using GPS with Map Software Using GPS with Map Software Software Compatibility Your phone sends location information to your You can use the GPS feature of your phone to laptop or other device using the standard National provide approximate location data to a laptop Marine Electronics Association (NMEA) format. - Page 104 GPS Enabled 2 With the phone’s display facing up, insert the • Stop bits: 1 data cable’s connector into the accessory • Flow control: Hardware connector, until you hear a click. To set your phone to send location information to your laptop or other device: 1 From the main menu, select GPS >...
-
Page 105: Voice Records
Creating Voice Records Voice Records To record a phone call: 1 While on an active call, press m. A voice record is a recording you make with your 2 Select Record. phone and can play back. You can record notes to 3 When you are finished recording, press O. -
Page 106: Deleting Voice Records
Voice Records 5 Press O. 4 Select Lock to lock the message. -or- Select Unlock to unlock the message. Deleting Voice Records When a voice record is locked, this icon appears To delete a voice record: next to it. 1 From the main menu, select VoiceRecord. Managing Memory 2 Scroll to the unlocked voice record you want to delete. -
Page 107: Customizing Your Phone
Setting the Volume Customizing Your Phone To set your phone to vibrate instead of making a sound when you receive Private calls, group calls, and SDG calls, even if you want your phone to ring Setting the Volume for other features: 1 From the main menu, select Settings >... - Page 108 Customizing Your Phone Setting Wallpaper to Change Automatically Setting Contrast Note: This feature may not be offered by your To set the contrast of the display: service provider. 1 From the main menu, select Settings > 1 From the main menu, select Settings > Display/Info >...
-
Page 109: Temporarily Turning Off Calls
Temporarily Turning Off Calls To control how long the backlight stays on: Set this option to Off. 1 From the main menu, select Settings > Using Settings Display/Info > Backlight > Backlight. 2 Select the number of seconds you want the Settings contains many submenus that let you backlight to stay on. - Page 110 Customizing Your Phone • Large Dialing — sets large digits to appear on • Call Duration — causes the duration of a call to the idle screen when you enter a number. appear on the display when the call ends. •...
- Page 111 Using Settings • Alert Type — controls how your phone notifies • Right Sftkey — sets the main menu item you you when you receive Private calls, group calls, access when you press the right option key from and.SDG calls. the idle screen.
- Page 112 Customizing Your Phone • Java Speaker —sets the volume of sound • Change Passwords — changes your phone associated with Java applications coming out of unlock code, security code, SIM PIN, and GPS the speaker. PIN. • Data — sets the volume of sounds that notify Advanced Features you that you are receiving a circuit data call.
- Page 113 Using Settings • Reset Defaults — Reset Settings returns all settings to their original defaults; Reset All returns all settings to their original defaults and erases all stored lists. Use only under the direction of your service provider. • Return to Home — controls how long the recent calls list displays after calls.
-
Page 114: Profiles
Profiles Profiles Viewing Profiles To view the profiles stored in your phone: A profile is a group of settings saved together so that you can apply them to your phone easily. 1 From the main menu, select Profiles. 2 Scroll to the profile you want to view. A profile contains these settings: Tip: The profile that is currently in effect on your •... -
Page 115: Temporary Profiles
Temporary Profiles Temporary Profiles When you do this, your phone either: • Updates the profile in effect to reflect these If your phone is set to create temporary profiles, a changes, without notifying you -or- temporary profile is created when you make •... -
Page 116: Creating Profiles
Profiles 2 Scroll to the temporary profile. want to base this profile on. If you do not choose 3 Press m. a profile to copy from, the new profile is based on a default profile. 4 Select Store As New. 5 Press A under Create. -
Page 117: Setting Call Filtering
Setting Call Filtering 5 Press O or press A under Yes to confirm. • Some Cntcs sets your phone to notify you only of phone calls from numbers you select To delete all profiles: from Contacts. 1 From the main menu, select Profiles. 3 If you set the Phone option to Some Cntcs, 2 Press m. - Page 118 Profiles • Off sets your phone to notify you of all messages. • Voice Messages sets your phone not to sound a tone or vibrate when you receive voice messages. • Text Messages sets your phone not to sound a tone or vibrate when you receive text messages.
-
Page 119: Shortcuts
Creating a Shortcut 6 Press O. Shortcuts 7 If you want to record a voice name for the shortcut: Select Voice. As directed by the Shortcuts lets you access most menu options by screen prompts, say and repeat the name you pressing a number on your keypad (1 through 9) or want to assign to the number. -
Page 120: Editing A Shortcut
Shortcuts 4 With Key or Voice highlighted, press O to If you assigned a voice name to the shortcut: Press and hold . Say the voice name into change assignments. your phone. The shortcut with that voice name is Deleting Shortcuts then highlighted. -
Page 121: Using A Headset
Attaching a Headset Using a Headset Using a Remote PTT Button If you are using a headset or other accessory with If you use a headset or similar device with your a remote PTT button, you can use the remote PTT phone, you can set your phone to send incoming button for phone calls and Private calls. -
Page 122: Understanding Status Messages
Understanding Status Messages Understanding Status Status Status Message Messages Messages Description Messages (internal (external display) display) You may receive status messages under certain The person that you conditions. Before contacting Customer Care, note Not Avail. User Not called has not the message, numeric code, and the conditions Authorized purchased this service. - Page 123 Status Status Message Status Status Message Messages Messages Description Messages Messages Description (internal (external (internal (external display) display) display) display) An error occurred. The incorrect PIN was Try Again Please Try PIN Blocked PIN Blocked Please try again. entered 3 consecutive Again Call Your times.
- Page 124 Understanding Status Messages Status Status Message Messages Messages Description (internal (external display) display) Searching for GPS Scanning for satellites. Satellites Could not find GPS Unable to satellites. Locate Sats Technical Error A problem occurred in your phone’s GPS circuitry. If this error occurs, contact Customer Care.
-
Page 125: Safety And General Information
9 kHz and 300 GHz." Operation and EME Exposure "Attachment to Resolution 303 from July 2, 2002." Your Motorola radio product is designed to comply with the following national and international standards and guidelines regarding exposure of human beings to radio frequency electromagnetic... - Page 126 Speak directly into the microphone. product in a Motorola approved clip, holder, holster, case or body harness for this product. Two-way radio operation Use of non-Motorola-approved accessories may exceed FCC RF exposure guidelines.
- Page 127 Before a phone model is available for sale to the public, it must be tested and certified to the FCC that is does not For a list of approved Motorola accessories call exceed the limit established by the government-adopted 1-800-453-0920, or visit our website at requirement for safe exposure.
-
Page 128: Electromagnetic Interference/Compatibility
Pacemakers The SAR information reported to the FCC includes the FCC-accepted Motorola testing protocol, assessment procedure, and measurement uncertainty range for this The Advanced Medical Technology Association product. -
Page 129: Operational Warnings
Operational Warnings • Not carry the radio product in a breast pocket. • Pull off the road and park before making or answering a call if driving conditions so require. • Use the ear opposite the pacemaker to minimize the potential for interference. Operational Warnings •... -
Page 130: Operational Cautions
Safety and General Information Note: The areas with potentially explosive charged battery, particularly when placing it inside atmospheres referred to above include a pocket, purse, or other container with metal fueling areas such as below decks on objects. To reduce the risk of injury, batteries boats, fuel or chemical transfer or should not be exposed to fire, disassembled, or storage facilities, areas where the air... -
Page 131: Accessory Safety Information
Accessory Safety Information If the radio product does not work after following • Do not expose any battery charger to water, the steps listed above, contact your dealer for rain, or snow as they are designed for indoor or servicing information. in-vehicle use only. - Page 132 Safety and General Information • An extension cord should not be used with any • The disconnection from the line voltage is battery charger unless absolutely necessary. made by unplugging the power supply from Use of an improper extension cord could result the AC receptacle.
-
Page 133: Motorola Limited Warranty
What Does this Warranty Cover? product. Subject to the exclusions contained below, Accessories as One (1) year from the Motorola, Inc. warrants its Motorola iDEN Digital defined above. date of purchase by the Mobile and Portable Handsets ("Products"), first consumer... - Page 134 Product or may subscribe to or use with the Products, Accessory to abnormal usage or conditions; or (d) Accessories or Software is excluded from other acts which are not the fault of Motorola, are coverage. excluded from coverage.
- Page 135 (b) a written description of the What will Motorola Do? Motorola, at its option, problem; (c) the name of your service provider, if will at no charge repair, replace or refund the applicable;...
- Page 136 FOR ANY INDIRECT, INCIDENTAL, SPECIAL OR disassembly of such Motorola software or exercise CONSEQUENTIAL DAMAGES OF ANY KIND, OR of the exclusive rights reserved for Motorola, is LOSS OF REVENUE OR PROFITS, LOSS OF permitted. BUSINESS, LOSS OF INFORMATION OR DATA,...
-
Page 137: Limited Warranty Motorola Communication Products (International)
Communication b. the battery develops leakage. Products (International) MOTOROLA, at its option, will at no charge either repair the Product (with new or reconditioned Note: This Warranty applies in Singapore and parts), replace it (with a new or reconditioned the Philippines. - Page 138 Limited Warranty Motorola Communication Products (International) MOTOROLA cannot be responsible in any way for TIME, INCONVENIENCE, COMMERCIAL LOSS, any ancillary equipment not furnished by LOST PROFITS OR SAVINGS OR OTHER MOTOROLA which is attached to or used in INCIDENTAL, SPECIAL OR CONSEQUENTIAL...
- Page 139 1.Any of the seals on the battery enclosure of extent that it is based on a claim that the Product or cells are broken or show evidence of parts infringe a patent, and Motorola will pay those tampering. costs and damages finally awarded against the end user purchaser in any such suit which are 2.The damage or defect is caused by...
- Page 140 MOTOROLA software. that such purchaser will permit MOTOROLA, at MOTOROLA software may be used in only the its option and expense, either to procure for Product in which the software was originally...
-
Page 141: Patent And Trademark Information
Laws in the United States and other trademarks indicated as such herein are countries preserve for Motorola and third party trademarks of Motorola, Inc. ® Reg. U.S. Pat. & software providers certain exclusive rights for Tm. Off. © 2004 Motorola, Inc. All rights reserved. -
Page 142: Index
Index Index entering number 17 from Contacts 18 Call alerts 28 Numerics from Datebook 19 deleting 29 from memo 57 2-way radio 98 queue 28 from Recent calls 18 see also Private calls, group receiving 28 calls, SDG calls, and call group, see Group calls responding 28, 29 alerts... - Page 143 deleting 36 screen 8 privacy options 89 icons 32 Drafts 70 security 90 iDEN Phonebook Manager see also MOSMS messages, viewing location 86 drafts GPS PIN 100 international numbers 37 GPS, see GPS Enabled searching 33 Group calls 49, 98 Email 33, 34, 46 showing all entries 34 see also Emergency Group...
- Page 144 Index Java applications 81, 94 quick notes 69 storing to Contacts 35 MOSMS messages 71 receiving 67 International numbers 43 ring tones 60 sending 68 calling 43 voice records 94 sent messages 70 storing 37 Menu key 2, 9 setting up 67 Menus 8 sorting 71 context-sensitive 2, 9...
- Page 145 Patent information 129 setting 58 Pauses One Touch 20 setting in Contacts 34, 59 dialing 43 One Touch, setting 43 vibrate 58 storing 36 PUK code 13 viewing assigned 59 Phone 1, 8 Ringer 95 active line 98 see also Ring tones Quick notes 69 flip action 16, 17, 44 off 95...
- Page 146 Index making 54 default 12 Word mode 61 receiving 55 entering 12 Trademark information 129 settings 98 requirement 13 TTY calls 47 starting 54 unblocking 13 baud rate 48 status icons 10 SMS messages 64, 67 making 47 Security 100 also see MOSMS messages mode 47 Selective Dynamic Group Calls,...
- Page 147 Waits dialing 43 storing 36 Warranty 125 Word mode 61...
-
Page 148: Driving Safety Tips
— driving safely. • Get to know your Motorola wireless phone and • Dial sensibly and assess the traffic; if possible, its features such as speed dial and redial. If place calls when you are not moving or before available, these features help you to place your pulling into traffic. - Page 149 • Your phone can perform many other functions besides allowing you to make and receive calls. Do not let these features distract you from driving. Use them only when it is safe to do so. • Use your wireless phone to call for help. Dial 9-1-1 or other local emergency number in the case of fire, traffic accident or medical emergencies.