
Related Manuals for Makita XSB01


Summary of Contents for Makita XSB01
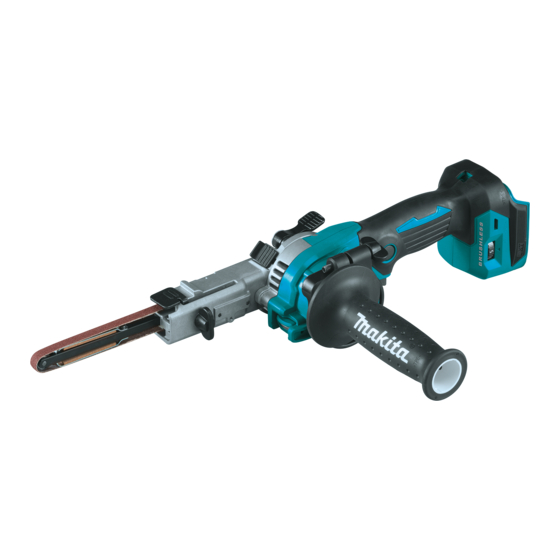
- Page 1 INSTRUCTION MANUAL MANUAL DE INSTRUCCIONES Cordless Belt Sander Lijadora de Banda Inalámbrica XSB01 IMPORTANT: Read Before Using. IMPORTANTE: Lea antes de usar.
-
Page 2: Specifications
ENGLISH (Original instructions) SPECIFICATIONS Model: XSB01 9 mm x 533 mm (3/8″ x 21″) Belt size 600 - 1,700 m/min (1,970 - 5,600 ft/min) Belt speed 500 mm (19-3/4″) *1 Overall length D.C. 18 V Rated voltage 2.1 kg (4.6 lbs) Net weight *1. - Page 3 Keep cutting tools sharp and clean. Properly Use personal protective equipment. Always wear eye protection. Protective equipment such maintained cutting tools with sharp cutting edges as dust mask, non-skid safety shoes, hard hat, or are less likely to bind and are easier to control. hearing protection used for appropriate conditions Use the power tool, accessories and tool bits will reduce personal injuries.
- Page 4 WARNING: 12. Use the batteries only with the products DO NOT let comfort or familiarity specified by Makita. Installing the batteries to with product (gained from repeated use) replace non-compliant products may result in a fire, exces- strict adherence to safety rules for the subject sive heat, explosion, or leak of electrolyte.
-
Page 5: Functional Description
It will it into place. Insert it all the way until it locks in place also void the Makita warranty for the Makita tool and with a little click. If you can see the red indicator on the charger. - Page 6 Replacing arm Indicator lamps Remaining capacity 6 mm (1/4″) and 13 mm (1/2″) width belts can be Lighted Blinking installed with the optional arms that are designed for the corresponding belt widths. Loosen the screw that 75% to 100% secures the arm and replace the standard-equipped arm with the optional arm, then tighten the screw firmly.
- Page 7 This tool is equipped with an electric brake. If the tool consistently fails to quickly cease to function after the switch trigger is released, have the tool serviced at a Makita service center. ASSEMBLY CAUTION: Always be sure that the tool is switched off and the battery cartridge is removed before carrying out any work on the tool.
- Page 8 Removing and installing abrasive Installing side grip belt CAUTION: Securely tighten the thumb screw Pull the cam lever back to release the tension in the before operation. belt, and remove the belt. CAUTION: Avoid exerting a strong external To install the belt, place one side of the belt over the force on the side grip, otherwise the grip base rear pulley in first, hook the other side over the front pul- becomes loosely attached and the tool may fall...
-
Page 9: Operation
Cleaner sanding operations can be performed by con- necting the belt sander to Makita vacuum cleaner. Open the nozzle cap, and install the dust nozzle. Connect the hose of a vacuum cleaner to the dust nozzle. -
Page 10: Maintenance
Discoloration, deformation or cracks may result. To maintain product SAFETY and RELIABILITY, repairs, any other maintenance or adjustment should be performed by Makita Authorized or Factory Service Centers, always using Makita replacement parts. Storage Be careful not to pinch your fin- CAUTION: ►... -
Page 11: Especificaciones
ESPAÑOL (Instrucciones originales) ESPECIFICACIONES Modelo: XSB01 Tamaño de banda 9 mm x 533 mm (3/8″ x 21″) Velocidad de la banda 600 m/min - 1 700 m/min (1 970 ft/min - 5 600 ft/min) 500 mm (19-3/4″) *1 Longitud total Tensión nominal... - Page 12 Cuando utilice una herramienta eléctrica en No permita que la familiaridad adquirida exteriores, utilice un cable de extensión apro- debido al uso frecuente de las herramientas haga que se sienta confiado e ignore los prin- piado para uso en exteriores. La utilización de un cable apropiado para uso en exteriores redu- cipios de seguridad de las herramientas.
- Page 13 Cuando vaya a utilizar esta herramienta, evite Símbolos usar guantes de trabajo de tela ya que éstos podrían atorarse. Si los guantes de trabajo de A continuación se muestran los símbolos utilizados tela llegaran a atorarse en las piezas móviles, para la herramienta.
- Page 14 Asimismo, esto inva- ya no sirva en absoluto. El cartucho de batería lidará la garantía de Makita para la herramienta y el puede explotar si se tira al fuego. cargador Makita.
-
Page 15: Descripción Del Funcionamiento
Sistema de protección para la DESCRIPCIÓN DEL herramienta/batería FUNCIONAMIENTO La herramienta está equipada con un sistema de pro- tección para la herramienta/batería. Este sistema corta PRECAUCIÓN: Asegúrese siempre de que la automáticamente la alimentación para prolongar la vida herramienta esté apagada y el cartucho de batería de la herramienta y la batería. - Page 16 Luces indicadoras Capacidad restante Iluminadas Apagadas Parpadeando 75% a 100% 50% a 75% 25% a 50% 0% a 25% Cargar la ► 1. Tornillo 2. Brazo batería. La batería Accionamiento del interruptor pudo haber funcionado mal. ADVERTENCIA: Por su seguridad, esta herramienta está...
-
Page 17: Montaje
Esta herramienta está equipada con un freno eléctrico. Si de manera consistente la herramienta no cesa de funcionar rápidamente después de soltar el gatillo interruptor, lleve la herramienta a un centro de servicio Makita para que le den mantenimiento. MONTAJE PRECAUCIÓN: Asegúrese siempre de que la herramienta esté... - Page 18 Extracción e instalación de la banda Instalación de la empuñadura lateral abrasiva PRECAUCIÓN: Apriete el tornillo de mari- Jale la palanca de leva para liberar la tensión en la posa firmemente antes de la operación. banda, y retire la banda. Evite ejercer una fuerza PRECAUCIÓN: Para instalar la banda, primero coloque un lado de la...
-
Page 19: Operación
Se pueden realizar las operaciones de lijado más limpias al conectar la lijadora de banda a la aspiradora de Makita. Abra la tapa de la boquilla e instale la boquilla para polvo. Conecte la manguera de una aspiradora a la boquilla para polvo. -
Page 20: Mantenimiento
Para mantener la SEGURIDAD y FIABILIDAD del pro- ducto, las reparaciones, y cualquier otra tarea de man- tenimiento o ajuste deberán ser realizadas en centros de servicio autorizados o de fábrica Makita, empleando siempre repuestos Makita. Almacenamiento ► 1. Palanca de bloqueo 2. Interruptor de desbloqueo Tenga cuidado de no pellizcar PRECAUCIÓN:... - Page 24 Para reducir la exposición a estos productos químicos: trabaje en un área bien ventilada y póngase el equipo de seguridad indicado, tal como las máscaras contra polvo que están especialmente diseñadas para filtrar partículas microscópicas. Makita Corporation 3-11-8, Sumiyoshi-cho, 885815-941 Anjo, Aichi 446-8502 Japan...