Table of Contents
Advertisement
Available languages
Available languages
Quick Links
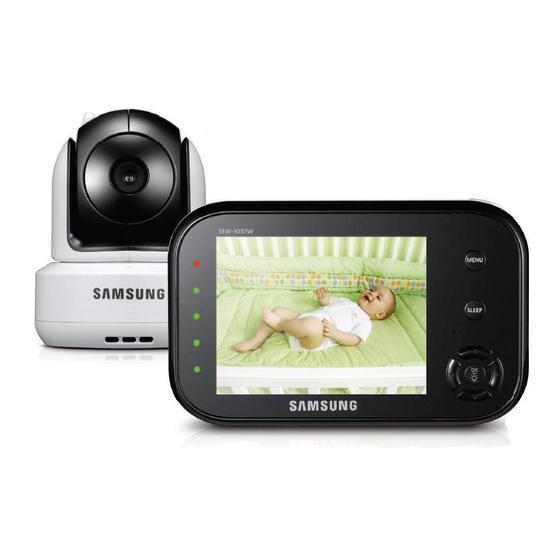
SafeVIEW
User Manual
If you have additional questions or need further assistance, contact Samsung support at (877) 349-3149.
To extend your one year warranty by three months, be sure to go to www.samsungsv.com and register your product.
SEW-3037W-ENGLISH.indd 1
SEW-3037W
English
2012-09-03 오전 11:37:12
Advertisement
Chapters
Table of Contents

Related Manuals for Samsung Techwin SafeVIEW Babyview SEW-3037P


Summary of Contents for Samsung Techwin SafeVIEW Babyview SEW-3037P
- Page 1 User Manual SEW-3037W English If you have additional questions or need further assistance, contact Samsung support at (877) 349-3149. To extend your one year warranty by three months, be sure to go to www.samsungsv.com and register your product. 2012-09-03 오전 11:37:12...
- Page 2 Only use attachments/ accessories specified by the manufacturer. is the registered logo of Samsung Techwin Co., Ltd. The name of this product is the registered trademark of Samsung Techwin Co., Ltd. Use only with the cart, stand, tripod, bracket, or table specified by Other trademarks mentioned in this manual are the registered trademark of their the manufacturer, or sold with the apparatus.
- Page 3 • Do not use extension cords with the AC power adapters to avoid entanglement. • Connect the equipment into an outlet on a circuit different from that to which the monitor is • This product should only be serviced by qualified and authorized Samsung service centers. connected.
-
Page 4: Table Of Contents
Contents WHAT’S INCLUDED INSTALLATION Package Contents ………………………………………………… 5 How to Install ……………………………………………………… 13 Wireless Monitor …………………………………………………………… 13 GETTING STARTED Wireless Camera …………………………………………………………… 13 Functional Description ……………………………………………… 6 APPENDIX Powering your monitor ……………………………………………………… 6 Specifications …………………………………………………… 14 Operating the System ……………………………………………………… 6 Troubleshooting …………………………………………………... -
Page 5: What's Included
’ NCLUDED Package Contents The system comes with the following components: Wireless camera Wireless monitor User Manual & Warranty Card Camera Adapter Monitor Adapter Plastic anchor (1EA) & Screw (1EA) Check your package to confirm that you have received the complete system, including all components shown above. English ·... -
Page 6: Getting Started
Operating the System ETTING TARTED The basic operation is as follows: Pairing Functional Description The units already come paired for your convenience. This button is used to add an additional camera. User can select camera number Powering your monitor to assign. Up to 4 Cameras may be paired. After opening the box, fully charge the monitor before use. - Page 7 Voice activated (VOX) Sound level Select to monitor significant sound with reduced ambient noise. The louder the sound around the camera, the more LEDs turn on. The screen goes off in “VOX” mode if there is no significant sound louder than a certain level within 1 minute. Meanwhile, the monitor screen turns on as soon as detecting sound around the camera.
-
Page 8: Viewing Mode Display
e Digital Clock IEWING ISPLAY Displays the time that is set on the monitor. It only provides AM / PM time format and no 24hour format. Indicator Description f Night light Indicates the night light is on. How to use the indicator g Monitor Speaker Mute Indicates the monitor speaker is muted. -
Page 9: How To Use The Setup Icon
b Camera VOX Sensitivity If not in “VOX” mode, “OFF” is displayed and not to be selected. ► ► ► In VOX mode, you can select “H” (High) or “L” (Low). If set to “H”, monitor can be triggered by lower audio level than “L” setting. Enter menu Move to a Adjust level... -
Page 10: Overview
VERVIEW Getting to know your Monitoring system Wireless Monitor After opening the box, fully charge the monitor before use. After initial charge, recharge as needed. Front Controls Monitor Antenna MENU Button Press to access from video monitor mode to menu Receives and sends signals from or to the camera. - Page 11 Back Controls TALK Button Belt Clip Press down and hold the button to talk back to the camera. When you carry the monitor, use the belt hanger to hold the monitor onto your belt. Kick Stand Speaker Use to hold the monitor onto a table. Produces the sound transmitted from the camera(s).
-
Page 12: Wireless Camera
Wireless Camera Front & Back Controls IR LEDs Night Light Button Infrared LED’s provide viewing in no / low light Turns Night Light ON or OFF. conditions. When the camera is powered on, Night Light would be automatically turned on. Microphone Receives sounds for the area near the camera, and Camera Antenna... -
Page 13: Installation
Carefully unpack the camera. NSTALLATION If you are installing cameras that did not come with the system, please see the pairing camera section of this manual for details on installation. Mount the camera to the wall. How to Install Mark the position of the screw hole on the wall, and drill hole and insert 1 screw, then firmly attach the CAUTION: If you use the system to watch a young child, do not place the camera in the camera to the wall by placing the stand over the... -
Page 14: Appendix
Item Details PPENDIX Wireless Camera Operating Humidity Range 85% RH Speciications Environment Rating Indoor use only Pan Angle 300° Item Details 110° Tilt Angle System General Regulation Compliance FCC/CE Operating Frequency Range 2400 MHz~2483.5 MHz RoHS Compliance Yes for CE version only Transmitting Power 17dBm Max Other Special Feature... -
Page 15: Troubleshooting
Troubleshooting Problem Solution No picture from a 1. Check all connections to the camera. Make sure the adapter is plugged in. camera 2. Make sure that the cameras and monitor are both ON. 3. Make sure that the camera is in range of the monitor. 4. - Page 16 Correct Disposal of This Product Samsung Techwin cares for the environment at all product manufacturing stages, and is taking measures to provide customers with more environmentally friendly products. (Waste Electrical & Electronic Equipment) The Eco mark represents Samsung Techwin’s devotion to creating environmentally friendly products, and indicates that the product satisfies the EU RoHS Directive.
- Page 17 TEMPLATE Screw holes for This template is used to install the Camera the camera on the wall. installation CAMERA FRONT 2012-09-03 오전 11:37:21 SEW-3037W-ENGLISH.indd 17...
- Page 18 TEL : +82-70-7147-8740~60 FAX : +82-31-8018-3745 SAMSUNG TECHWIN AMERICA Inc. SAMSUNG TECHWIN EUROPE LTD. 100 Challenger Rd. Suite 700 Ridgefield Park, NJ 07660 Samsung House, 1000 Hillswood Drive, Hillswood Business Park Chertsey, Toll Free : 1-877-349-3149 Surrey, UNITED KINGDOM KT16 OPS www.samsungsv.com TEL : +44-1932-45-5300 FAX : +44-1932-45-5325 2012-09-03 오전...
- Page 19 SafeVIEW Manuel d’utilisation SEW-3037W Français 2012-09-03 오전 11:30:10 SEW-3037W-FRENCH.indd 1...
- Page 20 Samsung Techwin Co., Ltd. d’alimentation et particulièrement au niveau des fiches et des prises de courant et au Le nom du produit est la marque commerciale déposée de Samsung Techwin Co., Ltd. niveau où ils se situent.
- Page 21 • Ce produit ne doit être entretenu que par le personnel qualifié et autorisé des centres de service • DANGER D'ÉTRANGLEMENT - Conservez le cordon hors de portée des enfants. Ne placez JAMAIS Samsung. la caméra ou les cordons à moins d’1 mètre de distance du berceau de l’enfant ou de son parc.
- Page 22 Sommaire CONTENU INSTALLATION Contenu ……………………………………………………………… 5 Comment installer………………………………………………… 13 Moniteur sans fil …………………………………………………………… 13 MISE EN ROUTE Caméra sans fil ……………………………………………………………… 13 Description des fonctions ………………………………………… 6 ANNEXE La mise sous tension de votre moniteur …………………………………… 6 Spécifications …………………………………………………… 14 Exploitation du système ……………………………………………………...
-
Page 23: Contenu
ONTENU Contenu Le système est livré avec les composants suivants: Caméra Moniteur Manuel d'utilisation & Bon de garantie Adaptateur de la caméra Adaptateur du moniteur Chevilles en plastique (1EA) et Vis (1EA) Vérifiez le contenu de votre colis afin de confirmer que vous avez reçu le pack complet, y compris tous les composants mentionnés ci-dessus. Français ·... -
Page 24: Mise En Route
Exploitation du système ISE EN ROUTE Le fonctionnement de base est le suivant : Jumelage du moniteur et de la caméra Description des fonctions Les unités sont déjà jumelées pour plus de facilités. Ce bouton est utilisé pour ajouter une caméra supplémentaire. L'utilisateur peut La mise sous tension de votre moniteur sélectionner le numéro de caméra à... - Page 25 Voix activée (VOX) Niveau de son Permet de faire ressortir un son significatif d' un bruit ambiant de fond. Plus le son est fort autour de la caméra, plus les LED s'allument. L'écran s'éteint et passe en mode « VOX » s'il n'y a aucun son significatif au-delà...
-
Page 26: Affichage Du Mode De Visualisation
e Horloge numérique FFICHAGE DU ODE DE ISUALISATION Permet d'afficher l'heure réglée sur le moniteur. L'heure s'affiche uniquement en format AM / PM et non en format 24 heures. Description du voyant f Veilleuse Indique si la veilleuse est allumée. Utilisation du voyant g Enceinte du moniteur en silencieux Permet d'indiquer que l'enceinte du moniteur est en mode silencieux. -
Page 27: Utilisation Des Icônes De Configuration
b Sensibilité de la VOIX de la caméra Si vous n'êtes pas en mode « VOX », « OFF » s'affiche et ne doit pas être sélectionné. ► ► ► En mode VOX, vous pouvez sélectionner « H » (Haute) ou « L » (Basse). Si vous sélectionnez «... -
Page 28: 10 · Présentation
RÉSENT A TION Apprendre à utiliser votre système de surveillance Moniteur sans fil Après avoir ouvert la boîte, chargez complètement le moniteur avant de l'utiliser. Après le chargement initial, rechargez selon les besoins. Commandes de la façade Antenne du moniteur Bouton MENU Permet de passer du mode du moniteur vidéo au Elle reçoit et envoie des signaux en provenance de ou à... - Page 29 Commandes postérieures Bouton TALK Attache de ceinture Appuyez sur le bouton et maintenez-le enfoncé pour activer Lorsque vous transportez le moniteur, utilisez l'attache pour l'interphone relié à la caméra. suspendre le moniteur à votre ceinture. Support Haut-Parleurs Permet de maintenir le moniteur sur une table. Ils produisent le son transmis par la(les) caméra(s).
-
Page 30: Caméra Sans Fil
Caméra sans fil Commandes de la façade et commandes postérieures LED infrarouge Bouton de la veilleuse Les LED infrarouges permettent de voir dans des Permet d'allumer ou d'éteindre la veilleuse. conditions de faible/d'absence d'éclairage. Lorsque la caméra est sous tension, la Veilleuse s'allume automatiquement. -
Page 31: Installation
Déballez soigneusement la caméra. NSTALLATION Si vous installez des caméras fournies séparément, veuillez consulter la section de jumelage des caméras de ce manuel pour obtenir plus de détails sur l'installation. Fixez la caméra sur le mur. Comment installer Indiquez la position du trou de la vis sur le mur, puis perforez le trou et insérez 1 vis, puis fixez fermement la ATTENTION : Si vous utilisez le système pour surveiller un enfant en bas âge, ne placez caméra au mur en plaçant le support sur la vis installée... -
Page 32: Annexe
Élément Détails NNEXE Caméra sans fil Plage de taux d'humidité Taux d'humidité 85 % Spéciications Cote environnementale Utilisation en intérieur exclusivement Angle panoramique 300° Élément Détails Angle d'inclinaison 110° Système général Conformité réglementaire FCC/CE Bande de fréquence de 2400 MHz~2483,5 MHz fonctionnement Conformité... -
Page 33: Dépannage
Dépannage Problème Solution Pas d'image en 1. Vérifiez toutes les connexions de la caméra. Assurez-vous que l'adaptateur est branché. provenance d’une 2. Assurez-vous que les caméras et le moniteur sont activés tous les deux. caméra 3. Assurez-vous que la caméra est dans la portée du moniteur. 4. - Page 34 Élimination appropriée du produit Samsung Techwin se soucie de l’environnement à toutes les phases de fabrication du produit et s’engage à tout mettre en oeuvre pour offrir à ses clients des produits (Déchets d’équipements électrique et électronique) plus respectueux de l’environnement. La marque Eco représente l'engagement de (Applicable dans les pays de l’Union Européenne et dans d’autres pays européens...
- Page 35 GABARIT Trous des vis pour Ce gabarit sert à installer la l'installation de la caméra sur le mur. caméra FAÇADE DE LA CAMÉRA 2012-09-03 오전 11:30:23 SEW-3037W-FRENCH.indd 17...
- Page 36 TEL : +82-70-7147-8740~60 FAX : +82-31-8018-3745 SAMSUNG TECHWIN AMERICA Inc. SAMSUNG TECHWIN EUROPE LTD. 100 Challenger Rd. Suite 700 Ridgefield Park, NJ 07660 Samsung House, 1000 Hillswood Drive, Hillswood Business Park Chertsey, Toll Free : 1-877-349-3149 Surrey, UNITED KINGDOM KT16 OPS www.samsungsv.com TEL : +44-1932-45-5300 FAX : +44-1932-45-5325 2012-09-03 오전...
- Page 37 SafeVIEW Benutzerhandbuch SEW-3037W Deutsch 2012-09-03 오전 11:42:13 SEW-3037W-GERMAN.indd 1...
- Page 38 Richtlinien Konsolen und Tische, die vom Hersteller empfohlen oder in Dieser Handbuch ist urheberrechtlich geschützt und Eigentum der Samsung Techwin Co., Ltd. Verbindung mit dem Gerät verkauft werden. Bei Verwendung eines Unter keinen Umständen, dürfen dieses Dokument ohne die schriftliche Genehmigung der Transportwagens bewegen Sie das Gerät nur mit äußerster Vorsicht,...
- Page 39 • STRANGULIERUNGSGEFAHR - Außerhalb der Reichweite von Kindern aufbewahren. NIEMALS die • Das Gerät darf ausschließlich durch qualifizierte und von Samsung zugelassene Kamera oder Kabel näher als 1 m vom Kinderbett oder dem Laufgitter platzieren. Niemals Kundendienststellen repariert werden.
- Page 40 Inhalt LIEFERUMFANG INSTALLATION Verpackungsinhalt ………………………………………………… 5 Installationsanleitung …………………………………………… 13 Funk Monitor ………………………………………………………………… 13 ERSTE SCHRITTE Funk Kamera ………………………………………………………………… 13 Funktionsbeschreibung …………………………………………… 6 ANHANG Anschließen des Monitors an die Stromversorgung ……………………… 6 Technische Daten ………………………………………………… 14 Bedienen des Systems ……………………………………………………… 6 Problembehebung ………………………………………………...
-
Page 41: Verpackungsinhalt
IEFERUMFANG Verpackungsinhalt Das System besteht aus folgenden Komponenten: Funk Kamera Funk Monitor Benutzerhandbuch & Garantiekarte Kamera Netzteil Monitor Netzteil Kunststoffdübel (1 Stck.) & Schrauben (1 Stck.) Überprüfen Sie, ob alle oben aufgeführten Komponenten des Systems und sämtliches Zubehör im Lieferumfang enthalten sind. Deutsch ·... -
Page 42: Erste Schritte
Bedienen des Systems RSTE CHRITTE Die grundlegenden Bedienungsfunktionen: Verbindungsherstellung Funktionsbeschreibung Um Ihnen den Betrieb zu vereinfachen, ist die Verbindung zwischen Geräten bereits eingerichtet. Diese Taste dient zum Hinzufügen einer Anschließen des Monitors an die Stromversorgung zusätzlichen Kamera. Der Benutzer kann die zuzuweisende Vor der Verwendung des Monitors, müssen Sie es vollständig aufladen. - Page 43 Stimmaktivierung (VOX) Geräuschpegel Bei dieser Einstellung werden relevante Geräusche bei schwachen Je lauter die Geräusche in der Nähe der Kamera sind, desto mehr Umgebungsgeräuschen überwacht. LEDs leuchten auf. Im “VOX” Modus wird der Bildschirm ausgeschaltet, wenn innerhalb 1 Minute keine relevanten Geräusche erkannt werden, die lauter sind als ein bestimmter Pegel.
-
Page 44: Anzeige Videomodus
Anzeige Videomodus e Digitaluhr Zeigt die auf dem Monitor eingestellte Uhrzeit an. Es steht nur das AM / PM Zeitformat zur Verfügung. Beschreibung der Symbolleiste f Nachtlicht Zeigt an, dass das Nachtlicht eingeschaltet ist. Bedeutung der Symbole g Monitor Lautsprecher Stumm Zeigt an, dass der Monitorlautsprecher ausgeschaltet ist. -
Page 45: Beschreibung Der Setup Symbole
b VOX Empfindlichkeit der Kamera Wenn der “VOX” Modus nicht eingeschaltet ist, wird “OFF” angezeigt und es kann keine Einstellung vorgenommen werden. ► ► ► Im VOX-Modus kann “H” (Hoch) oder “L” (niedrig) eingestellt werden. Wenn “H”, eingestellt wurde, wird der Monitor bei leiseren Geräuschen eingeschaltet, Enter menu Move to a Adjust level... -
Page 46: Übersicht
Ü BERSICHT Übersicht über das Überwachungssystem Funk Monitor Vor der Verwendung des Monitors, müssen Sie es vollständig aufladen. Nach der Erstaufladung, laden Sie wie benötig wieder auf. Bedienungselemente auf der Vorderseite Monitor Antenne MENU Taste Drücken Sie diese Taste, um vom Modus der Sendet und empfängt Signale aus oder zu der Kamera. - Page 47 Bedienungselemente auf der Rückseite TALK Taste Gürtelclip Für die Sprachübertragung zur Kamera die Taste drücken Beim Tragen des Monitors, den Monitor mithilfe des und gedrückt halten. Gürtelclips am Gürtel befestigen. Stützfuß Lautsprecher Verwenden Sie den Stützfuß, um den Monitor auf einem Liefert von Kamera(s) gesendete Töne.
-
Page 48: Funk Kamera
Funk Kamera Bedienelemente auf der Vor- und Rückseite IR LEDs Nachtlicht Taste Mithilfe der Infrarot-LEDs ist es möglich, auch bei Schaltet das Nachtlicht ein oder aus. Dunkelheit oder schwachen Lichtverhältnissen die Wenn die Kamera eingeschaltet ist, wird Nachtlicht Kamera zu betreiben. automatisch eingeschaltet. -
Page 49: Installation
Packen Sie die Kamera vorsichtig aus. NSTALLATION Wenn Sie eine Kamera installieren, die nicht im Lieferumfang enthalten ist, schlagen Sie bitte im Abschnitt über den Verbindungsaufbau in dieser Anleitung nach. Befestigen Sie die Kamera and die Wand. Installationsanleitung Markieren Sie die Position der Schraubenöffnung an der Wand, bohren Sie das Loch und ziehen sie die ACHTUNG: Bei der Verwendung des Geräts für die Beobachtung von Kleinkindern mit Schraube fest. -
Page 50: Anhang
Position Details NHANG Funk Kamera Zulässiger Luftfeuchtigkeitsbereich ~ 85 % rel. Luftfeuchtigkeit Technische Daten Betriebsumgebung Nur für die Verwendung in Innenräumen Schwenkwinkel 300° Neigungswinkel 110° Position Details Erfüllte Richtlinien FCC/CE System Allgemein RoHS Richtlinie Ja, nur für CE Version Betriebsfrequenzbereich 2400 MHz - 2483,5 MHz Andere Sonderfunktionen Integriertes Mikrofon / Lautsprecher... -
Page 51: Problembehebung
Problembehebung Problem Lösung Kein Bild von der 1. Überprüfen Sie alle Anschlüsse der Kamera Achten Sie darauf, dass der Kamera Netzstrom eingesteckt ist. 2. Stellen Sie sicher, dass die Kameras und der Monitor eingeschaltet sind. 3. Stellen Sie sicher, dass sich die Kamera im Übertragungsbereich des Monitors befindet. - Page 52 Korrekte Entsorgung von Altgeräten Samsung Techwin hat sich dem Schutz der Umwelt verpflichtet und wendet in allen Phasen des Produktherstellungsprozesses umweltfreundliche Verfahren an, um seinen Kunden (Elektroschrott) umweltgerechtere Produkte zu liefern. Das Eco-Gütesiegel ist ein Zeichen für die Absicht von Samsung Techwin, Produkte zu (In den Ländern der Europäischen Union und anderen europäischen Ländern mit einem...
- Page 53 SCHABLONE Schraublöcher Diese Schablone wird verwendet, für die Montage um die Kamera an die Wand zu installieren. der Kamera KAMERA FRONT 2012-09-03 오전 11:42:20 SEW-3037W-GERMAN.indd 17...
- Page 54 TEL : +82-70-7147-8740~60 FAX : +82-31-8018-3745 SAMSUNG TECHWIN AMERICA Inc. SAMSUNG TECHWIN EUROPE LTD. 100 Challenger Rd. Suite 700 Ridgefield Park, NJ 07660 Samsung House, 1000 Hillswood Drive, Hillswood Business Park Chertsey, Toll Free : 1-877-349-3149 Surrey, UNITED KINGDOM KT16 OPS www.samsungsv.com TEL : +44-1932-45-5300 FAX : +44-1932-45-5325 2012-09-03 오전...