Table of Contents
Advertisement
Quick Links
Advertisement
Table of Contents

Related Manuals for NEFF S517T80D0G


Summary of Contents for NEFF S517T80D0G
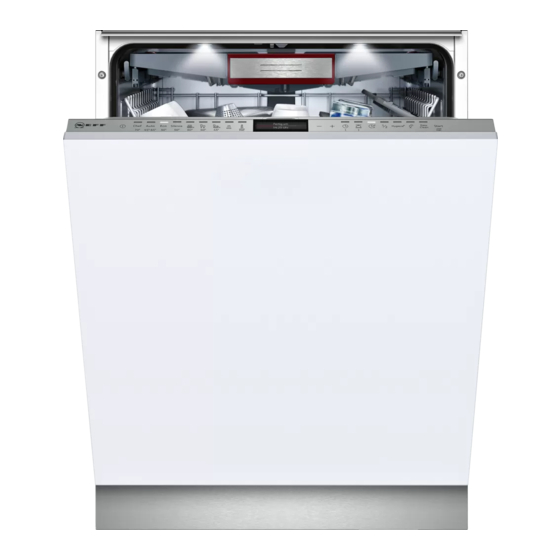
- Page 1 Dishwasher en Instruction manual S...
-
Page 3: Table Of Contents
Table of contents e n I n s t r u c t i o n m a n u a l Intended use ....5 Utensils. - Page 4 Operating the appliance ..33 Fault, what to do? ...41 Programme data ....33 Error message .
-
Page 5: Intended Use
Intended use en Keep children below the age of Intended use 8 years old at a safe distance from the appliance and power This appliance is intended ■ cable. I n t e n d e d u s e for use in the home and domestic environments. -
Page 6: Installation
en Safety instructions Also follow the installation Installation ■ instructions for the Following installation, ensure dishwasher to ensure that all ■ that the back of the appliances are operated dishwasher is not freely safely. accessible (protection If there is no information or if ■... -
Page 7: In Daily Use
Safety instructions en Please note that the Damage ■ insulation material of the The appliance may be dishwasher power cord may ■ repaired and opened up by a melt next to heat sources technician only. To do this, (e.g. heating / hot water disconnect the appliance installations) or hot from the power supply. - Page 8 en Safety instructions Do not lean or sit on the Keep children away from ■ ■ open door. detergents and rinse aid. In the case of free-standing These may cause chemical ■ appliances, ensure that the burns in the mouth, throat baskets are not overloaded.
-
Page 9: Door Lock
Safety instructions en Childproof lock (door lock) * Open the door with activated T he child-proof lock (door lock) child-proof lock (door lock) as D o o r l o c k protects children from potential follows: Press the catch of the hazards which the dishwasher child-proof lock to the right poses. -
Page 10: Environmental Protection
en Environmental protection Environmental Getting to know your protection appliance B oth the packaging of new appliances D iagrams of the control panel and the E n v i r o n m e n t a l p r o t e c t i o n G e t t i n g t o k n o w y o u r a p p l i a n c e and the old appliances themselves interior of the appliance can be found at... -
Page 11: Appliance Interior
Getting to know your appliance en Appliance interior Time setting W hen the appliance is switched on the See Fig. ~ Page 2 T i m e s e t t i n g for the first time, the time starts at 12:00 1"... -
Page 12: Switching On The Appliance For The First Time
en Getting to know your appliance Switching on the appliance for the first time When the dishwasher is switched on for Change the setting as follows: the first time, you are taken directly to Keep pressing button > )* until the the settings for switching on the required setting is displayed. -
Page 13: Settings
Getting to know your appliance en Settings The dishwasher has been preset with Make the setting with setting buttons certain settings for your convenience. + - X. You can change this factory setting. Press and hold the Info button { 8 for 3 seconds. - Page 14 en Getting to know your appliance Setting Factory setting Infotext by pressing Info button { Timelight * While programme is running, status information is projected onto floor. Infolight * Light is projected to signal an active cleaning cycle. Start programme Eco 50°...
-
Page 15: Water Softening System
Water softening system/special salt en Adjusting the water softening Water softening system system / special salt The amount of salt dispensed can be set from 0 to 62°E. Salt is not required T o ensure good rinsing results, the at the set value 0-8. W a t e r s o f t e n i n g s y s t e m / s p e c i a l s a l t dishwasher requires soft water, i.e. -
Page 16: Detergent With A Salt Component
en Water softening system/special salt Using detergents with salt Top up the salt as follows: Undo the screw plug on the component dispenser 1b. I f combined detergents with a salt Fill the dispenser with water D e t e r g e n t w i t h a s a l t c o m p o n e n t component are used, special salt can (required only when switching on the usually be omitted up to a water... -
Page 17: Rinse Aid
Rinse aid en Add rinse-aid up to the max. mark. Rinse aid As soon as the low rinse-aid indicator R i n s e a i d H is lit on the control panel or is requested on the front display * ):, rinse-aid should be topped up. -
Page 18: Switching Off Rinse Aid Refill Indicator
en Utensils Set the amount of rinse aid as follows: Utensils Open the door. Switch on ON/OFF switch (. N ot suitable Press Info button { 8 for 3 U t e n s i l s seconds until the following text is Cutlery and utensils made of wood. -
Page 19: Loading The Dishwasher
Utensils en Loading the dishwasher Note: Utensils must not be placed above the tablet collecting tray 1B. These may block the lid of the detergent Remove large food remnants. It dispenser and prevent it from opening is not necessary to prerinse utensils fully. -
Page 20: Cutlery Basket
en Utensils Tip: Other examples, such as the best Depending on the features of your way of loading your dishwasher, can be dishwasher, you can fold down the side found on our homepage. These can be shelves to provide more room for taller downloaded free of charge. -
Page 21: Etagere
Utensils en Etagere * Folding spikes * T he etagere and the space underneath * Depending on the features of your E t a g e r e F o l d i n g s p i k e s can be used for small cups and glasses dishwasher, the spikes can be folded or for larger items of cutlery, such as... -
Page 22: Knife Rack
en Utensils Knife rack * Baking sheet spray head * * Depending on the features of your * depending on the features of your K n i f e r a c k B a k i n g s h e e t s p r a y h e a d dishwasher, the upper basket is fitted dishwasher with a knife shelf. -
Page 23: Unloading The Dishwasher
Utensils en Unloading the dishwasher Appliance height 86.5 cm With cutlery basket Upper Lower To prevent water from dripping off the basket basket upper basket onto the utensils in the Setting 1 max. ø 24 cm 34 cm lower basket, it is recommended to empty the appliance from the bottom Setting 2 max. -
Page 24: Removing/Installing Cutlery Drawer
en Utensils Upper basket with side levers Removing/installing cutlery drawer Pull out upper basket 12. Hold the sides of the basket along the upper edge. This prevents it from suddenly dropping. To lower the upper basket; press in both levers on the left and right on the outside of the basket. -
Page 25: Removing/Installing Upper Basket
Utensils en Removing/installing upper Installing cutlery drawer 1*: Pull out cutlery drawer rails all the basket way (1). Insert cutlery drawer (2). In doing so, note the position of the detent pins (as illustrated in Step 2). Lift cutlery drawer slightly and insert rear detent pins into the lower locking hooks on the rails (3). -
Page 26: Removing/Installing Lower Basket
en Utensils Removing/installing lower Installing upper basket 12: Pull out upper basket rails all the basket way (1). Insert upper basket (2). In doing so, note the position of the detent pins (as illustrated in Step 2). Lift upper basket slightly and insert rear detent pins into the locking hooks (3). -
Page 27: Detergent
detergent en Installing lower basket 9*: Detergent Pull out lower basket rails all the way (1). Y ou can use tablets as well as powder Insert lower basket into the rear d e t e r g e n t or liquid detergents for dishwashers, but holders (2). -
Page 28: Adding Detergent
en detergent Adding detergent Close cover on the detergent dispenser. Cover “clicks” into position. If the detergent dispenser 9: is still closed, actuate locking bar 9B to open it. Pour detergent into the dry detergent CLICK dispenser 9: only (insert tablet flat, not on its edge). -
Page 29: Combination Detergent
detergent en Combination detergent If programmes are short, tablets may ■ not have full cleaning effect due to Apart from conventional detergents different dissolving properties and (Solo), a number of products are offered there may even be undissolved with additional functions. These detergent residue. -
Page 30: Overview Of Programmes
en Overview of programmes Overview of programmes T he max. possible number of programmes is illustrated in this overview. The O v e r v i e w o f p r o g r a m m e s corresponding programmes and their arrangement can be found on the fascia. -
Page 31: Programme Selection
Overview of programmes en Type of dish Type of soiling Programme Possible Programme sequence additional options Time-optimised: u / t / part dried, common Cleaning 60° mixed utensils household food Intermediate rinse and cutlery remnants Rinsing Short 60°C Drying sensitive Time-optimised: ñ... -
Page 32: Additional Functions
en Additional functions Ï intensiveZone * Additional functions P erfect for a mixed load. You can wash i n t e n s i v e Z o n e very soiled pots and pans in the lower * Depending on the features of your A d d i t i o n a l f u n c t i o n s basket together with normally soiled dishwasher, you can select different... -
Page 33: Operating The Appliance
Operating the appliance en Keep pressing button >)* until the Operating the required setting is indicated on the display window at the top @. appliance Make the setting with setting buttons + -X. P rogramme data Press and hold the Info button { O p e r a t i n g t h e a p p l i a n c e 8 for 3 seconds. -
Page 34: Zeolith Drying
en Operating the appliance ¼ Sensor setting Zeolith drying Warning The programme sequence is optmised Z e o l i t h d r y i n g in Auto programmes with the aid of Risk of burns from touching the blow sensors. -
Page 35: Autopoweroff
Operating the appliance en AutoPowerOff (Switching off TimeLight (Optical display automatically after the end of while the programme is the programme) running) * T o save energy, the dishwasher * depending on the features of your A u t o P o w e r O f f t i m e L i g h t is switched off 1 minute after dishwasher... -
Page 36: Button Volume
en Operating the appliance Button volume Switching the appliance on When you are operating the dishwasher, Turn on tap fully. a signal sounds whenever a button is Open the door. pressed. You can control the volume of Switch on ON/OFF switch (. the signal. -
Page 37: Time Preselection
Operating the appliance en Time preselection Switching off the appliance You can delay the start of the Short time after the end of the programme by up to 24 hours. programme: Depending on the setting of the time Open the door. display, the end of programme is Switch off ON/OFF switch (. -
Page 38: Terminating The Programme
en Cleaning and maintenance Terminating the programme Cleaning and (Reset) maintenance Open the door. T e r m i n a t i n g t h e p r o g r a m m e Press the START button )" and A regular inspection and maintenance hold for 3 seconds C l e a n i n g a n d m a i n t e n a n c e... -
Page 39: Easyclean
Cleaning and maintenance en Š Notes Easyclean Only clean the appliance with ■ E asyclean used in combination with special detergents/appliance E a s y C l e a n commercially available machine cleaners which are suitable for use cleaning detergent is a suitable with dishwashers. -
Page 40: Special Salt And Rinse Aid
en Cleaning and maintenance Filters Notes Remove any coarse soiling in the ■ The filters 1j keep large foreign interior using a damp cloth. objects in the rinsing water away from Run the programme without dishes, ■ the pump. hese foreign objects may and in combination with a machine occasionally block the filters. -
Page 41: Spray Arms
Fault, what to do? en Spray arms Fault, what to do? Limescale and contaminants in the rinsing water may block nozzles and E xperience has shown that you can F a u l t , w h a t t o d o ? bearings on the spray arms 1: and rectify most faults which occur in daily operation yourself. -
Page 42: Waste Water Pump
en Fault, what to do? Waste water pump Check impeller wheel and remove any foreign objects. Large food remnants or foreign objects Place pump cover in the original which were not captured by the filters position (2) and press down until it may block the waste water pump. -
Page 43: Fault Table
Fault, what to do? en Fault table Fault Cause Remedial action Error code “:‚‰ is lit. Supply hose kinked. Install supply hose without kinks. Tap turned off. Turn on the tap. Tap jammed or calcified. Turn on the tap. Flow rate must be min. 10 l/min. when water supply is open. - Page 44 en Fault, what to do? Fault Cause Remedial action Error code “:ƒ† is lit. Waste water pump blocked or Clean pump and lock cover correctly. cover on the waste water pump is ~ "Waste water pump" on page 42 not locked in position. Error code “:ƒˆ...
- Page 45 Fault, what to do? en Fault Cause Remedial action Utensils not dry. No or too little rinse aid in the Refill rinse aid. dispenser. Programme selected without Select programme with drying. drying. ~ "Overview of programmes" on page 30 Water collecting in depressions Arrange utensils in a sloping position, on the utensils and cutlery.
- Page 46 en Fault, what to do? Fault Cause Remedial action Food remnants on the Utensils placed too closely Arrange utensils with adequate clearance utensils. together, utensils basket between them ensuring that the spray jets overfilled. can reach the surface of the utensils. Prevent contact points.
- Page 47 Fault, what to do? en Fault Cause Remedial action Detergent residue. Detergent dispenser cover 9: Utensils must not be placed above the blocked by utensils and therefore tablet collecting tray 1B. These may does not open fully. block the lid of the detergent dispenser and prevent it from opening fully.
- Page 48 en Fault, what to do? Fault Cause Remedial action White, stubborn coatings; Detergent substances are Change detergent brand. limescale on the utensils, deposited. These coatings cannot Clean appliance mechanically. container or door. usually be removed with chemicals (appliance cleaner, ...). Hardness range incorrectly set or Set water softening system according to water hardness greater than 8.9...
- Page 49 Fault, what to do? en Fault Cause Remedial action Plastic parts discoloured. Too low rinsing temperature. Select programme with higher washing temperature. Utensils precleaned too intensely; Do not prerinse utensils. Remove only sensors therefore decide on large food remnants. weak programme sequence. Increase sensitivity of the sensors.
- Page 50 en Fault, what to do? Fault Cause Remedial action Appliance cannot be Malfunction. Disconnect appliance from the power switched on or operated. supply; pull out the mains plug or switch off the fuse. Wait at least 5 seconds, then connect the appliance to the power supply.
- Page 51 Fault, what to do? en Fault Cause Remedial action Detergent residue in the Spray arms blocked by utensils, Ensure that the spray arms can rotate detergent dispenser 9: therefore detergent is not rinsed freely. or in the tablet collecting out. tray 1B.
-
Page 52: Customer Service
en Customer service Customer service Installation and connection I f you are unable to rectify the fault, C u s t o m e r s e r v i c e please contact your customer service. T he dishwasher must be connected We will always find an appropriate I n s t a l l a t i o n a n d c o n n e c t i o n correctly, otherwise it will not function... -
Page 53: Delivery
Installation and connection en Delivery Installation Your dishwasher has been checked The required installation dimensions thoroughly in the factory to ensure that can be found in the installation it is in working order. This may cause instructions. Level the appliance with small water stains. -
Page 54: Drinking Water Connection
en Installation and connection Drinking water connection To change the setting: Open the door. Switch on ON/OFF switch (. Fasten the drinking water connection Press Info button {8 for 3 to the tap according seconds until the following text is to the installation instructions using indicated on the display window at the enclosed parts. -
Page 55: Removal
Installation and connection en Transporting The connection may be modified ■ by technicians only. Empty the dishwasher and secure loose A power cord extension may be ■ parts. purchased from customer service only. Drain the appliance according Use only a residual current operated ■... - Page 56 *9001280602* 9001280602 (9712) 642 TW...