Table of Contents
Advertisement
Quick Links
Advertisement
Table of Contents

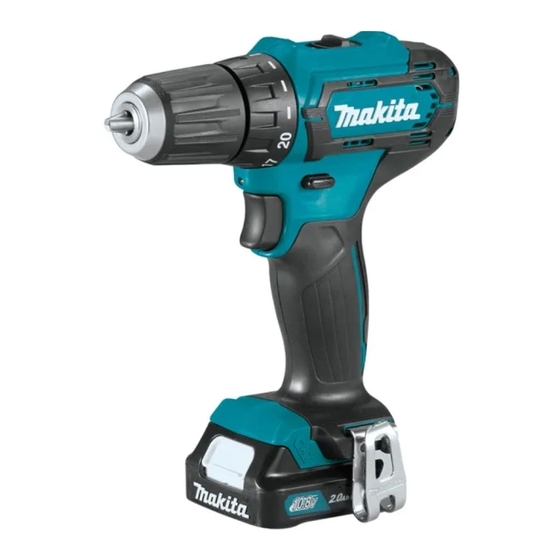
Summary of Contents for Makita DF333DWAE
- Page 1 INSTRUCTION MANUAL Cordless Driver Drill DF333D DF033D Read before use.
-
Page 2: Specifications
SPECIFICATIONS Model: DF333D DF033D Drilling capacities Steel 10 mm Wood 21 mm Fastening capacities Wood screw 5.1 mm x 63 mm Machine screw No load speed High (2) 0 - 1,700 min Low (1) 0 - 450 min Overall length 179 mm 149 mm Rated voltage... -
Page 3: Ec Declaration Of Conformity
Power tools can produce electromagnetic WARNING: The vibration emission during actual fields (EMF) that are not harmful to the user. use of the power tool can differ from the declared emission However, users of pacemakers and other similar value depending on the ways in which the tool is used. medical devices should contact the maker of their device and/or doctor for advice before operating WARNING: Be sure to identify safety measures to pro-... -
Page 4: Cordless Driver Drill Safety Warnings
It is an employer's responsibility to enforce Do not use a battery pack or tool that is dam- the use of appropriate safety protective equip- aged or modified. Damaged or modified batteries ments by the tool operators and by other per- may exhibit unpredictable behaviour resulting in sons in the immediate working area. fire, explosion or risk of injury. -
Page 5: Tips For Maintaining Maximum Battery Life
Always install the battery cartridge fully until the red indicator cannot be seen. If not, CAUTION: Only use genuine Makita batteries. it may accidentally fall out of the tool, causing injury to Use of non-genuine Makita batteries, or batteries that you or someone around you. have been altered, may result in the battery bursting CAUTION: Do not install the battery cartridge causing fires, personal injury and damage. It will forcibly. If the cartridge does not slide in easily, it is... -
Page 6: Battery Protection System
Battery protection system Switch action The tool is equipped with a battery protection system. This system automatically cuts off power to the motor to extend battery life. The tool will automatically stop during operation if the tool and/or battery are placed under one of the following conditions: Overloaded: The tool is operated in a manner that causes it to draw an abnormally high current. In this situation, turn the tool off and stop the application that caused the tool to become overloaded. Then turn the tool on to restart. -
Page 7: Reversing Switch Action
Reversing switch action Position of Speed Torque Applicable speed operation change lever High Heavy load- ing operation High Light loading operation To change the speed, switch off the tool first. Select the "2" side for high speed or "1" for low speed but high torque. Be sure that the speed change lever is set to the correct position before operation. If the tool speed is coming down extremely during the operation with "2", slide the lever to the "1"... -
Page 8: Adjusting The Fastening Torque
Adjusting the fastening torque ► 1 . Adjusting ring 2. Graduation 3. Arrow The fastening torque can be adjusted in 21 levels by turning the adjusting ring. Align the graduations with the arrow on the tool body. You can get the minimum fastening torque at 1 and maximum torque at marking. The clutch will slip at various torque levels when set at the number 1 to 20. The clutch does not work at marking. Before actual operation, drive a trial screw into your material or a piece of duplicate material to determine which torque level is required for a particular application. The following shows the rough guide of the relationship between the screw size and graduation. Graduation Machine screw Wood Soft wood – ɸ3.5 x 22 ɸ4.1 x 38 screw (e.g. -
Page 9: Installing Hook
Installing driver bit holder NOTE: Both shallower type (A=12 mm, B=9 mm) and deeper type (A=17 mm, B=14 mm) of driver bits can be used. Optional accessory To install the driver bit, pull the sleeve in the direction of the arrow and insert the driver bit into the sleeve as far as it will go. Then release the sleeve to secure the driver bit. ► 1 . -
Page 10: Screwdriving Operation
Screwdriving operation Using the tool as a hand screwdriver CAUTION: Adjust the adjusting ring to the proper torque level for your work. CAUTION: Make sure that the driver bit is inserted straight in the screw head, or the screw and/or driver bit may be damaged. Place the point of the driver bit in the screw head and apply pressure to the tool. Start the tool slowly and then increase the speed gradually. Release the switch trigger... -
Page 11: Optional Accessories
Put the tool in the holster and lock it with the hol- OPTIONAL ster button. ACCESSORIES CAUTION: These accessories or attachments are recommended for use with your Makita tool specified in this manual. The use of any other accessories or attachments might present a risk of injury to persons. Only use accessory or attachment for its stated purpose. If you need any assistance for more details regard- ing these accessories, ask your local Makita Service Center. - Page 12 Makita Europe N.V. Jan-Baptist Vinkstraat 2, 3070 Kortenberg, Belgium Makita Corporation 3-11-8, Sumiyoshi-cho, Anjo, Aichi 446-8502 Japan 885672-226 www.makita.com 20180731...


