Table of Contents
Advertisement
Quick Links
Advertisement
Table of Contents

Related Manuals for Lenovo D22-10


Summary of Contents for Lenovo D22-10
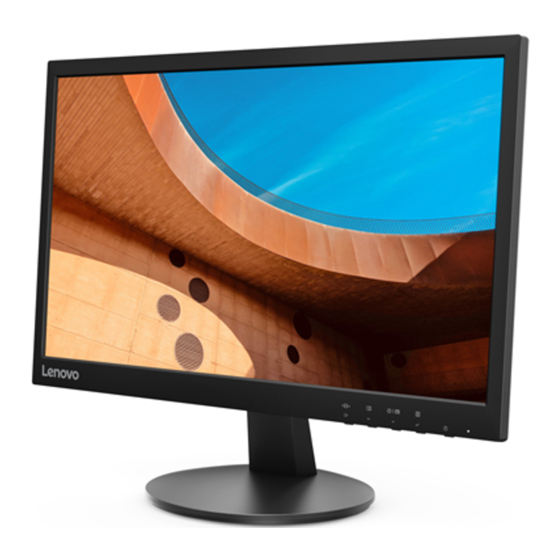
- Page 1 Lenovo D22-10 User Guide...
- Page 2 © Copyright Lenovo 2018.All rights reserved. LENOVO products, data, computer software, and services have been developed exclusively at private expense and are sold to governmental entities as commercial items as defined by 48 C.F.R. 2.101 with limited and restricted rights to use, reproduction and -disclosure.
-
Page 3: Table Of Contents
Online technical support ..............................A-1 Telephone technical support ............................. A-1 Appendix B Notices ................................ B-1 Recycling information ................................ B-1 Collecting and recycling a disused Lenovo computer or monitor ..................B-2 Disposing of Lenovo computer components ........................B-2 Trademarks ..................................B-2 ©Copyright Lenovo 2018... -
Page 4: Safety Information
To reduce the risk of electric shock, do not perform any servicing other than that contained in the operating instructions unless you are qualified to do so. Handling: If your monitor weighs more than 18 kg (39.68 lb), it is recommended that it be moved or lifted by two people. ©Copyright Lenovo 2018... -
Page 5: Chapter 1 Getting Started
2. Align the stand assembly bracket to the monitor. 3. Insert the bracket towards monitor until it locks in place. Note: To attach a VESA mount, please see “Detaching the monitor stand” on page 2-7. D22-10 Flat Panel Monitor User’s Guide... -
Page 6: Product Overview
Product overview This section will provide information on adjusting monitor positions, setting user controls, and using the cable lock slot. Types of adjustments Tilt Please see the illustration below for an example of the tilt range. User controls Your monitor has controls on the front which are used to adjust the display. For information on how to use these controls, please see “Adjusting your monitor image ”... -
Page 7: Cable Lock Slot
1. Power off your computer and all attached devices, and unplug the computer power cord. 2. Connect the analog signal cable to the D-SUB connector of the monitor and the other end on the back of the computer. D22-10 Flat Panel Monitor User’s Guide... - Page 8 3. Connect one end of the HDMI cable to the HDMI connector on the back of the computer, and the other end to the HDMI connector on the monitor. Lenovo recommends that customers who require to use the HDMI input on their monitor purchase the “Lenovo HDMI to HDMI cableOB47070”.
-
Page 9: Registering Your Option
Thank you for purchasing this Lenovo product. Please take a few moments to register your product and provide us with information that will help Lenovo to better serve you in the future. Your feedback is valuable to us in developing products and services that are important to you, as well as in developing better ways to communicate with you. -
Page 10: Chapter 2 Adjusting And Using Your Monitor
If you have questions on eye fatigue or visual discomfort, consult a vision care specialist for advice. 2-1 D22-10 Flat Panel Monitor User’s Guide... -
Page 11: Quick Tips For Healthy Work Habits
Quick tips for healthy work habits The following information is a summary of some important factors to consider to help you remain comfortable and productive while you use your computer. ● Good posture starts with equipment setup: The layout of your work area and the setup of your computer equipment have a large effect on your posture while using your computer. -
Page 12: Accessibility Information
Select Low Blue Light and press confirm. Accessibility information Lenovo is committed to providing greater access to information and technology to people with disabilities. With assistive technologies, users can access information in the way most appropriate to their disability. Some of these technologies are already provided in your operating system;... -
Page 13: Adjusting Your Monitor Image
Adjusting your monitor image This section describes the user control features used to adjust your monitor image. Using the direct access controls The direct access controls can be used when the On Screen Display (OSD) is not displayed. Table 2-1. Direct access controls Icon Control Description... - Page 14 HDMI Select HDMI Signal Full Screen ● Scaling Original AR Image Properties ● Screen Prioritization Text Mode ● Novo Vision Web pic Mode ● Image Properties Video Mode ● Low Blue Light ● 2-5 D22-10 Flat Panel Monitor User’s Guide...
- Page 15 Table 2-2. OSD functions OSD Icon on Main Description Submenu Menu Shows resolution, refresh rate, and product details. Note: This screen does not allow any changes to the settings. Information This section lists the languages supported by your monitor. Options Note: The language chosen only affects the language of the OSD.
-
Page 16: Selecting A Supported Display Mode
Note: Standby also occurs STAR if there is no image output to the monitor. Press power key to switch on ENERGY There may be a slight delay before the image reappears. STAR 2-7 D22-10 Flat Panel Monitor User’s Guide... -
Page 17: Caring For Your Monitor
Caring for your monitor Be sure to turn off the power before you perform any maintenance on the monitor. Do not: Apply water or liquid directly to your monitor. Use solvents or abrasives. Use flammable cleaning materials to clean your monitor or any other electrical equipment. -
Page 18: Chapter 3 Reference Information
0° to 50°C (32°F to 122° F) Storage Temperature -20° to 60°C (-4°F to 140° F) Shipping -20° to 60°C (-4° F to 140° F) Humidity Operating 8% to 80% Storage 5% to 95% Shipping 5% to 95% 3-1 D22-10 Flat Panel Monitor User’s Guide... -
Page 19: Troubleshooting
Troubleshooting If you have a problem setting up or using your monitor, you might be able to solve it yourself. Before calling your dealer or Lenovo, try the suggested actions that are appropriate to your problem. Table3-2.Troubleshooting Problem Possible cause... -
Page 20: Manual Image Setup
Manual image setup If automatic image setup does not establish the image that you prefer, perform manual image setup. Note: Have your monitor powered on for about 15 minutes, until the monitor warms up. 3-3 D22-10 Flat Panel Monitor User’s Guide... -
Page 21: Manually Installing The Monitor Driver
Colour Matching Profiles. Note: On LCD monitors, unlike CRTs, a faster refresh rate does not improve display quality. Lenovo recommends using either 1920 x 1080 at a refresh rate of 60 Hz, or 640 x 480 at refresh rate of 60 Hz. - Page 22 Color Matching Profiles. Note: On LCD monitors, unlike CRTs, a faster refresh rate does not improve display quality. Lenovo recommends using either 1920x1080 at a refresh rate of 60 Hz, or 640 x 480 at a refresh rate of 60 Hz.
-
Page 23: Service Information
Service information Customer responsibilities The warranty does not apply to a product which has been damaged due to accident, misuse, abuse, improper installation, usage not in accordance with product specifications and instructions, natural or personal disaster, or unauthorized alterations, repairs or modifications. -
Page 24: Appendix A Service And Support
Product replacement assistance or exchange of defective components also is available during the warranty period. In addition, if your option is installed in a Lenovo computer, you might be entitled to service at your location. A Lenovo technical support representative can help you determine the best alternative. -
Page 25: Appendix B Notices
Web sites. The materials at those Web sites are not part of the materials for this Lenovo product, and use of those Web sites is at your own risk. -
Page 26: Collecting And Recycling A Disused Lenovo Computer Or Monitor
Collecting and recycling a disused Lenovo computer or monitor If you are a company employee and need to dispose of a Lenovo computer or monitor that is the property of the company, you must do so in accordance with the Law for Promotion of Effective Utilization of Resources.