Table of Contents
Advertisement
Quick Links
The KitchenAid
®
KitchenAid
household Stand Mixers. For complete information on the use of these Stand Mixers,
®
please read the instructions that came with your Stand Mixer.
L' accessoire du robot culinaire KitchenAid
sur socle à usage domestique KitchenAid
ces batteurs sur socle, lire le guide d'instructions fourni avec le batteur sur socle.
El accesorio procesador de alimentos KitchenAid
batidoras domésticas con base KitchenAid
batidoras con base, lea las instrucciones que vienen con su batidora con base.
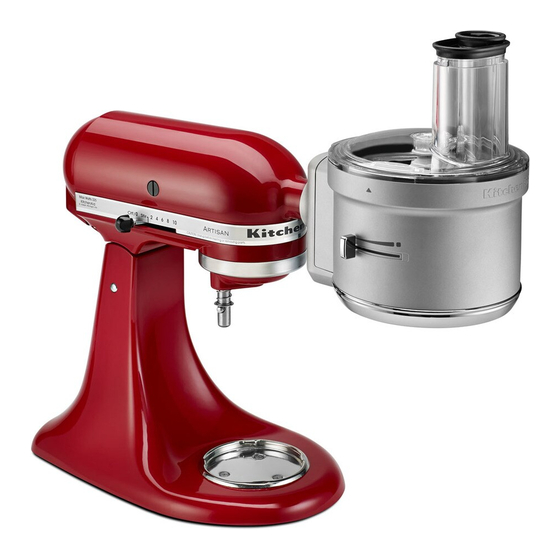
Food Processor Attachment is designed exclusively for use with all
est conçu pour être utilisé exclusivement avec des batteurs
®
. Pour des renseignements complets sur l'utilisation de
®
está diseñada exclusivamente para usarse con todas las
®
. Para obtener la información completa sobre el uso de estas
®
KSM1FPA
KSM2FPA
INSTRUCTIONS
INSTRUCTIONS
INSTRUCCIONES
Advertisement
Table of Contents

Related Manuals for KitchenAid KSM12FPA


Summary of Contents for KitchenAid KSM12FPA
- Page 1 Stand Mixers. For complete information on the use of these Stand Mixers, ® please read the instructions that came with your Stand Mixer. L' accessoire du robot culinaire KitchenAid est conçu pour être utilisé exclusivement avec des batteurs ®...
- Page 2 Your satisfaction is our #1 goal. Remember to register your product online at www.kitchenaid.com or by mail using the enclosed Product Registration Card. Join us in the kitchen at www.kitchenaid.com. USA: 1.800.541.6390 KitchenAid.com Canada: 1.800.807.6777 KitchenAid.ca...
-
Page 3: Table Of Contents
Food Processor attachment, please fill out and mail your product registration card packed with the unit, or register on-line at www.kitchenaid.com. This card will enable us to contact you in the unlikely event of a product safety notification and assist us in complying with the provisions of the Consumer Product Safety Act. -
Page 4: Food Processor Attachment Safety
FOOD PROCESSOR ATTACHMENT SAFETY IMPORTANT SAFEGUARDS When using electrical appliances, basic safety precautions should always be followed, including the following: 1. Read all instructions. 2. To protect against risk of electrical shock, do not put Stand Mixer in water or other liquid. - Page 5 FOOD PROCESSOR ATTACHMENT SAFETY 7. The use of attachments not recommended or sold by KitchenAid may cause fire, electric shock, or injury. 8. Do not use outdoors. 9. Close supervision is necessary when any appliance is used by or near children.
-
Page 6: Parts And Features
PARTS AND FEATURES 2-in-1 food pusher_ Feed tube Lid with inter_lock Liner_ Dr_ive pin Attachment assembly* Adjustable slicing disc contr_ol Dicing disc cleaner_ (KSM2FPA only) Rever_sible shr_edding disc Adjustable slicing disc Julienne disc Disc adapter_ Dicing disc (use with Julienne and blade and Rever_sible (KSM2FPA only) -
Page 7: Getting Started
GETTING STARTED Befor_e Fir_st Use Before using your Food Processor attachment for the first time, wash all parts and accessories either by hand or in the dishwasher (see “Care and cleaning” section). IMPORTANT: To avoid damaging the Food Processor attachment, do not immerse the attachment assembly in water or other liquids. -
Page 8: Installing The Discs
INSTALLING THE DISCS Installing the r_ever_sible shr_edding disc Disc adapter_ Dr_ive pin Insert the liner into the attachment Slide the disc adapter onto the drive pin. assembly so that the feed tubes line up and the liner lies flat. Disc adapter_ Finger_ gr_ip Hold the reversible shredding disc Install the lid by turning counter... -
Page 9: Installing The Adjustable Slicing Disc
INSTALLING THE DISCS Finger_ gr_ip Disc adapter_ Hold the julienne disc by the 2 finger Install the lid by turning counter grips, with the smaller side of the middle clockwise, being sure it locks into place. hole facing UP . Install the disc on the disc adapter by fitting the adapter through the hole in the bottom of the disc until it is seated against the liner. -
Page 10: Installing The Dicing Disc And Blade
INSTALLING THE DISCS Installing the dicing disc and blade Insert the liner into the attachment Hold the dicing disc by the middle hole assembly so that the feed tubes line and disc edge, chute lip-side facing up and the liner lies flat. DOWN. -
Page 11: Operating The Food Processor Attachment
OPERATING THE FOOD PROCESSOR ATTACHMENT Attaching the Food Pr_ocessor_ attachment to the Stand Mixer_ Turn Stand Mixer OFF and unplug. For_ Stand Mixer_s with a hinged attachment hub cover_: Flip up to open. For_ Stand Mixer_s with a r_emovable attachment hub cover_: Turn the attachment knob counterclockwise to remove attachment hub cover. - Page 12 OPERATING THE FOOD PROCESSOR ATTACHMENT Tighten attachment knob until the Food Place a bowl or container under the Processor attachment is completely food exit chute. secured to Stand Mixer. Plug into a grounded 3 prong outlet.
-
Page 13: Speed Selection Guide
OPERATING THE FOOD PROCESSOR ATTACHMENT Speed selection guide Different foods require varying degrees of pressure and speed for optimized results. • In general, use light pressure and low speeds for soft, delicate foods — soft fruits and vegetables like kiwi or ripened tomatoes, as well as soft cheeses like mozzarella. •... -
Page 14: Using The Food Processor Attachment
OPERATING THE FOOD PROCESSOR ATTACHMENT Using the Food Pr_ocessor_ attachment Before operating the Food Processor attachment, be sure the attachment assembly and discs are properly assembled and attached to the Stand Mixer (see “Assembling the Food Processor attachment” section). Place a bowl or container underneath the feed tube to catch all processed food. -
Page 15: Tips For Great Results
TIPS FOR GREAT RESULTS Using a slicing or_ shr_edding disc To slice or_ shr_ed fr_uits and vegetables that ar_e small: Position food vertically or horizontally in layers within the feed tube. Fill feed tube in order to keep food positioned properly. Process using even pressure with the food pusher. -
Page 16: Helpful Hints
TIPS FOR GREAT RESULTS Helpful hints • To avoid damage to the blade or motor, • Different foods require varying degrees of do not process food that is so hard or pressure and speed for optimal results. In firmly frozen that it cannot be pierced general, use light pressure and low speed with the tip of a sharp knife. -
Page 17: Recipes
Cr_ispy Potato Latkes DISCS Makes 12-16 latkes Place the adjustable slicing disc on the USED: KitchenAid Food Processor attachment and ® TIP: If a thermometer is slide the external lever to the 5th notch. Place unavailable, test the oil heat... - Page 18 1 to 2 slices in each jar. The more seeds that are Place the adjustable slicing disc on the added, the spicier the pickles KitchenAid Food Processor attachment and ® will become. slide the external lever to the 4th notch. Place...
- Page 19 USED: model or accessory pack, KSMFPAEP . TIP: Hash can be made one day ahead, then reheated on a Assemble the dicing kit on the KitchenAid ® baking sheet at 400°F (204°C) Food Processor attachment. Dice the for 10 minutes.
- Page 20 White Wine Sangr_ia Spr_itzer_ DISCS Makes 8-10 servings Place the adjustable slicing disc on the USED: KitchenAid Food Processor attachment ® TIP: For an alternative flavor, and slide the external lever to the 6th notch. use a sweet red wine in place Using the large feed tube, slice the limes, of the Sauvignon Blanc.
-
Page 21: Care And Cleaning
CARE AND CLEANING IMPORTANT: To avoid damaging the Food Processor attachment, do not immerse the attachment assembly in water or other liquids. All other parts are top rack dishwasher safe. Turn Stand Mixer OFF and unplug from outlet. Remove and disassemble Food Wipe the attachment assembly with a Processor attachment. -
Page 22: Troubleshooting
TROUBLESHOOTING Food Pr_ocessor_ attachment doesn’t r_un • Check to see whether the Stand Mixer is plugged into a grounded 3 prong outlet. If it is, check the fuse or circuit breaker on the electrical circuit the Stand Mixer is connected to and make sure the circuit is closed. -
Page 23: Warranty And Service
IF THIS PRODUCT FAILS TO WORK AS WARRANTED, CUSTOMER’S SOLE AND EXCLUSIVE REMEDY SHALL BE REPAIR OR REPLACEMENT ACCORDING TO THE TERMS OF THIS LIMITED WARRANTY. KITCHENAID AND KITCHENAID CANADA DO NOT ASSUME ANY RESPONSIBILITY FOR INCIDENTAL OR CONSEQUENTIAL DAMAGES. This warranty gives you specific legal rights and you may also have other... - Page 24 Centre. In the carton include your name and products meets the exacting standards of complete shipping address along with a copy the KitchenAid brand that, if your Food of the proof of purchase (register receipt, Processor attachment should fail within credit card slip, etc.).