Table of Contents
Advertisement
Quick Links
Advertisement
Table of Contents

Summary of Contents for Canon EF 70-200mm
- Page 1 EF70-200mm f/4L IS II USM Instructions...
- Page 2 Thank you for purchasing a Canon product. Canon’s EF70-200mm f/4L IS II USM is a Camera Firmware telephoto lens for use with EOS cameras. Please use the latest version of firmware with the camera “IS” stands for Image Stabilizer. in use. For details on whether the firmware is the latest ●...
-
Page 3: Safety Precautions
Safety Precautions Precautions to ensure that the camera is used Details pertaining to risks that may Caution safely. Read these precautions thoroughly. Make result in injury. sure all details are observed in order to prevent Do not leave the camera in locations subject to ●... -
Page 4: General Precautions
General Precautions Handling Precautions If the lens is taken from a cold environment into a ● ● warm one, condensation may develop on the lens surface and internal parts. To prevent condensation in this case, first put the lens into an airtight plastic bag before taking it from a cold to warm environment. - Page 5 This device complies with Part 15 of the FCC Rules. CAN ICES-3 (B) / NMB-3 (B) Operation is subject to the following two conditions: (1) This device may not cause harmful interference, and (2) this device must accept any interference received, including interference that may cause undesired operation.
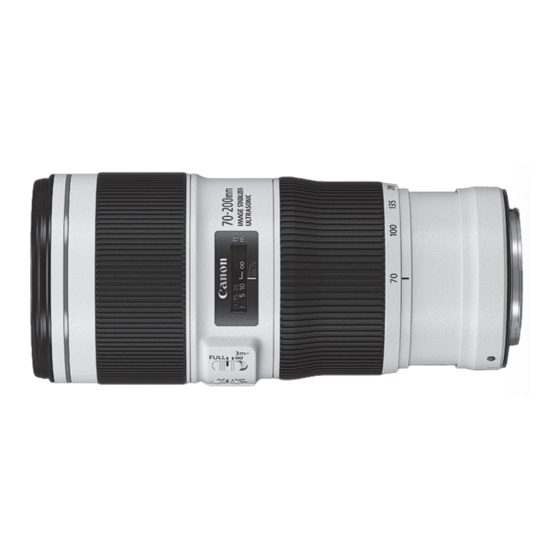
- Page 6 Nomenclature Focusing distance range selector switch (→ 7) Distance scale (→ 9) Hood mount (→ 14) Zoom ring (→ 8) Zoom position index (→ 8) Rubber ring (→ 6) Filter mounting thread (→ 16) Contacts (→ 6) Focusing ring (→ 7) Focus mode switch (→...
-
Page 7: Mounting And Detaching The Lens
If the rubber ring becomes worn, it is replaceable by a Canon Service Center at a cost. After detaching the lens, place the lens with ●... -
Page 8: Setting The Focus Mode
2. Setting the Focus Mode 3. Switching the Focusing Distance Range To shoot in autofocus (AF) mode, set the focus mode switch to AF. You can set the focusing distance range with a To use only manual focusing (MF), set the focus switch. - Page 9 4. Zooming To zoom, turn the lens’ zoom ring. Be sure to finish zooming before focusing. Zooming after focusing can affect the focus. ENG-8...
-
Page 10: Infrared Index
5. Infinity Compensation Mark 6. Infrared Index Infinity compensation mark Distance scale Infrared Index The infrared index corrects the focus setting when Distance index Distance scale using monochrome infrared film. Focus on the subject manually, then adjust the distance scale indicated by To compensate for shifting of the infinity focus the distance index by moving the focusing ring to the point that results from changes in temperature,... -
Page 11: Image Stabilizer
7. Image Stabilizer You can use the image stabilizer in AF or MF mode. Set the STABILIZER switch Select the stabilizer mode. First press the shutter to ON. button down halfway, then MODE 1: Corrects vibrations in ● ● press down all the way to all directions. -
Page 12: Tips On Using The Image Stabilizer
8. Tips on Using the Image Stabilizer The image stabilizer for this lens is effective for hand-held shots in the following conditions. MODE 1 MODE 2 ■ ■ In semi-darkened areas such as indoors or When panning subjects in motion. ●... - Page 13 Tips on Using the Image Stabilizer The Image Stabilizer cannot compensate for a When you use a tripod, the Image Stabilizer ● ● ● ● blurred shot caused by a subject that moved. should be turned off to save battery power. Set the STABILIZER switch to OFF when you Even with a monopod, the Image Stabilizer will ●...
- Page 14 9. Tripod Mount (Sold Separately) This lens can be used with the A II (W II) tripod mount ring, sold separately. Attaching the Tripod Mount Tripod ④ ⑥ Collar mounting location ③ ⑦ ① Lock ② ⑤ knob Open the collar of the tripod Attach tripod mount to lens Fix tripod mount to lens mount...
- Page 15 10. Hood The ET-78B hood cuts out unwanted light and protects the front of the lens from rain, snow, and dust. Attachment position mark Red dot Button Red dot Red dot ● Removing Attachment position mark Stop position mark Keep your finger pressed down on the button located on the side of the hood, and then rotate ●...
- Page 16 When using any other camera, perform shooting using manual focus (MF). *2: Please check the User's Manual of the camera as well as the Canon website. Attach the extender to the lens, and then attach the lens to the camera. To remove it, reverse the order.
- Page 17 II for magnified shots. The focusing distance and magnification are shown below. Only one filter may be attached. ● ● If you need a polarizing filter, use the Canon ● ● Focusing Distance Magnification (×) Circular Polarizing Filter PL-C B (72 mm).
-
Page 18: Specifications
The size and weight listed are for the lens only, except as indicated. ● ● Aperture settings are specified on the camera. ● ● All data listed is measured according to Canon standards. ● ● Product specifications and appearance are subject to change without notice. ● ●... - Page 19 CT1-D023-A 1017Ni © CANON INC. 2017...


