Table of Contents
Advertisement
Quick Links
Thank you for purchasing this Panasonic Product.
Before operating this product, please read the instructions carefully, and save this manual
J
for future use.
Before using your projector, be sure to read "Read this first!" (See pages 2 to 9).
J
Operating Instructions
DLP
Projector
™
Model No.
Functional Manual
Commercial Use
PT-CW330U
PT-CW240U
PT-CX300U
ENGLISH
TQBJ0510
Advertisement
Table of Contents

Related Manuals for Panasonic PT-CW240U


Summary of Contents for Panasonic PT-CW240U
- Page 1 Model No. PT-CW240U PT-CX300U Thank you for purchasing this Panasonic Product. Before operating this product, please read the instructions carefully, and save this manual for future use. Before using your projector, be sure to read “Read this first!” (See pages 2 to 9).
-
Page 2: Read This First
Read this first! WARNING: TO REDUCE THE RISK OF FIRE OR ELECTRIC SHOCK, DO NOT EXPOSE THIS PRODUCT TO RAIN OR MOISTURE. Power Supply: This Projector is designed to operate on 100 V - 240 V, 50 Hz/60 Hz AC, house current only. CAUTION: The AC power cord which is supplied with the projector as an accessory can only be used for power supplies up to 125 V, 10 A. - Page 3 FCC NOTICE (USA) Declaration of Conformity Model Number: PT-CW330U/PT-CW240U/PT-CX300U Trade Name: Panasonic Responsible Party: Panasonic Corporation of North America Address: One Panasonic Way, Secaucus, NJ 07094 Telephone number: (877)803-8492 E-mail: projectorsupport@us.panasonic.com This device complies with Part 15 of the FCC Rules.
- Page 4 Read this first! WARNING: POWER „ The wall outlet or the circuit breaker shall be installed near the equipment and shall be easily accessible when problems occur. If the following problems occur, cut off the power supply immediately. Continued use of the projector in these conditions will result in fire or electric shock. If foreign objects or water get inside the projector, cut off the power supply.
- Page 5 If liquid enters inside of the projector, consult your dealer. Particular attention must be paid to children. Use the ceiling mount bracket and the wall mount bracket specified by Panasonic. Defects in the ceiling mount bracket will result in falling accidents.
- Page 6 Read this first! WARNING: ACCESSORIES „ Do not use or handle the battery improperly, and refer to the following. Failure to observe this will cause burns, battery to leak, overheat, explode or catch fire. Do not use unspecified battery. Do not disassemble coin cell battery. Do not heat the battery or place them into water or fire.
- Page 7 Read this first! CAUTION: POWER „ When disconnecting the power cord, be sure to hold the power plug and power connector. If the power cord itself is pulled, the lead will become damaged, and fire, short-circuits or serious electric shocks will result. When not using the projector for an extended period of time, disconnect the power plug from the wall outlet.
- Page 8 Read this first! CAUTION: VIEWING 3D IMAGES „ Those with a medical history of oversensitivity to light, heart problems, or poor physical health should not view 3D images. This may lead to a worsening of medical conditions. If you feel tiredness or discomfort, or other abnormality while viewing with 3D Eyewear, discontinue viewing.
- Page 9 Read this first! Brazil Only Brasil Apenas Manuseio de baterias usadas „ BRASIL Após o uso, as pilhas e /ou baterias poderão ser entregues ao estabelecimento comercial ou rede de assistência técnica autorizada. Cobrir os terminais positivo (+) e negativo (-) com uma fita isolante adesiva, antes de depositar numa caixa destinada para o recolhimento.
- Page 10 Features of the Projector Features of the Projector Quick steps Quick steps Blu-ray 3D compatible For details, see the corresponding pages. discs You can use the projector to view 1. Set up your projector. Æ page 22) 3D videos by playing media such as Blu-ray 3D compatible discs on a 3D device such as a 3D Blu-ray player.
-
Page 11: Table Of Contents
Contents Be sure to read “Read this first!”. ( pages 2 to 9) Viewing 3D Images ........34 Important Information About viewing 3D images ..........34 Read this first! ........... 2 Contents ............11 Settings Precautions for Use......... 13 On-screen Display Menus....... 35 Cautions when transporting .......... - Page 12 Contents Information ..............46 3D .............. 47 3D ................47 3D Invert ............... 47 3D Format ..............47 1080p@24 ..............48 Safety Precautions Message ........48 Safety Precautions ............48 LAN ............49 DHCP ................49 IP Address ..............49 Subnet Mask ..............
-
Page 13: Precautions For Use
Precautions for Use Cautions when transporting When transporting the projector, be careful not to touch the mirror. When transporting the projector, hold it securely by its bottom and avoid excessive vibration and impacts. Doing so may damage the internal parts and result in malfunctions. Do not transport the projector with the adjustable feet extended. -
Page 14: Security
Make your password as difficult to guess as possible. Change your password periodically. Panasonic or its affiliate company never inquires a password directly to a customer. Do not tell your password in case you receive such an inquiry. The connecting network must be secured by firewall or others. -
Page 15: Cautions On Use
Precautions for Use Cautions on use In order to get the picture quality Draw curtains or blinds over windows and turn off any lights near the screen to prevent outside light or light from indoor lamps from shining onto the screen. Depending on where the projector is used, heated air from an exhaust port or warm or cold air from an air conditioner can cause a shimmering effect on screen. -
Page 16: Accessories
Store small parts in an appropriate manner, and keep them away from young children. Optional accessories Options Model No. ET-LAC300 (for PT-CW330U and PT-CX300U) Replacement lamp unit ET-LAC200 (for PT-CW240U) ET-PKV100H (for high ceilings) Ceiling Mount Bracket ET-PKV100S (for low ceilings) Projector Mount Base ET-PKC200B... -
Page 17: About Your Projector
About Your Projector Remote control (12) <S-VIDEO> button Switches to S-Video source. (13) <VIDEO> button Switches to Video source. (11) (14) <KEYSTONE +> button Adjusts the image to compensate for distortion (12) caused by tilting the projector. (13) (15) <IMAGE> button Selects the color mode among Dynamic, PC, (14) Movie, Game and User. -
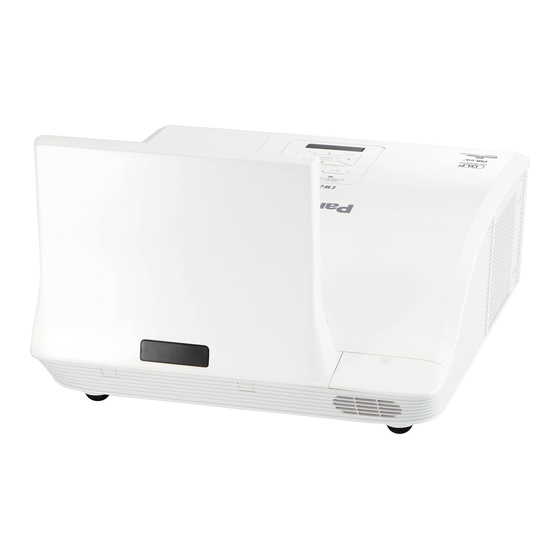
Page 18: Projector Body
About Your Projector Projector body 12 4 Do not open this cover. It is no use for this projector. (1) Air intake port (7) Speaker (2) Mirror Cover (8) Adjustable feet Adjusts the projection angle. (3) Remote control signal receiver (9) <AC IN>... -
Page 19: Control Panel And Indicators
About Your Projector Control Panel and Indicators (7) <INPUT> button (1) <ON(G) / STANDBY(R)> indicator Æ Displays [Source] menu. ( page 33) Indicates the projector’s status. (8) <LAMP> indicator (2) < > button Indicates the projector’s lamp status. Turns the projector on/off. (9) <TEMP>... -
Page 20: Connecting Terminals
About Your Projector Connecting terminals (9) <COMPUTER 2 IN> (1) <MINI USB> <COMPUTER 2 AUDIO IN> For service use. Connects to COMPUTER 2 IN input signal and (2) <HDMI IN> Input AUDIO 2 IN signal. Connects to HDMI input signals. (10) <VIDEO IN>... -
Page 21: Using Remote Control
Using Remote control Using Remote control Installing and Removing battery Press the guide and pull Install new battery into Put the cover back. out the battery base. the compartment. Remove the old Lithium coin cell battery and install new one (CR2025). Ensure that the side with a“+”... -
Page 22: Setting Up
Setting up Setting up Projection method You can use the projector with any of the following 4 projection methods to set the desired method in the projector. J Mounting on the ceiling Mounting on the ceiling and projecting forward and projecting from rear (Using translucent screen) J Setting on a desk/floor Setting on a desk/floor... -
Page 23: Adjusting Projection Image Size
Setting up Adjusting Projection Image Size For the setting of this projector, please refer to the following diagram or the projection distance on the next page. Attention Before installing, please read “Precautions for Use”. ( Æ pages 13 to 16) Do not use the projector and the high-powered laser equipment in the same room. - Page 24 Setting up Projection distance for PT-CW330U, PT-CW240U For 16:10 aspect ratio (unit: m) (There maybe some errors in the dimensions shown in the table below.) Projection size Projector top to Throw Throw Projector bottom to Bottom of the distance A...
- Page 25 Setting up Projection distance for PT-CX300U For 4:3 aspect ratio (unit: m) (There maybe some errors in the dimensions shown in the table below.) Projection size Projector top to Throw Throw Projector bottom to Bottom of the distance A distance B Bottom of the screen Diagonal (SD) Height (SH) Width (SW) screen...
-
Page 26: Adjusting The Projector's Height
Setting up Adjusting the Projector's Height The projector is equipped with elevator feet for adjusting the image height. Extend the adjustable feet by rotating in the direction shown in the below picture and retract by rotating in the opposite direction. Spacer Spacer (Detachable) -
Page 27: Connections
Connections Before connecting to the projector Read carefully the instruction manual for the device to be connected. Turn off the power switch of the devices before connecting cables. If any connection cable is not supplied with the device, or if no optional cable is available for connection of the device, prepare a necessary system connection cable to suit the device. -
Page 28: Connecting Example: Computers
Connections Connecting example: Computers Computer Active Speaker Monitor HDMI Cable LAN Cable Computer Cable Stereo sound Cord Stereo sound Cord Computer Cable - ENGLISH... -
Page 29: Connecting Example: Av Equipment
Connections Connecting example: AV equipment Blu-ray disc Player Video deck DVD Player, Set-top Box, HDTV receiver Audio Instrument Video deck DVD Player, Set-top Box, HDTV receiver HDMI Cable S-Video Cord Stereo sound Cord Mini stereo sound Cord Component Video Cord D-Sub Component Converse Adapter Video Cord Stereo sound Cord... -
Page 30: Powering On/Off
ic Operation Powering ON/OFF Connecting the power cord Make sure that the supplied power cord is securely fixed to the projector to prevent removal of the power cord. Installation Removal Insert the power cord holder in the holes Push the power cord holder to the left. provided above and below the AC input terminal. -
Page 31: On(G)/Standby(R) Indicator
Powering ON/OFF ON(G)/STANDBY(R) indicator The ON(G)/STANDBY(R) indicator informs you the status of the power. Confirm the status of the <ON(G)/STANDBY(R)> indicator before operating the projector. <ON(G)/STANDBY(R)> indicator Indicator status Status No illumination or flashing The power plug is not connected to the outlet. The power is switched off. -
Page 32: Powering On The Projector
Powering ON/OFF Powering On the Projector Connect the power plug to the power outlet. Enter Standby status when the <ON(G)/STANDBY(R)> indicator is lighting / flashing in red. Press the < > button on the control panel or the remote control. When the <ON(G)/STANDBY(R)>... -
Page 33: Projecting
Projecting Projecting Check the connections of the peripheral devices and connection of the power cord ( page 30) and switch on the Æ power ( page 32) to start the projector. Select the image and adjust the state of the image. Æ... -
Page 34: Viewing 3D Images
71) for the types of 3D video signals that can be used with the projector. This projector supports the 3D glass of DLP Link method. However, Panasonic do not guarantee this projector supports the 3D glass from other companies. -
Page 35: Settings
Settings On-screen Display Menus On-screen Display Menus How to operate menu Operation steps Press <MENU> button on the remote control or on the control panel. Main Menu displays. Use ▲▼ to select any item in the Main Menu. The selected item is highlighted in orange. Press ►. -
Page 36: Menu Tree
On-screen Display Menus Menu Tree Main Menu Sub Menu 2nd Sub Menu Default Value Range Color Mode Dynamic / PC / Movie / Game / User Wall color White / Light Yellow / Light Blue / White Pink / Dark Green Brightness 0 ~ 100 Contrast... - Page 37 On-screen Display Menus Main Menu Sub Menu 2nd Sub Menu Default Value Range Auto Source On / Off Input HDMI, Computer 1,Computer 2, S-Video, Video Auto Power Off (Min) 0~120 Lamp Hours Used (Normal) Lamp Hours Used (ECO) Lamp Life Off/On Reminder Lamp...
-
Page 38: Picture
Picture Picture Wall color Select [Picture] from the Main Menu (see “How to operate menu” on page 35) and then select Select an appropriate color for wall projection. the item from the Sub Menu. Press ▲▼ to select [Wall color]. Press ►... -
Page 39: Sharpness
Picture Sharpness Gamma You can adjust the sharpness of the projected image. Adjust the gamma table when the dark areas or bright areas of the image is not clear. Press ▲▼ to select [Sharpness]. Press ▲▼ to select [Gamma]. Press ► to display the adjustment dialog box. -
Page 40: Position
Position Position Note Select [Position] from the Main Menu (see “How If an aspect ratio which is different from the aspect ratio to operate menu” on page 35) and then select for the input signals is selected, the pictures will appear the item from the Sub Menu. -
Page 41: Position
Position V Position Press the ▲► on the remote control Shift the projected image position vertically. or the ► on the control panel to Press ▲▼ to select [V Position]. adjust the bottom of Press ► to display the adjustment the keystone. -
Page 42: Setting
Setting Do not display Closed Caption. Select [Setting] from the Main Menu (see “How to operate menu” on page 35) and then select Displays the CC1 data. the item from the Sub Menu. Displays the CC2 data. Displays the CC3 data. Displays the CC4 data. -
Page 43: Test Pattern
ID on the Æ projector. ( page 21) Startup Logo Set this function to display the Panasonic logo when the projector is turning on. Press ▲▼ to select [Startup Logo]. Press ► to display the setting dialog box. -
Page 44: Audio
Audio Audio In Standby Mode (Audio) Select [Audio] from the Main Menu (see “How to operate menu” on page 35) and then select This function is used to switch the output sound On/ the item from the Sub Menu. Off at standby mode. Press ▲▼... -
Page 45: Options
Options Options The input with a check mark will be able to be Select [Options] from the Main Menu (see “How searched when [Auto Source] is set to [On]. to operate menu” on page 35) and then select To remove the check mark, choose the desired the item from the Sub Menu. -
Page 46: Dynamic Black
Options Lamp Power Mode For the elevation approx. 1 000 m (3 300 ft) and approx. 3 000 m Selects desired lamp power mode under (10 000 ft). different situations. For the elevation below approx. Press ▲▼ to select [Lamp Power Mode]. 1 000 m (3 300ft). -
Page 47: 3D Invert
Even if the signal is input to <HDMI IN> terminal, when Select [3D] from the Main Menu (see “How to the signal does not have 3D video format, the 3D video operate menu” on page 35) and then select the is not displayed correctly when [3D] menu is set to [Auto]. -
Page 48: 1080P@24
1080p@24 Use this function to select 96Hz or 144Hz when viewing 1080p/24 signal according to the signal of the external equipment. Press ▲▼ to select [ 1080p@24]. Press ► to display the setting dialog box. Note Press ◄► to switch. The message of [3D SAFETY PRECAUTIONS] will appear for about 2 minutes. -
Page 49: Lan
The projector will acquire the IP Select [LAN] from the Main Menu (see “How to address automatically. operate menu” on page 35) and then select the item from the Sub Menu. User must set the [IP Address], [Subnet Mask], [Gateway] and [DNS] manually. -
Page 50: Store
Store Save the network settings. Press ▲▼ to select [Store]. Press ► to display the setting dialog box. Press ▲▼ to switch [Yes]/[No]. Press ► to execute. Press <MENU> to exit. Reset Return all data that has been set in the [Setting] menu to the factory defaults. -
Page 51: Connect To Network
Connect to Network The projector has a network fuction, and the following operations are available from the computer using the web browser control. Setting and adjustment of the projector. Display of the projector status. Transmission of an E-mail message when there is a problem with the projector. This projector supports "Crestron RoomView"... -
Page 52: Computer Operation Via Network
Computer operation via network Connection can be made with wired LAN. However, confirm to your system administrator on network settings before changing any settings. Turn on the computer. Make the network setting according to your system administrator. Æ If the projector settings are the default settings ( page 49), the computer can be used with the following network settings. - Page 53 Main Menu description (1) Projector Information Click this item and the [Projector Information] displays. (2) LAN Settings Click this item and the [LAN Settings] displays. (3) Projector Status and Control Click this item and the [Projector Status and Control] displays. (4) E-mail Setting Click this item and the [E-mail Setting] displays.
- Page 54 Projector Status and Control Sets the projector status and adjusts Image and Audio controls. (1) [Projector Status] Confirm Projector Status. Press [Refresh] button to refresh. Press [Power ON] and [Power OFF] button to operate power status. Set the time for the projector to shut down automatically when there is no signal input in [Power Saving].
- Page 55 Crestron RoomView Control Tool "Crestron RoomView" is a system developed by Crestron Electronics, Inc. which collectively manage and control multiple system devices connected via the network, from a computer. For details of "Crestron RoomView", refer to the Crestron Electronics, Inc. website (Provided only in English).
-
Page 56: Maintenance
Maintenance About indicator status About indicator status If an indicator turns on If a problem should occur inside the projector, the <TEMP> and/or <LAMP> indicators will inform you. Manage the indicated problems as follow. Attention Before you take a remedial measure, follow the procedure of switching the power off indicated in “Powering off the Æ... -
Page 57: Maintenance/Replacement
Maintenance/replacement Before cleaning/replacing the unit When you perform maintenance or replacement of the parts, make sure to turn off the power and disconnect Æ the power plug from the wall outlet. ( pages 30, 32) Æ Be sure to observe the procedure “Powering off the projector” ( page 32) when performing power supply operation. - Page 58 Maintenance/replacement Clean the air filters. Vacuum dirt and dust from the air filters. Install the air filters. To install the air filters, reverse the previous steps until you hear a "click" sound. Reset the [Filter Reminder]. Æ Turn on the power and perform [Cleaning up Reminder] in the [Options] menu. page 46) Attention Turn off the power before you clean the air filters.
-
Page 59: Replacing The Unit
Maintenance/replacement Replacing the unit Air filters The air filter should be replaced when cleaning is ineffective. A replacement air filter unit is available separately. (service component) Contact your dealer for the optional air filters. Also, please replace the air filters together when replacing the lamp unit. Air filters (Part Number: Side H518PE28G001, Rear H518PE29G001) are included with the [ET-LAC300 / ET-LAC200] replacement lamp unit. - Page 60 The estimated duration before replacement is 3 000 hours for PT-CW330U / PT-CX300U and 3 500 hours for PT-CW240U. However, this may be shortened depending on individual lamp characteristics, usage conditions, and the installation environment. Therefore, it is strongly recommended that a replacement lamp unit be prepared.
- Page 61 Maintenance/replacement Replacing the Lamp unit Attention When the projector is mounted on a ceiling, do not work with your face close to the projector. Attach the lamp unit and the lamp cover securely. When you experience difficulty in installing the lamp, remove it and try again. If you use force to install the lamp, the connector may be damaged.
-
Page 62: Troubleshooting
Troubleshooting Troubleshooting Please check following points. For details, see the corresponding pages. Reference Problem Cause page The power cord may not be connected. — No electric supply is at the wall outlet. — Power does not turn The circuit breakers have tripped. —... - Page 63 1. First, follow the steps above to adjust resolution of the computer. 2. Press the appropriate keys listed below for your notebook manufacturer to send signal out from notebook to projector. Partial, scrolling Panasonic [Fn]+[F3] SAMSUNG [Fn]+[F4] or incorrectly Gateway [Fn]+[F4] Acer ...
- Page 64 Troubleshooting Reference Problem Cause page Dust Filter Reminder Message: This message displays when the projector reached the timer set in the [Filter Reminder (Hour)]. In this case, please clean the air filters or replace them. Lamp Warning Message: The lamp has reached its end of life, please replace it as soon as possible.
-
Page 65: Appendices
Appendices Appendices Appendices Serial terminal The serial connector which is on the connector panel of the projector conforms to the RS-232C interface specification, so that the projector can be controlled by a personal computer which is connected to this connector. Connection Connecting terminals on projector... - Page 66 Appendices Basic format Transmission from the computer begins with STX, then the command, parameter, and ETX are sent in this order. Add parameters according to the details of control. Colon (1 byte) Start 3 command Parameter (1 byte) characters (undefined length) (1 byte) (3 bytes) When sending commands without parameters, a colon (:) is not necessary.
- Page 67 Appendices Control commands When controlling the projector from a computer, the following commands are available: [Projector control command] Command Control contents Remarks Power [ON] Power [OFF] (Parameter) VID = Video SVD = S-video INPUT selection RG1 = Computer 1 RG2 = Computer 2 HD1 = HDMI Turning off the projection and sound temporarily.
-
Page 68: Other Terminals
Appendices Other terminals Pin assignments and signal names of <S-VIDEO IN> terminal Pin No. Signal names Outside view GND (luminance signal) GND (color signal) Luminance signal Color signal Pin assignments and signal names of <COMPUTER 1 IN/COMPUTER 2 IN> terminal Pin No. -
Page 69: Pjlink Protocol
NAME ? Projector name query The name set for [Projector name] in [LAN Settings] is returned. INF1 ? Manufacturer name query “Panasonic” is returned. Answer the model name with "CW330U", "CW240U" or INF2 ? Model name query "CX300U". INF0 ? Other information query Information such as version number is returned. -
Page 70: List Of Compatible Signals
Appendices List of compatible signals The following table specifies the types of signals compatible with the projectors. Format : V = VIDEO, S = S-VIDEO, R = RGB, Y = YP , H = HDMI Scanning Plug and play * Display Dot clock frequency... -
Page 71: 3D Compatible Signals
*1: “i” added to the resolution value indicates an interlaced signal. Note The number of display dots is 1280 x 800 for the PT-CW330U, PT-CW240U and 1024 x 768 for the PT-CX300U. A signal with a different resolution will be projected after converting the resolution to match the projector display. -
Page 72: Specifications
*2 : For details of video signals that can be projected using this projector, refer to “List of compatible signals”. Æ pages 70-71) *3 : The value of native aspect ratio (16:10 for PT-CW330U and PT-CW240U; 4:3 for PT-CX300U). - ENGLISH... - Page 73 Specifications Model No. PT-CW330U PT-CX300U PT-CW240U 2 set, high-density D-Sub 15p (female) [RGB signal] 0.7 V [p-p] 75 Ω (When G-SYNC: 1.0 V [p-p] 75 Ω COMPUTER 1 HD/SYNC TTL high impedance, automatic positive/negative polarity compatible COMPUTER 2 VD TTL high impedance, automatic positive/negative polarity compatible...
-
Page 74: Dimensions
Ceiling mount bracket safeguards Dimensions <Unit : mm(inch)> 357 (14.06) 163 (6.42) 98 (3.86) 17 (0.67) 367 (14.45) 133.7 (5.27) 19.4 (0.76) 241 (9.49) 267.6 (10.53) Actual dimension may differ by product. Ceiling mount bracket safeguards Installation work of the ceiling mount bracket should only be carried by a qualified technician. Even if it is during guaranteed period, the manufacturer is not responsible for any hazard or damage caused by using a ceiling mount bracket which is not purchased from an authorized distributors, or environmental conditions. -
Page 75: Index
Powering On the Projector .....32 Connections........27 Precautions for Use ......13 Connect to Network ......51 Projection distance for Contrast ..........38 PT-CW330U, PT-CW240U ..24 Control panel ........19 Projection distance for Crestron RoomView Control Tool ...55 PT-CX300U .........25 Projection method......22 Projector body ........18 DHCP ..........49... - Page 76 If you wish to discard this product, please contact your local authorities or dealer and ask for the correct method of disposal. Panasonic Corporation Web Site : http://panasonic.net/avc/projector/ Panasonic Systems Communications Company of North America One Panasonic Way 2F-13, Secaucus, NJ 07094 TEL: (877) 803 - 8492 Panasonic Canada Inc.