Asus RT-N66U Dark Knight Quick Start Manual
Gigabit router wireless-n900
Hide thumbs
Also See for RT-N66U Dark Knight:
- Quick start manual (182 pages) ,
- User manual (70 pages) ,
- Setup manual (3 pages)

Related Manuals for Asus RT-N66U Dark Knight


Summary of Contents for Asus RT-N66U Dark Knight
- Page 1 ® RT-N66U Dark Knight Gigabit Router Wireless-N900 Quick Start Guide E7019 / Second Edition / November 2011...
- Page 2 Manufacturer: ASUSTek COMPUTER INC. No. 150, LI-TE RD., PEITOU, TAIPEI 112, TAIWAN R.O.C. Address, City: Country: TAIWAN Authorized representative in Europe: ASUS COMPUTER GmbH Address, City: HARKORT STR. 21-23, 40880 RATINGEN Country: GERMANY declare the following apparatus: Product name :...
-
Page 3: Table Of Contents
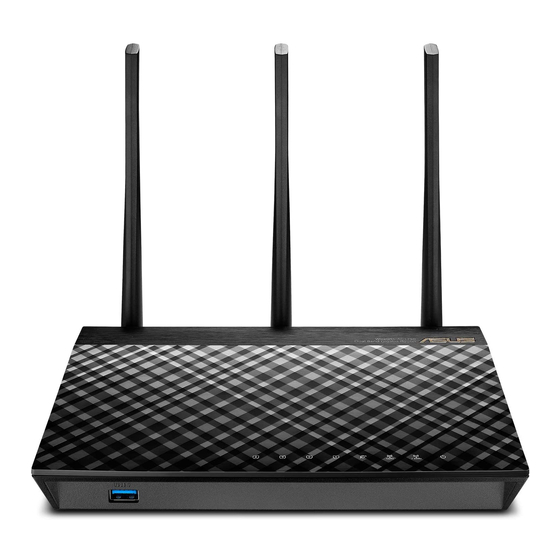
Table of contents English .....................4 T-Chinese ..................17 French ....................30 Portuguese ..................43 Spanish ....................56 NOTE / <T-CHINESE> / <FRENCH> / <PORTUGUESE> / <SPANISH> • For more details, refer to the user manual included in the support CD. • <T-CHINESE> • <FRENCH> •... - Page 4 Package contents RT-N66U AC adapter Network cable Quick Start Guide Support CD (User Manual/utilities) Warranty card Stand NOTE: If any of the items is damaged or missing, contact your retailer. A quick look 1) Power LED 5) 5GHz LED USB 2.0 ports 2) LAN LED 6) USB 2.0 LED 10) Reset button...
- Page 5 Incorrect removal of the USB disk may cause data corruption. • For the list of file system and hard disk partitions that the wireless router supports, visit http://event.asus.com/networks/ disksupport • For the list of printers that the wireless router supports, visit...
- Page 6 • For optimum performance, adjust the internal cooling system. Refer to the user manual for details. • Always update to the latest firmware. Visit the ASUS website at http://www.asus.com to get the latest firmware updates.
- Page 7 Mounting to the stand • Align and insert the stand’s mounting hooks to the wireless router’s mounting holes. Before you proceed 1. Unplug and disconnect the wires/cables from your existing modem setup and release your computer’s outmoded IP address. a: Unplug the AC adapter from the power outlet and disconnect it from your cable/ADSL modem.
- Page 8 WARNING! Before disconnecting the wires/cables, ensure that your cable/ADSL modem has been turned off for at least two minutes. If your modem has a backup battery, remove it as well. 2. Set up your wireless environment. Wall Power Outlet RT-N66U Power Modem Computer...
- Page 9 3. Disable some settings on your computer. A. Disable the proxy server, if enabled. B. Set the TCP/IP settings to automatically obtain an IP address. C. Disable the dial-up connection, if enabled. NOTE: For more details on disabling your computer settings, refer to Frequently Asked Questions (FAQs).
- Page 10 NOTE: If QIS does not launch automatically, follow these steps to manually launch QIS: • On your web browser, key in http://192.168.1.1 and run the Quick Internet Setup (QIS) Wizard again. • Disable the proxy settings, dial-up connection, and set your TCP/IP settings to automatically obtain an IP address.
- Page 11 Frequently Asked Questions (FAQs) After following the steps, I still cannot access the wireless router’s web graphics user interface (web GUI) to configure the wireless router settings. A. Disable the proxy server, if enabled. Windows® 7 1. Click Start > Internet Explorer to launch the web browser.
- Page 12 MAC OS 1. From your Safari browser, click Safari > Prefer- ences > Advanced > Change Settings... 2. From the Network screen, deselect FTP Proxy and Web Proxy (HTTP). 3. Cllick Apply Now when done. NOTE: Refer to your browser's help feature for details on disabling the proxy server.
- Page 13 3. To obtain the iPv4 IP settings automatically, tick Obtain an IP address automatically. 4. Click OK when done. MAC OS 1. Click the Apple icon located on the top left of your screen. 2. Click System Preferences > Network > Configure...
- Page 14 C. Disable the dial-up connection, if enabled. Windows® 7 1. Click Start > Internet Explorer to launch the browser. 2. Click Tools > Internet options > Connections tab. 3. Tick Never dial a connection. 4. Click OK when done. NOTE: Refer to your browser's help feature for details on disabling the dial-up connection settings.
- Page 15 • Try setting up the wired connection and configuring the wireless encryption again. • Press the Reset button of the wireless router for more than five seconds. • Factory default settings: User name / Password: IP address: SSID: ASUS admin / admin 192.168.1.1...
- Page 16 ASUS Recycling/Takeback Services ASUS recycling and takeback programs come from our commitment to the highest standards for protecting our environment. We believe in providing solutions for you to be able to responsibly recycle our products, batteries, other components, as well as the packaging materials. Please go to http://csr.asus.
- Page 17 WARNING! Any changes or modifications not expressly approved by the party responsible for compliance could void the user’s authority to operate the equipment. Prohibition of Co-location This device and its antenna(s) must not be co-located or operating in conjunc- tion with any other antenna or transmitter. IMPORTANT NOTE: Radiation Exposure Statement: This equipment complies with FCC radia- tion exposure limits set forth for an uncontrolled environment.
- Page 18 Informations concernant l’exposition aux fréquences radio (RF) La puissance de sortie émise par l’appareil de sans l ASUS est inférieure à la limite d’exposition aux fréquences radio d’Industry Canada (IC). Utilisez l’ appareil de sans l ASUS de façon à minimiser les contacts humains lors du...
- Page 19 Ce périphérique a été évalué et démontré conforme aux limites SAR (Speci c Absorption Rate – Taux d’absorption spéci que) d’IC lorsqu’il est installé dans des produits hôtes particuliers qui fonctionnent dans des conditions d’exposition à des appareils portables (les antennes se situent à moins de 20 centimètres du corps d’une personne).
-
Page 20: English
Networks Global Hotline Information NOTE: For more information, visit the ASUS support site at: http://support.asus.com Support Area Hotline Number Availability Languages Mon. to Fri. Australia 1300-2787-88 English 9:00-18:00 Mon. to Fri. Austria 0043-820240513 German 9:00-18:00 Mon. to Fri. Belgium 0032-78150231... -
Page 21: Portuguese
9:00-18:00 Mon. to Fri. 00225-718-033 Poland Polish 9:00-17:00 00225-718-040 8:30-17:30 Mon. to Fri. Portugal 707-500-310 Portuguese 9:00-17:00 Mon. to Fri. +8-800-100-ASUS; Russian/ Russia +7-495-231-1999 English 9:00-18:00 +65-6720-3835 Mon. to Fri. Singapore (Check Repair De- English 11:00-19:00 tail Status Only) -66221701 Mon. - Page 22 Networks Global Hotline Information Support Area Hotline Number Availability Languages Mon. to Fri. 0041-848111010 German/French 9:00-18:00 Mon. to Fri. Switzerland 0041-848111014 French 9:00-17:45 Mon. to Fri. 0041-848111012 Italian 9:00-17:00 Mon. to Fri. 0800-093-456; Taiwan Traditional Chinese 9:00-12:00; 02-81439000 13:30-18:00 +662-679-8367 Mon.
- Page 23 Manufacturer ASUSTeK Computer Inc. Tel: +886-2-2894-3447 Address: No. 150, LI-TE RD., PEITOU, TAIPEI 112, TAIWAN Authorised ASUS Computer GmbH representative in Europe Address: HARKORT STR. 21-23, 40880 RATINGEN, GERMANY Authorised distributors BOGAZICI BIL GISAYAR SAN. VE TIC. A.S. in Turkey Tel: +90 212 3311000 Address: AYAZAGA MAH.