
Related Manuals for LG BD640


Summary of Contents for LG BD640
- Page 1 OWNER’S MANUAL Network Blu-ray Disc™ Player Please read this manual carefully before operating your set and retain it for future reference. BD640 www.lg.com P/NO : MFL67100462 BD651D-N_US_MP_BALCK.indd 1 2011-01-21 4:58:12...
- Page 2 BD651D-N_US_MP_BALCK.indd 2 2011-01-21 4:58:12...
- Page 3 Getting Started Safety Information CAUTION RISK OF ELECTRIC SHOCK DO NOT OPEN CAUTION: TO REDUCE THE RISK OF ELECTRIC SHOCK DO NOT REMOVE COVER (OR BACK) NO USER-SERVICEABLE PARTS INSIDE REFER SERVICING TO QUALIFIED SERVICE PERSONNEL. This lightning flash with arrowhead symbol within an equilateral triangle is intended to alert the user to the presence of uninsulated dangerous voltage within the product’s enclosure that may be of sufficient magnitude to constitute a risk of electric shock to persons. The exclamation point within an equilateral triangle is intended to alert the user to the presence of important operating and maintenance (servicing) instructions in the literature accompanying the product. WARNING: TO PREVENT FIRE OR ELECTRIC SHOCK HAZARD, DO NOT EXPOSE THIS PRODUCT TO RAIN OR MOISTURE. WARNING: Do not install this equipment in a confined space such as a book case or similar unit. CAUTION: Do not block any ventilation openings. Install in accordance with the manufacturer’s instructions. Slots and openings in the cabinet are provided for ventilation and to ensure reliable operation of the product and to protect it from over heating. The openings shall be never be blocked by placing the product on a bed, sofa, rug or other similar surface. This product shall not be placed in a built-...
- Page 4 BD651D-N_US_MP_BALCK.indd 4 y Connect the equipment into an outlet on a circuit different from that to which the receiver is connected. y Consult the dealer or an experienced radio/TV technician for help. CAUTION: Any changes or modifications not expressly approved by the party responsible for compliance could void the user’s authority to operate this equipment. FCC RF Radiation Exposure Statement : This equipment complies with FCC radiation exposure limits set forth for an uncontrolled environment. This equipment should be installed and operated with minimum distance 20 cm between the radiator and your body. End users must follow the specific operating instructions for satisfying RF exposure compliance. This transmitter must not be co-located or operating in conjunction with any other antenna or transmitter. CAUTION: Regulations of the FCC and FAA prohibit airborne operation of radio-frequency wireless devices because their signals could interfere with critical aircraft instruments. Responsible Party : LG Electronics USA, Inc.1000 Sylvan avenue Englewood Cliffs, NJ 07632 TEL. : +1-800-243-0000 2011-01-21 4:58:12...
- Page 5 Notes on Copyrights y Because AACS (Advanced Access Content System) is approved as content protection system for BD format, similar to use of CSS (Content Scramble System) for DVD format, certain restrictions are imposed on playback, analog signal output, etc., of AACS protected contents. The operation of this product and restrictions on this product may vary depending on your time of purchase as those restrictions may be adopted and/or changed by AACS after the production of this product. y Furthermore, BD-ROM Mark and BD+ are additionally used as content protection systems for BD format, which imposes certain restrictions including playback restrictions for BD-ROM Mark and/or BD+ protected contents. To obtain additional information on AACS, BD-ROM Mark, BD+, or this product, please contact an authorized Customer Service Center. y Many BD-ROM/DVD discs are encoded with copy protection. Because of this, you should only connect your player directly to your TV, not to a VCR. Connecting to a VCR results in a distorted picture from copy-protected discs. y This product incorporates copyright protection technology that is protected by U.S. patents and other intellectual property rights. Use of this copyright protection technology must be authorized by Rovi, and is intended for home and other limited viewing uses only unless otherwise authorized by Rovi. Reverse engineering or disassembly is prohibited. y Under the U.S. Copyright laws and Copyright laws of other countries, unauthorized recording, use, display, distribution, or revision of television programs, videotapes, BD-ROM discs, DVDs, CDs...
-
Page 6: Table Of Contents
Table of Contents Table of Contents Getting Started Safety Information Introduction – Playable Discs and symbols used in this manual – About the “7” Symbol Display – Supplied Accessorries – File compatibility – AVCHD (Advanced Video Codec High Definition) – Certain System Requirements –... -
Page 7: Table Of Contents
Troubleshooting Troubleshooting – General – Picture – Sound – Network – Customer Support – Open source software notice Appendix Controlling a TV with the Supplied Remote Control – Setting up the remote to control your Network Software Update – Network update notification –... -
Page 8: Getting Started
Getting Started Introduction Playable Discs and symbols used in this manual Media/Term Logo Blu-ray DVD-ROM DVD-R DVD-RW DVD+R DVD+RW (8 cm / 12 cm disc) DVD-RW (VR) (8 cm / 12 cm disc) Audio CD (8 cm / 12 cm disc) CD-R/RW (8 cm / 12 cm disc) Note – Caution – BD651D-N_US_MP_BALCK.indd 8 Symbol Description y Discs such as movies that can be purchased or rented. -
Page 9: About The "7" Symbol Display
Pre-recorded DVDs are automatically set to these standards. There are many different types of recordable disc formats (including CD-R containing MP3 or WMA files) and these require certain pre-existing conditions to ensure compatible playback. y Customers should note that permission is required in order to download MP3 / WMA files and music from the Internet. Our company has no right to grant such permission. Permission should always be sought from the copyright owner. y You have to set the disc format option to [Mastered] in order to make the discs compatible with the LG players when formatting rewritable discs. When setting the option to Live System, you cannot use it on LG player. (Mastered/Live File System : Disc format system for windows Vista) BD651D-N_US_MP_BALCK.indd 9 Getting Started About the “7” Symbol Display “7” may appear on your TV display during operation and indicates that the function explained in this owner’s manual is not available on that specific media. Supplied Accessorries Wireless LAN Adapter Audio / Video Cable (1) -
Page 10: File Compatibility
Getting Started File compatibility Video files File File Location Extension “.avi”, “.mpg”, XVID, MPEG1 SS, “.mpeg”, “.mkv”, H.264/MPEG-4 AVC, “.mp4”, “.asf”, MPEG2 PS, MPEG2 TS Disc, “.wmv”, “.m4v” (DRM free) Music files File File Location Extension Disc, “mp3”, “.wma”, USB, “.wav”, “.m4a” (DRM free) Photo files File File Location Extension Disc, “.jpg”, “.jpeg”, USB, “.png”, “.gif” BD651D-N_US_MP_BALCK.indd 10 Codec Format Audio Format... -
Page 11: Avchd (Advanced Video Codec High Definition)
Note y The file name is limited to 180 characters. y A “avi “file which is encoded “WMV 9 codec” is not supported. y Depending on the size and number of the files, it may take several minutes to read the contents on the media. y This unit cannot support the ID3 Tag embedded MP3 file. y The total playback time of music file indicated on the screen may not correct for VBR files. y HD video files contained on the CD or USB 1.0/1.1 may not played properly. Blu-ray disc , DVD or USB 2.0 are recommended to play back HD video files. y This player supports H.264/MPEG-4 AVC profile Main, High at Level 4.1. For a file with higher level, the warning message will appear on the screen. y This player does not support files that are recorded with GMC or Qpel *1 GMC – Global Motion Compensation *2 Qpel – Quarter pixel y This player supports UTF-8 files even it contains Unicode subtitle contents. This player can not support the pure Unicode subtitle files. y Depending on the types of file or ways of recording, it may not play back. -
Page 12: Certain System Requirements
Getting Started Certain System Requirements For high definition video playback: y High definition display that has COMPONENT or HDMI input jacks. y BD-ROM disc with high definition content. y HDMI or HDCP capable DVI input on your display device is required for some content (as specified by disc authors). For Dolby® Digital Plus, Dolby TrueHD and DTS-HD multi-channel audio playback: y An amplifier/receiver with a built-in (Dolby Digital, Dolby Digital Plus, Dolby TrueHD, DTS or DTS-HD) decoder. y Main, center, surround speakers and subwoofer as necessary for chosen format. About Digital Multi-channel sound A digital multi-channel connection provides the best sound quality. For this, you need a multi- channel Audio/Video Receiver that supports one or more of the audio formats supported by your player. Check the logos on the front of the Audio/ Video receiver and the manual. (PCM Stereo, PCM Multi-Ch, Dolby Digital, Dolby Digital Plus, Dolby TrueHD, DTS and/or DTS-HD) BD651D-N_US_MP_BALCK.indd 12 Compatibility Notes y Because BD-ROM is a new format, certain disc, digital connection and other compatibility issues are possible. If you experience compatibility... -
Page 13: Remote Control
Remote control Battery Installation Remove the battery cover on the rear of the Remote Control, and insert a R03 (size AAA) battery with 4 and 5 matched correctly. BD651D-N_US_MP_BALCK.indd 13 • • • • • • a • • • • • • • • • • • • d • • • • • ZOOM: Displays or exits the 1 (POWER): Switches the player ON or OFF. [Zoom] menu. B (OPEN/CLOSE): Opens and MARKER: Marks any point during closes the disc tray. -
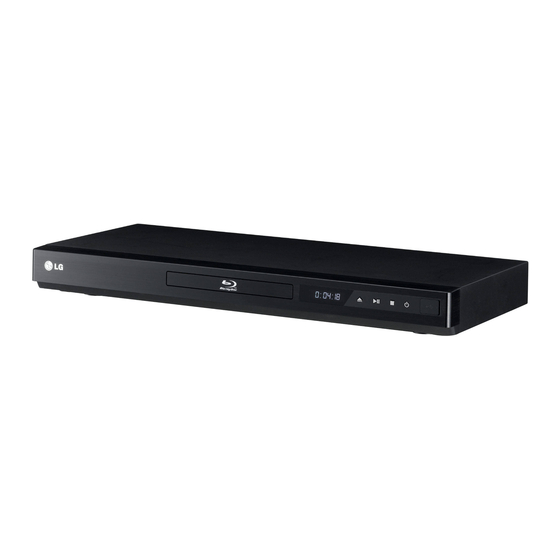
Page 14: Front Panel
Getting Started Front panel a Disc Tray b Display Window c Remote Sensor d B (OPEN/CLOSE) Rear panel a AC power cord b VIDEO OUT c 2CH AUDIO OUT (Left/Right) d COMPONENT VIDEO OUT (Y P BD651D-N_US_MP_BALCK.indd 14 e N (PLAY / PAUSE) f Z (STOP) g 1 (POWER) Button h USB Port... -
Page 15: Connecting
Connecting to Your TV Make one of the following connections, depending on the capabilities of your existing equipment. y HDMI connection (page 15) y Component Video connection (page 16) y Video connection (page 17) Note y Depending on your TV and other equipment you wish to connect, there are various ways you could connect the unit. Use only one of the connections described in this manual. y Please refer to the manuals of your TV, Stereo System or other devices as necessary to make the best connections. y Do not connect the unit’s AUDIO OUT jack to the phono in jack (record unit) of your audio system. y Do not connect your unit via your VCR. The image could be distorted by the copy protection system. BD651D-N_US_MP_BALCK.indd 15 Connecting HDMI Connection If you have a HDMI TV or monitor, you can connect it to this player using a HDMI cable (Type A, High Speed HDMI Cable). Connect the HDMI jack on the player to the HDMI jack on a HDMI compatible TV or monitor. -
Page 16: What Is Simplink
HDMI OUT jack using [HDMI Color Setting] option on the [Setup] menu (see page 26). y Changing the resolution when the connection has already been established may result in malfunctions. To solve the problem, turn off the unit and then turn it on again. y When the HDMI connection with HDCP is not verified, TV screen is changed to black screen. In this case, check the HDMI connection, or disconnect the HDMI cable. y If there are noises or lines on the screen, please check the HDMI cable (length is generally limited to 4.5 m(15 ft.)). What is SIMPLINK? Some functions of this unit are controlled by the TV’s remote control when this unit and LG TV’s with SIMPLINK are connected through HDMI connection. Controllable functions by LG TV’s remote control; Play, Pause, Scan, Skip, Stop, Power Off, etc. Refer to the TV owner’s manual for the details of SIMPLINK function. LG TV’s with SIMPLINK function has the logo as shown above. Note Depending on the disc type or playing status, some SIMPLINK operation may differ from your purpose or not work. BD651D-N_US_MP_BALCK.indd 16 Component Video Connection Connect the COMPONENT VIDEO OUT jacks on the player to the corresponding input jacks on the TV using component video cable. Connect the left and... -
Page 17: Video/Audio (Left/Right) Connection
Video/Audio (Left/Right) Connection Connect the VIDEO OUT jack on the player to the video in jack on the TV using a video cable. Connect the left and right AUDIO OUT jacks of the player to the audio left and right IN jacks on the TV using the audio cables. Rear of the unit Audio/ Video cable BD651D-N_US_MP_BALCK.indd 17 Resolution Setting The player provides several output resolutions for HDMI OUT and COMPONENT VIDEO OUT jacks. You can change the resolution using [Setup] menu. 1. Press HOME (n). 2. Use a/d to select the [Setup] and press ENTER (b). The [Setup] menu appears. 3. Use w/s to select [DISPLAY] option then press d to move to the second level. 4. Use w/s to select the [Resolution] option then press ENTER (b) to move to the third level. 5. Use w/s to select the desired resolution then press ENTER (b) to confirm your selection. Note y If your TV does not accept the resolution you have set on the unit, you can set resolution to 480p as follows: 1. Press B to open the disc tray. 2 Press Z (STOP) for more than 5 seconds. -
Page 18: Connecting To An Amplifier
Connecting Connecting to an Amplifier Make one of the following connections, depending on the capabilities of your existing equipment. y HDMI Audio connection (page 18) y Digital Audio connection (page 18) y 2CH Analog Audio connection (page 19) Since many factors affect the type of audio output, see “Audio Output Specifications” for details (page 52). Connecting to an Amplifier via HDMI Output Connect the player’s HDMI OUT jack to the corresponding in jack on your amplifier using a HDMI cable. Rear of the unit HDMI cable Receiver/Amplifier BD651D-N_US_MP_BALCK.indd 18 Connect the amplifier’s HDMI output jack to HDMI input jack on your TV using a HDMI cable if your amplifier has HDMI output jack. You will need to activate the player’s digital output. (See “[AUDIO] Menu” on page 27.) Connecting to an Amplifier via Digital Audio Output Connect the player’s DIGITAL AUDIO OUT jack to the corresponding in jack (COAXIAL) on your... -
Page 19: Channel Audio Output
Connecting to an Amplifier via 2 Channel Audio Output Connect the Left and Right 2CH AUDIO OUT jacks on the player to the audio left and right in jacks on your amplifier, receiver, or stereo system using audio cables. Rear of the unit Audio cable Receiver/Amplifier BD651D-N_US_MP_BALCK.indd 19 Connecting Connecting to your Home Network This player can be connected to a local area network (LAN) via the LAN port on the rear panel. By connecting the unit to a broadband home network, you have access to services such as software updates, BD-Live interactivity and on-line content services. Wired network connection Using a wired network provides the best performance, because the attached devices connect directly to the network and are not subject to radio frequency interference. Please refer to the documentation for your network device for further instructions. Connect the player’s LAN port to the corresponding port on your Modem or Router using a commercially available LAN or Ethernet cable. -
Page 20: Wired Network Setup
Connecting Broadband service Rear of the unit Wired Network Setup If there is a DHCP server on the local area network (LAN) via wired connection, this player will automatically be allocated an IP address. After making the physical connection, a small number of home networks may require the player’s network setting to be adjusted. Adjust the [NETWORK] setting as follow. Preparation Before setting the wired network, you need to connect the broadband internet to your home network. 1. Select [Connection Setting] option in the [Setup] menu then press ENTER (b). BD651D-N_US_MP_BALCK.indd 20 2. The [Connection Setting] menu appear on the screen. Use w/s to select the [Wired] and press ENTER (b). Router 3. Select [Yes] and press ENTER (b) to continue. The new connection settings reset the current network settings. 4. Use w/s/a/d to select the IP mode between [Dynamic] and [Static]. Normally, select [Dynamic] to allocate an IP address automatically. Note If there is no DHCP server on the network and you want to set the IP address manually, select [Static] then set [IP Address], [Subnet Mask], [Gateway] and [DNS Server] using w/s/ a/d and numerical buttons. If you make a... -
Page 21: Wireless Network Connection
You can also test it on the [Connection Status] in the [Setup] menu. Wireless Network Connection Another connection option is to use an Access Point or a wireless router. The network configuration and connection method may vary depending on the equipment in use and the network environment. You can enjoy the on-line contents by using supplied Wireless LAN Adapter without Internet LAN cable. This player is equipped with an IEEE 802.11n (2.4 GHz band only) wireless module, which also supports the 802.11 b/g standards. For the best wireless performance, we recommend using a IEEE 802.11n certified Wi-Fi network (access point or wireless router). Wireless LAN Adapter Front of the unit Wireless Communication Access Point or Wireless Router Broadband service BD651D-N_US_MP_BALCK.indd 21 Connecting Refer to the setup instructions supplied with your access point or wireless router for detailed connection steps and network settings. Note y For best performance, a direct wired connection from this unit to your home network’s router or cable/DSL modem is always the best option. y If you do chose to use the wireless option, note that performance can sometimes be affected by other electronic devices in the... -
Page 22: Wireless Network Setup
Connecting Wireless Network Setup For the wireless network connection, the player needs to be set up for network communication. This adjustment can be done from the [Setup] menu. Adjust the [NETWORK] setting as follow. Setting up the access point or the wireless router is required before connecting the player to the network. Preparation Before setting the wireless network, you need to: - connect the broadband internet to the wireless home network. - set the access point or wireless router. - note the SSID and security code of the network. - insert the included Wireless LAN Adapter to the USB port on the front panel. 1. Select [Connection Setting] option in the [Setup] menu then press ENTER (b). 2. The [Connection Setting] menu appear on the screen. Use w/s to select [Wireless] and press ENTER (b). 3. Select [Yes] and press ENTER (b) to continue. The new connection settings reset the current network settings. 4. The player scans the all available access points or wireless routers within range and display them as a list. Use w/s to select an access point or wireless router on the list, and then press ENTER (b). BD651D-N_US_MP_BALCK.indd 22 If you have security on your access point or wireless router, verify that the WEP or WPA key... - Page 23 6. Select [OK] and press ENTER (b) to apply network settings. 7. The player will ask you to test the network connection. Select [OK] and press ENTER (b) to complete the network connection. 8. If you select [Test] and press ENTER (b) at step 7 above, the network connection status is displayed on the screen. You can also test it on the [Connection Status] in the [Setup] menu. Notes on Network Connection: y Many network connection problems during set up can often be fixed by re-setting the router or modem. After connecting the player to the home network, quickly power off and/ or disconnect the power cable of the home network router or cable modem. Then power on and/or connect the power cable again. y Depending on the internet service provider (ISP), the number of devices that can receive internet service may be limited by the applicable terms of service. For details, contact your ISP. y Our company is not responsible for any malfunction of the player and/or the internet connection feature due to communication errors/malfunctions associated with your broadband internet connection, or other connected equipment. y The features of BD-ROM discs made available through the Internet Connection feature are not created or provided by our company, and our company is not responsible for their functionality or continued availability. Some disc related material available by the Internet Connection...
-
Page 24: Usb Device Connection
Connecting USB device connection This player can play movie, music and photo files contained in the USB device. Playback content in the USB device 1. Insert a USB device to the USB port until it fits into place. When you connect the USB device on the HOME menu, the player plays a music file contained in the USB storage device automatically. If the USB storage device is containing various types of files, a menu for the file type selection will appear. File loading may take few minutes depending on the number of content stored in the USB storage device. Press ENTER (b) while [Cancel] is selected to stop loading. 2. Press HOME (n). 3. Select [Movie], [Photo] or [Music] using a/d, and press ENTER (b). 4. Select the [USB] option using w/s, and press ENTER (b). 5. Select a file using w/s/a/d, and press PLAY or ENTER (b) to play the file. 6. Withdraw the USB device carefully. BD651D-N_US_MP_BALCK.indd 24 Note y This unit supports USB flash drive/external HDD formatted in FAT16, FAT32 and NTFS when accessing files (music, photo,... -
Page 25: System Setting
Settings Adjust the Setup Settings You can change the settings of the unit in the [Setup] menu. 1. Press HOME (n). 2. Use a/d to select the [Setup] and press ENTER (b). The [Setup] menu appears. 3. Use w/s to select the first setup option, and press d to move to the second level. 4. Use w/s to select a second setup option, and press ENTER (b) to move to the third level. 5. Use w/s to select a desired setting, and press ENTER (b) to confirm your selection. BD651D-N_US_MP_BALCK.indd 25 System Setting [DISPLAY] Menu TV Aspect Ratio Select a TV aspect ratio option according to your TV type. [4:3 Letter Box] Select when a standard 4:3 TV is connected. Displays theatrical images with masking bars above and below the picture. [4:3 Pan Scan] Select when a standard 4:3 TV is connected. -
Page 26: [Language] Menu
System Setting Resolution Sets the output resolution of the Component and HDMI video signal. Refer to page 17 and 54 for details about the resolution setting. [Auto] If the HDMI OUT jack is connected to TVs providing display information (EDID), automatically selects the resolution best suited to the connected TV. If the COMPONENT VIDEO OUT is only connected, this changes the resolution to 480i as default resolution [480i] Outputs 480 lines of interlaced video. [480p] Outputs 480 lines of progressive video. [720p] Outputs 720 lines of progressive video. [1080i] Outputs 1080 lines of interlaced video. [1080p] Outputs 1080 lines of progressive video. 1080p Display Mode When the resolution is set to 1080p, select [24 Hz] for smooth presentation of film material (1080p/24 Hz) with a HDMI-equipped display compatible with 1080p/24 Hz input. Note y When you select [24 Hz], you may experience some picture disturbance when the video switches video and film material. In this case, select [60 Hz]. y Even when [1080p Display Mode] is set to [24 Hz], if your TV is not compatible with 1080p/24 Hz, the actual frame frequency of the video output will be 60 Hz to match the video source format. -
Page 27: [Audio] Menu
[AUDIO] Menu Each disc has a variety of audio output options. Set the unit’s Audio options according to the type of audio system you use. Note Since many factors affect the type of audio output, see “Audio Output Specifications” on page 52 for details. HDMI / Digital Output (SPDIF) [PCM Stereo] Select if you connect this unit’s HDMI OUT or DIGITAL AUDIO OUT jack to a device with two- channel digital stereo decoder. [PCM Multi-Ch] (HDMI only) Select if you connect this unit’s HDMI OUT jack to a device with multi-channel digital decoder. [DTS Re-Encode] Select if you connect this unit’s HDMI OUT or DIGITAL AUDIO OUT jack to a device with DTS decoder. [Primary Pass-Thru] Select if you connect this unit’s DIGITAL AUDIO OUT and HDMI OUT jack to a device with LPCM, Dolby Digital, Dolby Digital Plus, Dolby TrueHD, DTS and DTS-HD decoder. Note y When [HDMI] option is set to [PCM Multi- Ch], the audio may output as PCM Stereo if the PCM Multi-Ch information is not detected from HDMI device with EDID. -
Page 28: [Lock] Menu
System Setting DTS Neo:6 If the unit is connected to the multi-channel Audio Receiver by HDMI connection, set this option to enjoy the multi-channel surround sound with the 2-channel audio source. [Off] Outputs the stereo sound via front speakers. [Music] Outputs the multi-channel sounds that are optimized for listening to music. [Cinema] Outputs the multi-channel sounds that are optimized for watching movie. Note y This function is not available on an on-line service. y Only the audio source with less than 48 kHz sampling frequency is available for this function. y This function is availabe only when [HDMI] option is set to [PCM Multi-Ch]. BD651D-N_US_MP_BALCK.indd 28 [LOCK] Menu The [LOCK] settings affect only CinemaNow movie, Blu-ray Disc and DVD playback. To access the any features in [LOCK] settings, you must enter the 4-digit security code you have created. If you have not entered a password yet, you are prompted to do so. Enter a 4-digit password twice, and press ENTER (b) to create a new password. Password You can create or change the password. -
Page 29: [Network] Menu
DVD Rating Blocks playback of rated DVD based on their content. (Not all discs are rated.) [Rating 1-8] Rating one (1) has the most restrictions and rating eight (8) is the least restrictive. [Unlock] If you select [Unlock], parental control is not active and the disc plays in full. BD Rating Set an age limit of BD-ROM play. Use number buttons to input an age limit for BD-ROM viewing. [255] All BD-ROM can be played. [0-254] Prohibits play of BD-ROM with corresponding ratings recorded on them. Note y The [BD Rating] will be applied only for the BD that containing the Advanced Rating Control. y For the region using MPAA rating level, refer to the table below as an example. BD Rating MPAA Rating Not restricted Area Code Enter the code of the area whose standards were used to rate the DVD video disc, based on the list on page 49. BD651D-N_US_MP_BALCK.indd 29 [NETWORK] Menu The [NETWORK] settings are needed to use the software update, BD Live and NetCast features. -
Page 30: [Others] Menu
System Setting Netflix [Netflix ESN] Display its unique Netflix ESN (Electronic Serial Number) that allows you to use the Netflix streaming. [Deactivate Netflix] Deactivates your unit. To activate the Netflix again, contact to the service provider. Deactivate Vudu You can deactivate your unit from your Vudu account. It is recommended that you do this if you give your unit to someone else who should not share your Vudu account. [OTHERS] Menu Auto Power Off The screen saver appears when you leave the unit in Stop mode for about five minutes. If you set this option to [On], the unit automatically turns itself off after the Screen Saver is displayed for 20 minutes. Set this option to [Off ] to leave the screen saver until the unit is operated by the user. Initialize [Factory Set] You can reset the unit to its original factory settings. [BD Storage Clear] Initializes the BD contents from the connected USB storage. Note If you reset the unit to its original factory settings using [Factory Set] option, you have... -
Page 31: Operating
Operating General Playback Using [HOME] menu The home menu appears when you press HOME (n). Use a/d to select a category and press ENTER (b). a [Movie] - Plays video contents. b [Photo] - Plays photo contents. c [Music] - Plays audio contents. d [NetCast] - Access to the NetCast Home. e [Setup] - Adjusts the system settings. Playing a Disc 1. Press B (OPEN/CLOSE), and place a disc on the disc tray. 2. Press B (OPEN/CLOSE) to close the disc tray. For the most Audio CD, BD-ROM and DVD-ROM discs, playback starts automatically. 3. Press HOME (n). 4. Select [Movie] or [Music] using a/d, and press ENTER (b). -
Page 32: Enjoying Bd-Live
Operating Enjoying BD-Live Note y To enjoy the BD-Live feature with a wireless LAN Adapter, you must use a USB HUB device by connecting it to the USB port on the front panel. y When you connect USB sticks to the USB HUB, the number of USB sticks should be limited to one USB flash memory excluding the wireless LAN Adapter. y The USB HUB device is not supplied. BD-Video supporting BD-Live (BD-ROM version 2 Profile 2) that has a network extension function allows you to enjoy more functions such as downloading new movie trailers by connecting this unit to the internet. 1. Check the wired network connection and settings. (pages 19-23). 2. Insert a USB storage device to the USB port on the front panel. A USB storage device is needed to download bonus content. 3. Press HOME (n), and set the [BD-LIVE connection] option on the [Setup] menu (page 29). Depending on a disc, the BD-Live function may not be operated if [BD-LIVE connection] option is set to [Partially Permitted]. 4. Insert a BD-ROM with BD-Live. The operations are different depending on the disc. Refer to the manual supplied with the disc. >... -
Page 33: Basic Operations For Photo Content
Basic operations for photo content To play a slide show Press z (PLAY) to start slide show. To stop a slide show Press Z (STOP) while slide show. To pause a slide show Press M (PAUSE) while slide show. Press z (PLAY) to re-start the slide show. To skip to the next/previous photo While viewing a photo in full screen, press a or d to go to the previous or next photo. Note The file requirements are described on page Using the disc menu To display the disc menu The menu screen may be displayed first after loading a disc which contains a menu. If you want to display the disc menu while playback, press DISC... -
Page 34: Advanced Playback
Operating Advanced Playback Repeat Playback erotu, During playback, press REPEAT (h) repeatedly to select a desired repeat mode. Blu-ray discs/DVDs/ Video jA- – Selected portion will be repeated continually. jChapter – The current chapter will be played back repeatedly. jTitle – The current title will be played back repeatedly. jAll - All the tracks or files will be played back repeatedly. To return to normal playback, press REPEAT (h) repeatedly to select [Off ]. Audio CDs/Audio files kA-B – Selected portion will be repeated continually. (Audio CD only) ;Track– The current track or file will be played back repeatedly. :All – All the tracks or files will be played back repeatedly. l:All – All the tracks or files will be played back repeatedly in random order. l,– The tracks or files will be played back in random order. To return to normal playback, press CLEAR. Note y If you press V once during Repeat Chapter/Track playback, the repeat playback cancels. -
Page 35: Marker Search
Marker Search eroy You can start playback from up to nine memorized points. To enter a marker 1. While playback, press MARKER at the desired point. The Marker icon appears on the TV screen briefly. 2. Repeat step 1 to add up to nine markers. To recall a marked scene 1. Press SEARCH and the search menu appears on the screen. 2. Press a number button to select a marker number that you want to recall. Playback starts from the marked scene. To delete a Marker 1. Press SEARCH and the search menu appears on the screen. 2. Press s to highlight a marker number. Use a/d to select a marked scene that you want to delete. 3. Press CLEAR and the marked scene is erased from the search menu. -
Page 36: Changing Content List View
Operating Changing content list view On the [Movie], [Music] or [Photo] menu, you can change the content list view. Method 1 Press red (R) colored button repeatedly. Method 2 1. On the content list, press INFO/DISPLAY (m) to display the option menu. 2. Use w/s to select the [View Change] option. 3. Press ENTER (b) to change the content list view. BD651D-N_US_MP_BALCK.indd 36 Viewing content information The unit can display the content information. 1. Select a file using w/s/a/d. 2. Press INFO/DISPLAY (m) to display the option menu. 3. Select the [Information] option using w/s, and press ENTER (b). The file information appears on the screen. While movie playback, you can display the file information by pressing TITLE/POP-UP. Note The information displayed on the screen may not correct comparing actual content information. -
Page 37: Last Scene Memory
Last Scene Memory This unit memorizes the last scene from the last disc that is viewed. The last scene remains in memory even if you remove the disc from the unit or switch off the unit. If you load a disc that has the scene memorized, the scene is automatically recalled. Note y Last Scene Memory function for a previous disc is erased once a different disc is played. y This function may not work depending on the disc. y On BD-Video discs with BD-J, the last scene memory function does not work. y This unit does not memorize settings of a disc if you switch off the unit before commencing to play it. BD651D-N_US_MP_BALCK.indd 37 Operating Options while viewing a photo You can use various options during viewing a photo in full screen. 1. While viewing a photo in full screen, press INFO/ DISPLAY (m) to display the option menu. 2. Select an option using w/s. a Current photo/Total number of photos – Use a/d to view previous/next photo. -
Page 38: Listening To Music While Slide Show
Operating Listening to music while slide show You can display photo files while listening to audio files. 1. While viewing a photo in full screen, press INFO/ DISPLAY (m) to display the option menu. 2. Use w/s to select [Music Select] option, and press ENTER (b) to display the [Music Select] menu. 3. Use w/s to select a device, and press ENTER (b). 4. Use w/s to select a file or a folder you wish to play. Select g and press ENTER (b) to display the upper directory. Note When selecting music file from folder selection is not available. Only file selection is available. 5. Use d to select [OK], and press ENTER (b) to complete music selection. BD651D-N_US_MP_BALCK.indd 38 On-Screen display You can display and adjust various information and settings about the content. Displaying content information on-screen eroy 1. While playback, press INFO/DISPLAY (m) to show various playback information. -
Page 39: Playing From Selected Time
2. Select an option using w/s. 3. Use a/d to adjust the selected option value. 4. Press BACK (x) to exit the On-Screen display. Note y If no button is pressed for a few seconds, the on-screen display disappears. y A title number cannot be selected on some discs. y Available items may differ depending on discs or titles. y If BD interactive title is playing back, some setting information is displayed on the screen but prohibited to be changed. Playing from selected time eroy 1. Press INFO/DISPLAY (m) during playback. The time search box shows the elapsed playing time. 2. Select the [Time] option and then input the required start time in hours, minutes, and seconds from left to right. For example, to find a scene at 2 hours, 10 minutes, and 20 seconds, enter “21020”. Press a/d to skip the playback 60 seconds forward or backward. 3. Press ENTER (b) to start playback from selected time. Note This function may not work on some disc or titles. -
Page 40: Watching From A Different Angle
Operating Watching from a different angle If the disc contains scenes recorded at different camera angles, you can change to a different camera angle during playback. 1. During playback, press INFO/DISPLAY (m) to display the On-Screen display. 2. Use w/s to select the [Angle] option. 3. Use a/d to select desired angle. 4. Press BACK (x) to exit the On-Screen display. Changing the TV Aspect Ratio eroy You can change the TV aspect ratio setting while playback. 1. During playback, press INFO/DISPLAY (m) to display the On-Screen display. 2. Use w/s to select the [TV Aspect Ratio] option. 3. Use a/d to select desired option. 4. Press BACK (x) to exit the On-Screen display. Note Even if you change the value of the [TV Aspect Ratio] option in On-Screen display, the [TV Aspect Ratio] option in the [Setup] menu is not changed. -
Page 41: Audio Cd Recording
1 min. 4 min. y Recording times in the table above are approximate. y Actual recording time for USB storage device varies depending on the USB storage device’s ability. y Make sure that there is minimum of 50 MB free space is needed when recording into the USB storage device. y The length of the music should be longer than 20 seconds for the proper recording. y Do not turn off this unit or extract the connected USB storage device during Audio CD recording. > Caution The recording or copying features on this player are provided for your personel and noncommercial use. The making of unauthorized copies of copy-protected material, including computer programs, files, broadcasts and sound recordings, may be an infringement of copyrights and constitute a criminal offense. This equipment should not be used for such purposes. LG expressly disclaims any responsibility for illegal distribution or use of unauthorized content in commercial purpose. Be Responsible Respect Copyrights 2011-01-21 4:58:22... -
Page 42: Enjoying The Netcast™ Entertainment Access
Operating Enjoying the NetCast™ Entertainment Access You can use various content services via Internet with the NetCast Entertainment Access feature. 1. Check the network connection and settings (pages 19-23). 2. Press HOME (n). 3. Select the [NetCast] using a/d, and press ENTER (b). 4. Select an option using a/d, and press ENTER (b). Note y Detailed information of each service, contact to the content provider or visit support link of the service. y The content of NetCast services and service related information, including user interface, is subject to changes. Please refer to the web site of each service for most up-to-date information. y Using NetCast with wireless network connection may result in improper streaming speed by interference from household devices that are using radio frequencies. BD651D-N_US_MP_BALCK.indd 42 2011-01-21 4:58:22... -
Page 43: Troubleshooting
Troubleshooting Troubleshooting General Symptom The Power does not turned on. The unit does not start playback. The angle cannot be changed. Cannot play movie, photo or music files. The remote control does not work properly. The unit is plugged in, but the power will not turn on or off. The unit is not operating normally. BD651D-N_US_MP_BALCK.indd 43 Cause & Solution y Plug the power cord into the wall outlet securely. y Insert a playable disc. (Check the disc type, colour system, and regional code.) y Place the disc with the playback side down. y Place the disc on the disc tray correctly inside the guide. y Clean the disc. y Cancel the Rating function or change the rating level. y Multi-angles are not recorded on the DVD Video being played. y The files are not recorded in a format that the unit can play. y The unit does not support the codec of the movie file. y The remote control is not pointed at the remote sensor of the unit. -
Page 44: Picture
Troubleshooting Picture Symptom There is no picture. Picture noise appears Sound Symptom There is no sound or the sound is distorted. BD651D-N_US_MP_BALCK.indd 44 Cause & Solution y Select the appropriate video input mode on the TV so the picture from the unit appears on the TV screen. y Connect the video connection securely. y Check the [HDMI Color Setting] in the [Setup] menu is set to the appropriate item that conforms to your video connection. y Your TV may not suppot the resolution you have set on the unit. Change the resolution that your TV accepts. y The unit’s HDMI OUT jack is connected to a DVI device that does not support copyright protection. y You are playing a disc recorded in a colour system that is different from your TV. y Set the resolution which your TV accepts. Cause & Solution y Connect the audio connection securely. y The input source setting on the amplifier or the connection to the amplifier is incorrect. -
Page 45: Network
Network Symptom BD-Live feature does not work. Streaming video services (such as YouTube™, etc.) are often stopped or “buffer” during playback. Cannot connect the player to the access point or wireless LAN router. Customer Support You can update the Unit using the latest software to enhance the products operation and/or add new features. To obtain the latest software for this unit (if updates have been made), please visit http://us.lgservice.com or contact LG Electronics customer care center. Open source software notice To obtain the corresponding source code under GPL, LGPL and other open source licenses, please visit http://opensource.lge.com. All referred license terms, warranty disclaimers and copyright notices are available to download with the source code. BD651D-N_US_MP_BALCK.indd 45 Cause & Solution y The connected USB storage may not have enough space. Connect the USB storage with at least 1GB free space. y Ensure that the unit is correctly connected to the local area network and can access the internet (see pages 19-23). y Your broadband speed may not fast enough to use the BD-Live features. Contact your Internet Service Provider (ISP) and increase the broadband speed is recommended. y The [BD-LIVE connection] option in the [Setup] menu is set to [Prohibited]. Set the option to [Permitted]. -
Page 46: Appendix
Appendix Appendix Controlling a TV with the Supplied Remote Control You can control your TV using the buttons below. By pressing You can 1 (TV POWER) Turn the TV on or off. Switch the TV’s input source AV/INPUT between the TV and other input sources. Scan up or down through PR/CH +/– memorized channels. VOL +/– Adjust the volume of the TV Turn the TV’s volume on TV MUTE or off. Note Depending on the unit being connected, you may not be able to control your TV using some of the buttons. BD651D-N_US_MP_BALCK.indd 46 Setting up the remote to control your TV You can operate your TV with the supplied remote control. -
Page 47: Network Software Update
Network Software Update Network update notification From time to time, performance improvements and/or additional features or services may be made available to units that are connected to a broadband home network. If there is new software available and the unit is connected to a broadband home network, the player will inform you about the update as follows. Option 1: 1. The update menu will appear on the screen when you turn on the player. 2. Use a/d to select a desired option and then press ENTER (b). [OK] Starts the software update. [Cancel] Exits the update menu and displays it next booting. [Hide] Exits the update menu and it does not appear until next software is uploaded in the update server. Option 2: If the software update is available from the update server, the “Update” icon appears at the bottom of the Home menu. Press blue (B) colored button to start the update procedure. BD651D-N_US_MP_BALCK.indd 47 Appendix Software Update You can update the player using the latest software to enhance the products operation and/or add... - Page 48 [Cancel] will end the update.) 6. The player starts downloading the newest update from the server. (Downloading will takes several minutes depending on your home network condition) 7. When downloading is completed, the message, “Download is complete. Do you want to update?” appears. 8. Select [OK] to start updating. (Selecting [Cancel] will end the update and downloaded file will not be re-usable. To update software the next time, the software update procedure has to be started from the beginning again.) > Caution Do not turn off the power during the software update. Note If the software includes the driver update, disc tray may open during the process. 9. When update is completed, the power will be turned automatically in a few seconds. 10. Turn the power back on. The system now operates with the new version. Note The Software Update function may not work properly depending on your internet environment. In this case, you can obtain the latest software from the authorized LG Electronics Service Center then update your player. Refer to “Customer Support” on page BD651D-N_US_MP_BALCK.indd 48 2011-01-21 4:58:22...
-
Page 49: Area Code List
Area Code List Choose an area code from this list. Area Code Area Afghanistan Fiji Argentina Finland Australia France Austria Germany Belgium Great Britain Bhutan Greece Bolivia Greenland Brazil Hong Kong Cambodia Hungary Canada India Chile Indonesia China Israel Colombia Italy Congo Jamaica Costa Rica Japan Croatia Kenya Czech Republic Kuwait Denmark Libya... -
Page 50: Language Code List
Appendix Language Code List Use this list to input your desired language for the following initial settings: [Disc Audio], [Disc Subtitle] and [Disc Menu]. Language Code Language Afar 6565 French Afrikaans 6570 Frisian Albanian 8381 Galician Ameharic 6577 Georgian Arabic 6582 German Armenian 7289 Greek Assamese 6583 Greenlandic Aymara 6588 Guarani Azerbaijani 6590 Gujarati Bashkir 6665 Hausa Basque 6985 Hebrew Bengali; Bangla... -
Page 51: Trademarks And Licenses
Trademarks and Licenses Blu-ray Disc™, Blu-ray™, BD-Live™, BONUSVIEW™ and the logos are trademarks of the Blu-ray Disc Association. Java and all Java-based trademarks and logos are trademarks or registered trademarks of Sun Microsystems, Inc. in the United States and other countries. HDMI, the HDMI logo and High-Definition Multimedia Interface are trademarks or registered trademarks of HDMI licensing LLC. Manufactured under license from Dolby Laboratories. Dolby and the double-D symbol are trademarks of Dolby Laboratories. BD651D-N_US_MP_BALCK.indd 51 Manufactured under license under U.S. Patent #’s: 5,451,942; 5,956,674; 5,974,380; 5,978,762; 6,226,616; 6,487,535; 7,212,872; 7,333,929; 7,392,195; 7,272,567 & other U.S. and worldwide patents issued & pending. DTS and the symbol are registered trademarks, & DTS-HD, DTS-HD Master Audio, and the DTS logos are trademarks of DTS, Inc. Product includes software. © DTS, Inc. All Rights Reserved. “DVD Logo” is a trademark of DVD Format/Logo Licensing Corporation. “AVCHD” and the “AVCHD” logo are trademarks of Panasonic Corporation and Sony Corporation. The Wi-Fi CERTIFIED Logo is a certification mark of the Wi-Fi Alliance. “x.v.Color” is a trademark of Sony Corporation. Appendix 2011-01-21 4:58:23... -
Page 52: Audio Output Specifications
Appendix Audio Output Specifications Jack/Setting Analog Source 2CH Output Dolby Digital PCM 2ch Dolby Digital Plus PCM 2ch Dolby TrueHD PCM 2ch PCM 2ch DTS-HD PCM 2ch Linear PCM 2ch PCM 2ch Linear PCM 5.1ch PCM 2ch Linear PCM 7.1ch PCM 2ch Jack/Setting Source PCM Stereo Dolby Digital PCM 2ch Dolby Digital Plus PCM 2ch... - Page 53 y The audio is outputted as PCM 48 kHz/16 bit for MP3/WMA file and PCM 44.1kHz/16 bit for Audio CD while playback. y The Dolby TrueHD audio recorded on some Blu- ray discs consists of Dolby Digital and TrueHD audio. Dolby Digital audio is output through DIGITAL AUDIO OUT jacks and “DD” displays on the screen if TrueHD audio is not output (for example, when [HDMI] is set to [PCM Stereo] and [Digital Output (SPDIF)] is set to [Primary Pass- Thru]). y You must select a digital audio output and a maximum sampling frequency that your Amplifier (or AV receiver) accepts using [Digital Output (SPDIF)], [HDMI] and [Sampling Freq.] options on the [Setup] menu (see page27). y With digital audio connection (DIGITAL AUDIO OUT or HDMI), Disc Menu button sounds of BD- ROM may not be heard if the [Digital Output (SPDIF)] or [HDMI] option is set to [Primary Pass- Thru]. y If the audio format of the digital output does not match the capabilities of your receiver, the receiver will produce a strong, distorted sound or no sound at all. y Multi-channel Digital Surround Sound via digital connection can only be obtained if your receiver is equipped with a Digital Multi-channel decoder. BD651D-N_US_MP_BALCK.indd 53 Appendix 2011-01-21 4:58:23...
-
Page 54: Video Output Resolution
Appendix Video Output Resolution When the non-copy protected media is playing back Video Out Resolution 480i 480p 720p 1080i 1080p/24 Hz 1080p / 60 Hz When the copy protected media is playing back Video Out Resolution 480i 480p 720p 1080i 1080p/24 Hz 1080p / 60 Hz HDMI OUT connection y If you select a resolution manually and then connect the HDMI jack to TV and your TV does not accept it, the resolution setting is set to... -
Page 55: Specifications
Specifications General Power requirements Power consumption Dimensions (W x H x D) Net Weight (Approx.) Operating temperature Operating humidity Outputs VIDEO OUT COMPONENT VIDEO OUT HDMI OUT (video/audio) ANALOG AUDIO OUT DIGITAL OUT (COAXIAL) System Laser wavelength Signal system Frequency response Signal-to-noise ratio Harmonic distortion Dynamic range LAN port Bus Power Supply (USB) Wireless LAN Adapter (PW-DN427) Interface Standards Frequency Data Security y Design and specifications are subject to change without notice. BD651D-N_US_MP_BALCK.indd 55 AC 120 V ~ 60 Hz 14 W Approx. 430 x 45 x 190 mm (16.9 x 1.7 x 7.4 inches) 1.6 kg (3.5 lbs) 5 °C to 35 °C (41 °F to 95 °F) 5 % to 90 % 1.0 V (p-p), 75 Ω, sync negative, RCA jack x 1 (Y) 1.0 V (p-p), 75 Ω, sync negative, RCA jack x 1 (Pb)/(Pr) 0.7 V (p-p), 75 Ω, RCA jack x 2 19 pin (Type A, HDMI™ Connector) -
Page 56: Maintenance
Appendix Maintenance Handling the Unit When shipping the unit Please save the original shipping carton and packing materials. If you need to ship the unit, for maximum protection, re-pack the unit as it was originally packed at the factory. Keeping the exterior surfaces clean y Do not use volatile liquids such as insecticide spray near the unit. y Wiping with strong pressure may damage the surface. y Do not leave rubber or plastic products in contact with the unit for a long period of time. Cleaning the unit To clean the player, use a soft, dry cloth. If the surfaces are extremely dirty, use a soft cloth lightly moistened with a mild detergent solution. Do not use strong solvents such as alcohol, benzine, or thinner, as these might damage the surface of the unit. Maintaining the Unit The unit is a high-tech, precision device. If the optical pick-up lens and disc drive parts are dirty or worn, the picture quality could be diminished. For details, please contact your nearest authorized service center. BD651D-N_US_MP_BALCK.indd 56 Notes on Discs Handling Discs... -
Page 57: Important Information Relating To Network Services
Appendix Important Information Relating to Network Services All information, data, documents, communications, downloads, files, text, images, photographs, graphics, videos, webcasts, publications, tools, resources, software, code, programs, applets, widgets, applications, products and other content (“Content”) and all services and offerings (“Services”) provided or made available by or through any third party (each a “Service Provider”) is the sole responsibility of the Service Provider from whom it originated. The availability of and access to Content and Services furnished by the Service Provider through the LGE Device are subject to change at any time, without prior notice, including, but not limited to the suspension, removal or cessation of all or any part of the Content or Services. Should you have any inquiry or problem related to the Content or Services, you may refer to the Service Provider’s website for the most up-to- date information. LGE is neither responsible nor liable for customer service related to the Content and Services. Any question or request for service relating to the Content or Services should be made directly to the respective Content and Service Providers. Please note that LGE is not responsible for any Content or Services provided by the Service Provider or any changes to, removal of, or cessation of such Content or Services and does not warrant or guaranty the availability of or access to such Content or Services. BD651D-N_US_MP_BALCK.indd 57 2011-01-21 4:58:24... -
Page 58: Warranty
THE EXTENT ANY IMPLIED WARRANTY IS REQUIRED BY LAW, IT IS LIMITED IN DURATION TO THE EXPRESS WARRANTY PERIOD ABOVE. LG ELECTRONICS WILL NOT BE LIABLE FOR ANY INCIDENTAL, CONSEQUENTIAL, INDIRECT, SPECIAL OR PUNITIVE DAMAGES OF ANY NATURE, EVEN IF ADVISED... - Page 59 BD651D-N_US_MP_BALCK.indd 59 2011-01-21 4:58:24...
- Page 60 Register your product Online! www.lg.com Printed in China BD651D-N_US_MP_BALCK.indd 60 As an E ® Partner, nergy LG has determined that this product or product models meet the E nergy guidelines for energy efficiency. ® is a U.S. registered mark. nergy ®...