Table of Contents
Advertisement
Quick Links
Before operating this product, please read the instructions carefully and save this manual for future use.
Operating Instructions
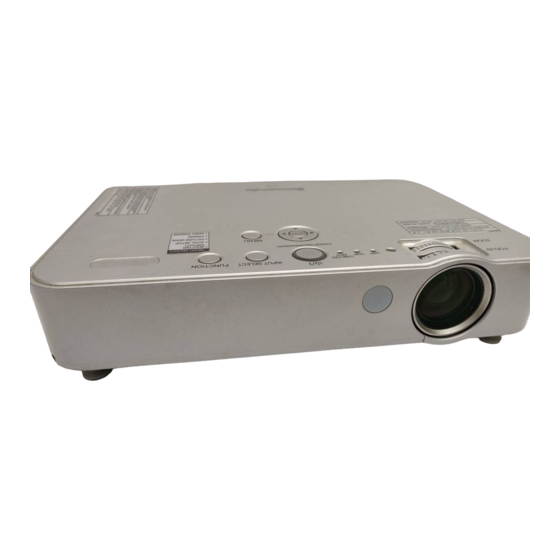
LCD Projector
PT-LB51NTE
Model No.
Commercial Use
AUTO
SETUP
INPUT
SELECT
COMPUTER WIRELESS VIDEO
WIRELESS
PRESENTATION PAGE
MENU
RETURN
ENTER
FREEZE
SHUTTER
COMPUTER
SEARCH
DEFAULT
INDEX-
WINDOW
MULTI-LIVE
DIGITAL ZOOM
VOLUME
TQBJ0229
E
NGLISH
Advertisement
Table of Contents

Related Manuals for Panasonic PT-LB51SE


Summary of Contents for Panasonic PT-LB51SE
- Page 1 Operating Instructions LCD Projector Commercial Use PT-LB51NTE Model No. AUTO SETUP INPUT SELECT COMPUTER WIRELESS VIDEO WIRELESS PRESENTATION PAGE MENU RETURN ENTER FREEZE SHUTTER COMPUTER SEARCH DEFAULT INDEX- WINDOW MULTI-LIVE DIGITAL ZOOM VOLUME Before operating this product, please read the instructions carefully and save this manual for future use. TQBJ0229 NGLISH...
-
Page 2: Important Safety Notice
This instruction booklet provides all the necessary operating information that you might require. We hope it will help you to get the most out of your new product, and that you will be pleased with your Panasonic LCD projector. The serial number of your product may be found on its bottom. - Page 3 Important Safety Notice Information on Disposal for Users of Waste Electrical & Electronic Equipment (private households) This symbol on the products and/or accompanying documents means that used electrical and electronic products should not be mixed with general household waste. For proper treatment, recovery and recycling, please take these products to designated collection points, where they will be accepted on a free of charge basis.
-
Page 4: Declaration Of Conformity
Cet appareil est conforme aux exigences essentielles et aux autres dispositions pertinentes de la Directive 1999/5/EC. Les clients peuvent télécharger une copie de la DC originale pour ce produit à partir de notre serveur DC: http://www.doc.panasonic.de Coordonnées dans l’UE : Panasonic Services Europe, a Division of Panasonic Marketing Europe GmbH, Panasonic Testing Centre, Winsbergring 15, 22525 Hamburg, F.R.Germany... - Page 5 NGLISH - 5...
-
Page 6: Table Of Contents
Contents Quick steps Important Information Important Safety Notice ..........2 1. Set up your projector Declaration of Conformity..........4 See “Setting up” on page 16. Precautions with regard to safety......8 WARNINGS ..............8 CAUTIONS................ 9 Cautions when transporting ..........10 Cautions when installing .......... - Page 7 Settings Appendix Menu Navigation ............29 Technical Information ..........46 Navigating through the MENU ........29 List of compatible signals ..........46 Main menu and Sub-menu..........30 Serial terminal..............47 PICTURE menu............32 Computer connection guidance........49 Specifications ..............50 PICTURE MODE ............32 Dimensions..............
-
Page 8: Precautions With Regard To Safety
Precautions with regard to safety WARNINGS If you notice smoke, strange smells or noise coming Do not place the projector on top of surfaces which from the projector, disconnect the mains plug from are unstable. the mains socket. If the projector is placed on top of a surface which is Do not continue to use the projector in such cases, sloped or unstable, it may fall down or tip over, and otherwise fire or electric shocks could result. -
Page 9: Cautions
Precautions with regard to safety Do not use the projector in a bath or shower. Replacement of the lamp is recommended to be Fire or electric shocks can result. carried out by a qualified technician. The lamp has high internal pressure. If improperly Do not place your skin into the light beam while the handled, explosion might result. -
Page 10: Cautions When Transporting
Precautions with regard to safety Do not mix old and new batteries. Disconnect the mains plug from the mains socket as If the batteries are inserted incorrectly, they may a safety precaution before carrying out any cleaning. explode or leak, and fire, injury or contamination of Electric shocks can result if this is not done. -
Page 11: Cautions On Use
Precautions with regard to safety Cautions on use In order to get the best picture quality Screen Draw curtains or blinds over any windows and turn off Do not apply any volatile substances which may any lights near the screen to prevent outside light or cause discolouration to the screen, and do not let it light from indoor lamps from shining onto the screen. -
Page 12: About Your Projector
About Your Projector Remote control POWER button Automatically adjust the Switch between stand-by setting of DOT CLOCK, mode and projection mode. CLOCK PHASE for the (page 21) projected image of COMPUTER signal. (page 25) AUTO SETUP INPUT INPUT SELECT buttons SELECT Switch the required input COMPUTER... - Page 13 About Your Projector Attaching a hand strap You can attach a favourite strap on to the Remote control. NOTE: • Do not drop the Remote control. • Avoid contact with liquids or moisture. • Use manganese batteries or alkaline batteries with the Remote control. •...
-
Page 14: Projector Body
About Your Projector Projector body Top and front view COMPUTER INPUT indicator LAMP indicator (page 41) This indicator illuminates when a signal is being input to the Luminance Sensor connector (COMPUTER1 IN or (page 33) COMPUTER 2 IN) selected using This sensor detects the luminance the INPUT SELECT buttons. - Page 15 About Your Projector Back and bottom view Connector Panel Air exhaust port Speaker Lamp unit compartment Air exhaust port (page 43) Air intake port, Air filter (page 42) Font adjustable legs (L/R) Adjust the projection angle. (page 17) Connector Panel COMPUTER2 IN/1 OUT S-VIDEO IN Connect an RGB signal cable from...
-
Page 16: Setting Up
Setting up Screen size and throw distance You can adjust the projection size with 1.2x zoom lens. Calculate and define the throw distance as follows. Projected image L (LW/LT) Screen L (LW/LT) Projection size (4 : 3) Throw distance (L) Height position Screen... -
Page 17: Projection Method
Setting up Projection method You can use the projector with any of the following 4 projection methods. To set the desired method in the projector, See “INSTALLATION” on page 37.. Setting on a desk/floor and Setting on a desk/floor and projecting from front projecting from rear INSTALLATION: FRONT/DESK... -
Page 18: Connections
Connections Before connection to the projector Read and follow the operating and connecting instructions of each peripheral device. The peripheral devices must be turned off. Use cables that match each peripheral device to be connected. If the input signal is affected by signal jitter, the projected image may have poor image quality and timebase correction is effective. -
Page 19: Connecting With Av Equipment
Connections Connecting with AV equipment Connecting with VIDEO IN/S-VIDEO IN DVD player To S-VIDEO output Audio system To video output or audio output Video player Connecting with COMPONENT IN D-sub15-pin (male) - BNCx5 (male) adapter cable Red (connect to P signal connector) Blue (connect to P signal connector) -
Page 20: Switching The Projector On/Off
Switching the projector on/off Mains lead Connecting 1. Make sure the shape of the mains plug and the AC IN connector on the back of the projector match, then push the plug all the way in. 2. Connect the Mains lead to a mains socket. Disconnecting 1. -
Page 21: Power Indicator
Switching the projector on/off POWER indicator POWER indicator Indicator status Status The projector is in standby. When the LAMP or TEMP indicator is flashing, the POWER indicator will not be lit. Flashing The POWER is switched on and the projector is getting ready to project. GREEN The projector is ready to project. -
Page 22: Switching On The Projector
Switching the projector on/off Switching on the projector POWER button POWER indicator 1. Plug the Mains lead into the projector. The POWER indicator lights up in RED. 2. Press the POWER button. The POWER indicator lights up in GREEN after flashing for a while. The STARTUP LOGO is displayed on the screen. -
Page 23: Switching Off The Projector
Switching the projector on/off Switching off the projector (1)(2) POWER button POWER indicator 1. Press the POWER button. The confirmation screen is displayed. It will disappear and return to the projection after 10 seconds without any operation. To return to the projection, press any button except the POWER button. 2. -
Page 24: Projecting An Image
Projecting an image Selecting the input signal 1. Switch on the connected devices. Press the play button of the required device. 2. Press the INPUT SELECT buttons to select the required input method if needed. See “Switching the input signal” on page 26. The image will be projected on the screen. -
Page 25: Remote Control Operation
Remote control operation Operating range You can operate the projector with the Remote control within the remote range 15 m (49'2"). AUTO Facing to the projector SETUP INPUT Ensure the Remote control emitter is facing to SELECT COMPUTER WIRELESS VIDEO the Remote control signal receptor on front of the projector and press the required buttons to operate. -
Page 26: Switching The Input Signal
Remote control operation Switching the input signal Pressing the VIDEO button You can switch the input method manually by pressing the COMPUTER, WIRELESS and VIDEO S-VIDEO VIDEO buttons. Press the required button several times or I H to cycle through the input methods as follows. -
Page 27: Capturing An Image
Remote control operation Resetting to the factory default settings You can reset most of the customised settings NOTE: to the factory defaults by pressing DEFAULT • Some menu items are not available to reset by pressing button of the Remote control. Display the the DEFAULT button. -
Page 28: Enlarging The Centred Area
Remote control operation Enlarging the centred area Shifting the centre point You can enlarge the projected image down to a centred area for emphasizing within the Press F G I H to shift the centre point. range of 1x to 2x. Enlarging the image 1. -
Page 29: Settings
Menu Navigation The menu system allows you to access functions which do not have their own dedicated buttons on the Remote control. The menu options are structured and categorised. You can navigate through the menu with F G H I buttons. -
Page 30: Main Menu And Sub-Menu
Menu Navigation Main menu and Sub-menu The Main menu has 6 options. Select the required menu item and press ENTER to display the Sub-menu. NOTE: • Some default settings vary by the selected input signal. • Sub-menu items vary according to the selected input signal. •... - Page 31 Menu Navigation Main menu Sub-menu Options (Under line is default setting) Page OPTION INPUT GUIDE DETAILED SIMPLE page 36 STARTUP LOGO page 36 FUNCTION BUTTON SHUTTER AUTO SETUP page 36 PICTURE MODE FREEZE INDEX WINDOW COMPUTER2 SELECT INPUT OUTPUT page 36 LAMP POWER STANDARD ECO-MODE...
-
Page 32: Picture Menu
PICTURE menu COLOR Remote control Control panel (S-VIDEO/VIDEO/COMPONENT signals only) You can adjust the colour saturation of the projected image. See “Navigating through the MENU” on page 29. Lighter Darker See “Main menu and Sub-menu” on page 30. PICTURE MODE TINT Depending on the projection environment, you can use these preset parameter settings to optimise image... -
Page 33: Daylight View
PICTURE menu DETAILED SETUP DAYLIGHT VIEW You can perform more detailed image adjustment You can keep the projected image bright and vivid even manually. in well-lit rooms where the ambient light sources cannot be controlled, such as when a door opens or when For RGB signals window coverings fail to block out sunlight. -
Page 34: Position Menu
POSITION menu POSITION Remote control Control panel (S-VIDEO/VIDEO/COMPUTER/COMPONENT signals only) You can move the projected image for fine adjustment. Press I H to move horizontally and F G vertically. See “Navigating through the MENU” on page 29. POSITION See “Main menu and Sub-menu” on page 30. REALTIME KEYSTONE DOT CLOCK This projector detects its own degree of tilt and corrects... -
Page 35: Resizing
LANGUAGE menu S1 video signals The input signal will be projected without any • S1 video signals are a type of video signal with an change. aspect ratio of 16:9 which include a detector signal. This detector signal is output by some sources such as wide-vision video decks. -
Page 36: Option Menu
OPTION menu FUNCTION BUTTON Remote control Control panel You can assign frequently-used operations to the FUNCTION button on the projector and use it as a convenient shortcut button. The functions which can be set are “SHUTTER”, “AUTO SETUP”, “PICTURE MODE”, “FREEZE” and “INDEX WINDOW”. Use I H to select the function to assign to the See “Navigating through the MENU”... -
Page 37: Lamp Runtime
OPTION menu LAMP RUNTIME AUTO SETUP You can check how long the lamp has been used. You can turn off the AUTO SETUP function for when the COMPUTER signal is detected. AUTO When the projector detect a NOTE: COMPUTER signal, adjust the •... -
Page 38: Highland
OPTION menu HIGHLAND DETAILED SETUP If you use the projector at high elevation, the HIGHLAND You can perform more detailed setting in various items. setting need to be ON to set the fan speed high. Press INDEX-WINDOW I H to select the required option. The fan speed is low. -
Page 39: Security Menu
SECURITY menu PASSWORD CHANGE Remote control Control panel You can change the password operation to your original. 1. Press a series of button operation up to 8 as a password by using F G I and H buttons. 2. Press ENTER. 3. -
Page 40: Wireless Menu
WIRELESS menu Items in WIRELESS menu Remote control Control panel In WIRELESS menu, the following items are available. NETWORK Select the network setting you want to use. NAME CHANGE The name for this projector can be set. INPUT PASSWORD See “Navigating through the MENU” on page 29. Set to “ON”... -
Page 41: Temp And Lamp Indicators
TEMP, LAMP Indicators Managing the indicated problems If a problem should occur with the projector, the TEMP, LAMP indicators will inform you. Manage the indicated problems as follow. 1. Confirm the status of all indicators and projector, and switch off the projector in proper way. 2. -
Page 42: Care And Replacement
Care and Replacement Cleaning the projector Before cleaning the projector Disconnect the mains plug from the mains socket. Unplug all the cables from the projector. Cleaning the outer surface of the projector Wipe off dirt and dust gently with a soft cloth. If it is difficult to remove the dirt, soak a cloth in a neutral detergent diluted with water, wring the cloth well and then wipe the projector. -
Page 43: Replacing The Lamp Unit
Care and Replacement Replacing the Lamp unit Before replacing the Lamp unit Disconnect the mains plug from the mains socket. Make sure the Lamp unit and the surroundings are cooled enough. Prepare a Phillips-head screwdriver. Contact an Authorised Service Centre to purchase a replacement Lamp unit (ET-LAB50). When the projector is mounted in the ceiling, do not work directly under the projector or put your face closer to the projector. - Page 44 Care and Replacement 2. Use a Phillips screwdriver to turn the lamp unit cover fixing screws at the bottom of the projector, and then remove the Lamp unit cover. lamp unit cover fixing screws Lamp unit cover 3. Use a Phillips screwdriver to loosen the two lamp unit cover fixing screws until the screws turn freely. Then hold the handles of the Lamp unit and gently pull the Lamp unit out from the projector.
-
Page 45: Troubleshooting
Troubleshooting Should any problem persist, contact your dealer. Reference Problem Cause page The Mains lead may not be connected. No electric supply is at the mains socket. TEMP indicator is lit or flashes. Power does not turn on. LAMP indicator is lit or flashes. The lamp unit cover has not been securely installed. -
Page 46: Technical Information
Technical Information List of compatible signals Scanning Display Dot clock Picture Terminals frequency resolution Mode frequency Resizing <signals> quality (MHz) (dots) H (kHz) V (kHz) NTSC/NTSC 4.43/ VIDEO IN/ 720 x 480i 15.7 59.9 PAL-M/PAL60 S-VIDEO IN <VIDEO/S-VIDEO PAL/PAL-N/SECAM 720 x 576i 15.6 50.0 signals>... -
Page 47: Serial Terminal
Technical Information Serial terminal The serial connector which is on the connector panel of the projector conforms to the RS-232C interface specification, so that the projector can be controlled by a personal computer which is connected to this connecter. Connection COMPUTER1 DIN 8 pin (male) Serial terminal (female) - Page 48 Technical Information Cable specifications (When connected to a personal computer) Projector PC (DTE) Control commands Command Control contents Remarks In standby mode, all commands other than the PON command are Power ON ignored. The PON command is ignored during lamp ON control. If a PON command is received while the cooling fan is operating after the Power OFF lamp has switched off, the lamp is not turned back on again straight away...
-
Page 49: Computer Connection Guidance
INPUT GUIDE is set to DETAILED, the computer connection guidance will be displayed. Manufacturer Key command Manufacturer Key command Manufacturer Key command TOSHIBA SONY Panasonic SHARP Apple EPSON FUJITSU Other DELL NOTE: • The computer connection guidance will disappear after 5 minutes. -
Page 50: Specifications
Technical Information Specifications Power supply AC 100 - 240 V 50 Hz/60 Hz 240 W Power consumption During standby (when fan is stopped): 4 W Amps 2.8 A - 1.3 A Panel size (diagonal) 0.6 type (15.24 mm) Aspect ratio 4 : 3 LCD panel Display method... - Page 51 Technical Information Single - line, Mini DIN 4p S-VIDEO IN Ω Y: 1.0 V [p-p], C: 0.286 V [p-p], 75 Single - line, RCA pin jack VIDEO IN Ω 1.0 V [p-p], 75 Single - line, D - sub HD 15-pin (female) During RGB signals input Ω...
- Page 52 Technical Information Dimensions <Units: mm (inch)> NGLISH - 52...
-
Page 53: Dimensions
Technical Information Trademark acknowledgements VGA and XGA are trademarks of International Business Machines Corporation. S-VGA is a registered trademark of the Video Electronics Standards Association. The font used in the on-screen displays is a Ricoh bitmap font, which is manufactured and sold by Ricoh Company, Ltd. -
Page 54: Index
Index ............15 AC IN ENTER ........14 ..........11 Accessories Control panel button ......... 12 ............... 33 Remote control button ..........15 Air exhaust port ............15 Air filter ..........14, 24 Focus ring ..........15 Air intake port .......... - Page 55 Index ..........39 TEXT CHANGE ..........39 TEXT DISPLAY ..........36 OPTION menu Throw distance ..........38 OSD DESIGN ............16 16:9 ............16 ..........17 Throwing angle ............12 PAGE ............32 TINT ......... 39 PASSWORD CHANGE ...........45 Troubleshooting ........... 32 PICTURE menu ..........33 TV-SYSTEM .........
- Page 56 Matsushita Electric Industrial Co., Ltd. Web Site: http://panasonic.net Printed in Japan © 2007 Matsushita Electric Industrial Co., Ltd. All Rights Reserved. S0607-0A...