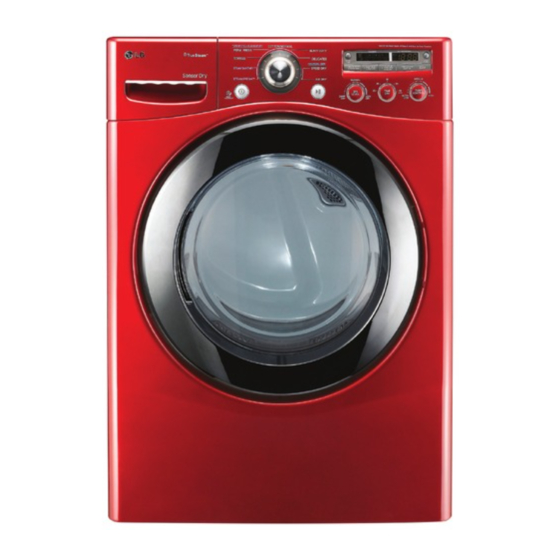
LG DLGX2451 Series Owner's Manual
Hide thumbs
Also See for DLGX2451 Series:
- Owner's manual (200 pages) ,
- Specifications (2 pages) ,
- Owner's manual (100 pages)
Table of Contents
Advertisement
Available languages
Available languages
Quick Links
Advertisement
Chapters
Table of Contents

Related Manuals for LG DLGX2451 Series


Summary of Contents for LG DLGX2451 Series
- Page 1 OWNER’S MANUAL DRYER Please read this manual carefully before operating your dryer and retain it for future reference. DLEX2550* DLGX2551* DLEX2450* DLGX2451* DLEX2650* DLGX2651* DLEX2655* DLGX2656* www.lg.com P/No. MFL67408112...
-
Page 2: Table Of Contents
Safety Instructions for Installation ......5 Congratulations on your purchase Safety Instructions for Steam Functions ....6 Safety Instructions for Connecting Electricity ..7 and welcome to the LG family. Your PARTS AND FEATURES new LG Dryer combines the most Special Features ............. 8 Key Parts and Components ........ -
Page 3: What To Do If You Smell Gas
READ ALL INSTRUCTIONS BEFORE USE wWARNING For your safety, the information in this manual must be followed to minimize the risk of fire or explosion, electric shock, or to prevent property damage, injury to persons , or death. Your Safety and the safety of others is very important. We have provided many important safety messages in this manual and on your appliance. -
Page 4: Basic Safety Precautions
READ ALL INSTRUCTIONS BEFORE USE wWARNING For your safety, the information in this manual must be followed to minimize the risk of fire or explosion, electric shock, or to prevent property damage, injury to persons , or death. BASIC SAFETY PRECAUTIONS wWARNING: To reduce the risk of fire, electric shock, or injury to persons when using this appliance, follow basic precautions, including the following:... -
Page 5: Grounding Instructions
READ ALL INSTRUCTIONS BEFORE USE wWARNING For your safety, the information in this manual must be followed to minimize the risk of fire or explosion, electric shock, or to prevent property damage, injury to persons , or death. GROUNDING INSTRUCTIONS This appliance must be grounded. -
Page 6: Safety Instructions For Steam Functions
READ ALL INSTRUCTIONS BEFORE USE wWARNING For your safety, the information in this manual must be followed to minimize the risk of fire or explosion, electric shock, or to prevent property damage, injury to persons, or death. SAFETY INSTRUCTIONS FOR INSTALLATION wWARNING: To reduce the risk of injury to persons , follow all industry recommended safety procedures including the use of long sleeved gloves and safety glasses. -
Page 7: Safety Instructions For Connecting Electricity
READ ALL INSTRUCTIONS BEFORE USE wWARNING For your safety, the information in this manual must be followed to minimize the risk of fire or explosion, electric shock, or to prevent property damage, injury to persons , or death. SAFETY INSTRUCTIONS FOR CONNECTING ELECTRICITY wWARNING: To reduce the risk of fire, electric shock, or injury to persons when using this appliance, follow basic precautions, including the following:... -
Page 8: Special Features
The door hinge can be reversed to adjust for installation location. STEAM FUNCTIONS LG’s steam technology allows you to inject fabrics with a swirling jet of hot steam to refresh clothes, reduce static, and make ironing easier. -
Page 9: Key Parts And Components
kEY PARTS AND COMPONENTS In addition to the special features and components outlined in the Special Features section, there are several other important components that are referenced in this manual. FRONT-MOUNT LINT FILTER Front-mount lint filter allows for easy access and cleaning after every load. -
Page 10: Installation Location Requirements
WARNING: Read all installation instructions completely before installing and operating your dryer! It is important that you review this entire manual before installing and using your dryer. Detailed instructions concerning electrical connections, gas connections, and exhaust requirements are provided on the following pages. INSTALLATION LOCATION REQUIREMENTS A location that allows for proper exhaust installation. -
Page 11: Installation With Optional Pedestal Base Or Stacking Kit
INSTALLATION WITH OPTIONAL PEDESTAL BASE OR STACkING kIT WARNING : If you are installing your dryer using an optional pedestal base or stacking kit, please refer to Optional Accessories in this manual or to the instructions for your pedestal or stacking kit before proceeding with the installation. -
Page 12: Leveling The Dryer
Position the dryer in the final location. Place a level across the top of the dryer. OPTIONAL ACCESSORIES For these and other LG products, contact your local LG dealer, or visit our Web site at www.lg.com. Stacking kit Pedestal (sold separately) -
Page 13: To Remove The Door
TO REMOVE THE DOOR wWARNING THE DRYER DOOR IS VERY LARGE AND HEAVY. Failure to follow the instructions below can result in damage to the dryer, property damage or injury to persons . • T o avoid damage to the dryer or the door, support the door with a stool or box that fits under the door, or have an assistant support the weight of the door. • A lways reverse the door BEFORE stacking the dryer on top of the washer. -
Page 14: To Install The Door
TO INSTALL THE DOOR wWARNING THE DRYER DOOR IS VERY LARGE AND HEAVY. Failure to follow the instructions below can result in damage to the dryer, property damage or injury to persons . • T o avoid damage to the dryer or the door, support the door with a stool or box that fits under the door, or have an assistant support the weight of the door. • A lways reverse the door BEFORE stacking the dryer on top of the washer. -
Page 15: Changing The Dryer Vent Location
(right-side venting is not available on gas models). screw. Pull out the exhaust duct. An adapter kit, part number 383EEL9001B, may be purchased from your LG retailer. This kit contains the necessary duct components to change the dryer vent location. -
Page 16: Venting The Dryer
VENTING THE DRYER wWARNING: To reduce the risk of fire, electric shock, or injury to persons when using this appliance, follow basic precautions, including the following: • Do not crush or collapse ductwork. Failure • Rigid or semirigid metal ducting is to follow these instructions can result in fire recommended for use between the dryer or death. - Page 17 VENTING THE DRYER (cont.) Ductwork Maximum Length of 4-inch Diameter Wall Cap Type Number of 90° Elbows Rigid Metal Duct 65 ft. (19.8 m) Recommended 55 ft. (16.8 m) 47 ft. (13.7 m) 36 ft. (11.0 m) 4" 4" (10.2 cm) (10.2 cm) 28 ft.
-
Page 18: Connecting Gas Dryers
CONNECTING GAS DRYERS wWARNING: To reduce the risk of fire, electric shock, or injury to persons when using this appliance, follow basic precautions, including the following: • Connect the dryer to the type of gas shown on • Gas supply requirements: As shipped from the factory, this dryer is the nameplate. - Page 19 CONNECTING GAS DRYERS (cont.) wWARNING: To reduce the risk of fire, electric shock, or injury to persons when using this appliance, follow basic precautions, including the following: • Installation and service must be performed • If necessary, the correct orifice (for the LP by a qualified installer, service agency, or the orifice kit order part number 383EEL3002D) gas supplier.
-
Page 20: Connecting Electric Dryers
CONNECTING ELECTRIC DRYERS wWARNING: To help prevent fire, electric shock, serious injury, or death, the wiring and grounding must conform to the latest edition of the National Electrical Code, ANSI/NFPA 70 and all applicable local regulations. Please contact a qualified electrician to check your home’s wiring and fuses to ensure that your home has adequate electrical power to operate the dryer. - Page 21 CONNECTING ELECTRIC DRYERS (cont.) USA ONLY wWARNING: • Connect the power cord to the terminal block. Each colored wire should be connected to same color screw. Wire color indicated on manual is connected to the same color screw in block. Failure to follow these instructions may result in a short or overload. •...
- Page 22 CONNECTING ELECTRIC DRYERS (cont.) USA ONLY wWARNING: • Connect the power cord to the terminal block. Each colored wire should be connected to same color screw. Wire color indicated on manual is connected to the same color screw in block. Failure to follow these instructions may result in a short or overload. •...
- Page 23 CONNECTING ELECTRIC DRYERS (cont.) USA ONLY wWARNING: • Connect the power cord to the terminal block. Each colored wire should be connected to same color screw. Wire color indicated on manual is connected to the same color screw in block. Failure to follow these instructions may result in a short or overload. •...
- Page 24 CONNECTING ELECTRIC DRYERS (cont.) USA ONLY WARNING: • Connect the power cord to the terminal block. Each colored wire should be connected to same color screw. Wire color indicated on manual is connected to the same color screw in block. Failure to follow these instructions may result in a short or overload. •...
-
Page 25: Special Requirements For Manufactured Or Mobile Homes
SPECIAL REQUIREMENTS FOR MANUFACTURED OR MOBILE HOMES Any installation in a manufactured or mobile • The dryer exhaust duct must be affixed securely home must comply with the Manufactured Home to the manufactured or mobile home structure, Construction and Safety Standards Title 24 CFR, and the exhaust duct must be made of a Part 32-80 or Standard CAN/CSA0Z240 MH and material that will resist fire and combustion. -
Page 26: Installation Test (Exhaust Check)
INSTALLATION TEST (Exhaust check) Once you have completed the installation of the dryer, use this test to make sure the condition of the exhaust system is adequate for proper operation of the dryer. This test should be performed to alert you to any serious problems in the exhaust system of your home. - Page 27 INSTALLATION TEST (Exhaust check) Check the Error Code before you call for service • Error Code Possible Causes Solutions Temperature sensor failure T urn off the dryer and call for • • tE1 or tE2 service. Humidity Sensor failure. T urn off the dryer and call for •...
-
Page 28: Control Panel Features
NOTE: If you do not press the START/PAUSE STEAM FUNCTIONS button to resume a cycle within 4 minutes, the dryer turns off automatically. LG’s steam technology allows you to inject fabrics with a swirling jet of hot steam to refresh clothes, reduce static, MORE TIME/LESS TIME BUTTONS and make ironing easier. -
Page 29: Operating The Dryer
OPERATING THE DRYER CLEAN THE LINT FILTER If the lint filter has not already been cleaned, lift out the filter and remove the lint from the last load. This will help ensure the fastest and most efficient drying performance. LOAD THE DRYER Load the dryer with the wet laundry from the washer. -
Page 30: Cycle Guide
Sensor Dry Cycles Manual Dry Cycles Sensor Dry cycles utilize LG’s unique dual sensor system Use Manual Dry cycles to select a specific amount of to detect and compare the moisture level in clothes and drying time and a drying temperature. When a Manual... -
Page 31: Sorting Loads
Following are instructions for starting and using your new dryer. Please refer to specific sections of this manual for more detailed information. w WARNING: To reduce the risk of fire, electric shock, or injury to persons , read this entire manual, including the Important Safety Instructions, before operating this dryer. -
Page 32: The Display
THE DISPLAY The display shows the settings, estimated time remaining, options, and status messages for your dryer. When the dryer is turned on, the light in the display will illuminate. ESTIMATED TIME REMAINING CHECk FILTER REMINDER When the START/PAUSE button is pressed, The display will show CHECK FILTER when the dryer will display the estimated (SENSOR the dryer is turned on as a reminder to check... -
Page 33: Cycle Setting Buttons
CYCLE SETTING BUTTONS SENSOR DRY cycles have preset settings Your dryer features several additional cycle that are selected automatically. MANUAL DRY options to customize cycles to meet your cycles have default settings, but you may individual needs. Certain option buttons also customize the settings using the cycle setting feature a special function (see the following page buttons. -
Page 34: Special Functions
SPECIAL FUNCTIONS The option buttons also activate special Fuctions, including CHILD LOCK, RACK DRY, DAMP DRY SIGNAL. Press and hold the option button marked with the special function for 3 seconds to activate. CHILD LOCk RACk DRY Use this option to prevent Use RACK DRY with items, such unwanted use of the dryer or to as wool sweaters, silk, and lingerie,... -
Page 35: Custom Program
CUSTOM PROGRAM If you have a special combination of settings NOTE: You may save only one custom that you use frequently, you can save these program at a time. Pressing and holding the settings as a CUSTOM PROGRAM. CUSTOM PROGRAM button will overwrite any previously saved custom program. - Page 36 STEAM FUNCTIONS (cont.) Using the Steam Options: LG’s new steam technology allows you to inject fabrics with a swirling jet of hot steam to refresh This option injects steam late in the clothes, reduce static, and make ironing easier. drying cycle to reduce the static...
-
Page 37: Steam Cycle Guide
STEAM FUNCTIONS (cont.) IMPORTANT NOTES ABOUT STEAM CYCLES: wWARNING: • S team may not be clearly visible during the • Do not open the dryer door during steam steam cycles. This is normal. cycles. Steam can cause severe burns. • D o not use STEAMFRESH with items such as ™ • Do not fill the steam feeder with gasoline, wool, wool blanket, leather jackets, silk, wet dry-cleaning solvents, or other flammable or clothes, lingerie, foam products, or electric explosive substances. -
Page 38: Regular Cleaning
REGULAR CLEANING wWARNING: To reduce the risk of fire, electric shock, or injury to persons when using this appliance, follow basic precautions, including the following: • Unplug the dryer before cleaning to avoid the risk of electric shock. Failure to follow this warning can cause serious injury, fire, electric shock, or death. -
Page 39: Before Calling For Service
BEFORE CALLING FOR SERVICE Your dryer is equipped with an automatic error-monitoring system to detect and diagnose problems at an early stage. If your dryer does not function properly or does not function at all, check the following before you call for service. Problem Possible Causes Solutions... - Page 40 BEFORE CALLING FOR SERVICE (cont.) Problem Possible Causes Solutions • The drying time for a load will vary depending on Drying time is not • Heat settings, load size, or dampness of clothing is not the heat setting, the type of heat used (electric, consistent natural gas, or LP gas), the size of the load, the consistent.
- Page 41 BEFORE CALLING FOR SERVICE (cont.) Problem Possible Causes Solutions Steam doesn’t • Unplug dryer and call for service. • Water level error. generate but no error code is shown Garments still • Too many or too different • Small loads of 1 to 5 items work best. wrinkled after types of garments in dryer. • Load fewer garments. Load similar-type garments. STEAM FRESH ™ • Use an iron to make creases.
-
Page 42: Using Smartdiagnosis Tm
Accordingly, LG does not guarantee that SMARTDIAGNOSIS would accurately troubleshoot any given issue. -
Page 43: Optional Accessories
OPTIONAL ACCESSORIES For these and other LG products contact your local LG dealer, or visit our Web site at www.lg.com. Stacking kit Pedestal If space is at a premium, use this kit Give your LG washer and dryer a boost to securely stack your LG front-load with matching 14-inch high pedestals. -
Page 44: Pedestal Installation
PEDESTAL INSTALLATION The pedestal accessory includes: To ensure safe and secure installation, please thoroughly follow the instructions below. • Drawer divider (1) • Wrench (1) • S crews (18) † • Retainers (4) †† wWARNING • Incorrect installation can cause serious accidents. • The appliances are heavy. Two or more people are required when installing the pedestal. - Page 45 PEDESTAL INSTALLATION (cont.) For dryer For washer/combo Make sure the screws on the pedestal align Place the dryer on the pedestal. Make sure with the holes in the retainers, then install 4 the front and back feet are in the correct screws on each side to securely attach the positions.
-
Page 46: Stacking Kit Installation
STACkING kIT INSTALLATION This stacking kit includes: To ensure safe and secure installation, please observe the following instructions. • T wo (2) side rails • O ne (1) front rail wWARNING • F our (4) screws • I ncorrect installation can cause serious accidents. -
Page 47: Key Dimensions And Specifications
STACkING kIT INSTALLATION (cont.) Dryer Washer Place the dryer on top of the washer by Insert the front rail between the bottom of fitting the dryer feet into the side brackets as the dryer and the top of the washer. Push the illustrated. -
Page 48: Warranty
WARRANTY: Should your LG Dryer (“Product”) fail due to a defect in material or workmanship under normal home use during the warranty period set forth below, LG Canada will at its option repair or replace the Product upon receipt of proof of original retail pur- chase. - Page 49 MODE D’EMPLOI SÉCHEUSE Avant d’utiliser votre sécheuse, lisez attentivement ce mode d’emploi et conservez-le pour vous y référer ultérieurement. DLEX2550* DLGX2551* DLEX2450* DLGX2451* DLEX2650* DLGX2651* DLEX2655* DLGX2656* www.lg.com...
- Page 50 Instructions de sécurité pour l’installation ....5 Félicitations pour votre achat et Instructions de sécurité pour les fonctions de vapeur ..6 Instructions de sécurité pour la raccordement bienvenue dans la famille LG. Votre à l’électricité ............7 nouvelle sécheuse LG associe la PIÈCES ET CARACTÉRISTIQUES Caractéristiques spéciales ........
-
Page 51: Ce Qu'il Faut Faire Si Vous Détectez Une Odeur De Gaz
LISEZ TOUTES LES DIRECTIVES AVANT D’UTILISER L’APPAREIL wAVERTISSEMENT Pour votre sécurité, vous devez suivre l’information contenue dans ce manuel afin de réduire les risques d’incendie et d’explosion, de choc électrique, ainsi que pour éviter les dommages matériels, les blessures corporelles, ou un décès. Votre sécurité... -
Page 52: Précautions De Sécurité De Base
LISEZ TOUTES LES DIRECTIVES AVANT D’UTILISER L’APPAREIL wAVERTISSEMENT Pour votre sécurité, vous devez suivre l’information contenue dans ce manuel afin de réduire les risques d’incendie et d’explosion, de choc électrique, ainsi que pour éviter les dommages matériels, les blessures corporelles, ou un décès. PRÉCAUTIONS DE SÉCURITÉ... -
Page 53: Instructions De Mise À La Terre
LISEZ TOUTES LES DIRECTIVES AVANT D’UTILISER L’APPAREIL wAVERTISSEMENT Pour votre sécurité, vous devez suivre l’information contenue dans ce manuel afin de réduire les risques d’incendie et d’explosion, de choc électrique, ainsi que pour éviter les dommages matériels, les blessures corporelles, ou un décès. INSTRUCTIONS DE MISE À... -
Page 54: Instructions De Sécurité Pour Les Fonctions De Vapeur
LISEZ TOUTES LES DIRECTIVES AVANT D’UTILISER L’APPAREIL wAVERTISSEMENT Pour votre sécurité, vous devez suivre l’information contenue dans ce manuel afin de réduire les risques d’incendie et d’explosion, de choc électrique ainsi que pour éviter les dommages matériels, les blessures corporelles, ou un décès. INSTRUCTIONS DE SÉCURITÉ... -
Page 55: Instructions De Sécurité Pour La Raccordementà L'électricité
LISEZ TOUTES LES DIRECTIVES AVANT D’UTILISER L’APPAREIL wAVERTISSEMENT Pour votre sécurité, vous devez suivre l’information contenue dans ce manuel afin de réduire les risques d’incendie et d’explosion, de choc électrique ainsi que pour éviter les dommages matériels, les blessures corporelles, ou un décès. INSTRUCTIONS DE SÉCURITÉ... -
Page 56: Caractéristiques Spéciales
FONCTIONS DE VAPEUR La technologie vapeur LG permet de vaporiser sur les tissus des jets de vapeur chaude tourbillonnant pour rafraîchir les vêtements, réduire l’électricité statique et rendre le repassage plus facile. -
Page 57: Composantes Et Pièces Principales
COMPOSANTES ET PIÉCES PRINCIPALES En plus des composantes et caractéristiques spéciales détaillées dans la section Caractéristiques spéciales, ce manuel fait référence à de nombreuses autres composantes importantes. FILTRE À CHARPIE EN FAÇADE Le filtre à fibres monté à l'avant permet un accès facile pour le nettoyage entre les charges. -
Page 58: Conditions Requises Pour L'emplacement D'installation
w AVERTISSEMENT: Lire toutes les directives d’installation dans leur inté- gralité avant d’installer et d’utiliser votre sécheuse ! Il est important que vous lisiez ce manuel dans son intégralité avant d’installer et d’utiliser votre sécheuse.Vous retrouverez dans les pages qui suivent des directives détaillées pour les raccords électriques et de gaz, ainsi que les exigences en matière d’évacuation de l’air. -
Page 59: Installations Avec Piédestal Ou Trousse D'empilage En Option
INSTALLATIONS AVEC PIÉDESTAL OU TROUSSE D’EMPILAGE EN OPTION AVERTISSEMENT : Si vous installez la sécheuse avec le piédestal ou la trousse d’empilage en option, consultez la section Accessoires en option dans ce manuel ou la section des directives relatives à votre piédestal ou à votre trousse d’empilage avant de procéder à l’installation. Espacement recommandé... -
Page 60: Mise À Niveau De La Sécheuse
Placez la sécheuse à l’endroit où elle demeurera. Placez un niveau en travers de la surface de la sécheuse. ACCESSOIRES EN OPTION Pour ces produits LG et les autres, contactez votre détaillant LG local ou visitez notre site Internet au www.lg.com. Trousse d’empilage Piédestal (vendu séparément) -
Page 61: Pour Retirer La Porte
POUR RETIRER LA PORTE wAVERTISSEMENT LA PORTE DU SÈCHE-LINGE EST TRÈS LARGE ET LOURDE. Si vous ne respectez pas les instructions ci-dessous, vous risquez d'endommager le sèche-linge, de provoquer des dégâts matériels ou de vous blesser. • P our éviter d'endommager le sèche-linge ou la porte, soutenez la porte en plaçant dessous un tabouret ou une caisse adaptée, ou faites-vous aider d'une personne pour soutenir le poids de la porte. • I nversez toujours la porte AVANT d'empiler le sèche-linge sur le lave-linge. -
Page 62: Pour Installer La Porte
POUR INSTALLER LA PORTE wAVERTISSEMENT LA PORTE DU SÈCHE-LINGE EST TRÈS LARGE ET LOURDE. Si vous ne respectez pas les instructions ci-dessous, vous risquez d'endommager le sèche-linge, de provoquer des dégâts matériels ou de vous blesser. • P our éviter d'endommager le sèche-linge ou la porte, soutenez la porte en plaçant dessous un tabouret ou une caisse adaptée, ou faites-vous aider d'une personne pour soutenir le poids de la porte. • I nversez toujours la porte AVANT d'empiler le sèche-linge sur le lave-linge. -
Page 63: Modification De L'emplacement De La Sortie D'air
à gaz). pour le faire sortir. Une trousse de conversion, pièce n o 383EEL9001B, est offerte chez votre détaillant LG. L’ensemble comprend les éléments nécessaires pour modifier l’emplacement du conduit de la sortie d’air. OPTION 2 : Sortie d’air inférieure OPTION 1 : Sortie d’air latérale... -
Page 64: Ventilation De La Sécheuse
VENTILATION DE LA SÉCHEUSE wAVERTISSEMENT : Afin de réduire les risques d’incendie, de choc électrique, ou les blessures corporelles lorsque vous utilisez cet électroménager, vous devez toujours suivre les précautions de base, y compris ce qui suit : • N’écrasez pas et ne laissez pas le système • Des conduits métalliques rigides ou semi- de conduits s’affaisser. - Page 65 VENTILATION DE LA SÉCHEUSE (suite) Système d’évacuation d’air Type de sortie Longueur max. de 4 po (10,2 cm) de diamètre Nombre de coudes de 90° murale externe conduit métallique rigide 65 pi (19,8 m) Recommandé 55 pi (16,8 m) 47 pi (13,7 m) 36 pi (11,0 m) 4 po 4 po...
-
Page 66: Raccordement Des Sécheuses À Gaz
RACCORDEMENT DES SÉCHEUSES À GAz wAVERTISSEMENT : Afin de réduire les risques d’incendie, de choc électrique, ou les blessures corporelles lorsque vous utilisez cet électroménager, vous devez toujours suivre les précautions de base, y compris ce qui suit : • Alimentation en gaz requis : La sécheuse est expédiée de l’usine prête pour • Raccordez la sécheuse au type de gaz indiqué... - Page 67 RACCORDEMENT DES SÉCHEUSES À GAz (suite) wAVERTISSEMENT : Afin de réduire les risques d’incendie, de choc électrique, ou les blessures corporelles lorsque vous utilisez cet électroménager, vous devez toujours suivre les précautions de base, y compris ce qui suit : • L’installation et l’entretien doivent être effectués utilisation avec du gaz naturel.
-
Page 68: Raccordement Des Sécheuses Électriques
RACCORDEMENT DES SÉCHEUSES ÉLECTRIQUES wAVERTISSEMENT : Pour aider à empêcher des incendies, des électrocutions, des blessures graves, ou des décès, le câblage et la mise à la terre doivent se conformer à l’édition la plus récente du Code national de l'électricité, ANSI/NFPA 70 et à tous les règlements locaux en vigueur. Veuillez faire vérifier par un technicien qualifié... -
Page 69: Exigences Particulières Pour Les Maisons Mobiles Ou Préfabriquées
EXIGENCES PARTICULIÈRES POUR LES MAISONS MObILES OU PRÉFAbRIQUÉES Toute installation dans une maison mobile ou l’extérieur par le panneau droit en raison de la préfabriquée doit être conforme au chapitre 24 de la présence du module du brûleur. CFR, paragraphes 32-80 des normes américaines • Le conduit d’évacuation d’air de la sécheuse doit en matières de sécurité... -
Page 70: Test D'installation (Contrôle D'échappement)
TEST D’INSTALLATION (Contrôle d’échappement) Lorsque vous avez effectué l’installation du sèche-linge, utilisez ce test pour vous assurer que les conditions du système d’échappement sont adéquates à une opération correcte du sèche-linge. Ce test doit être réalisé pour vous signaler d’éventuels problèmes dans le système d’échappement de votre environnement domestique. • L e sèche-linge présente la caractéristique FlowSense, un système de détection innovateur qui détecte automatiquement les blocages et les obstructions du conduit du sèche-linge. - Page 71 TEST D’INSTALLATION (Contrôle d’échappement) Vérifiez le code d’erreur avant de contacter le service après-vente • Code d’erreur Cause éventuelles Solutions Dysfonctionnement du thermostat E teignez le sèche-linge et con- • • tE1 ou tE2 tactez le service après-vente. D ysfonctionnement du détecteur E teignez le sèche-linge et con- •...
-
Page 72: Caractéristiques Du Panneau De Commande
4 minutes, la sécheuse se FONCTIONS DE VAPEUR PRATIQUES mettra automatiquement hors tension. La nouvelle technologie à vapeur de LG vous permet d’envoyer un jet de vapeur BOUTONS TEMPS+/TEMPS- (MORE TIME/ tourbillonnante dans les tissus dans le but de LESS TIME) rafraîchir les vêtements, réduire l’électricité... -
Page 73: Fonctionnement De La Sécheuse
FONCTIONNEMENT DE LA SÉCHEUSE NETTOYER LE FILTRE A PELUCHES Si le filtre à peluches n’a pas déjà été nettoyé, retirez-le et nettoyez les peluches de la charge précédente. Cela permettra d’assurer un séchage plus rapide et efficace. CHARGER LE SECHE-LINGE Chargez le sèche-linge avec du linge mouillé... -
Page 74: Guide Des Cycles
Les cycles Séchage á Capteur (Sensor Dry) utilisent le Utilisez les cycles Séchage Manuel (Manual Dry) pour systeme exclusif a double capteur de LG qui decele selectionner un temps et une temperature de sechage. Lors et compare le niveau d’humidite des vetements et de la selection d’un cycle Manual Dry, l’afficheur TEMPS... -
Page 75: Triage Des Brassées
Voici les instructions de mise en marche et d’utilisation de votre nouvelle sécheuse. Veuillez consulter des sec- tions particulières de ce manuel pour de plus amples informations. w AVERTISSEMENT : Pour réduire le risque d’incendie, d’électrocution, ou de blessure, lisez tout le manu- el, y compris les Instructions importantes de sécurité, avant de faire fonctionner cette sécheuse. -
Page 76: Afficheur
AFFICHEUR L’afficheur ACL illustre les réglages, le temps restant estimé, les options et les messages d’état de votre sécheuse. Lorsque la sécheuse est en marche, l’afficheur s’illuminera. TEMPS RESTANT ENVIRON RAPPEL CHECK FILTER (VÉRIFICATION DU FILTRE À CHARPIE) (ESTIMATED TIME REMAINING) L’afficheur indiquera CHECK FILTER (vérification Lorsque le bouton MARCHE/PAUSE (START/ du filtre à... -
Page 77: Boutons De Réglage Des Cycles
bOUTONS DE RÉGLAGE DES CYCLES Votre sécheuse vous offre plusieurs options de Les cycles SÉCHAGE À CAPTEUR (SENSoR DRY) cycle supplémentaires pour personnaliser les possedent des reglages preprogrammes qui se cycles et ainsi satisfaire vos besoins individuels. Selectionnent automatiquement et ne peuvent etre Certains boutons d'options comportent modifies. -
Page 78: Fonctions Spéciales
FONCTIONS SPÉCIALES Les boutons d’options activent egalement des VERROUILLAGE POUR ENFANTS (CHILD LOCK) fonctions speciales comme VERRoUILLAGE PoUR ENFANTS (CHILD LoCK), SÉCHAGE SUR Utilisez cette option pour empecher PANIER (RACK DRY), BIP SÉCHAGE HUMIDE une utilisation non desiree de la secheuse ou pour empecher toute (DAMP DRY SIGNAL). -
Page 79: Fonctions De Vapeur
FONCTIONS DE VAPEUR Remplissage de l’alimentation de vapeur Sortez le tiroir. Remplissez le dispositif d’alimentation en vapeur jusqu’à la crépine. UNIQUEMENT Tiroir Alimentation de vapeur Sortez l’alimentation de vapeur de son Remettez l’alimentation de vapeur dans le compartiment, puis faites glisser le tiroir jusqu’au compartiment. - Page 80 FONCTIONS DE VAPEUR (suite) Utilisation des Options Vapeur : La nouvelle technologie a vapeur de LG vous permet d’envoyer un jet de vapeur tourbillonnante Cette option injecte de la vapeur dans les tissus dans le but de rafraichir les tardivement dans le cycle de sechage vetements, reduire l’electricite statique et faciliter...
-
Page 81: Guide Des Cycles Vapeur
FONCTIONS DE VAPEUR (suite) wAVERTISSEMENT : IMPORTANTES REMARQUES SUR LES CYCLES VAPEUR : • La vapeur n’est pas visible pendant les Cycles Vapeur. C’est • Ne pas ouvrir la porte de la sécheuse pendant les normal. Cycles Vapeur. La vapeur peut occasionner de graves • Ne pas utiliser STEAM FRESH sur les articles suivants : brûlures. les lainages, les couvertures, les vestes en cuir, la soie, les • Ne pas remplir l’alimentation vapeur avec de l’essence, vêtements humides, les produits en mousse ou les couvertures des solvants de nettoyage à... -
Page 82: Nettoyage Régulier
NETTOYAGE RÉGULIER wAVERTISSEMENT : Afin de réduire les risques d’incendie, de choc électrique, ou les blessures corporelles lorsque vous utilisez des électroménagers, vous devez toujours suivre les précautions de base, y compris ce qui suit : • Débranchez votre sécheuse avant de la nettoyer pour éviter le risque d’électrocution. Tout non-respect de ces instructions peut entraîner des blessures, un incendie, une électrocution, ou la mort. -
Page 83: Avant D'appeler Le Service
AVANT D’APPELER LE SERVICE Votre sécheuse est dotée d’un système de contrôle des erreurs automatique qui détecte et diagnostique les problèmes dès leur apparition. Si votre sécheuse ne fonctionne pas correctement ou ne fonctionne pas du tout, vérifiez les éléments suivants avant d’appeler le service. Problèmes Causes possibles Solutions... - Page 84 AVANT D’APPELER LE SERVICE (suite) Problème Causes possibles Solutions • Le temps de séchage d’une charge varie selon Le temps de séchage • Les paramètres de séchage, la taille de la brassée, et le le paramètre de chaleur, le type de chaleur utilisé n’est pas constant taux d’humidité des (électrique, à gaz naturel, ou PL), la taille de la brassée, vêtements ne sont pas le type de tissus, le taux d’humidité...
- Page 85 AVANT D’APPELER LE SERVICE (suite) Problème Causes possibles Solutions Le voyant • Vérifiez le tiroir d’alimentation de vapeur : • Erreur d’alimentation d’eau. est allumé pendant le (1) Assurez-vous que l’alimentation de vapeur est cycle de séchage remplie d’eau jusqu’à la ligne MAX. (2) Assurez-vous que l’alimentation de vapeur est correctement positionnée et que le tiroir est bien fermé.
- Page 86 AVANT D’APPELER LE SERVICE (suite) Problème Causes possibles Solutions Des gouttes d’eau • De la condensation doit normalement se • C’est normal. coulent le long de constituer sur le côté intérieur de la porte du la porte pendant un séchoir (sécheuse) durant l'opération vapeur. cycle Steam Cycle Quelques gouttes de condensation peuvent (Cycle a vapeur) s'écouler au bas de la porte.
-
Page 87: Utilisation De Smartdiagnosis Mc
Par conséquent, LG ne peut pas garantir que SMARTDIAGNoSIS effectue de manière efficace le dépannage d’un problème donné. -
Page 88: Accessoires En Option
ACCESSOIRES EN OPTION Pour ces produits LG et les autres, contactez votre détaillant LG local ou visitez notre site Internet au www.lg.com Piédestal Trousse d’empilage Donnez à votre machine à laver et Si l’espace est restreint, utilisez cette sécheuse LG un coup de pouce grâce trousse pour empiler de façon sécuritaire... -
Page 89: Installation Du Piédestal
INSTALLATION DU PIÉDESTAL Le piédestal accessoire comprend : Pour vous assurer que l’installation est sécuritaire et sûre, conformez-vous aux directives suivantes. • Diviseur à tiroir (1) • Clé (1) • V is (18) † • Supports (4) †† wAVERTISSEMENT • U ne installation incorrecte peut entraîner des accidents graves. • L es appareils électroménagers sont lourds. - Page 90 INSTALLATION DU PIÉDESTAL (suite) Pour la sécheuse Pour la machine à laver/combo Assurez-vous que les trous du piédestal sont Positionnez la sécheuse sur le piédestal. alignés avec les trous des souteneurs. Assurez-vous que les pieds à l’avant et à Insérez et serrez 2 vis à chaque coin pour l’arrière de la machine se logeront en les fixer solidement l’appareil au piédestal.
-
Page 91: Installation De La Trousse D'empilage
INSTALLATION DE LA TROUSSE D’EMPILAGE La trousse d’empilage comprend : Pour vous assurer que l’installation est sécuritaire et sûre, conformez-vous aux directives suivantes. • D eux (2) rails latéraux wAVERTISSEMENT • U n (1) rail avant • Q uatre (4) vis • U ne installation incorrecte peut entraîner des accidents graves. -
Page 92: Spécifications Et Dimensions Principales
INSTALLATION DE LA TROUSSE D’EMPILAGE (suite) Sécheuse Machine à laver Placez la sécheuse par-dessus la machine à Insérez le rail avant entre le bas de la laver en ajustant les pattes de la sécheuse sécheuse et le haut de la machine à laver. dans les rails latéraux tel qu’illustré. -
Page 93: Garantie
GARANTIE LIMITÉE DE LA SÉCHEUSE LG - Canada GARANTIE : Si votre sécheuse LG (le « produit ») s'avère défectueuse en raison d'un défaut de matériau ou de fabrication lors d'une utilisation normale, pendant la période de garantie spécifiée ci-après, LG Canada réparera ou remplacera à sa discrétion le produit sur réception de la preuve d'achat originale fournie par le détaillant. - Page 94 re m a r que s...
- Page 95 re mar qu e s...
- Page 96 re m a r que s...
- Page 97 re mar qu e s...
- Page 98 re m a r que s...
- Page 99 re mar qu e s...
- Page 100 LG Customer Information Center 1-800-243-0000 1-888-542-2623 CANADA Register your product Online! www.lg.com...