Table of Contents
Advertisement
Quick Links
Advertisement
Table of Contents

Related Manuals for Asus M80CJ


Summary of Contents for Asus M80CJ
- Page 1 Desktop PC M80CJ User Guide...
- Page 2 Product warranty or service will not be extended if: (1) the product is repaired, modified or altered, unless such repair, modification of alteration is authorized in writing by ASUS; or (2) the serial number of the product is defaced or missing.
-
Page 3: Table Of Contents
Wi-Fi connection (on selected models only) ................27 Chapter 5: Troubleshooting Troubleshooting ..........................29 Appendix Windows 10 User Manual ® Starting for the first time ......................39 Using the Windows 10 UI ......................40 ® Keyboard shortcuts ........................44 ASUS contact information ASUS contact information ......................46... -
Page 4: Notices
Notices ASUS Recycling/Takeback Services ASUS recycling and takeback programs come from our commitment to the highest standards for protecting our environment. We believe in providing solutions for you to be able to responsibly recycle our products, batteries, other components, as well as the packaging materials. Please go to http://csr.asus.com/english/Takeback.htm for the detailed recycling information in different regions. - Page 5 Avertissement relatif aux batteries Lithium-Ion MISE EN GARDE: Danger d’explosion si la pile n’est pas remplacée correctement. Remplacer uniquement avec une pile de type semblable ou équivalent, recommandée par le fabricant. Mettez au rebut les batteries usagées conformément aux instructions du fabricant.
- Page 6 VCCI: Japan Compliance Statement VCCI Class B Statement This is a Class B product based on the standard of the VCCI Council. If this is used near a radio or television receiver, it may cause radio interference. Install and use equipment according to the instruction manual.
- Page 7 BSMI: Taiwan Wireless Statement Japan RF Equipment Statement KC (RF Equipment)
-
Page 8: Safety Information
Safety information Disconnect the AC power and peripherals before cleaning. Wipe the Desktop PC using a clean cellulose sponge or chamois cloth dampened with solution of nonabrasive detergent and a few drops of warm water then remove any extra moisture with a dry cloth. DO NOT place on uneven or unstable work surfaces. -
Page 9: Conventions Used In This Guide
Where to find more information Refer to the following sources for additional information and for product and software updates. ASUS websites The ASUS website provides updated information on ASUS hardware and software products. Refer to the ASUS website www.asus.com. ASUS Local Technical Support Visit ASUS website at http://support.asus.com/contact for the contact information of local... -
Page 10: Package Contents
Package contents Desktop PC Keyboard x1 Mouse x1 M80CJ Power cord x1 Power adapter x1 Warranty Card x1 Installation Guide x1 • If any of the above items is damaged or missing, contact your retailer. • The illustrated items above are for reference only. Actual product specifications may vary with different models. -
Page 11: Chapter 1: Getting Started
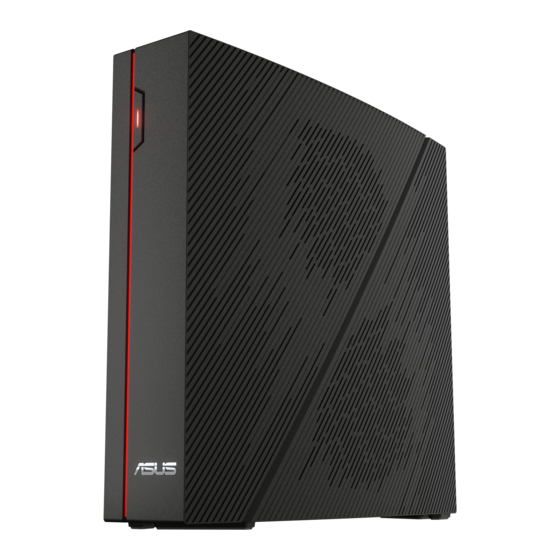
All these values are encapsulated in a stunningly futuristic and stylish system casing. Read the ASUS Warranty Card before setting up your ASUS Desktop PC. Getting to know your computer Illustrations are for reference only. The ports, their locations and the chassis color vary with different models. - Page 12 Front Power button. Press this button to turn on your computer. Chapter 1: Getting started...
- Page 13 HDCP compliant allowing playback of HD DVD, Blu-ray, and other protected content. Power jack. This port connects to a 230W adapter (Dual adapters needed on selected models). Adapter rating: • 230W Input rating: 100-240V ~ 3.2A 50-60Hz Output rating: 19.5V 11.8A ASUS M80CJ...
- Page 14 Line Out port (lime). This port connects to a headphone or speaker. In a 4.1 or 5.1-channel configuration, the function of this port becomes Front Speaker Out. Supported by ASUS Audio Wizard. Line In port (light blue). This port connects to a tape, CD, DVD player, or other audio sources.
-
Page 15: Setting Up Your Computer
Connect an HDMI monitor to the HDMI port on the rear panel of your computer. Plug the monitor to a power source. Connecting a USB keyboard and a USB mouse Connect a USB keyboard and a USB mouse to the USB ports on the rear panel of your computer. ASUS M80CJ... -
Page 16: Turning Your Computer On
Connecting the power cord Connect one end of the power cord to the power connector on the rear panel of your computer and the other end to a power source. Turning your computer ON This section describes how to turn on your computer after setting up your computer. Turning your computer ON Power button To turn your computer ON:... -
Page 17: Chapter 2: Connecting Devices To Your Computer
This desktop PC provides USB 2.0/1.1 and USB 3.1 Gen 1 ports on the rear panel. The USB ports allow you to connect USB devices such as storage devices. To connect a USB storage device: • Insert the USB storage device to your computer. Rear panel ASUS M80CJ... -
Page 18: Connecting Microphone And Speakers
Connecting microphone and speakers This desktop PC comes with microphone ports and speaker ports on both the front and rear panels. The audio I/O ports located on the rear panel allow you to connect 2.1-channel, 4.1-channel, and 5.1-channel stereo speakers. Connecting 2.1-channel Speakers Connecting 4.1-channel Speakers Connecting 5.1-channel Speakers... -
Page 19: Connecting Multiple External Displays
From the Start menu, click Settings > System > Display. Configure the settings for your displays. For some graphic cards, only the monitor that is set to be the primary display has display during POST. The dual display function works only under Windows. ASUS M80CJ... -
Page 20: Connecting An Hdtv
Connecting an HDTV Connect a High Definition TV (HDTV) to the HDMI port of your computer. • You need an HDMI cable to connect the HDTV and the computer. The HDMI cable is purchased separately. • To get the best display performance, ensure that your HDMI cable is less than 15 meters. Chapter 2: Connecting devices to your computer... -
Page 21: Chapter 3: Using Your Computer
• Adjust the back of your chair so that the base of your spine is firmly supported and angled slightly backward. • Sit upright with your knees, elbows and hips at an approximately 90º angle when you are at the PC. • Place the monitor directly in front of you, and turn the top of the monitor screen even with your eye level so that your eyes look slightly downward. • Keep the mouse close to the keyboard, and if necessary, use a wrist rest for support to reduce the pressure on your wrists while typing. • Use your Desktop PC in a comfortably-lit area, and keep it away from sources of glare such as windows and straight sunlight. • Take regular mini-breaks from using your Desktop PC. ASUS M80CJ... - Page 22 Chapter 3: Using your computer...
-
Page 23: Chapter 4: Connecting To The Internet
DSL/cable modem. Modem RJ-45 cable Turn on the DSL/cable modem and your computer. Configure the necessary Internet connection settings. • Contact your network administrator for details or assistance in setting up your Internet connection. • For more details, refer to the sections Configuring a dynamic IP/PPPoE network connection or Configuring a static IP network connection. ASUS M80CJ... - Page 24 Connecting via a local area network (LAN) To connect via a LAN: Connect one end of an RJ-45 cable to the LAN (RJ-45) port on the rear panel of your computer and the other end to your LAN. RJ-45 cable Turn on your computer.
- Page 25 From the Open Network and Sharing Center screen, click Change Adapter settings. Right-click on your LAN and select Properties. Click Internet Protocol Version 4(TCP/ IPv4) and click Properties. Click Obtain an IP address automatically and click OK. Continue to the next steps if you are using PPPoE connection. ASUS M80CJ...
- Page 26 Return to the Network and Sharing Center and then click Set up a new connection or network. Select Connect to the Internet and click Next. Select Broadband (PPPoE) and click Next. Follow the next onscreen instructions to complete the setup. Configuring a static IP network connection To configure a static IP network connection: Repeat steps 1 to 4 of the previous section.
-
Page 27: Wi-Fi Connection (On Selected Models Only)
To establish a wireless connection, you need to connect to a wireless access point (AP). Wireless AP Modem To increase the range and sensitivity of the wireless radio signal, connect the external antennas to the antenna connectors on the ASUS WLAN Card. ASUS M80CJ... - Page 28 Chapter 4: Connecting to the Internet...
-
Page 29: Chapter 5: Troubleshooting
Select the program that is not responding, then click End Task. • If the keyboard is not responding, press and hold the Power button on the top of your chassis until the computer shuts down. Then press the Power button to turn it I cannot connect to a wireless network using the ASUS WLAN Card (on selected models only)? • Ensure that you enter the correct network security key for the wireless network you want to connect to. - Page 30 No display on the monitor. • Check if the monitor is powered on. • Ensure that your monitor is properly connected to the video output port on your computer. • If your computer comes with a discrete graphics card, ensure that you connect your monitor to a video output port on the discrete graphics card. • Check if any of the pins on the monitor video connector is bent. If you discover bent pins, replace the monitor video connector cable. • Check if your monitor is plugged to a power source properly. • Refer to the documentation that came with your monitor for more troubleshooting information. When using multiple monitors, only one monitor has display. •...
- Page 31 Hover your mouse pointer over the lower left corner of Windows desktop then ® right-click on the Start Screen’s thumbnail. From the popup menu, click File Explorer to open the Computer screen. Right-click , then click Eject from the menu. ASUS M80CJ...
- Page 32 • E nsure that the power cord is properly Your computer’s power cord connected. is not properly connected. • U se other compatible power cord. PSU (Power supply unit) Contact the ASUS Service Center about problems installing another PSU on your computer. Display Problem Possible Cause Action • C onnect the signal cable to the correct...
- Page 33 Ensure the LAN LED is on. If not, try LAN cable problems another LAN cable. If it still does not work, contact the ASUS service center. Your computer is not Ensure that your computer is properly Cannot access the properly connected to a connected to a router or hub.
- Page 34 Computer virus attack • R einstall the operating system. • S end the damaged hard disk drive to ASUS Service Center for servicing. Hard disk drive failure • R eplace with a new hard disk drive. • R emove the extra memory modules that you have installed, then try again. Memory module problems The system often • C ontact the ASUS Service Center for...
- Page 35 • C ontact the ASUS Service Center for assistance. If the problem still persists, refer to your Desktop PC’s warranty card and contact the ASUS Service Center. Visit the ASUS Support site at http://support.asus.com for the service center information. ASUS M80CJ...
- Page 36 Chapter 5: Troubleshooting...
-
Page 37: Appendix
ASUS Desktop PC Windows ® User Manual Appendix Windows 10 User Manual ® E10435 First Edition May 2015 Copyright © ASUSTeK Computer Inc. All Rights Reserved... -
Page 39: Starting For The First Time
Follow the onscreen instructions to configure the following basic items: • Personalize • Get online • Settings • Your account Wait until Windows® 10 finishes installing the apps and system settings. After the installation, the Windows® 10 desktop appears. ASUS Desktop PC... -
Page 40: Using The Windows 10 Ui
Using the Windows 10 UI ® The Windows ® 10 User Interface (UI) includes the favorite Start menu and the tiled-formatted Start screen. It includes the following features you can use while working on your Desktop PC. Click your account name to change the Click to expand the Start screen picture, sign out of your account, or lock your Desktop PC Click to launch the Start menu Pin on or launch an app... - Page 41 Some apps require signing in to your Microsoft account before they are fully launched. Click to restore the Start screen Moving apps on the Start screen You can move apps from the Start screen simply through dragging and dropping the app to your preferred location. Unpinning apps from the Start screen To unpin an app from the Start screen, right-click on the app to activate its settings bar then click Unpin from Start. ASUS Desktop PC...
- Page 42 Taskbar Windows® 10 comes with the standard taskbar, which keeps all your currently running apps or items in the background. Unpinning apps from the taskbar From the Start screen or taskbar, right-click the app you want to unpin. Click Unpin from Start or Unpin this program from taskbar to remove the app from the Start screen or taskbar.
- Page 43 Snap another app to your preferred location on the screen. Using your keyboard a) Launch an app, press and the arrow keys to select the direction where you want to snap the app in place. b) Snap another app using and the arrow keys. ASUS Desktop PC...
-
Page 44: Keyboard Shortcuts
Keyboard shortcuts Using your keyboard, you can also use the following shortcuts to help you launch apps and navigate Windows ® Switches between the Start screen and the last running app Launches the desktop + <D> Launches File Explorer + <E> Activates the File search function + <F>... - Page 45 From the Start menu, click Settings > Update & security > Recovery. Scroll down to view the Remove everything and reinstall Windows option. Under this option, click Get started. Follow the onscreen instructions to complete the reinstallation and reset process. ASUS Desktop PC...
-
Page 46: Asus Contact Information
800 Corporate Way, Fremont, CA 94539, USA Telephone +1-510-739-3777 Fax +1-510-608-4555 Web site usa.asus.com Technical Support Telephone +1-812-282-2787 Support fax +1-812-284-0883 Online support support.asus.com ASUS COMPUTER GmbH (Germany and Austria) Address Harkort Str. 21-23, D-40880 Ratingen, Germany Fax +49-2102-959931 Web site asus.com/de Online contact eu-rma.asus.com/sales Technical Support Telephone (Component) +49-2102-5789555 Telephone Germany (System/Notebook/Eee/LCD) +49-2102-5789557...