
Related Manuals for LG WFSL1533EK


Summary of Contents for LG WFSL1533EK
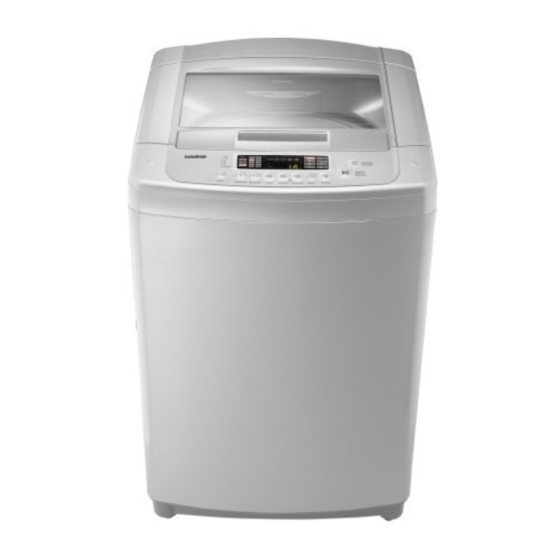
- Page 1 OWNER’S MANUAL WASHING MACHINE Please read this manual carefully before operating your washing machine and retain it for future reference. WFSL1533EK P/No.: MFL67221399...
- Page 2 roduct Features Washer doesn't operate while the lid is open. If the lid is open during the wash, rinse or spin cycles, the operation stops for safety. FUZZY logic control A built-in load sensor automatically detects the laundry load and a microprocessor optimizes washing conditions such as ideal WATER LEVEL and washing time.
-
Page 3: Read This Manual
ontents READ THIS MANUAL Inside you will find many helpful hints on how to use and maintain your washer properly. Just a little preventive care on your part can save you a great deal of time and money over the life of your washer. You will find many answers to common problems in the Troubleshooting section. -
Page 4: Afety Information
afety Information Read carefully and thoroughly through this booklet as it contains important safety information that will protect the user from unexpected dangers and prevent potential damages to the product. This booklet is divided into 2 parts : Warning and Caution. : This is a warning sign specifying user’s applications which might be dangerous. - Page 5 afety Information YOUR Warning LAUNDRY AREA • Keep the area underneath and around your appliances free of combustible materials such as lint, paper, rags, chemical, etc. Operating with such materials around the machine may trigger explosion or fire. • Close supervision is necessary if this appliance is used by or near children. Do not allow children to play on, with, or inside this or any other appliance.
-
Page 6: When Not In Use
afety Information WHEN USING Warning THE WASHER Do not use a plug socket and wiring equipment for more than their rated capacity. Exceeding the limit may lead to electric shock, fire , break down, and/or deformation of parts. Do not mix chlorine bleach with ammonia or acids such as vinegar and/or rust remover. Mixing different chemicals can produce toxic gases which may cause death. - Page 7 dentification of Parts Body POWDER AND LIQUID * WATER SUPPLY DETERGENT BOX ( HOSE Make sure the LINT FILTER water does not Clean regularly to leak. stop linting on the clothes load. * POWER PLUG If the supply cord is BLEACH damaged, it must be DISPENSER (...
- Page 8 unction Information Our machine provides various washing methods which suits various conditions and types of laundry. Different types of laundry washing FUZZY(Normal) Wash Use this Program for everyday washing e.g. sheets, towels, T-shirts. (refer to page 16) JEANS Wash Use this Program for heavily soiled durable garments e.g. overalls, jeans. Thick and heavy clothes or those which are excessively dirty like jeans or working uniforms can be washed.
- Page 9 Use nylon nets for long, DELICATE items. For laundry with long strings or long length , a net will prevent tangling during washing. Fasten zippers, hook, and strings to make sure that these items don't snag on other clothes. Nylon net is not supplied by LG.
-
Page 10: Water Temperature
se of Water, Dispenser Drawer, Detergent, Bleach and Softener Using Water Amount of WATER LEVEL • This machine detects the quantity of laundry automatically, then sets the WATER LEVEL and proper amount of Detergent. • When you select a wash program, the WATER LEVEL and amount of Detergent (to be used) will be shown on the control panel. -
Page 11: Using Detergent
Using Detergent Detergent Follow the Detergent package directions. Using too little Detergent is a common cause of laundry problems. Use more Detergent if you have hard water, large loads, greasy or oily soils or lower Water Temperature. Choosing the right Detergent We recommend the use of domestic Detergent, (powder, liquid or concentrated). - Page 12 se of Water, Dispenser Drawer, Detergent, Bleach and Softener Using Liquid Bleach • Check clothing care label for special instructions and separate the Bleach dispenser ( laundry to be bleached • Dilute liquid chlorine bleach. • Measure the recommended amount of liquid bleach carefully following instructions on the bottle.
-
Page 13: Stain Removal
pecial Guide for Stain Removal WARNING Do not use or mix liquid chlorine bleach with other household chemicals such as toilet cleaners, rust removers, acid or products containing ammonia. These mixtures can produce dangerous fumes which can cause serious injury or death. To reduce the risk of fire or serious injury to persons or property, comply with the basic warnings listed below: •... - Page 14 unction of each Button WATER TEMPERATURE WATER LEVEL BUTTON BUTTON (OPTION) • Use to select Water Temperature. • Use to select the proper amount of water in relation to the weight and type of laundry. Pressing the button allows you to •...
- Page 15 POWER(AUTO OFF) TIME LEFT, DELAY START (RESERVATION), ALARM INDICATION BUTTON • Time left - During operation, the remaining time indicated. • Use to turn the power on or off. • DELAY START INDICATION (RESERVATION) - When DELAY • Push again and power goes on or off START (RESERVATION) program is selected, it indicates the finishing •...
-
Page 16: Washing Programs
ashing Programs Washing Programs the Detergent laundry (Normal Wash) Used for normal loads, this • Add the appropriate mode automatically selects the quantity of Detergent as most appropriate conditions indicated by the and completes the sequence WATER LEVEL next to in one operation. -
Page 17: Close The Lid
Caution & Note Finish Close the lid • If water is already in the tub, or putting wet laundry into the tub before starting will increase the WATER LEVEL. • The pulsator rotates for 8 • Water will be • When the wash •... - Page 18 OAK Wash Use this mode to wash normal clothes or thick and heavy clothes which are excessively dirty. SOAK mode can be used with FUZZY or JEANS or SILENT or FAVORITE program. Press the POWER (AUTO OFF) button to turn power on. Press the PROGRAM button to select the washing program.
- Page 19 AVORITE Wash Pressing the FAVORITE button allows you to store your FAVORITE wash conditions in the normal cycle memory and then recall it for use at a later time. Press the POWER (AUTO OFF) button to turn power on. Select the FAVORITE program. Select your FAVORITE wash conditions.
- Page 20 ILENT Wash Use this program to wash quietly in SILENT especially during late night and dawn. Press the POWER (AUTO OFF) button to turn power on. Press the PROGRAM button to select SILENT program. Add the laundry into the washing tub. Press the START/PAUSE button.
- Page 21 UB CLEAN If scrud is allowed to build-up in the machine it can result in stains on your clothes or unpleasant smell in your washer. Scrud is the way build-up that can occur within any washer when the fabric softener comes into contact with Detergent, and according to particular degree of dirtiness or quality of water to be use, in these case, use this program to clean inner tub and outer tub.
-
Page 22: Press The Start/Pause Button
IR DRY AIR DRY for your laundary. Press the POWER (AUTO OFF) button to turn power on. Press the AIR DRY button to select the desired timing. Press the START/PAUSE button. Close the lid. NOTE Select "Air Dry" 30min ‘ TUB DRY -Use this mode to keep inner tub from getting moldy caused by remaining moisture. - Page 23 ption Washing When you only need the Wash, Wash/Rinse or Rinse cycles, these can be set manually. Press the POWER (AUTO OFF) button to turn power on. Only Wash Only Rinse Only Spin Press the WASH button to Press the RINSE button to Press the SPIN button to select the desired timing.
- Page 24 ELAY START (RESERVATION) Wash DELAY START (RESERVATION)Wash is used to delay the finishing time of the operation. The hours to be delayed can be set by the user accordingly. The time on the display is the finishing time , not the start time. Press thePOWER (AUTO OFF) button to turn power on.
- Page 25 ther Useful Functions Child Lock Function If you want to lock all the keys to prevent settings from being changed by a child, you can use the child lock option. How to Lock Press the POWER (AUTO OFF) button. • Turn Power on. Press the START/PAUSE button to start washing.
- Page 26 lacing and Leveling Please ensure that transit restraint has been removed before operating your machine. Place the machine on a flat and firm surface which allows proper clearance. We suggest a minimum clearance of 2 cm to the right side and left sides of the machine for ease of more than 10 cm installation.
- Page 27 onnecting Water Supply Hose Before connecting the Water Supply Hose to the water tap, check the hose type and then choose the correct instruction here under. Note that the Water Supply Hose supplied may vary from country to country, Make sure to connect the blue inlet hose to the COLD water tap, and the orange inlet hose to the HOT water tap.
- Page 28 onnecting Water Supply Hose Normal Type (Normal tap without thread & one touch type inlet hose.) Separate Middle connector from Water Supply Hose Middle Separate Middle connector from the Water Fixed Sticker connector Supply Hose by pulling the Pressing Rod and Pressing Handle the Pressing Handle that is attached to the Water Pressing Rod...
- Page 29 Screw Type Attach the water supply hose to the tap. Push the water supply hose up so that the rubber Water packing within the hose can adhere completely to the tap. Rubber Packing Water Supply Hose Connect the water supply hose to the tap. Connect the water supply hose to the tap and then tighten it by screwing it to the right.
- Page 30 onnecting Drain Hose Before connecting Drain Hose, check 1 the drain hose applicable to your model and choose the correct instructions. Pump Model Insert the plastic holder into hole in the back side toward the stand pipe direction. Adjust the holder by pressing both sides to push in.
- Page 31 rounding Method Earth wire should be connected. If the earth wire is not connected, there is possible a danger of electric shock caused by the current leakage . Grounding Method with Ground insert space Terminal Ground If the AC current outlet has a ground terminal, then Terminal separate grounding is not required.
-
Page 32: Leaning And Maintenance
• Before cleaning the filter, the impurities in the water supply hose should be removed. To Clean the Lint Filter NOTE • If the lint filter is torn or damaged, purchase a new one from LG service center. To Clean the Pump casing (for pump model) Place a towel on the... - Page 33 leaning and Maintenance When there is a fear of freezing • Close the water taps and remove the Water Supply Hose. • Remove the water which remains in the water supply. • Lower the drain hose and drain the water in the bowl and the drain hose by spinning. If frozen •...
- Page 34 se of Handle Locker You can use handle hold function if you like to use. Handle hold function is operated by holder under the handle. • Slide holder to left/right side until you listen to "Click" sound to holding handle. •...
- Page 35 ommon washing problems Many washing problems involve poor soil & stain removal, residues of lint and scum, and fabric damage. For satisfactory washing results, follow these instructions. WASH PROBLEM Problems Possible Causes Solutions & Preventive Measures • • Poor soil Not enough Detergent Use correct amount of Detergent for load size, amount of soil •...
- Page 36 • Is the laundry evenly balanced? Spin Failure • Is the washing machine placed on a flat surface? Door(Lid) Open • Is the lid closed? • Please call your nearest LG Electronics service center for help. Internal sensing failure Power failure...
-
Page 37: What Is Not Covered
erms of Warranty What Is Not Covered: • Service trips to your home to teach you how to use the product. • If the product is connected to any voltage other than that shown on the rating plate. • If the fault is caused by accident, neglect, misuse or Act of God. •... - Page 38 Model WFSL1533EK Power supply 120 V~, 60 Hz Rate output 520 W Water tab pressure 30 - 800 kPa (0.3 - 8.0 kgf/cm Weight 47 kg Size 632(W) x 670(D) x 1020(H) Wash capacity 15.0 kg (33 lbs) In our continuing effort to improve the quality of our appliances, it may be necessary to make changes to the...
-
Page 39: Manual Del Usuario
MANUAL DEL USUARIO LAVADORA Favor de leer este manual cuidadosamente antes de utilizar su lavadora y consérvelo para una referencia futura. WFSL1533EK P/No.: MFL67221399... - Page 40 aracterísticas del Producto La lavadora no funcionará con la tapa abierta. Si se abre la tapa durante el lavado, el enjuague o el , la operación se detendrá por seguridad. Control de lógica FUZZY Un sensor de carga y un microprocesador en el controlador detectan la carga de lavado y fijan las condiciones óptimas de lavado, tales como nivel de agua, tiempo de lavado, etc.
-
Page 41: Instalación
ontenidos LEA ESTE MANUAL En él usted encontrará muchos consejos útiles de cómo usar y mantener apropiadamente su lavadora. Con sólo un poco de cuidado preventivo de su parte puede ahorrarle un gran gasto de tiempo y dinero durante la vida de su lavadora. Encontrará muchas respuestas a problemas comunes en la sección de Detección de Fallas. - Page 42 nformación de Seguridad Leer detallada y completamente este manual que contiene información importante acerca de la seguridad, que protegerá al usuario de peligros inesperados y prevendrá daños potenciales al producto. Este manual está divido en dos partes: Advertencia y Precaución. : Esta es una señal de advertencia especificando las aplicaciones del usuario que pueden ser peligrosas.
- Page 43 nformación de Seguridad AREA DE LAVADO Advertencia • Mantener el área limpia y alrededor de su electrodoméstico, y libre de combustible o materiales tales como papeles, pelusillas de ropa, químicos, etc. El operar con ese tipo de materiales alrededor de la máquina puede ocasionar una explosión o incendio. •...
- Page 44 nformación de Seguridad CUANDO USE LA Advertencia LAVADORA Por favor no conecte más aparatos eléctricos en la toma de corriente donde tiene conectada su lavadora. Exceder el límite puede causar una descarga eléctrica, fuego, averías, y/o deformaciones de las partes. No mezcle cloro blanqueador con amoniaco o ácidos tales como vinagre para limpiar.
- Page 45 dentificación de Partes Cuerpo • Caja de detergente en polvo y liquido • Manguera de suministro de agua * • Cable eléctrico * Si el cable de alimentación se • Dispensador de blanqueador encuentra dañado, deberá cambiarse por parte del fabricante o de sus agentes de •...
- Page 46 nformación de Función Nuestra máquina propor ciona varios métodos de lavado que se adaptan a diversas condiciones y tipos de ropa. Diferentes tipos de lavado de ropa Lavado FUZZY (Normal) Use este programa para el lavado diario, o sea, sábanas, toallas, camisetas. (refiérase a la página 16) Lavado de JEANS Use este programa para prendas de vestir fuertemente manchadas, por ejemplo overoles, jeans.
- Page 47 Cierre la cremallera y abroche el corchete y la cuerda para asegurarse de que estos artículos no hagan rasgones a otras ropas. La red de nilón no será suministrada por LG.
-
Page 48: Uso Del Agua
so del Agua, Detergente, Blanqueador y Suavizante Uso del Agua Cantidad de Agua • Este aparato detecta automáticamente la cantidad de ropa, ajustando el nivel de agua y la cantidad apropiada de detergente. • Cuando usted seleccione un programa de lavado, el nivel de agua y la cantidad de detergente (a usar) serán mostrados en el panel de control. -
Page 49: Uso De Detergente
Uso de Detergente Detergente Siga las instrucciones del paquete de detergente. El uso de poca cantidad de detergente causará problemas del lavado. Use más detergente si agua dura, tiene gran cantidad de ropa o suciedad causada por el aceite o temperatura baja del agua. - Page 50 so del Agua, Detergente, Blanqueador y Suavizante Uso de blanqueador Dispensador de cloro • Revise las instrucciones de lavado de sus prendas y separe las que necesitan lavarse con cloro. • Diluya el blanqueador. • Mida la cantidad recomendada de cloro de acuerdo a las instrucciones que tenga en su empaque.
-
Page 51: Eliminación De Manchas
uía Específica para Quitar las Manchas Advertencia No use o mezcle el blanqueador líquido de cloro con otros químicos del uso doméstico tales como el líquido de limpieza del baño, eliminador de orín, ácido o los productos que contienen amonio. Este tipo de mezcla puede producir el humo peligroso el cual puede causar una lesión seria o la muerte. - Page 52 unción de cada botón Botón de nivel de agua Botón de Temperatura de agua (Indicación de cantidad de detergente) (opcional) • Úselo para seleccionar la temperatura del • Úselo para ajustar el nivel de agua que necesite ; la cantidad de agua.
- Page 53 Tiempo restante, Inicio Demorado (Reservación), APAGADO AUTOMÁTICO Botón (Encendido) Indicación de Alarma • Tiempo restante - Durante la operación, el tiempo restance es indicado. • Úselo para apagar o encender la • Indicación de Inicio Demorado (Reservación) - Cuando el programa lavadora.
- Page 54 rogramas de Lavado TEMP. DE AGUA TEMP. DE AGUA Agregue Programas de Agregue el la ropa a Lavado detergente. lavor NIVEL DE AGUA NIVEL DE AGUA (Lavado Normal) En este modo se puede realizar un lavado normal.En el lavado fuzzy, la máquina •...
- Page 55 Cierre la tapa. Finalización Precaución & Nota • Controlar el NIVEL DE AGUA cuando el agua permanece en el tambor o poniendo la ropa mojada antes de anunciar el lavado aumentará el NIVEL DE AGUA. • El pulsador gira por 8 s •...
- Page 56 avado de Remojo Use esta modalidad para lavar prendas normales, o gruesas y pesadas, que estén excesivamente sucias. El modo Remojo se puede usar con los programas FUZZY o JEANS o SILENCIOSO o FAVORITO. Presione el botón ENCENDIDO(AUTO OFF) para encender la lavadora. TEMP.
- Page 57 avado de Favorito Presionar el botón Favorito le permite almacenar las condiciones de lavado favoritas en la memoria de ciclo normal y luego re-llamarlo para usarlo en una oportunidad posterior. Presione el botón ENCENDIDO(AUTO OFF) para encender la lavadora. TEMP. DE AGUA NIVEL DE AGUA Seleccione el programa FAVORITO.
- Page 58 avado Silencioso Use este programa para lavar en Silencio, especialmente durante la noche. Presione el botón ENCENDIDO(AUTO OFF) para encender la lavadora. TEMP. DE AGUA NIVEL DE AGUA Presione el botón de PROGRAMA para seleccionar programa silencioso. TEMP. DE AGUA NIVEL DE AGUA Agreque la ropa en el tambor.
- Page 59 impieza Tambor Si se produce sarro en el tambor, podría manchar su ropa o producir un desagradable aroma en su lavadora. El sarro se puede producir dentro de cualquier lavadora cuando el suavizante de fábrica entra en contacto con el detergente , y de acuerdo con el grado particular de suciedad o calidad del agua a usarse;...
- Page 60 IR DRY Presione el botón ENCENDIDO(AUTO OFF) para encender la lavadora. TEMP. DE AGUA NIVEL DE AGUA Seleccione el botón AIR DRY. TEMP. DE AGUA NIVEL DE AGUA Presione el botón de INICIO/PAUSA. Cierre la tapa. Nota Seleccionar Air Dry (Secado por Aire) 30 min ‘ TUB DRY (Secado por Tina) - Utilize este sistema para prevenir desarrollo de la suciedad causado por la humedad existentes del tambor despues del lavado - No coloque ropa en la tina durante este ciclo.
- Page 61 pción de Lavado Cuando sólo necesite Lavado, Lavado/Enjuague o ciclos de Enjuague, éstos pueden ser determinados manualmente. Presione el botón ENCENDIDO(AUTO OFF) para apagar. TEMP. DE AGUA Sólo Lavado Sólo Centrifugado Sólo Enjuague NIVEL DE AGUA Presione el botón LAVADO Presione el botón ENJUAGUE Presione el botón para seleccionar el tiempo...
- Page 62 avado con Reserva (Inicio diferido) El lavado con reserva se usa para retardar el tiempo de finalización de la operación. Las horas a ser diferido pueden fijarse por el usuario según desee. El tiempo mostrado en el indicador es el tiempo de finalización, no el de inicio. Presione el botón ENCENDIDO(AUTO OFF) para encender la lavadora.
- Page 63 tras funciones útiles Función de bloqueo para niños Si desea bloquear todos los botones para evitar que los ajustes sean cambiados por un niño, puede usar la opción de bloqueo para niños. ENJUAGUE CENTRIFUGADO. ENJUAGUE CENTRIFUGADO Nota • " " (bloqueo para niños) y el tiempo sobrante se muestran alternativamente en la pantalla mientras están bloqueados.
- Page 64 nstalación y Nivelación Asegúrese de sacar todos los accesorios de traslado, antes de operar la máquina. Advertencia Si la lavadora esta instalada sobre una superficie dispareja, debil o inclinada, se podria producir una vibracion excesiva, una falla en la funcion de Centrifugado, o puede aparecer error " "...
- Page 65 onexión de la manguera de suministro de agua Antes de conectar la manguera de suministro de agua a la llave, revise el tipo de manguera y escoja la instrucción correcta. Las mangueras de suministro de agua pueden variar de acuerdo al país. Conexión de la manguera de suministro de agua a la llave Atención La lavadora debe ser conectada a las llaves del agua usando el paquete de mangueras nuevo, y los antiguos no...
- Page 66 onexión de la manguera de suministro de agua Otros tipos no normales Separe el conector del medio de la manguera de suministro de agua Etiqueta adhesiva Conector del medio Manilla de presión Tornillo Vástago de presión Manguera de suministro de agua Afloje las tuercas para conectar el conector a la llave Empaquetadura de goma...
- Page 67 onexión de la manguera de suministro de agua El aparato se debe conectar a la entrada principal de agua utilizando un juego nuevo de mangueras; además de considerar que no se debe reutilizar las mangueras viejas o las que se encuentran en malas condiciones.
- Page 68 onexión de la manguera de drenaje Antes de conectar la manguera de drenaje, revise modelo de manguera de drenaje y escoja la instrucción correcta de las siguientes. Introducir el soporte de plástico en el orificio en la parte de atrás hacia la dirección vertical. Ajuste el soporte presionando ambos lados hacia dentro.
- Page 69 étodo de puesta a tierra Debe conectarse un cable a tierra. Si el cable a tierra no está conectado, hay un peligro de golpe eléctrico causado por la fuga de corriente de la lavadora. Precaución Precauciones de los Cordones de Enchufes En la mayoría de los electrodomésticos se recomienda que sean puestos en un circuito que sea dedicado sólo para ellos;...
- Page 70 Filter bomba en el sentido de las manecillas del reloj. Canaletas guia Filter Filtro • Cuando el filtro para pelusas se encuentre gastado, etc., póngase en contacto con un Centro de Servicio Técnico Autorizado de LG para obtener uno nuevo.
- Page 71 impieza y Mantenimiento Cuando hay un riesgo de conhelación • Cierre el grifo y quite la Manguera del Suministro del Agua • Elimine el agua que se queda dentro del camino de suministro del agua. • Baje la manguera de desagüe y quite todo el agua dentro de cazoleta y la manguera de desagüe haciendo el centrifugado.
- Page 72 so del Seguro en la Tapa Usted puede usar la función de bloqueo manual si lo desea. El bloqueo de mano es activado por un seguro deslizante bajo la tapa. • Deslizar a la izquierda/derecha hasta que escuche un “click”. •...
- Page 73 roblemas Comunes de Lavadora La mayor parte de los problemas de lavado trae los resultados tales como la eliminación no suficiente de suciedad, manchas, residuos de pelusas y espumas y el daño a la lavandería. Para un resultado satisfactorio del lavado, siga las instrucciones siguientes : PROBLEMAS DEL LAVADO Problemas...
- Page 74 roblemas Comunes de Lavadora...
- Page 75 érminos de la Garantía Que no cubre : • Servicio técnico a domicilio para enseñarle acerca del uso del producto • Si el artefacto fue conectado a un voltaje que no está indicado en la placa.. • Si la falla fue causada por negligencia o por accidente. •...
- Page 76 Modelo WFSL1533EK Voltaje y frecuencia 120 V ~ 60 Hz Potencia nominal 520 W Rango de presión de Alimentación del agua 30 - 800 kPa (0,3 kgf /cm - 8 kgf /cm Peso del producto 47 kg Dimensiones 632(Anchura) x 670(Profundidad) x 1 020(Altura)mm...