Table of Contents
Advertisement
Quick Links
Turbo Air Speeds up the Pace of Innovation
Premiere Pro Series
Refrigerators & Freezers
Installation and Operation Manual
Please read this manual completely before attempting to install or operate this equipment!
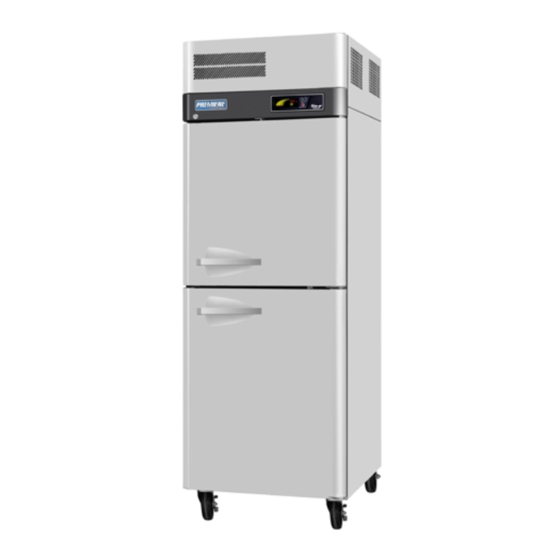
SOLID DOOR
REFRIGERATORS
PRO-26R
PRO-26-2R
PRO-50R
PRO-50-4R
PRO-77R
PRO-77-6R
GLASS & SOLID HALF DOOR
REFRIGERATORS
PRO-26R-GSH
PRO-50R-GSH
PRO-77R-GSH
SOLID DOOR FREEZERS
PRO-26F
PRO-26-2F
PRO-50F
PRO-50-4F
PRO-77F
PRO-77-6F
PASS THRU REFRIGERATORS
PRO-26R-PT
PRO-26-2R-PT
PRO-50R-PT
PRO-50-4R-PT
PRO-26R-GSH-PT
PRO-50R-GSH-PT
Full Stainless Steel Interior and Exterior
www.turboairinc.com
Advertisement
Table of Contents

Related Manuals for Turbo Air Premiere Pro Series


Summary of Contents for Turbo Air Premiere Pro Series
- Page 1 Turbo Air Speeds up the Pace of Innovation Premiere Pro Series Refrigerators & Freezers Installation and Operation Manual Please read this manual completely before attempting to install or operate this equipment! Full Stainless Steel Interior and Exterior SOLID DOOR REFRIGERATORS...
-
Page 2: Table Of Contents
CONTENTS PAGE 1. SPECIFICATIONS ..................2 2. SERIAL NUMBER ..................3 3. INSTALLATION .................... 3 4. CLEANING & CAUTION ....................4 5. BASIC OPERATION 5-1. REFRIGERATORS ................5~8 5-2. FREEZERS..................9~12 ............13 6. TROUBLESHOOTING 7. STAINLESS STEEL EQUIPMENT CARE AND CLEANING ....14~15 8. -
Page 3: Serial Number
- Be sure to avoid any partition and object which may stop the air flow - Be sure that air space is allowed to flow the rear of the unit. Turbo air recommends that the rear of the unit would be no less than 5 inches from the wall 2. -
Page 4: Cleaning & Caution
CLEANING 1. CLEANING THE INTERIOR AND EXTERIOR - The interior and exterior of the unit can be cleaned using warm water with soap - Do not use an abrasive cleaner because it will scratch the surface 2. CLEANING THE CONDENSER FINS - To maintain proper refrigeration performance, the Condenser coil must be free of dust, dirt, and grease. -
Page 5: Basic Operation
BASIC OPERATION PRO-26R PRO-26-2R REFRIGERATORS PRO-50R PRO-50-4R PRO-77R PRO-77-6R 1. Plug in and turn on the power switch located on the control box. The Display panel will be lighted and make a beep sound. The compressor will begin to run. 2. - Page 6 DISPLAY PANEL OF REFRIGERATOR TEMP. SETTING TEMP. CONTROL BUTTON (SEE TO PAGE 7) INNER TEMP. (SEE TO PAGE 8) ˚F TEMPERATURE TEMPERATURE T.C. DOOR TURBO COOLING TURBO COOLING TURBO COOLING BUTTON (SEE TO PAGE 7) FAN RUNNING DOOR OPENING...
- Page 7 TURBO COOLING 1. If you push the T.C. button again during Turbo Cooling mode, the compressor will return to the normal operation. 2. During the Turbo Cooling mode works, the temperature Up/Down button will not affect the compressorʼs operation. UP/DOWN BUTTON (Temperature control button) 1.
- Page 8 INNER TEMPERATURE DISPLAY 1. It displays the inside temperature. 2. Display range is 14˚F to 69˚F (-10˚C ~ +20˚C). 3. When the inside temperature is lower than 14˚F, the panel will display ʻ ʼ. and, higher than 69˚F, the panel will display ʻ ʼ.
-
Page 9: Freezers
BASIC OPERATION PRO-26F PRO-26-2F FREEZER PRO-50F PRO-50-4F PRO-77F PRO-77-6F 1. Plug in and turn on the power switch located on the bottom of the top grille right side. The Display panel will be lighted and make a beep sound. The compressor will begin to run. - Page 10 DISPLAY PANEL OF FREEZER TEMP. SETTING TEMP. CONTROL BUTTON (SEE TO PAGE 11) INNER TEMP. (SEE TO PAGE 12) ˚F TEMPERATURE TEMPERATURE D.F. DOOR MANUAL DEFROST MANUAL DEFROST MANUAL DEFROST BUTTON (SEE TO PAGE 11) FAN RUNNING DOOR OPENING...
- Page 11 MANUAL DEFROST 1. If you push MANUAL DEFROST button for 5 seconds, the Defrost will start. 2. During the Manual Defrost mode, the Up/Down button for the temperature control can not make the compressor cycle ON or OFF. 3. If you want to change the Manual Defrost mode to the normal mode, push MANUAL DEFROST button for 5 seconds.
- Page 12 INNER TEMPERATURE DISPLAY 1. It displays inside temperature. 2. Display range is -50˚F to 50˚F (-45˚C ~ +10˚C). 3. When inside temperature is lower than -50˚F, the panel will display ʻ ʼ. and, higher than +50˚F, the panel will show ʻ ʼ.
-
Page 13: Troubleshooting
TROUBLESHOOTING SYMPTOMS CAUSES SOLUTIONS Freezer is melting • The controller is set too high to • Turn the temperature dial to a food contain food fresh. warmer position. The unit does not • There is a power connection • Check the power cord and plug in refrigerate at all failure problem. -
Page 14: Stainless Steel Equipment Care And Cleaning
STAINLESS STEEL EQUIPMENT CARE AND CLEANING CAUTION : Do not use any steel wool, abrasive or chlorine based products to clean stainless steel surfaces. Stainless Steel Opponents There are three basic things which can break down your stainless steel’s passivity layer and allow corrosion to rear its ugly head. - Page 15 4. Water Treatment To reduce deposits, soften the hard water when possible. Installation of certain filters can remove corrosive and distasteful elements. Salts in a properly maintained water softener can be to your advantage. Contact a treatment specialist if you are not sure of the proper water treatment.
- Page 16 THREE YEAR WARRANTY Turbo Air warrants to the original purchaser of every new Turbo Air refrigerated unit, the cabinet and all parts thereof, to be free from defects in material or workmanship, under normal use and service, for a period of three (3) year from the date of original installation or 39 months after shipment date from Turbo Air , whichever occurs first.
- Page 17 3. ALTERATION, NEGLECT, ABUSE, MISUSE, ACCIDENT, DAMAGE DURING TRANSIT OR INSTALLATION, FIRE, FLOOD, ACTS OF GOD. TURBO AIR is not responsible for the repair or replacement of any parts that Turbo Air determines have been subjected after the date of manufacture to alteration, neglect, abuse, misuse, accident, damage during transit or installation, fire, flood, or an Act of God.
-
Page 18: Warranty
(3) year from the date of original installation or 39 months after shipment date from Turbo Air, whichever occurs first. Any part, covered under this warranty, that are by Turbo Air to have been defective within three (3) year of original installation or thirty-nine (39) months after shipment date from manufacturer, whichever occurs first, is limited to the repair or replacement, including labor charges, of defective parts or assemblies.