Table of Contents
Advertisement
Quick Links
Advertisement
Table of Contents

Related Manuals for Dukane ImagePro 8800


Summary of Contents for Dukane ImagePro 8800
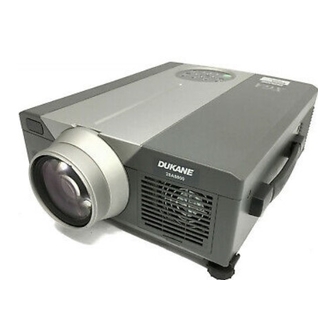
- Page 1 Liquid Crystal Projector Model 28A8800 OPERATING GUIDE...
-
Page 3: Table Of Contents
Model ImagePro 8800 USER’S GUIDE Thank you for purchasing the Dukane liquid crystal projector. Please read this user’s manual thoroughly to ensure correct usage through understanding. After reading, store this instruction manual in a safe place for future reference. Outline... -
Page 5: Before Use
Before Use <Before Using> About the Symbols Various symbols are used in this instruction manual and on the product itself to ensure correct usage, to prevent danger to the user and others, and to prevent property damage. The meanings of these symbols are described below. It is important that you read these descriptions thoroughly and fully understand the contents. -
Page 6: Safety Precaution
Do not place flower vases, flower pots, cups, cosmetics, liquids such as water, etc., on top of this projector. Spillage could result in fire or electrical shock. Do not disassemble. Use only the indicated power supply. - Page 7 • Damaging the cord • Placing near heaters • Do not position the power cord under the projector. damage the power cord and cause fire or electrical shock. Also, do not place a spread, cover, etc., over the power cord because this could result in the inadvertent placing of heavy objects on the concealed power cord.
- Page 8 Do not block the ventilation openings of this projector. Blocking ventilation could lead to internal overheating which could result in fire. Do not place this projector on its side during use or push it into a small, poorly ventilated location. Do not...
- Page 9 When the projector is not to be used for an extended period. For safety purposes when the projector is not to be used for an extended period because of travel, etc., always disconnect the power plug from the power outlet. Also close the lens cover to prevent the lens surface being scratched.
-
Page 10: Checking The Package Contents
STANDBY / ON button Press this button to turn the power on and off. When turned off, the projector enters standby status. Refer to page 13 - 14 for details. LAMP indicator This indicator lights or blinks when the lamp is off. - Page 11 Names and functions of each part (continued) Remote control photoreceptor Main power switch Used to turn the power on and off. Caution Connecting to the AC IN jack Make sure the accesory power cord is plugged into the AC IN jack as far as it will go. Incomplete connection can result in fire or electrical shock.
-
Page 12: Remote Control Transmitter
AUTO button Used to execute auto-adjust. *3 Auto adjustment function The projector automatically adjusts 4 items (V. POSIT, H. POSIT, H. PHASE, H. SIZE). When you choose AUTO (move the cursor to the right from the manual operation position), the AUTO confirmation menu shown below is indicated. - Page 13 Battery usage cautions Caution • Use only the specified batteries with this projector. Also, do not mix new and old batteries. This could cause in battery cracking or leakage, which could result in fire or personal injury. • When loading the batteries, make sure the plus and minus poles are correctly oriented as indicated in the projector.
-
Page 14: Installation
3. Rotate the adjusters for fine adjustment. Caution • Do not release the locks unless the projector is being held; otherwise, the projector could overturn or the fingers could get caught and cause personal injury. • Do not force the adjusters to rotate. This could damage the adjusters or cause the lock to fail. -
Page 15: Basic Operations
Basic operations To project Turn on the main power switch of the projector [ I: ON]. • The Power indicator lights orange. Press the STANDBY / ON button. • The Power indicator will blink green and then light green. • The green blinking indicates warmup. -
Page 16: Turning Off The Power
Plug & Play This projector is VESA DDC 1/2B compatible. Plug & play is possible by connecting to a computer that is VESA DDC (Display Data Channel) compatible. (Plug & play is a system configured with peripheral equipment including a computer and display, and an operating system. -
Page 17: Freeze Function
Basic operations (continued) Freeze function This function is used to freeze the image being displayed. (refer to page 10) Press the FREEZE button. • The image being displayed will freeze. • The [ ] mark appears in the lower right corner of the screen when the Freeze function is on. Cancelling the FREEZE function Press the FREEZE button. -
Page 18: Magnify Function
Basic operations (continued) Magnify function Part of an image can be displayed magnified. (refer to page 10) Press the MAGNIFY • The center part of the image will be displayed magnified approximately two times. Changing the magnification ratio Press the MAGNIFY •... -
Page 19: Adjustments And Functions
• The selected menu item will be displayed in orange. Adjust the selected menu item with the MENU ( buttons of the projector or DISK PAD button of the remote control. • The selected menu item will be displayed in orange. - Page 20 (COLOR BALANCE Blue) Using the SETUP Menu Move the cursor to the item to be adjusted and move the MENU button of the projector or the DISK PA button of the remote control to change the length of the bar display.
- Page 21 Adjustments and functions (continued) INPUT The INPUT menu is used to select RGB signal sync signal frequency of the monitor and the VIDEO signal. S E T U P I N P U T I M A G E O P T . fH:38kHz VIDEO fV:60Hz...
- Page 22 Adjustments and functions (continued) IMAGE Projection image inversion, etc., can be selected from the IMAGE menu. S E T U P I N P U T I M A G E O P T . KEYSTONE MIRROR BLANK START UP P.
- Page 23 Adjustments and functions (continued) Communication functions, etc., can be set from the OPT menu. S E T U P I N P U T I M A G E O P T . COM. SPEED COM. BITS TIMER LANGUAGE AUTO OFF SYNC ON G Adjustment item COM.
-
Page 24: Terminals
Connection to the video signal terminals 1. Input signals S-VIDEO signal VIDEO signal Input Audio signal Output 2. Signal input jacks The priority sequence of the video input jacks is as follows. Caution (1) S-VIDEO input jack When video signals are being projected, the audio input by the video is output to the audio output jack (RGB/VIDEO). -
Page 25: Example Of Computer Signal
80.0 Note 1: Mac adapter is necessary to the resolution mode. Projector is compatible with 13 inch mode and 16 inch mode. Mac 13" mode=switch 1 and switch 2 are ON. Mac 16" mode=switch 2 and switch 4 are ON. - Page 26 Connection to the RGB signal terminal (continued) 4. Initial set signals The following signals are used for the initial settings. The signal timing of some computer models may be different. In such case, refer to pages 17 and 18 and adjust the V.POSIT and H.POSIT of the menu.
-
Page 27: Connecting To The Usb
1. Connect the projector and computer with a suitable commercially available cable. 2. Press the INPUT button of the projector or the RGB 1/2 button of the remote control and select the input where the computer is to be connected. -
Page 28: Terminal
Connection to the control signal terminal 1. Mouse functions (1) Turn off the main power switches of the projector and computer and connect the two units with the cable provided or an optional suitable commercially available cable. Disconnect the USB cable from the projector. - Page 29 Connection to the control signal terminal (continued) CONTROL signal jack Mouse Pin no. RS-232C PS/2 DATA DATA SELO SELO Serial mouse Projector SELO ADB (Mac) mouse Serial Projector DATA SELO SELO SW-L SEL-1 Mouse cable (ADB) (option) SW-R Computer Mouse jack...
- Page 30 (1) Turn off the projector and computer power supplies and connect with the RS232C cable. (2) Turn on the computer power supply and, after the computer has started up, turn on the projector power supply. (3) Refer to page 20, 21 and set the communication speed and the number of communication bits.
-
Page 31: Command Data Chart
• The first byte of a command indicates the command type with 3 bits on the MSB side and the data length with 4 bits on the LSB side. Projector - computer ‘0xH’ : Error code ‘1xH’ : response code ‘70H’... - Page 32 When the data length is greater than indicated by the data length code, the projector will ignore the excess data code. Conversely, when the data length is shorter than indicated by the data length code, an error code will be returned to the projector.
-
Page 33: Example Of System Setup
Refer to the instruction manual of each device before connecting. Cleaning the Air filter Clean the air filter about every 100 hours . Turn off the MAIN POWER switch of the projector and pull out the power cord. Remove the front air filter. -
Page 34: Lamp
When used for an extended time, the images may become darker and the colors may deteriorate. A malfunction could occur if the projector is used in this condition, so replace the lamp with a new one. The following indicator or a message which appears when the power is turned on will indicate when the lamp should be replaced. -
Page 35: When You Think Something Wrong
*1: When the cooling fan is stopped and the interior becomes overheated, the power will turn off automatically to allow cooling (the indicator will turn off). In such cases, turn off the projector power, allow the set to cool and then turn the projector power on again. The lamp will then light. If the lamp does not light, contact your dealer or service company. -
Page 36: Specifications
RGB signal input/output jacks CONTROL signal jack Dimensional Diagram Unit: inches · ALL specifications are subject to change without notice. Liquid crystal projector 28A8800 Three liquid crystal panels, three primary color system. 3.3 cm (1.3 type) TFT active matrix Zoom lens F=1.7~2.3 f=49~64mm 190w UHB 1.2W + 1.2W (Stereo) -
Page 37: After-Service
LEGAL INFORMATION FIVE-YEAR LIMITED WARRANTY This Dukane LCD projector is warranted to the original purchaser for a period of five (5) years from the original purchase date - in normal use and service - against defects in material and workmanship. DUKANE CORPORATION EXPRESSLY DISCLAIMS ALL OTHER WARRANTIES OF MERCHANTABILITY AND FITNESS FOR A PARTICULAR PURPOSE. - Page 38 Dukane Corporation Audio Visual Products Division 2900 Dukane Drive St. Charles, IL 60174-3395 E-mail: avsales@dukane.com Phone: (630) 584-2300 Orders: (800) 676-2485 Information: (800) 676-2486 Fax: (630) 584-5156 Parts & Service: (800) 676-2487 Fax: (630) 584-0984 Audio Visual Products Part # 401-552-01...