Table of Contents
Advertisement
Quick Links
Advertisement
Table of Contents

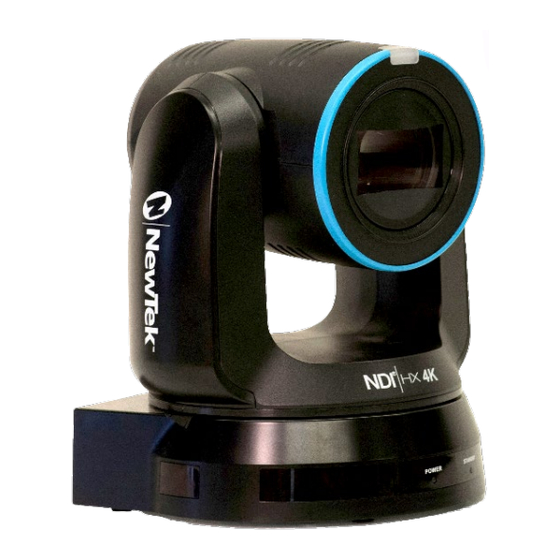
Summary of Contents for NDI NewTek NDIHXPTZ4K
- Page 1 ® NewTek NDI PTZUHD 4K Video Camera Operating Instructions Page |...
- Page 2 MediaDS, MDS1, 3PLAY, 3Play, 3Play 3P1, 3Play 4800, 3PXD4800, 3Play 440, 3PXD440, 3Play Mini, 3Play 820, 3PXD820, 3Play 425, 3PXD425 3Play 330, 3PXD330, TalkShow, TalkShow VS 4000, TalkShow VS100, Network Device Interface, NDI, NewTek Connect, NewTek Connect Spark, NewTek IsoCorder, ProTek, ProTek Care, ProTek Elite, iVGA, SpeedEDIT, IsoCorder, LiveText, LiveGraphics Creator,...
-
Page 3: Table Of Contents
2.1 Remote Control .......................................13 2.2 OSD Menu.........................................14 SECTION 3 MOUNTING PTZUHD ....................... 21 3.1 Preparation.......................................21 3.1.1 Other Precautions...................................21 3.2 Ceiling Mounting .....................................23 3.3 Removal ........................................24 SECTION 4 ABOUT NDI ® ..........................25 4.1 A ‘Video Internet’ ....................................25 4.2 NDI ® Benefits ......................................26 4.3 NDI Virtual Input......................................26... - Page 4 SECTION 5 END USER LICENSE AGREEMENT .................... 29 CREDITS ..............................39 Page |...
-
Page 5: Section 1 Introduction And Setup
It even includes built-in PTZ controls. NOTE: The End User License Agreement under which you use the NDI|HX driver specifies that “you may use up to five (5), and no more than five, copies on separate machines at one time.”... -
Page 6: Making Connections
2. Optional – for Microsoft Windows users, downloading and installing the NewTek NDI Tools pack, ® ® available at no cost from ndi.tv/tools/, will provide a very useful array of practical NDI learning tools and utilities. MAKING CONNECTIONS FI GURE 1 1. DC IN 12V 6. -
Page 7: Web Configuration
DC power by this means. 2. Connect one end of a network cable to PTZUHD’s RJ-45 Ethernet port, marked NDI|HX PoE+ (Power over ethernet). Connect the other end of the cable to your network switch or router, or a computer's Ethernet port. -
Page 8: Studio Monitor
FI GURE 3 Among its capabilities, Studio Monitor (see Figure 3, which shows the Windows version of the application) detect and display any NDI or NDI|HX sources available on your network. In the lower bottom left of the Studio Monitor’s screen, you will find a QR Code. - Page 9 Hint: Detection of newly-connected NDI sources can take a few moments; in network settings with a great number of NDI sources available, a complete refresh of the source list can take a minute or even more. When the sub-menu lists multiple NDI channels with the same name, the device IP address is shown to further identify them.
-
Page 10: Logging In
Hint: Detection of newly-connected NDI sources can take a few moments; in network settings with a great number of NDI sources available, a complete refresh of the source list can take a minute or even more. When the sub-menu lists multiple NDI channels with the same name, the device IP addresses are shown to further identify them. -
Page 11: Video Source
VIDEO SOURCE After logging in, your camera’s options and controls are shown in your web browser (Figure 8). The first tab shown on this web page is labeled Video Source. At the time of writing, a placeholder image FI GURE 8 substitutes for the ‘monitor’... -
Page 12: Audio Video Settings
AUDIO VIDEO SETTINGS Click the second web page tab to reveal more advanced Audio/Video Settings (Figure 10). Expanding the Video Settings control group shows additional nested tabs with various Exposure, Picture, White Balance, and Focus options. A little lower on the page, you can expand the Audio Settings control group (Figure 11). -
Page 13: Multicast
Channel Name fields, which determine ® how your camera is identified on your NDI network. These names are editable, allowing you a convenient way to make identify the output of specific cameras to other NDI-enabled devices and systems connected downstream. -
Page 14: Network Settings
ULT I CA ST OR N ICAST Multicast can seem like a bandwidth-saving miracle. Unlike NDI’s default mode (unicast), multicast does not require a unique stream from the source to each receiver. When using unicast, each connection to the sender reduces the bandwidth available by a similar amount. -
Page 15: Tally
Manual mode and attempt to connect using a static IP address. The default IP address is 192.168.100.168. TALLY Your camera unit provides ‘tally’ notification from NDI devices supporting it. The Power and Standby lights ® are located on the top of the camera’s head, as well as the front of the pedestal base. Both locations light up in red or green to tell you when video output from the device is visible on the Program output or Preview, as listed in the following table. -
Page 17: Section 2 Remote Control & Osd
Section 2 REMOTE CONTROL & OSD Some of the more exotic settings and options available on your NDI |HX PTZUHD are ® supported by means of the onscreen display, and accessed via the included remote control. This section first describes the features of the latter, then provides a full list of options and settings in the ‘OSD’. -
Page 18: Osd Menu
OSD MENU Press the Menu button on the remote control to display the OSD (On Screen Display) and settings menu over your live video on PTZUHD’s hardware video output (SDI or HDMI). Hint: The bold underlined values in the following table are the defaults. The following tables detail the options available to you in the OSD settings menu. - Page 19 F1.6 F2.2 F2.7 F3.2 F3.8 F4.5 F5.4 Iris Pri Iris setting F6.3 10. F7.8 11. F9 12. F11 13. F13 14. F16 15. F18 2 dB 4 dB 6 dB 8 dB 10 dB 12 dB 14 dB Manual Gain Manually set the gain 16 dB 10.
- Page 20 1/120 1/120 1/100 1/100 1/90 1/75 1/60 1/50 1/30 1/25 1/15 1/12 F1.6 F2.2 F2.7 F3.2 F3.8 F4.5 Manual Iris F5.4 Manually set the iris F6.3 10. F7.8 11. F9 12. F11 13. F13 14. F16 15. F18 8 dB 10 dB 12 dB Gain Limit...
- Page 21 WDR settings Select color temperature mode Auto 4000k ~ 7000k Indoor 3200k Outdoor 5800k One Push WB 1700k ~ 10000k 1700k ~ 10000k Manual Custom Sodium Lamp Mode 2800k 3000K 3000K 4300K 4300K White Balance 10. 5000K 10. 5000K 11. 6500K 11.
- Page 22 1. Mode 1 2. Mode 2 3. Mode 3 Image Mode 4. Mode 4 Customize desired image modes 5. Mode 5 6. Mode 6 7. Custom 1. Mode 1 Adjustable when the image 2. Mode 2 mode is set to Custom. After 3.
- Page 23 Zoom Limit X1 - X20 1. Off 2. Mirror Set the mode at which the image Dig-Effect Mirror 3. Flip is turned 4. Mirror + Flip 1. Low Select the AF triggering speed. AF Sensitivity 2. Middle The higher the speed is, the 3.
- Page 24 Audio Volume 0 - 10 Defaults to 5 1. Off Audio Delay 2. On Audio Delay Time -1ms to -500ms Turn on/off prompt Prompt On / Off information on the display Turn on/off infrared IR Receive On / Off reception When the function is enabled, the screen will Freeze when Motionless Preset...
-
Page 25: Section 3 Mounting Ptzuhd
Section 3 MOUNTING PTZUHD Of course it is vital that your camera installation be secure and safe. This section provides detailed information to help you ensure your installation poses neither safety nor environmental risks, and provides performance consistent with your expectations. PREPARATION Installation and connection of your camera requires some skill. - Page 26 I MEN SIONS • Length x Width x Height: 170.20 x 187.63 x 226.58 mm Weight: .24 kg • OT T OM DET AILS Page |...
-
Page 27: Ceiling Mounting
CEILING MOUNTING The camera (including mounting plates) weighs about 3.5 kg. If it is to be installed on the ceiling, please use the supplied UL approved hanger, which is designed to prevent the unit from falling. NOTE: Please check periodically to ensure the camera is installed securely. Please determine the desired resolution for the camera, and set it using the DIP switches before continuing. -
Page 28: Removal
REMOVAL Remove the connecting wires from the camera. • Uninstall the camera together with the ceiling, loosen the three screws that fix the metal plates A and B and push to the left to remove the machine. • Then remove the screws on the hanger and the camera. •... -
Page 29: Section 4 About Ndi
IP to integrate data, video, and audio are transforming live video production in ways that would have seemed miraculous just a few years ago. You can think of NDI as turning your network into a ‘video internet’. A ‘VIDEO INTERNET’... -
Page 30: Ndi ® Benefits
You supply a video source – in this case, an NDI stream from your NewTek NDI|HX PTZUHD. At that point, anyone else on that network can see it and work with it just as if it was a locally connected to their system (unless you deliberately limit access). - Page 31 • FI GURE 18 Afterward, you will see an entry named NewTek NDI Video (or Audio) listed along with any other qualified sources available to applications like Skype™, etc. •...
- Page 33 THIS SOFTWARE LICENSE AND LIMITED WARRANTY APPLIES TO THE PRODUCTS LISTED ABOVE. TRICASTERS, 3PLAY AND TALKSHOW ARE REFERRED TOGETHER AS “PRODUCT” IN THIS SOFTWARE LICENSE AND LIMITED WARRANTY. This license does not replace the NDI License for developers, which are under separate SDK license agreement. SOFTWARE LICENSE AND LIMITED SOFTWARE WARRANTY 1.
- Page 34 This License allows you to use one copy of the Software and when installed on this Product’s hardware. However, if the Product is an NDI/HX driver, you may use up to five (5), and no more than five, copies on separate machines at one time.
- Page 35 3. Termination This License is effective until terminated. This License will terminate immediately without notice from NEWTEK, or by judicial resolution, if you fail to comply with any provision of this License. Upon such termination you must destroy the Software, all accompanying written materials and all copies thereof. You may also terminate this License at any time by destroying the Software, all accompanying written materials and all copies thereof.
- Page 36 NewTek VMC1, NewTek NC1 IN, NewTek NC1 I/O, NewTek VMC1 OUT, NewTek MDS1, MDS1, MediaDS, NDI/HX, NewTek NDI Connect Spark SDI, NewTek NDI Connect Spark HDMI, Connect Spark, Spark, NewTek NDI PTZ, PTZ-1, PTZUHD, NewTek NVG1, NVG1, TriCaster Advanced Edition, TriCaster XD, TCXD8000, TriCaster 8000, TC, TCXD 860, TriCaster 860;...
- Page 37 PORTFOLIO, WHICH LICENSE IS AVAILABLE FROM MPEG LA, L.L.C., 250 STEELE STREET, SUITE 300, DENVER, COLORADO 80206. MPEG-4; THIS PRODUCT IS LICENSED UNDER THE MPEG-4 VISUAL PATENT PORTFOLIO LICENSE FOR THE PERSONAL AND NON-COMMERCIAL USE OF A CONSUMER FOR (i) ENCODING VIDEO IN COMPLIANCE WITH THE MPEG-4 VISUAL STANDARD (“MPEG-4 VIDEO”) AND/OR (ii) DECODING MPEG-4 VIDEO THAT WAS ENCODED BY A CONSUMER ENGAGED IN A PERSONAL AND NON-COMMERCIAL ACTIVITY AND/OR WAS OBTAINED FROM A VIDEO PROVIDER LICENSED BY MPEG LA TO PROVIDE MPEG-4 VIDEO.
- Page 38 If this Software was acquired by or on behalf of a unit or agency of the United States Government this provision applies. (a) This Software was developed at private expense, and no part of it was developed with government funds, (b) This Software is a trade secret of NEWTEK for all purposes of the Freedom of Information Act, (c) This Software is "commercial computer software"...
- Page 39 you by this Limited Warranty are in addition to other rights or remedies you may have under law in relation to the goods to which the warranty relates: Our goods come with guarantees that cannot be excluded under the Australian Consumer Law. You are entitled to a replacement or refund for a major failure and for compensation for any other reasonably foreseeable loss or damage.
- Page 40 http://www.skype.com/en/legal/broadcast/. b. NewTek is solely responsible for the TalkShow product. c. You agree that NewTek may share certain information about the use and performance of the TalkShow system with Skype™ and Microsoft d. As with other software licensed elsewhere in this License, your license of the TalkShow software is limited to the object code only, and all of the provisions of this license apply, including those in paragraph two.
- Page 41 conjunction with the hardware, will void all warranties and any technical support service otherwise available. TO THE BEST OF NEWTEK’S KNOWLEDGE, NEITHER THE SOFTWARE NOR THE HARDWARE OF THE PRODUCT INFRINGE ANY PATENT, TRADEMARK, COPYRIGHT OR OTHER INTELLECTUAL PROPERTY RIGHTS OF ANY THIRD PARTY; NO WARRANTY IS PROVIDED AGAINST SUCH INFRINGEMENT OR CLAIMS OF INFRINGEMENT.
- Page 43 MediaDS, MDS1, 3PLAY, 3Play, 3Play 3P1, 3Play 4800, 3PXD4800, 3Play 440, 3PXD440, 3Play Mini, 3Play 820, 3PXD820, 3Play 425, 3PXD425 3Play 330, 3PXD330, TalkShow, TalkShow VS 4000, TalkShow VS100, Network Device Interface, NDI, NewTek Connect, NewTek Connect Spark, NewTek IsoCorder, ProTek, ProTek Care, ProTek Elite, iVGA, SpeedEDIT, IsoCorder, LiveText, LiveGraphics Creator,...
- Page 46 Copyright © 1990-2020 NewTek Inc. San Antonio TX USA...