
Related Manuals for Yamaha ATS-CU2070


Summary of Contents for Yamaha ATS-CU2070
- Page 1 English Front Surround System Français ATS-CU2070 NS-WSW42 Español Owner’s Manual...
-
Page 2: Important Safety Instructions
Explanation of Graphical Symbols The lightning flash with arrowhead symbol within C A UT I ON an equilateral triangle is intended to alert the user to the presence of uninsulated “dangerous RISK OF ELECTRIC SHOCK voltage” within the product’s enclosure that may be DO NOT OPEN of sufficient magnitude to constitute a risk of electric shock to persons. - Page 3 FCC requirements. Modifications not expressly approved by be installed and operated with at least 20 cm and more between the radiator and Yamaha may void your authority, granted by the FCC, to use the product. person’s body. 2. IMPORTANT: •...
-
Page 4: Precautions
• When setting up the unit, make sure that the AC outlet you are using is easily • Yamaha cannot be held responsible for injury to you or accessible. If some trouble or malfunction occurs, immediately turn off the power damage of the products caused by improper use or switch and disconnect the plug from the AC outlet. - Page 5 AC outlet. Then, request an inspection from the • Do not disassemble a battery. If the contents of the battery get on your hands or in dealer where you purchased the unit or from qualified Yamaha service personnel. your eyes, it can cause blindness or chemical burns.
- Page 6 Immediately request an inspection from the dealer not plugged in sufficiently can cause dust to accumulate on the plug, causing a fire where you purchased the unit or from qualified Yamaha service personnel. or burns.
- Page 7 AC outlet and request an inspection from the dealer where you purchased the unit or from qualified Yamaha service personnel. • Keep small parts out of the reach of infants. Your children may accidentally swallow...
- Page 8 Notice Handling • Do not place vinyl, plastic, or rubber products on this unit. Failure to observe this Indicates points that you must observe in order to may cause discoloration or deformation in the panel of this unit. • If the ambient temperature changes drastically (such as during unit transportation prevent product failure, damage or malfunction and or under rapid heating or cooling) and there is a chance condensation may have data loss, as well as to protect the environment.
- Page 9 Information About disposal • Be sure to discard used batteries in accordance with local regulations. Indicates information of note regarding this Information for users on collection and disposal of old equipment and used product. batteries: Functions included in the unit These symbols on the products, packaging, and/or accompanying documents mean that used electrical and electronic products and batteries should not be mixed with general household waste.
- Page 10 ® The Bluetooth word mark and logos are registered trademarks owned by Bluetooth SIG, Inc. and any use of such marks by Yamaha Corporation is under license. • This manual uses the following signal words for the important information: WARNING Manufactured under license from Dolby Laboratories.
-
Page 11: Table Of Contents
Contents IMPORTANT SAFETY INSTRUCTIONS ... 2 Listening to the sound from a Bluetooth device .......... 31 PRECAUTIONS ..........4 Settings ............34 Supplied items ..........12 Configuring the HDMI control function....34 Features ............15 Configuring HDMI audio output ....... 34 Frequently asked questions...... -
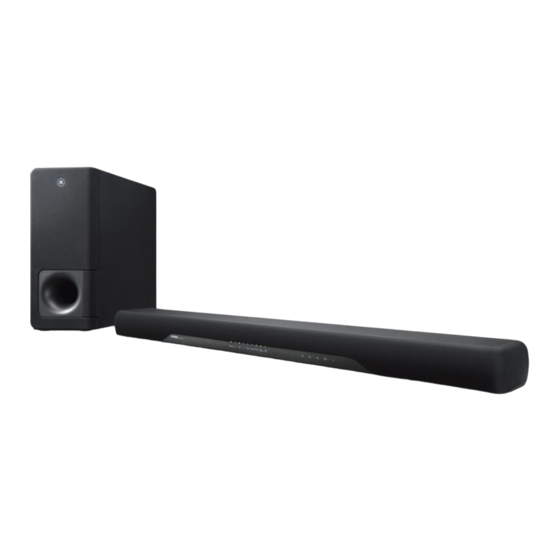
Page 12: Supplied Items
Supplied items Make sure you have received all of the following items. Center unit (ATS-CU2070) HDMI Wireless subwoofer (NS-WSW42) Mounting template In this manual, the wireless subwoofer is referred Use when mounting the center unit on a wall to as “subwoofer”. - Page 13 Preparing the remote control Operating range of the remote control Remove the battery’s insulating strip before attempting to use the Operate the remote control within the range as shown below. remote control. Within 6 m (20 ft) Remote control sensor Battery’s insulating strip...
- Page 14 Replacing the battery in the remote control Press and hold the release tab in the direction indicated by and slide the battery holder out in the direction indicated by Battery holder Release tab CR2025 Lithium battery...
-
Page 15: Features
Features This front surround system, comprised of the center unit and wireless subwoofer, allows you to enjoy dynamic sound with video played on your home TV. • 3D surround playback Surround sound can be heard not only from horizontal directions, but also from varying heights when DTS Virtual:X is used (p. 27). •... -
Page 16: Frequently Asked Questions
Frequently asked questions The following section covers popular functions and frequently asked questions about the unit. Can I use the TV’s remote control to operate the unit? Can the brightness of the indicators be adjusted? Yes. When the unit is connected to a TV via HDMI cable, the Yes. -
Page 17: Part Names And Functions
Part names and functions Center unit (front panel) (input) Select an input source to be played back (p. 26). (mute) Mute the audio output. Touch again to unmute (p. 28). (volume +/-) Adjust the volume (p. 28). (power) Turn on or off the unit (p. 25). 1 Speakers NOTE •... -
Page 18: Center Unit (Rear Panel)
Center unit (rear panel) Illustrations of the rear panel of the center unit used in this manual show the respective positions of jacks with the labels used on the bottom of the center unit itself so that jacks may be easily recognized. AC IN 8 AC IN jack a ANALOG input jack... -
Page 19: Subwoofer
Subwoofer Front panel Rear panel 2 3 4 PAIRING STANDBY PAIRING STANDBY 1 Bass reflex port indicator Glows when the center unit and subwoofer are connected 2 PAIRING button wirelessly. Used to pair the center unit with the subwoofer manually (p. 42). 5 AC IN jack 3 STANDBY indicator Connect the power cord of the subwoofer (p. -
Page 20: Installation
Installation The center unit can be installed on a TV stand or mounted on a wall. Position the subwoofer to the left or right of the center unit. Angle the subwoofer slightly toward the center of the room to prevent sound from reflecting off of walls. - Page 21 Doing so may cause the unit to fall. HDMI • Check that the unit is fixed securely after the installation. Yamaha will bear no responsibility for any accidents caused by improper installations. Mounting holes on bottom of the unit...
-
Page 22: Connections
Connections Connecting a TV and set-top box For the cable connection, follow the procedure below. : Video signals HDMI cable (optional) : Audio signals HDMI INPUT OPTICAL The digital audio/video signals from the set- OUTPUT top box or BD/DVD player are input to this unit. - Page 23 Connecting a game console via the analog jack Connect an external device, such as a game console or TV that does NOTE not have an optical digital audio output, to the ANALOG input jack of Audio Return Channel (ARC) supported TV the center unit.
- Page 24 Connecting the power cable Turning on the unit After all connections are complete, connect the supplied power Press the (power) key on the remote control or touch on the cables to the AC IN jack on the center unit and subwoofer center unit.
-
Page 25: Operations
Operations (power) key Remote control signal transmitter Turns on or off the unit. Transmits infrared signals. Center unit Turned on The indicator for the last input source selected glows. Turned off (Bluetooth standby function enabled, p. 33) Subwoofer Turned on Glows STANDBY Turned off... - Page 26 Input keys Select an input source to be played back. HDMI ....Sound from a device connected to the HDMI IN jack TV ......TV audio or sound from a device connected to the unit’s TV input jack ANALOG ...Sound from a device connected to the ANALOG input jack BLUETOOTH ..Sound from a Bluetooth connected device (p.
- Page 27 SURROUND and STEREO keys CLEAR VOICE key Enable/disable the clear voice function. Switch between surround and stereo (2-channel) playback. When this function is enabled, human voices such as lines in movies and TV shows, or news and sport commentary, are SURROUND key played clearly.
- Page 28 SUBWOOFER (+/–) keys Adjust the volume of the subwoofer. Volume down (–) Volume up (+) NOTE • The SUBWOOFER (–) key is also used when pairing the center unit and subwoofer manually. MUTE key Mute the audio output. Press the key again to unmute. Flash (on mute) VOLUME (+/–) keys Adjust the volume of the unit.
- Page 29 Decoder indicator The unit supports the following audio signals. The color of the DIMMER key indicator identifies the type of audio input signal. Green (Dolby Digital), Red (DTS) Change the brightness of the indicators. Each time the key is pressed, the brightness of the indicators changes as follows. Dim (default setting) →...
-
Page 30: Operating The Unit By Tv's Remote Control (Hdmi Control)
Operating the unit by TV’s remote control (HDMI control) The HDMI control function (link function) coordinates operation of a TV and the unit so that the unit can be operated using the TV’s remote control. When a TV is connected to the center unit with an HDMI cable (p. 22), the TV’s remote control can be used to perform the following operations. Coordinated functions via the TV remote control NOTE •... -
Page 31: Listening To The Sound From A Bluetooth Device
Listening to the sound Press the BLUETOOTH key on the unit’s remote control to select Bluetooth as the input source. from a Bluetooth The BLUETOOTH indicator on the unit flashes. device BLUETOOTH Flashes Audio from a Bluetooth device, such as a smartphone or a digital music player, can be played over a wireless connection. - Page 32 Select “ATS-2070 Yamaha” in the Bluetooth device list Terminating Bluetooth connection on the device. Bluetooth connection is terminated in the following cases. If a passkey (PIN) is required, enter the number “0000”. • The Bluetooth function is turned off on the compatible device.
- Page 33 Using the Bluetooth standby function Using the HOME THEATER CONTROLLER The Bluetooth standby function allows you to turn on or off the unit automatically, linked with the operation of the Bluetooth device. When the free HOME THEATER CONTROLLER app is installed on a Bluetooth-compatible smartphone or other device, various operations With the unit turned on, hold down the BLUETOOTH (basic operation of the unit, selection of a surround mode, adjustment...
-
Page 34: Settings
Settings Configuring the HDMI control function Configuring HDMI audio output Follow the procedure below to enable or disable the unit’s HDMI Specify whether HDMI audio input signal will be played from the unit control function. This function is enabled by default. or the TV. -
Page 35: Enabling/Disabling The Auto Power Standby Function
Enabling/disabling the auto power Initializing the unit standby function Follow the procedure below to initialize the unit. Enabling the auto power standby function prevents the unit from Turn off the unit. remaining on when not in use. When the auto power standby function is enabled, the unit automatically turns off in any of the following Touch and hold on the center unit until all... -
Page 36: Troubleshooting
Refer to the table below when the unit does not function properly. If the problem you are experiencing is not listed below or if the instructions below do not help, turn off the unit, disconnect the power cables of the center unit and subwoofer, and contact the nearest authorized Yamaha dealer or service center. - Page 37 Problem Cause Remedy All indicators go out although The unit is configured so that indicators do not glow or Use the DIMMER key to select the desired brightness (p. 29). flash unless the unit is being operated. the unit is turned on (it may seem that the unit is turned off).
- Page 38 The protection circuitry in the subwoofer has been To protect the product, the power of the subwoofer cannot be activated. turned on. Unplug the power cable from the AC wall outlet and contact the nearest authorized Yamaha dealer or service center.
- Page 39 Pair the center unit and subwoofer manually (p. 42). If a wireless connection is not established, the unit may be malfunctioning. Unplug the power cables from the AC wall outlets and contact the nearest authorized Yamaha dealer or service center. Though the indicator on The volume is too low.
- Page 40 Problem Cause Remedy No surround effect. Stereo playback is selected. Select surround playback or 3D surround playback (p. 27). The volume is too low. Turn up the volume (p. 28). The TV or playback device is set to output 2 channel Change the digital audio output setting on the TV or playback audio (such as PCM) only.
- Page 41 Bluetooth Problem Cause Remedy The unit cannot be connected Bluetooth is not selected as the input source. Select Bluetooth as the input source (p. 31). to a Bluetooth device. The unit is connected to a different Bluetooth device. Unpair the Bluetooth device that is currently connected, and pair with the desired Bluetooth device.
- Page 42 Pairing the center unit and subwoofer manually Within 30 seconds, press and hold the PAIRING button on the rear panel of the subwoofer for more than 3 seconds. Turn off the unit. Once the center unit and subwoofer have been paired and a Press and hold the SUBWOOFER (–) key on the wireless connection established, the indicator will glow, and...
-
Page 43: Specifications
Specifications Item Center unit (ATS-CU2070) Subwoofer (NS-WSW42) Amplifier Section Maximum Rated Output Power Front L/R 50 W x 2 ch 100 W Type Front L/R: Acoustic suspension type Bass reflex type Front L/R: 46 mm (1-3/4") cone magnetic shielding type x 4 Driver 16 cm (6-1/4") cone non-magnetic shielding type x 1... - Page 44 Item Center unit (ATS-CU2070) Subwoofer (NS-WSW42) Bluetooth version Ver. 4.1 — Supported profiles A2DP, SPP — Supported codecs SBC, MPEG4 ACC — Radio frequency (Operational 2402 MHz to 2480 MHz — frequency) Bluetooth Maximum output power (EIRP) 20 dBm (100 mW) —...
- Page 45 • To decode audio bitstream signals on this unit, set the input source device date. appropriately so that the device outputs the bitstream audio signals directly (does To obtain the latest manual, access the Yamaha website then download the manual not decode the bitstream signals on the device). Refer to documentation supplied file.
- Page 46 For detailed guarantee information about this Yamaha product, and Pan-EEA* and Switzerland warranty service, please either visit the website address below (Printable file is available at our website) or contact the Yamaha representative office for your country. * EEA: European Economic Area http://europe.yamaha.com/warranty/...