
Related Manuals for LG W182BC


Summary of Contents for LG W182BC
- Page 1 OWNER’S MANUAL AIR CONDITIONER Please read this manual carefully before operating your set and retain it for future reference. TYPE : WINDOW P/NO : MFL67740301 www.lg.com...
-
Page 2: Table Of Contents
Window-Type Air Conditioner Owner’s Manual TABLE OF CONTENTS FOR YOUR RECORDS Safety Precautions ......3 Write the model and serial numbers here: Before Opeation ......7 Model # Serial # You can find them on a label on the side of each unit. Introduction ........8 Dealer's Name Date Purchased... -
Page 3: Safety Precautions
Safety Precautions Safety Precautions To prevent injury to the user or other people and property damage, the following instructions must be followed. Incorrect operation due to ignoring instruction will cause harm or damage. The seriousness is classified by the following indications. WARNING This symbol indicates the possibility of death or serious injury. - Page 4 Safety Precautions Operation Do not place heavy object Always install a dedicated Do not touch(operate) the on the power cord and take circuit and breaker. product with wet hands. care so that the cord should not be pressed. • There is danger of fire or •...
- Page 5 Safety Precautions Do not plug or unplug the Do not damage or use an Do not operate with wet power supply plug during unspecified power cord. hands or in damp operation. environment. • It will cause electric shock or • It will cause electric shock. •...
- Page 6 Safety Precautions Operation Do not put a pet or house Do not block the inlet or Use a soft cloth to clean. Do plant where it will be outlet of air flow. not use wax, thinner, or a exposed to direct air flow. strong detergent.
-
Page 7: Before Opeation
Before to Operation Before Operation Preparing for Operation 1. Contact an installation specialist for installation. 2. Plug in the power plug properly. 3. Use a dedicated circuit. 4. Do not use an extension cord. 5. Do not start/stop operation by plugging/unplugging the power cord. 6. -
Page 8: Introduction
Introduction Introduction Symbols Used in this Manual This symbol alerts you to the risk of electric shock. This symbol alerts you to hazards that could cause harm to the air conditioner. NOTICE This symbol indicates special notes. Features This appliance should be installed in accordance with the National Electric Code. Vertical Air Deflector (Horizontal Louver) Brace... -
Page 9: Installation
Installation Installation Select the Best Location 1. Measure the space for installation to assure a good fit. The air conditioner must be installed firmly into FENCE FOAM AWNING place to prevent vibration and noise. 2. Avoid exposure to direct sunlight. HEAT 3. - Page 10 Installation Installation of the Housing Step 1 Remove the air conditioner from it’s packaging and UNIT MAY BE SUPPORTED BY A NOTICE SOLID FRAME FROM BELOW slide the air conditioner out of it’s housing. OR BY A HANGER FROM A SOLID OVERHEAD SUPPORT.
- Page 11 Installation Install the Air Conditioner in the Case 1. Slide the air conditioner into the case. 4. Attach the front grille to the case by inserting the Reinstall the 2 screws removed earlier on each tabs on the grille into the slots on the front of the side of the case.
- Page 12 Installation How to Use the Reversible Inlet Grille(For Some Models) The grille is designed to clean the filter both upward and downward. A. Before attaching the front grille to the cabinet, if you want to pull out the filter upward; 1.
- Page 13 Installation Circuit Breaker Installation and Parts for Installation • Read thoroughly and follow all directions provided. • A circuit breaker must be installed between the power source and the unit if the plug is not used (see illustration below). Main Power source Circuit Breaker Use a circuit breaker or time delay fuse.
-
Page 14: Operating Instructions
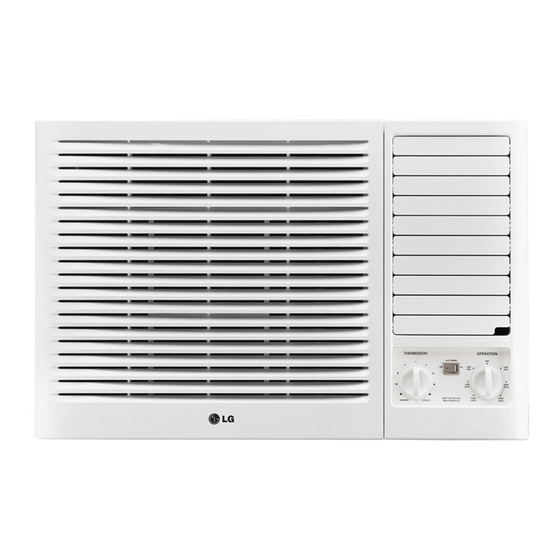
Operating Instructions Operating Instructions Controls The controls will look like one of the following. Thermostat Operation : Turns the air conditioner off. Turn the thermostat control to the desired setting. The control position is a normal setting for MED FAN : Permits the medium fan speed average conditions. - Page 15 Operating Instructions COOLING DESCRIPTIONS For Normal Cooling - Select High Cool or Med Cool with the Operation knob at the midpoint of Thermostat knob. For Maximum Cooling - Select High Cool with the Operation knob at the highest number available on your Thermostat knob.
- Page 16 Operating Instructions Remote Control The controls will look like the following. REMOTE CONTROL The Remote Control unit will not function properly if strong light strikes the sensor window of the air conditioner or it there are obstacles between the Remote Control unit and the air conditioner.
- Page 17 Operating Instructions Auto Restart In case the power comes on again after a power failure, Auto Restarting Operation is the function to operate procedures automatically to the previous operating conditions. Inserting the Remote Control Batteries 1. Push out the cover on the back of the remote control with your thumb 2.
- Page 18 Operating Instructions Ventilation The ventilation lever must be in the CLOSE position in order to maintain the best cooling conditions. When fresh air is necessary in the room, set the ventilation lever to the OPEN position. The damper is opened and room air is drawn out. Part B CLOSE VENT...
- Page 19 Operating Instructions How to Connect a Drain Hose A drain hole is provided at the rear of the air conditioner unit. Select a drain method according to the following. Fig. 1 1. Remove the hole rubber from the base-pan. (for some models) DRAIN PIPE 2.
- Page 20 Maintenance and Service Maintenance and Service TURN THE AIR CONDITIONER OFF AND REMOVE THE PLUG FROM THE POWER OUTLET. Air Filter Cleaning The air filter should be checked at least twice a month to see if cleaning is necessary. Trapped particles in the filter will build up and block the airflow.
-
Page 21: Maintenance And Service
Maintenance and Service Warnings Listed below are important instructions which will prevent malfunctions of the unit or serious problem with your air conditioner. 1. Operate the unit from a stable power supply voltage variation must be within ±10 percent of the rated voltage. - Page 22 Maintenance and Service Please check before service call When you find something wrong with your room air conditioner, please check carefully referring to the following items. If you can’t find out the causes of trouble, get into contact with your dealer. A.
- Page 23 Maintenance and Service Details of LG serial No. Code Detail Code of Model Meaning Year The last digit of year ex) 2000 0, 2012 2 (Digit) Month 01~12 Month ex) March → 03, August → 08 (Digit) Nation Where manufactured ex) K →...
- Page 24 Maintenance and Service Troubleshooting Normal Operating • You may hear a pinging noise caused by water being picked up and thrown against the condenser on rainy days or when the humidity is high. This design feature helps remove moisture and improve efficiency.
- Page 25 :ﺍﻟﻨﻮﻉ P/NO : MFL67740301 www.lg.com...
- Page 26 3....... 7......8........9........14....21.....
- Page 27 • • • • • • l i n G a s o...
- Page 28 • • • • • • • • • • •...
- Page 29 • • • • • • • •...
- Page 30 • • • • • • • • •...
- Page 37 • • L:BL(WH) N:BR(BK) G:GN/YL(GN)
- Page 38 MED FAN LOW FAN HIGH COOL MED COOL LOW COOL LOW HEAT HIGH HEAT...
- Page 39 ) ON ) OFF Auto Swing ١٥ ﺩﻟﻴﻞ ﺍﻟﻤﺴﺘﺨﺪﻡ...
- Page 40 (Dry) (ON/OFF) ٦١ ﻣﻜﻴﻒ ﻫﻮﺍﺀ ﺍﻟﻐﺮﻓﺔ...
- Page 41 • • ١٧ ﺩﻟﻴﻞ ﺍﻟﻤﺴﺘﺨﺪﻡ...
- Page 42 • • • • ﻣﻜﻴﻒ ٨١ ﻫﻮﺍﺀ ﺍﻟﻐﺮﻓﺔ...
- Page 43 ١٩ ﺩﻟﻴﻞ ﺍﻟﻤﺴﺘﺨﺪﻡ...
- Page 44 ٠٢ ﻣﻜﻴﻒ ﻫﻮﺍﺀ ﺍﻟﻐﺮﻓﺔ...
- Page 45 OF F...
- Page 47 ٢ ← ٢٠١٢ , ٠←٢٠٠٠ Ó ( e ã ¬ ( É F « g é h ± ) M ô (02)6738249 (01)4020570 (03)8141116...
- Page 48 • • • • • • • • • • • • • • • • •...