Table of Contents
Advertisement
Operating Instructions
EN
ID5G00KMW/UK
ID5G00KMW/UK
ID5G00KMW/UK
ID5G00KMW/UK
ID5G00KMK/UK
ID5G00KMK/UK
ID5G00KMK/UK
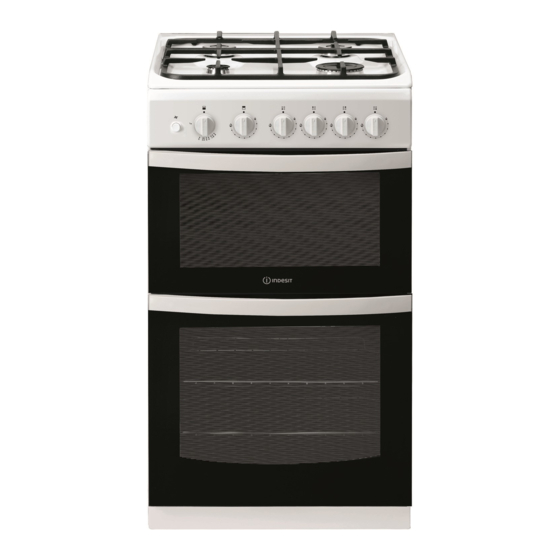
50cm Free Standing Gas Cooker
Contents
Features, 7
Use of hotplates, 14
Grilling, 15
Oven, 16
If it Still Won't Work..., 21
Installation, 23
EN
EN
Advertisement
Table of Contents

Related Manuals for Indesit ID5G00KMW/UK


Summary of Contents for Indesit ID5G00KMW/UK
-
Page 1: Table Of Contents
Operating Instructions 50cm Free Standing Gas Cooker Contents Safety Information, 2 Features, 7 Control Panel, 8 ID5G00KMW/UK ID5G00KMW/UK ID5G00KMW/UK ID5G00KMW/UK ID5G00KMK/UK ID5G00KMK/UK ID5G00KMK/UK Technical Characteristics, 9 Installation tips, 10 Use of hotplates, 14 Grilling, 15 Oven, 16 Oven cooking charts, 17... -
Page 2: Safety Information
unless continuously supervised. Children from 8 years old and above and persons with reduced SAFETY INSTRUCTIONS physical, sensory or mental capabilities or lack of experience and knowledge can use this appliance IMPORTANT TO BE READ AND OBSERVED only if they are supervised or have been given These instructions are valid if the country instructions on safe use and understand the symbol appears on the appliance. - Page 3 WARNING : Modification of the appliance and motels, bed & breakfast and other residential environments. its method of installation are essential in order to use the appliance safely and correctly in all the No other use is permitted (e.g. heating rooms). additional countries This appliance is not for professional use.
- Page 4 To ensure adequate ventilation, the back panel The gas supply pipe fitting is a threaded 1/2 gas of the cabinet must be removed. It is advisable cylindrical male attachment. These pipes must to install the oven so that it rests on two strips be installed so that they are never longer than of wood, or on a completely flat surface with an 2000 mm when fully extended.
- Page 5 If the power cable needs to be replaced, contact an authorised service centre. WARNING: Ensure that the appliance is switched off before replacing the lamp to avoid the possibility of electric shock. CLEANING AND MAINTENANCE WARNING: Ensure that the appliance is switched off and disconnected from the power supply before performing any maintenance operation;...
- Page 6 Your new appliance is guaranteed* and will give lasting service. This guarantee is only applicable if the appliance has been installed in accordance with the installation instructions detailed in this booklet. To help make best use of your cooking equipment, please read this booklet carefully.
-
Page 7: Features
Features GLASS COVER* HOB VENTILATION SLOTS 1900W 1900W 3000W 1000W CONTROL PANEL GRILL/MEAT PAN WITH REMOVABLE HANDLE AND WIRE FOOD SUPPORT SHELF SUPPORT GRILL MODEL & SERIAL NUMBER GRILL DOOR MAIN OVEN GLASS SHELF DOOR SUPPORTS OVEN ROD SHELVES... -
Page 8: Control Panel
Control Panel MAIN GRILL LEFT RIGHT RIGHT LEFT FRONT FRONT OVEN REAR REAR BURNER BURNER BURNER BURNER Control Knobs for the gas burners • The position of the gas burner controlled by each one of the knobs is shown by a solid ring . -
Page 9: Technical Characteristics
Electric section Rated power Class Voltage kW (1) 12,80 (931 g/h - G30) II2H3+ 220-240V~ 50-60Hz ID5G00KMW/UK ID5G00KMW/UK ID5G00KMW/UK ID5G00KMW/UK (914 g/h - G31) ID5G00KMK/UK ID5G00KMK/UK ID5G00KMK/UK (1) The values in g/h refer to the capacities with liquid gas (Butane, Propane). -
Page 10: Installation Tips
! This procedure must be performed by a qualified Installation tips technician who has been authorised by the manufacturer. Positioning Gas connection This unit may be installed and used only in permanently ventilated rooms according to the British The cooker should be connected to the gas-supply Standards Codes Of Practice: B.S. - Page 11 ! This procedure must be performed by a qualified technician who has been authorised by the manufacturer. Electrical connection • the mains cable is wired directly into a 13 amp cable Power supply voltage and frequency: 230-240V a.c. outlet, controlled by a switch, (in compliance with 50Hz.
- Page 12 ! This procedure must be performed by a qualified technician who has been authorised by the manufacturer. • Pry the fixing tab “V” and remove the oven burner • Unscrew the oven burner nozzle using the socket a) replace the hose holder mounted on the spanner for the nozzles “Z”, or a 7 mm socket appliance with that supplied in the bag of “cooker spanner, and replace it with a nozzle suited to the...
- Page 13 2,50 Grill 2,50 Nominal (mbar) 28-30 Supply Minimum (mbar) Pressures Maximum (mbar) At 15°C and 1013 mbar- dry gas Propane P.C.S. = 50,37 MJ/Kg Butane P.C.S. = 49,47 MJ/Kg Natural P.C.S. = 37,78 MJ/m ID5G00KMW/UK ID5G00KMW/UK ID5G00KMW/UK ID5G00KMK/UK ID5G00KMK/UK ID5G00KMK/UK...
-
Page 14: Use Of Hotplates
Use of Hotplates Practical Advice on Using the Burners Each burner is fitted with a spark ignitor for lighting the gas. To ensure rapid lighting of the burners every To use the burners as efficiently as possible, some time they are used, the ignitors must be kept clean and basic guidelines should be followed: dry. -
Page 15: Grilling
Grilling Relighting‘ the burner GRILLING MUST BE DONE WITH THE GRILL DOOR OPEN. In the event of the burner flames being accidentally CONTROL KNOBS MAY BECOME HOT DURING extinguished, turn off the burner control and do not GRILLING. attempt to re-ignite the burner for at least one minute. CAUTION: ACCESSIBLE PARTS WILL BECOME HOT WHEN THE GRILL Using the grill pan kit... -
Page 16: Oven
Oven COLD START COOKING Anything requiring long slow cooking such as The oven has different heat zones - the thermostat casseroles and rich fruit cakes can be put into a cold settings refer to the temperature on the middle shelf; oven. -
Page 17: Oven Cooking Charts
Oven Cooking Chart The following times and setting are for guidance preheat for best results. Always turn the thermostat only. You may wish to alter the setting to give a result knob to Mark 9 before selecting the appropriate gas more to your satisfaction. -
Page 18: Care And Cleaning
Care and maintenance TURN OFF THE MAIN SWITCH AND ENSURE THE COOKER IS COLD BEFORE CLEANING. BEFORE SWITCHING ON AGAIN, ENSURE THAT ALL CONTROLS ARE IN THE OFF POSITION. Do not use steam cleaning Carry out the required Do not use wire wool, abrasive equipment. - Page 19 Please refer to the enclosed warranty leaflet for more information on the warranty. A complete product specification, including the energy efficiency ratings for this oven, can be read and downloaded from our website www.indesit.com...
-
Page 20: Cooking Results Not Satisfactory
Cooking Results Not Satisfactory? Problem Check Grilling Uneven cooking front to Ensure that the grill pan is positioned centrally below the grill element. back Fat splattering Ensure that the grill is not set to too high a temperature. Ensure that the oven shelves are level by using a spirit Oven Baking level on the rod shelf and adjusting, using suitable Uneven rising of cake... -
Page 21: Something Wrong With Your Cooker
Something Wrong with your Cooker? Before contacting your nearest Service Centre/Installer, check the problem guide below; there may be nothing wrong with your cooker. Problem Check Ignition does not work If all burners fail to ignite: Check that sparks appear at the burners; A clicking noise should be heard. - Page 22 Min. 750 mm Min. 420 mm max. 15 mm...
-
Page 23: Installation
>50°C Connecting to gas supply Gas hose connection point must be installed within the shaded area... - Page 24 Whirlpool EMEA S.p.A. 11/2018 - W11298966 Via Carlo Pisacane n.1 XEROX FABRIANO 20016 Pero (MI), Italy VAT number: IT00693740425 www.indesit.com...