Table of Contents
Advertisement
Advertisement
Table of Contents

Related Manuals for Toshiba PA3575U-1PRP dynadock U


Summary of Contents for Toshiba PA3575U-1PRP dynadock U
- Page 1 User’s Manual dynadock™...
-
Page 2: Table Of Contents
Contents Introduction...11 Features ...11 Front panel ...12 Back panel...13 Top panel...14 Computer Requirements ...14 Assembly...14 Installation ...15 Installing the Drivers ...15 Background Utility Program ...17 Connecting the dynadock™ to the Computer...18 Uninstalling...20 Using the dynadock™ ...21 Undock button ...21 USB 2.0 Ports...22 Ethernet Port ...22 Microphone Port ...23 Headphone Port ...23... -
Page 3: Fcc Information
Consult the dealer or an experienced radio/TV technician for help. WARNING: Changes or modifications made to this equipment, not expressly approved by TOSHIBA or parties authorized by TOSHIBA could void the user’s authority to operate the equipment. FCC Conditions This equipment has been tested and found to comply with Part 15 of the FCC Rules. - Page 4 Medical environment: The compliance to the Medical Product Directive has not been verified by Toshiba, therefore this product cannot be used as a medical product without further verification. The use in usual office environments e.g. in hospitals should be no problem if there is no restriction by the responsible administration.
-
Page 5: Safety Instructions
Do not attempt to disassemble, modify, tamper with or repair product (including AC adaptor). Disassembly, modification, tampering or repairing the product could cause fire or electric shock, possibly resulting in serious injury. Please contact an authorized Toshiba service provider for any repair service. User’s Manual EN-5... - Page 6 Always use the TOSHIBA AC adaptor that was provided with your product (that may have been provided with your product), or use AC adaptors specified by TOSHIBA to avoid any risk of fire or other damage to the product. Use of an incompatible AC adaptor could cause fire or damage to the product possibly resulting in serious injury.
- Page 7 Use correct power source Never plug the AC adaptor into a power source that does not correspond to both the voltage and the frequency specified on the regulatory label of the unit. Failure to do so could result in a fire or electric shock, possibly resulting in serious injury.
- Page 8 Never place your product in a location with extremely low temperatures Never place your product in a location where it will be exposed to extremely low temperatures. This may result in a system failure, malfunction or loss of data. Never subject your product to sudden temperature variations Never subject your product to sudden temperature variations.
- Page 9 Copyright Statement No part of this publication may be reproduced in any form by any means without prior written permission. Other trademarks or brand names mentioned herein are trademarks or registered trademarks of their respective companies. Disclaimer Information in this document is subject to change without notice. The manufacturer does not make any representations or warranties (implied or otherwise) regarding the accuracy and completeness of this document and shall in no event be liable for any loss of profit or any...
- Page 10 Windows Vista ® The Fn + F5 functionality detailed in the electronic User’s Guide for your TOSHIBA computer only controls the internal video controller of your computer. The TOSHIBA dynadock utilizes an advanced video graphics controller to display the video on the external monitor connected to it. However, due to USB 2.0 transfer speed limitations, some or all portions of DVD playback...
-
Page 11: Introduction
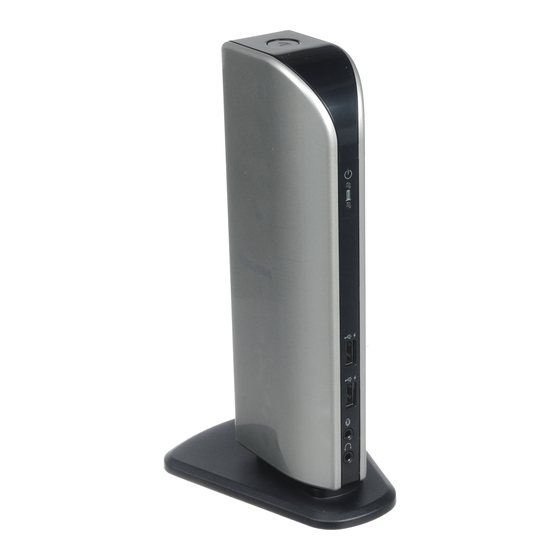
Introduction Thank you for purchasing the Toshiba dynadock, the universal docking station that enables you to connect your deskspace peripherals through one USB cable to just about any Windows-based notebook. The dynadock is software upgradable to enable you to keep your dynadock in line with technological advances. -
Page 12: Front Panel
Front panel (Sample Illustration) Indicators and connectors on the front of the dynadock EN-12 DC-IN LED: Glows blue when power is being correctly supplied from the AC power adaptor. Status LED: Indicates the status of docking, undocking and charging functions. Docking: Flashes green during the docking process, glows green when docked. -
Page 13: Back Panel
Back panel (Sample Illustration) Connections on the back of the dynadock User’s Manual 3.5mm stereo lineout port: For connection to stereo speakers. 0ptical S/PDIF digital audio output port: Use an optical S/PDIF cable (not provided) to connect to your digital audio equipment, e.g, Dolby receiver and speaker system. -
Page 14: Top Panel
Top panel Computer Requirements 1.2GHz or higher processor. Intel ® /AMD Athlon™/AMD Duron™ family, or compatible processor recommended (Intel recommended for optimal video performance) 512 MB memory or higher (1 GB memory or higher recommended) USB 2.0 port 30 MB of available disk space Microsoft Windows Vista Assembly... -
Page 15: Installation
Installation Installing the Drivers 1. Insert the provided Installation CD into your optical disc drive. It will run automatically and the dialog box will appear. If the auto-run function is disabled on your system, the program will fail to load automatically. Please open the disk in Windows double click “AutoRun.exe”. - Page 16 Driver Type dynadock Utility Network Driver Audio Driver Video Driver In addition, these icons are added to the Notification Area / System Tray: Toshiba dynadock Utility USB Multi-Channel Audio Device DisplayLink Core Software EN-16 (Sample Illustration) dynadock USB Installer Driver Name -dynadock Utility II -AX88772A &...
-
Page 17: Background Utility Program
4. Follow the on-screen directions to finish the installation. If there’s any previous version installed, dynadock setup package will auto detect the installed version, and pop up the following screen. Please follow the on-screen directions to finish the installation. Background Utility Program After the dynadock utility is installed and the computer is restarted, a program named ‘TOSDockApp.exe’... -
Page 18: Connecting The Dynadock™ To The Computer
Connecting the dynadock™ to the Computer 1. Plug the AC adaptor cord/cable into the DC-IN on the back of the dynadock. (Sample Illustration) Connecting the AC adaptor cord to the dynadock 2. Connect the AC Power Adaptor with the AC power cord/cable, and then connect the AC power cord/cable to a live electrical outlet. - Page 19 dynadock™ 4. Plug the other end of the USB cable into an available USB 2.0 port on your computer. (Sample Illustration) Connecting the USB cable to your computer NOTE: Some computers may not immediately recognize the dynadock is connected upon start-up. This is not malfunction of the dynadock, it is related to the computers BIOS start up sequence.If this occurs, follow the steps below: 1.
-
Page 20: Uninstalling
NOTE: Before starting the steps below, you must eject the dynadock™ from your computer using the undock button or TOSHIBA dynadock™ utility icon on your Notification Area/System Tray. Disconnect the dynadock™ from the computer. Any devices connected to the dynadock™... -
Page 21: Using The Dynadock
2. Click on “Setup” on the above screen. Then click Uninstall button to start to uninstall the programs you select. 3. Follow the on-screen directions to finish the uninstall. Using the dynadock™ You may connect devices to the appropriate ports on the dynadock while your computer is running. -
Page 22: Usb 2.0 Ports
When the dynadock is not connected to your computer, or the computer’s power is off Press the Undock button once to put the dynadock into charging mode. The Status LED will glow orange when charging. Press the Undock button again to stop the charging process. This applies to both USB powered ports on the front of the dynadock. -
Page 23: Microphone Port
Microphone Port To connect a microphone, plug the 3.5mm microphone jack into the microphone input port. Headphone Port To connect headphones, plug the 3.5mm headphone jack into the headphone port. After installing the provided audio software, a USB Multi-Channel Audio Device utility is installed in your computer. It can be accessed by double-clicking the USB Multi-Channel Audio Device icon on the system tray /notification area. - Page 24 Windows Vista ® Operations 1. In the Analog Output section, select headphone. 2. On the panel, click the 7.1 Virtual SPEAKER SHIFTER button to enable the virtual multi-channel function. The icon will turn blue and a mark will be shown in the rightside window when selected. 3.
- Page 25 Windows ® XP Operations 1. In the Analog Output section, select headphone icon. 2. On the panel, click the 7.1 Virtual SPEAKER SHIFTER button to enable the virtual multi-channel function. The icon will turn blue when selected. 3. The button next to DSP Mode string allows you to switch between the SHIFTER control and basic control window.
- Page 26 Using the Virtual Speaker Shifter Controls for both Windows Windows Vista 1. Volume control 2. Rotate all the virtual speakers clockwise 3. Rotate all the virtual speakers counterclockwise 4. Manually rotate all the virtual speakers 5. Manual shifting function. You can drag a specific virtual speaker to the preferred position to enhance an individual channel output.
- Page 27 dynadock™ Using the Basic Controls - Windows ® XP only 1. To adjust/reset the volume of the left and right channel of your speakers/headphones 2. To test the left and right channel of your speakers/headphones 3. Stops the audio test (Sample Image) Basic controls screen User’s Manual EN-27...
- Page 28 Digital S/PDIF Output - Windows Using the S/PDIF output function you can directly output the digital sound source from the computer to your home theater equipment without loss of sound quality. To experience true digital sound quality: 1. Make sure your DVD content supports Dolby 2.
-
Page 29: Video Port (Vga And Dvi)
Video Port (VGA and DVI) Connection The dynadock has both the following types of video ports: VGA – for connection to VGA interface monitors DVI – for connection to DVI interface monitors NOTE: Only one monitor can be connected to the dynadock. Although the ports and video drivers are different, the connection and setup is the same. - Page 30 Mirror Mode This mode “mirrors” – creates an identical display – from your computer screen to the external monitor. This is useful, for example, if you want to use a larger desktop monitor rather than the computer screen. In Mirror Mode, the dynadock automatically selects the settings (screen resolution, color quality and refresh rate) for the external monitor that will allow the best resolution based on your computer’s settings.
- Page 31 Switching from Extended Mode to Mirror Mode Follow these steps to change the video output to Mirror Mode: 1. Click or right-click the icon in the system tray/notification area. 2. Select “Mirror” from the menu. NOTE: You can also use the Windows between Extended Mode and Mirror Mode.
-
Page 32: Adjusting Video Settings
Adjusting Video Settings There are three components that make up the screen mode: Resolution: In common usage, this refers to the number of pixels displayed on the screen horizontally and vertically. Color Depth: This defines the number of different colors that can be shown on the screen at the same time. - Page 33 Initial Use When the VGA or DVI component first starts, it will extend the primary monitor. Changes to the screen mode and VGA or DVI component operation mode can be made under the Windows display properties. If no output is seen on the monitor connected to the VGA or DVI component, it may be in a mode which cannot be displayed by the monitor.
- Page 34 3. To change the refresh rate, select “Advanced” from the menu, this will open the Windows 4. On the Display Settings screen, click Advanced Settings (Windows Vista)/Advanced (Windows XP) and then click Monitor. Windows Vista 5. Select a refresh rate from the Screen refresh rate pull down list. Be sure to select a refresh rate that is supported for the resolutions and color depth settings, as indicated in the table above.
-
Page 35: How Standby/Sleep Or Hibernation Mode Affects Devices Attached To The Dynadock
Using the dynadock™ Utility Eject Dock When the dynadock is connected to your computer, the TOSHIBA dynadock Utility can remove all devices with one-click. You can eject the dock by using one of the following two options: Option 1- pressing the undock button: 1. - Page 36 Option 2- clicking the icon in the system tray/notification area: 1. Click or right-click the icon in the system tray/notification area. 2. Select “Eject Dock” from the menu. 3. The dynadock will undock. If the dynadock is removed from the system successfully, the icon in the system tray/notification area will disappear.
-
Page 37: Eject Dock And Sleep
Eject Dock and Sleep When the dynadock is connected to your computer, the TOSHIBA dynadock Utility can remove all devices and let the system sleep instantly with one-click. Please follow these steps: 1. Click or right-click the icon in the system tray/notification area. -
Page 38: Changing The Dynadock Utility Settings
1. Click “Start” and then click “Control Panel”. 2. Double-click the “TOSHIBA dynadock Utility” icon. Note: If you can not find the “TOSHIBA dynadock Utility” icon, please click “classic view” on the left of the control panel window. 3. Setting dialog will appear. - Page 39 The Notify Message Service shows warning messages when you undock the dynadock. By default, the boxes are checked. NOTE: TOSHIBA recommends that you do not uncheck these boxes. If the boxes are unchecked, there will be no warning messages if the dynadock is improperly ejected/disconnected.
-
Page 40: Select Audio Device
“Show unexpected remove message” option lets users see a warning dialog box like the following when the user disconnects the USB dock directly. Select Audio Device Once dynadock™ is installed, the sound on the notebook will be disabled, enabling you to connect external speakers. To re-enable sound through your notebook, please follow these steps: 1. -
Page 41: Select Update Support
3. Change the “Sound playback” default device to other than “3-USB Multi-Channel Audio Device”. Windows Vista Select Update Support Choose the “Update support” option. User can receive the update information from the e-mail used for registration. There would be a dialog to prompt user: User’s Manual ®... -
Page 42: Select Help
Select Help If you select “Help”, the online user manual opens. Select About If you select “About”, you will see the following information: EN-42 (Sample Image) About dynadock utility User’s Manual... -
Page 43: Specifications
Specifications This section summarizes the dynadock’s technical specifications. Physical Dimensions Weight Size Environmental Requirements Conditions Operating Non-operating Thermal Gradient Wet-bulb Temperature Power Requirements AC adaptor User’s Manual About 490g/17.2 ounces (including the Base) 42 (w) x 77 (d) x 222 (h) mm/1.7" (w) x 3.0" (d) x 8.7" (h) (not including the parts that extend beyond the main body) 112.5 (w) x 130 (d) x 234 (h) mm/4.4"... - Page 44 General Specifications Computer Interface Ports and Connectors Supported Video Display Modes *Depending on operating system *Specifications are subject to change without further notice. EN-44 USB 2.0 4 USB 2.0 ports in the back 2 USB 2.0 Powered ports in front 1 x S/PDIF (optical digital audio output) 1 x Ethernet Port (10/100 Base-T Ethernet RJ-45 connector)