Table of Contents
Advertisement
Quick Links
global_main.book.book Page 1 Thursday, December 10, 2020 8:05 AM
OWNER'S MANUAL
WASHING MACHINE
Before beginning installation, read these instructions
carefully. This will simplify installation and ensure that the
product is installed correctly and safely. Leave these
instructions near the product after installation for future
reference.
ENGLISH
WF0710WHN
MFL71774438
Rev.00_121020
Copyright © 2020 LG Electronics Inc. All Rights Reserved.
www.lg.com
Advertisement
Table of Contents

Related Manuals for LG WF0710WHN


Summary of Contents for LG WF0710WHN
- Page 1 This will simplify installation and ensure that the product is installed correctly and safely. Leave these instructions near the product after installation for future reference. ENGLISH WF0710WHN www.lg.com MFL71774438 Rev.00_121020 Copyright © 2020 LG Electronics Inc. All Rights Reserved.
-
Page 2: Table Of Contents
Preparing the Wash Load ................20 Adding Detergents and Softeners ..............20 Programme Table ....................23 Extra Options and Functions ................27 SMART FUNCTIONS LG ThinQ Application ..................29 Smart Diagnosis ....................29 MAINTENANCE Cleaning After Every Wash................30 Cleaning the Appliance Periodically & Performing an Emergency Water Evacuation......................31... -
Page 3: Safety Instructions
global_main.book.book Page 3 Thursday, December 10, 2020 8:05 AM SAFETY INSTRUCTIONS SAFETY INSTRUCTIONS READ ALL INSTRUCTIONS BEFORE USE The following safety guidelines are intended to prevent unforeseen risks or damage from unsafe or incorrect operation of the appliance. The guidelines are separated into ‘WARNING’ and ‘CAUTION’ as described below. - Page 4 global_main.book.book Page 4 Thursday, December 10, 2020 8:05 AM SAFETY INSTRUCTIONS • Children should be supervised to ensure that they do not play with the appliance. • If the power cord is damaged, it must be replaced by the manufacturer, its service agent or similarly qualified persons in order to avoid a hazard.
- Page 5 global_main.book.book Page 5 Thursday, December 10, 2020 8:05 AM SAFETY INSTRUCTIONS • Do not modify the power plug provided with the appliance. If it does not fit the power outlet, have a proper outlet installed by a qualified electrician. • This appliance is equipped with a power cord having an equipment- earthing / grounding conductor (earthing pin) and a grounding power plug.
- Page 6 • Do not touch the door during a high temperature programme. • In case of a water leak from the appliance or flood, disconnect the power plug and contact the LG Electronics customer information centre. • Turn off water taps to relieve pressure on hoses and valves and to minimize leakage if a break or rupture should occur.
- Page 7 • Only qualified service personnel from LG Electronics service centre should disassemble, repair, or modify the appliance. Contact an LG Electronics customer information centre if you move and install the appliance in a different location.
-
Page 8: Installation Parts And Specifications
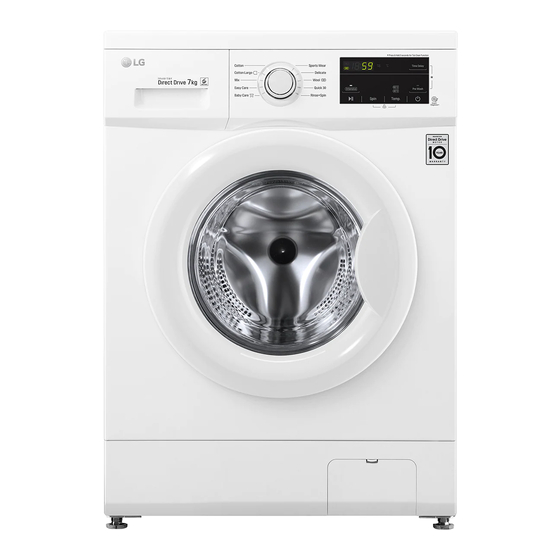
global_main.book.book Page 8 Thursday, December 10, 2020 8:05 AM INSTALLATION INSTALLATION Parts and Specifications NOTE • Appearance and specifications may change without notice to improve the quality of the appliance. Front View Rear View Control Panel Power Plug Detergent Dispenser Drawer Transit Bolts Drum Drain Hose... - Page 9 Cold Supply Hose Anti–slip Sheets Spanner Elbow Bracket for Securing Drain Hose Caps for Covering Transit Bolt Holes Tie Strap Specifications Model WF0710WHN Power Supply 220 V~ , 50/60 Hz 60 kg Product Weight Maximum Power 1700 W Annual Water Consumption...
-
Page 10: Installation Place Requirements
global_main.book.book Page 10 Thursday, December 10, 2020 8:05 AM INSTALLATION Installation Place WARNING Requirements • This appliance must only be used for domestic household purposes and should not be used in Before installing the appliance, check the following mobile applications. information to make sure that the appliance should be installed in a correct place. -
Page 11: Unpacking The Appliance
INSTALLATION grounded/earthed in accordance with all local NOTE codes and ordinances. • You can purchase rubber cups (part No. 4620ER4002B) from the LG service centre. Unpacking the Appliance Lifting the Appliance Off the Ventilation Foam Base • Make sure that air circulation around the... -
Page 12: Levelling The Appliance
global_main.book.book Page 12 Thursday, December 10, 2020 8:05 AM INSTALLATION Starting with the bottom two transit bolts • If the appliance rocks when pushing the top use the spanner (included) to fully loosen all plate of the appliance diagonally, adjust the feet transit bolts by turning them counterclockwise. -
Page 13: Connecting The Water Supply Hose
Page 13 Thursday, December 10, 2020 8:05 AM INSTALLATION manufactured by LG Electronics for use with this slip sheets under the levelling feet and adjust the model. level. Clean the floor to attach the anti-slip sheets. • Use a dry rag to remove and clean foreign Check if the appliance is perfectly level using a objects and moisture. - Page 14 global_main.book.book Page 14 Thursday, December 10, 2020 8:05 AM INSTALLATION • Periodically check the condition of the water Connecting Screw-Type Hose to Tap Without supply hose and replace the water supply hose if Thread necessary. Loosen the 4 fixing screws NOTE •...
- Page 15 global_main.book.book Page 15 Thursday, December 10, 2020 8:05 AM INSTALLATION completely to the tap and then tighten the watertight. Tighten the 4 fixing screws and the hose by screwing it to the right. adapter ring plate. Pull the connector latch plate down, push Connecting One Touch Type Hose to Tap the inlet hose onto the adapter, and release the...
-
Page 16: Installing The Drain Hose
global_main.book.book Page 16 Thursday, December 10, 2020 8:05 AM INSTALLATION Connecting the Hose to the • Securing the drain hose correctly will protect the floor from damage due to water leakage. Appliance Screw the supply hose to the water inlet valve on the back of the appliance. -
Page 17: Operation Operation Overview
global_main.book.book Page 17 Thursday, December 10, 2020 8:05 AM OPERATION OPERATION Operation Overview • Add the proper amount of detergent to the detergent dispenser. If desired, add bleach or fabric softener to the appropriate areas of Using the Appliance the dispenser. Before the first wash, select the Cotton wash programme and add a half amount of the Turn on the appliance. -
Page 18: Control Panel
global_main.book.book Page 18 Thursday, December 10, 2020 8:05 AM OPERATION Control Panel The actual control panel may differ from model to model. Control Panel Features Description Power On/Off Button • Press this button to turn the washing machine on. Programme Knob •... - Page 19 global_main.book.book Page 19 Thursday, December 10, 2020 8:05 AM OPERATION Description Extra Options and Functions • To use the extra functions, press and hold the corresponding button for 3 seconds. The corresponding symbol lights up in the display. • This allows you to select an additional programmes and will light when selected. Child Lock Use this option to disable the controls.
-
Page 20: Preparing The Wash Load
global_main.book.book Page 20 Thursday, December 10, 2020 8:05 AM OPERATION Preparing the Wash Load NOTE Sort the wash load for best washing results, and • The dashes under the symbol give you then prepare the clothes according to the symbols information about the type of fabric and the on their care labels. - Page 21 global_main.book.book Page 21 Thursday, December 10, 2020 8:05 AM OPERATION detergents that are suitable for Drum (front • Minimum load: 1/3 of full load. load) type washers. • If too many suds occur, reduce the detergent amount. Using the Dispenser •...
- Page 22 global_main.book.book Page 22 Thursday, December 10, 2020 8:05 AM OPERATION Adding Water Softener maximum fill line can cause it to dispense too early, which may stain the clothes. A water softener, such as anti-limescale can be used to cut down on the use of detergent in areas with high water hardness level.
-
Page 23: Programme Table
global_main.book.book Page 23 Thursday, December 10, 2020 8:05 AM OPERATION Programme Table Washing Programme Cotton 40 ℃ ( 0 ℃ to 95 ℃) Max. Load: Rating Description Washes normally soiled clothes by combining various drum motions. • Pressing the Start/Pause button without selecting a programme will cause the Cotton programme to begin immediately, using the default settings. - Page 24 global_main.book.book Page 24 Thursday, December 10, 2020 8:05 AM OPERATION Quick 30 20 ℃ (0 ℃ to 40 ℃) Max. Load 2 kg Description Washes small loads of lightly soiled clothes for approximately 30 minutes. Rinse+Spin Max. Load: Rating Description Rinses and spins clothes.
- Page 25 global_main.book.book Page 25 Thursday, December 10, 2020 8:05 AM OPERATION Standard 60 °C Cotton Standard 40 °C Cotton programme programme (Half Load) Full Load Half Load Duration of each spin cycle (minutes) Extra Options NOTE • The Time Delay option can be selected for every washing programme in this table. Programme Intensive Pre Wash...
- Page 26 global_main.book.book Page 26 Thursday, December 10, 2020 8:05 AM OPERATION Spin Speed Programme Default Available 1000 rpm Easy Care 800 rpm Up to 800 rpm Baby Care 800 rpm Up to 800 rpm Sports Wear 800 rpm Up to 800 rpm Delicate 800 rpm Up to 800 rpm...
-
Page 27: Extra Options And Functions
global_main.book.book Page 27 Thursday, December 10, 2020 8:05 AM OPERATION Extra Options and Customize the washing programme (Temp., Spin and Intensive) as necessary. Functions You can use the extra options and functions to Press the Start/Pause button. customize the programmes. Only Using a Spin Function Customizing a Washing Programme... - Page 28 global_main.book.book Page 28 Thursday, December 10, 2020 8:05 AM OPERATION Press the Power button. Press and hold the Spin and Temp. buttons at the same time for 3 seconds to activate this function. Select a washing programme. • A beeper will sound, and will appear on the display.
-
Page 29: Smart Functions
Follow the instructions below to use the audible smartphone. diagnosis method. LG ThinQ Application Feature • Launch the LG ThinQ application and select the Smart Diagnosis feature in the menu. Follow the instructions for audible diagnosis provided Communicate with the appliance from a in the LG ThinQ application. -
Page 30: Maintenance
global_main.book.book Page 30 Thursday, December 10, 2020 8:05 AM MAINTENANCE MAINTENANCE WARNING • Unplug the appliance before cleaning to avoid the risk of electric shock. Failure to follow this warning may result in serious injury, fire, electric shock, or death. •... -
Page 31: Cleaning The Appliance Periodically & Performing An Emergency Water Evacuation
global_main.book.book Page 31 Thursday, December 10, 2020 8:05 AM MAINTENANCE Cleaning the Appliance WARNING Periodically & Performing • Leave the door open to dry inside of the an Emergency Water appliance only if the children are supervised at home. Evacuation Tub Clean Cleaning the Water Inlet Filter This is a special function to help clean the inside of... - Page 32 global_main.book.book Page 32 Thursday, December 10, 2020 8:05 AM MAINTENANCE Cleaning the Drain Pump Filter CAUTION and Performing an Emergency • Be careful when draining, as the water may be Water Evacuation hot. The drain filter collects threads and small objects •...
- Page 33 global_main.book.book Page 33 Thursday, December 10, 2020 8:05 AM MAINTENANCE Reassemble the components of the drawer to the proper compartments and insert the drawer.
-
Page 34: Troubleshooting
Operation of your appliance can lead to errors and malfunctions. The following tables contain possible causes and notes for resolving an error message or malfunction. It is recommended to read the tables carefully below in order to save your time and money that may cost for calling to LG Electronics service centre. - Page 35 • Check and clean the drain filter. Door sensor malfunctions. dE dE1 dEz dE4 DOOR ERROR • Please call LG service centre. You can find your local LG service centre phone number in the warranty card. This is a control error. CONTROL ERROR •...
- Page 36 global_main.book.book Page 36 Thursday, December 10, 2020 8:05 AM TROUBLESHOOTING Symptoms Possible Cause & Solution Thumping sound Heavy clothes may produce a thumping sound. This is usually normal. • If the sound continues, the appliance is probably out of balance. Stop and redistribute the clothes.
- Page 37 global_main.book.book Page 37 Thursday, December 10, 2020 8:05 AM TROUBLESHOOTING Symptoms Possible Cause & Solution Appliance does not Control panel has powered off due to inactivity. operate. • This is normal. Press the Power button to turn the appliance on. Appliance is unplugged.
- Page 38 global_main.book.book Page 38 Thursday, December 10, 2020 8:05 AM TROUBLESHOOTING Symptoms Possible Cause & Solution Appliance is not filling Inlet filter clogged. properly. • Make sure the inlet filters on the fill valves are not clogged. Inlet hoses may be kinked. •...
- Page 39 global_main.book.book Page 39 Thursday, December 10, 2020 8:05 AM TROUBLESHOOTING Symptoms Possible Cause & Solution Staining Bleach or softener is dispensed too soon. • Dispenser compartment is overfilled. It makes bleach or softer dispensed rapidly. Always measure bleach or softener to prevent overfilling. •...
- Page 40 ar_main.book.book Page 36 Thursday, December 10, 2020 9:16 AM ﻣﺫﻛﺭﺓ...
- Page 41 ar_main.book.book Page 36 Thursday, December 10, 2020 9:16 AM ﻣﺫﻛﺭﺓ...
- Page 42 ar_main.book.book Page 35 Thursday, December 10, 2020 9:16 AM ﺍﺳﺗﻛﺷﺎﻑ ﺍﻷﻋﻁﺎﻝ ﻭﺇﺻﻼﺣﻬﺎ ﺍﻟﺳﺑﺏ ﺍﻟﻣﺣﺗﻣﻝ ﻭﺍﻟﺣﻝ ﺍﻷﻋﺭﺍﺽ .ﻳﺗﻡ ﺗﻭﺯﻳﻊ ﺍﻟﻣﺑ ﻳ ّ ﺽ ﺃﻭ ﺍﻟﻣﻧ ﻌ ّ ﻡ ﻓﻲ ﻭﻗﺕ ﻣﺑﻛﺭ ﻣﻥ ﺍﻟﺩﻭﺭﺓ ﺍﻟﺑﻘﻊ ﻭﺣﺩﺓ ﺍﻟﻣﻭﺯﻉ ﻣﻣﻠﻭءﺓ ﺑﺷﻛﻝ ﺯﺍﺋﺩ، ﻣﻣﺎ ﻳﺳﺑﺏ ﺗﻭﺯﻳﻊ ﺍﻟﻣﺑ ﻳ ّﺽ ﺃﻭ ﺍﻟﻣﻧﻌﻡ ﺑﺳﺭﻋﺔ. ﻗﻡ ﺩﺍﺋ ﻣ ً ﺎ ﺑﻣﻌﺎﻳﺭﺓ ﺍﻟﻣﺑ ﻳ ّﺽ ﻟﺗﺟﻧﺏ •...
- Page 43 ar_main.book.book Page 34 Thursday, December 10, 2020 9:16 AM ﺍﺳﺗﻛﺷﺎﻑ ﺍﻷﻋﻁﺎﻝ ﻭﺇﺻﻼﺣﻬﺎ ﺍﻟﺳﺑﺏ ﺍﻟﻣﺣﺗﻣﻝ ﻭﺍﻟﺣﻝ ﺍﻷﻋﺭﺍﺽ .ﺍﻧﺳﺩﺍﺩ ﻓﻠﺗﺭ ﺍﻹﺩﺧﺎﻝ .ﻻ ﻳﺗﻡ ﻣﻝء ﺍﻟﺟﻬﺎﺯ ﺑﻁﺭﻳﻘﺔ ﺻﺣﻳﺣﺔ .ﺗﺄﻛﺩ ﻣﻥ ﺃﻥ ﻓﻼﺗﺭ ﺇﺩﺧﺎﻝ ﺍﻟﻣﻳﺎﻩ ﺍﻟﻣﻭﺟﻭﺩﺓ ﻋﻧﺩ ﺻﻣﺎﻣﺎﺕ ﺍﻟﻣﻝء ﻏﻳﺭ ﻣﺳﺩﻭﺩﺓ • .ﻗﺩ ﺗﻛﻭﻥ ﺧﺭﺍﻁﻳﻡ ﺇﺩﺧﺎﻝ ﺍﻟﻣﻳﺎﻩ ﻣﻠﺗﻭﻳﺔ .ﺗﺄﻛﺩ...
- Page 44 ar_main.book.book Page 33 Thursday, December 10, 2020 9:16 AM ﺍﺳﺗﻛﺷﺎﻑ ﺍﻷﻋﻁﺎﻝ ﻭﺇﺻﻼﺣﻬﺎ ﺍﻟﺗﺷﻐﻳﻝ ﺍﻟﺳﺑﺏ ﺍﻟﻣﺣﺗﻣﻝ ﻭﺍﻟﺣﻝ ﺍﻷﻋﺭﺍﺽ .ﺍﻧﺳﺩﺍﺩ ﺃﻧﺎﺑﻳﺏ ﺍﻟﺗﺻﺭﻳﻑ ﺑﺎﻟﻣﻧﺯﻝ ﺗﺳﺭ ّ ﺏ ﺍﻟﻣﺎء .ﺃﺯﻝ ﺍﻟﻌﻭﺍﺋﻖ ﻣﻥ ﺃﻧﺎﺑﻳﺏ ﺍﻟﺗﺻﺭﻳﻑ. ﺍﺗﺻﻝ ﺑﺎﻟﺳﺑﺎﻙ ﺇﺫﺍ ﻟﺯﻡ ﺍﻷﻣﺭ • .ﺣﺩﻭﺙ ﺗﺳﺭﻳﺏ ﺑﺳﺑﺏ ﺍﻟﺗﺭﻛﻳﺏ ﻏﻳﺭ ﺍﻟﺻﺣﻳﺢ ﻟﺧﺭﻁﻭﻡ ﺍﻟﺗﺻﺭﻳﻑ ﺃﻭ ﺑﺳﺑﺏ ﺍﻧﺳﺩﺍﺩﻩ .ﻗﻡ...
- Page 45 ar_main.book.book Page 32 Thursday, December 10, 2020 9:16 AM ﺍﺳﺗﻛﺷﺎﻑ ﺍﻷﻋﻁﺎﻝ ﻭﺇﺻﻼﺣﻬﺎ ﺍﻟﺳﺑﺏ ﺍﻟﻣﺣﺗﻣﻝ ﻭﺍﻟﺣﻝ ﺍﻷﻋﺭﺍﺽ .ﺣﻣﻭﻟﺔ ﺯﺍﺋﺩﺓ ﻋﻠﻰ ﺍﻟﻣﺣﺭﻙ ﺧﻁﺄ ﺗﻭﻗﻑ ﺍﻟﻣﺣﺭﻙ .ﺩﻗﻳﻘﺔ ﺣﺗﻰ ﻳﺑﺭﺩ ﺍﻟﻣﺣﺭﻙ، ﺛﻡ ﺃﻋﺩ ﺗﺷﻐﻳﻝ ﺍﻟﺩﻭﺭﺓ ﺍﺗﺭﻙ ﺍﻟﺟﻬﺎﺯ ﻟﻣﺩﺓ • .ﻳﺗﺩﻓﻖ ﺍﻟﻣﺎء ﻧﻅﺭ ً ﺍ ﺇﻟﻰ ﻭﺟﻭﺩ ﻋﻳﺏ ﻓﻲ ﺻﻣﺎﻡ ﺍﻟﻣﺎء ﺧﻁﺄ...
- Page 46 .ﻗﺩ ﻳﺅﺩﻱ ﺗﺷﻐﻳﻝ ﺟﻬﺎﺯﻙ ﺇﻟﻰ ﺣﺩﻭﺙ ﺃﺧﻁﺎء ﻭﺃﻋﻁﺎﻝ. ﺗﺣﺗﻭﻱ ﺍﻟﺟﺩﺍﻭﻝ ﺍﻟﺗﺎﻟﻳﺔ ﻋﻠﻰ ﺍﻷﺳﺑﺎﺏ ﺍﻟﻣﺣﺗﻣﻠﺔ ﻭﺍﻟﻣﻼﺣﻅﺎﺕ ﺍﻟﺗﻲ ﺗﻘﻭﻡ ﺑﻣﻌﺎﻟﺟﺔ ﺃﻱ ﺭﺳﺎﻟﺔ ﺧﻁﺄ ﺃﻭ ﻋﻁﻝ LG Electronics ﻳ ُﻭﺻﻰ ﺑﻘﺭﺍءﺓ ﺍﻟﺟﺩﺍﻭﻝ ﺍﻟﺗﺎﻟﻳﺔ ﺑﻌﻧﺎﻳﺔ ﺗﻭﻓﻳﺭ ً ﺍ ﻟﻠﻭﻗﺕ ﻭﺍﻟﻣﺎﻝ ﺍﻟﺫﻱ ﻗﺩ ﺗﺗﻛﺑﺩﻩ ﻋﻧﺩ ﺍﻟﺗﻭﺍﺻﻝ ﻣﻊ ﻣﺭﻛﺯ ﺧﺩﻣﺔ...
- Page 47 ar_main.book.book Page 30 Thursday, December 10, 2020 9:16 AM ﺍﻟﺻﻳﺎﻧﺔ ﻭﺍﻟﺗﺳﺭﻳﺏ. ﺃﻋﺩ ﺇﺩﺧﺎﻝ ﺍﻟﺳﺩﺍﺩﺓ ﻓﻲ ﺃﻧﺑﻭﺏ ﺍﻟﺗﺻﺭﻳﻑ ﺛﻡ ﺿﻊ ﺍﻷﻧﺑﻭﺏ ﻓﻲ .ﺣﺎﻣﻠﻪ .ﺃﻏﻠﻖ ﻏﻁﺎء ﺍﻟﻐﻼﻑ ﺗﻧﺑﻳﻪ .ﺍﺣﺗﺭﺱ ﻋﻧﺩ ﺍﻟﺗﺻﺭﻳﻑ ﺣﻳﺙ ﺇﻥ ﺍﻟﻣﺎء ﻗﺩ ﻳﻛﻭﻥ ﺳﺎﺧ ﻧ ً ﺎ • ﺷﻐﻝ ﺑﺭﻧﺎﻣﺞ ﺗﻧﻅﻳﻑ ﺣﻭﺽ ﺍﻟﻐﺳﻝ ﻣﺭﺓ ﻭﺍﺣﺩﺓ ﻓﻲ ﺍﻟﺷﻬﺭ )ﺃﻭ ﺃﻛﺛﺭ ﻣﻥ ﻣﺭﺓ •...
- Page 48 ar_main.book.book Page 29 Thursday, December 10, 2020 9:16 AM ﺍﻟﺻﻳﺎﻧﺔ ﺃﺯﻝ ﻣﺻﻔﺎﺓ ﺍﻟﻣﻳﺎﻩ ﺍﻟ ﻣ ُ ﺩﺧﻠﺔ ﺑﺎﺳﺗﺧﺩﺍﻡ ﺯﺭﺍﺩﻳﺔ ﺻﻐﻳﺭﺓ ﺛﻡ ﻧﻅﻑ ﺍﻟﻣﺻﻔﺎﺓ .ﺃﻏﻠﻖ ﺩﺭﺝ ﺍﻟﻣﻭﺯﻉ ﺑﺑﻁء .ﺑﺎﺳﺗﺧﺩﺍﻡ ﻓﺭﺷﺎﺓ ﺃﺳﻧﺎﻥ ﺫﺍﺕ ﺷﻌﻳﺭﺍﺕ ﻣﺗﻭﺳﻁﺔ Time Delay ﺍﺿﻐﻁ ﻋﻠﻰ ﺯﺭ ﺗﺷﻐﻳﻝ ﺍﻟﻁﺎﻗﺔ ﺛﻡ ﺍﺿﻐﻁ ﻋﻠﻰ ﺯﺭ ﻓﻲ...
- Page 49 ar_main.book.book Page 28 Thursday, December 10, 2020 9:16 AM ﺍﻟﺻﻳﺎﻧﺔ ﺍﻟﺻﻳﺎﻧﺔ ﺗﺣﺫﻳﺭ ﺍﻓﺻﻝ ﺍﻟﺟﻬﺎﺯ ﻗﺑﻝ ﺍﻟﺗﻧﻅﻳﻑ ﻟﺗﺟﻧﺏ ﺧﻁﺭ ﺍﻟﺗﻌﺭﺽ ﻟﺻﺩﻣﺔ ﻛﻬﺭﺑﺎﺋﻳﺔ. ﻗﺩ ﻳﺅﺩﻱ ﻋﺩﻡ ﺍﺗﺑﺎﻉ ﻫﺫﺍ ﺍﻟﺗﺣﺫﻳﺭ ﺇﻟﻰ ﺍﻟﺗﻌﺭﺽ ﺇﻟﻰ ﺇﺻﺎﺑﺔ ﺧﻁﻳﺭﺓ، ﺃﻭ ﻧﺷﻭﺏ ﺣﺭﻳﻖ، ﺃﻭ • .ﺍﻟﺗﻌﺭﺽ ﻟﺻﺩﻣﺔ ﻛﻬﺭﺑﺎﺋﻳﺔ، ﺃﻭ ﺣﺩﻭﺙ ﻭﻓﺎﺓ .ﻻ...
- Page 50 Page 27 Thursday, December 10, 2020 9:16 AM ﺍﻟﻭﻅﺎﺋﻑ ﺍﻟﺫﻛﻳﺔ ﺍﻟﻭﻅﺎﺋﻑ ﺍﻟﺫﻛﻳﺔ LG ThinQ ﺗﻁﺑﻳﻖ ﺃﻭ ﺿﻊ ﺻﻭﺍﻥ ﺍﻟﺗﻛﻠﻡ ﻓﻲ ﻫﺎﺗﻔﻙ ﺍﻟﺫﻛﻲ ﺑﺎﻟﻘﺭﺏ ﻣﻥ ﺍﻟﺭﻣﺯ .ﻟﻙ ﺑﺎﻟﺗﻭﺍﺻﻝ ﻣﻊ ﺍﻟﺟﻬﺎﺯ ﺑﺎﺳﺗﺧﺩﺍﻡ ﻫﺎﺗﻑ ﺫﻛﻲ LG ThinQ ﻳﺳﻣﺢ ﺗﻁﺑﻳﻖ LG ThinQ ﻣﺯﺍﻳﺎ ﺗﻁﺑﻳﻖ...
- Page 51 ar_main.book.book Page 26 Thursday, December 10, 2020 9:16 AM ﺍﻟﺗﺷﻐﻳﻝ ﻣﻼﺣﻅﺔ ﻭﻗﺕ ﺍﻟﺗﺄﺧﻳﺭ ﻫﻭ ﻭﻗﺕ ﺍﻧﺗﻬﺎء ﺍﻟﺑﺭﻧﺎﻣﺞ، ﻭﻟﻳﺱ ﻭﻗﺕ ﺍﻟﺑﺩء. ﺭﺑﻣﺎ ﻳﺧﺗﻠﻑ ﻭﻗﺕ • .ﺍﻟﺗﺷﻐﻳﻝ ﺍﻟﻔﻌﻠﻲ ﺑﺳﺑﺏ ﺩﺭﺟﺔ ﺣﺭﺍﺭﺓ ﺍﻟﻣﺎء، ﻭﺍﻟﻣﻼﺑﺱ، ﻭﻋﻭﺍﻣﻝ ﺃﺧﺭﻯ ﺍﻟﻁﺎﻗﺔ ﻹﻟﻐﺎء ﻫﺫﻩ ﺍﻟﻭﻅﻳﻔﺔ، ﻳﺟﺏ ﺍﻟﺿﻐﻁ ﻋﻠﻰ ﺯﺭ •...
- Page 52 ar_main.book.book Page 25 Thursday, December 10, 2020 9:16 AM ﺍﻟﺗﺷﻐﻳﻝ ﺧﻳﺎﺭﺍﺕ ﻭﻭﻅﺎﺋﻑ ﺇﺿﺎﻓﻳﺔ ﺍﻟﻁﺎﻗﺔ ﺍﺿﻐﻁ ﻋﻠﻰ ﺍﻟﺯﺭ .ﻻ ﺗﺣﺩﺩ ﺑﺭﻧﺎﻣﺞ ﺍﻟﻐﺳﻳﻝ ﻭﻻ ﺗﺿﻑ ﺍﻟﻣﻧﻅﻑ • .ﻳ ُﻣﻛﻧﻙ ﺍﺳﺗﺧﺩﺍﻡ ﺍﻟﺧﻳﺎﺭﺍﺕ ﻭﺍﻟﻭﻅﺎﺋﻑ ﺍﻹﺿﺎﻓﻳﺔ ﻟﺗﺧﺻﻳﺹ ﺍﻟﺑﺭﺍﻣﺞ ﺗﺧﺻﻳﺹ ﺑﺭﻧﺎﻣﺞ ﺍﻟﻐﺳﻳﻝ ()ﺩﻭﺭﺍﻥ Spin ﺍﺿﻐﻁ ﻋﻠﻰ ﺍﻟﺯﺭ ﻳﺗﻣﻳﺯ...
- Page 53 ar_main.book.book Page 24 Thursday, December 10, 2020 9:16 AM ﺍﻟﺗﺷﻐﻳﻝ ﺳﺭﻋﺔ ﺍﻟﺩﻭﺭﺍﻥ ﺍﻟﻘﺻﻭﻯ ﺍﻟﻘﺎﺑﻠﺔ ﻟﻠﺗﺣﺩﻳﺩ ﺳﺭﻋﺔ ﺍﻟﺩﻭﺭﺍﻥ ﺍﻟﺑﺭﻧﺎﻣﺞ ﺍﻟﻣﺗﺎﺡ ﺍﻻﻓﺗﺭﺍﺿﻲ 0001 دورة ﻓﻲ اﻟدﻗﯾﻘﺔ ﺟﻣﻳﻊ ()ﺍﻟﻘﻁﻥ Cotton 0001 دورة ﻓﻲ اﻟدﻗﯾﻘﺔ ﺟﻣﻳﻊ ()ﻣﻼﺑﺱ ﻗﻁﻧﻳﺔ ﻛﺑﻳﺭﺓ Cotton Large 0001 دورة ﻓﻲ اﻟدﻗﯾﻘﺔ ﺟﻣﻳﻊ...
- Page 54 ar_main.book.book Page 23 Thursday, December 10, 2020 9:16 AM ﺍﻟﺗﺷﻐﻳﻝ ﺑﺭﻧﺎﻣﺞ ﺍﻟﻘﻁﻥ ﺑﺩﺭﺟﺔ ﺣﺭﺍﺭﺓ ﻗﻳﺎﺳﻳﺔ ﺑﺭﻧﺎﻣﺞ ﺍﻟﻘﻁﻥ ﺑﺩﺭﺟﺔ ﺣﺭﺍﺭﺓ ﻗﻳﺎﺳﻳﺔ ﺩﺭﺟﺔ ﻣﺋﻭﻳﺔ (ﺩﺭﺟﺔ ﻣﺋﻭﻳﺔ )ﻧﺻﻑ ﺣﻣﻭﻟﺔ ﻧﺻﻑ ﺣﻣﻭﻟﺔ ﺣﻣﻭﻟﺔ ﻛﺎﻣﻠﺔ (ﺍﺳﺗﻬﻼﻙ ﺍﻟﻣﻳﺎﻩ ﺃﺛﻧﺎء ﺩﻭﺭﺓ ﺍﻟﺷﻁﻑ )ﺑﺎﻟﻠﺗﺭﺍﺕ (ﻣﺩﺓ ﻛﻝ ﺩﻭﺭﺓ ﺷﻁﻑ )ﺑﺎﻟﺩﻗﺎﺋﻖ ﻋﺩﺩ...
- Page 55 ar_main.book.book Page 22 Thursday, December 10, 2020 9:16 AM ﺍﻟﺗﺷﻐﻳﻝ ﺩﺭﺟﺔ ﻣﺋﻭﻳﺔ ﺇﻟﻰ ﺩﺭﺟﺔ ﻣﺋﻭﻳﺔ )ﻣﻥ ﻛﺟﻡ ﺍﻟﺣﺩ ﺍﻷﻗﺻﻰ ﻟﻠﺣﻣﻭﻟﺔ ()ﺍﻟﺻﻭﻑ Wool (ﺩﺭﺟﺔ ﻣﺋﻭﻳﺔ ﻣﻧﺎﺳﺏ ﻟﻠﻣﻼﺑﺱ ﺍﻟﺭﻗﻳﻘﺔ ﺍﻟﺗﻲ ﻳﻣﻛﻥ ﻏﺳﻠﻬﺎ ﺑﺎﻟﻳﺩ ﺃﻭ ﺩﺍﺧﻝ ﺍﻟﻐﺳﺎﻟﺔ، ﻣﺛﻝ ﺍﻟﺻﻭﻑ ﻭﺍﻟﻣﻼﺑﺱ ﺍﻟﺩﺍﺧﻠﻳﺔ ﻭﺍﻟﻔﺳﺎﺗﻳﻥ ﻭﻏﻳﺭﻫﺎ ﻣﻥ ﺍﻟﻣﻼﺑﺱ ﺍﻟﻭﺻﻑ...
- Page 56 ar_main.book.book Page 21 Thursday, December 10, 2020 9:16 AM ﺍﻟﺗﺷﻐﻳﻝ ﺟﺩﻭﻝ ﺍﻟﺑﺭﺍﻣﺞ ﺑﺭﻧﺎﻣﺞ ﺍﻟﻐﺳﻳﻝ ﺩﺭﺟﺔ ﻣﺋﻭﻳﺔ ﺇﻟﻰ ﺩﺭﺟﺔ ﻣﺋﻭﻳﺔ )ﻣﻥ ﺍﻟﺣﺩ ﺍﻷﻗﺻﻰ ﻟﻠﺣﻣﻭﻟﺔ: ﻣﻘﻧﻥ ()ﺍﻟﻘﻁﻥ Cotton (ﺩﺭﺟﺔ ﻣﺋﻭﻳﺔ .ﻳﻘﻭﻡ ﺑﻐﺳﻝ ﺍﻟﻐﺳﻳﻝ ﺍﻟﻣﺗﺳﺦ ﺍﻟﻌﺎﺩﻱ ﻣﻥ ﺧﻼﻝ ﺍﻟﺟﻣﻊ ﺑﻳﻥ ﺣﺭﻛﺎﺕ ﺣﻭﺽ ﺍﻟﻐﺳﻝ ﺍﻟﻣﺧﺗﻠﻔﺔ ﺍﻟﻭﺻﻑ...
- Page 57 ar_main.book.book Page 20 Thursday, December 10, 2020 9:16 AM ﺍﻟﺗﺷﻐﻳﻝ ﺇﺿﺎﻓﺔ ﻣﻧﻘﻲ ﺍﻟﻣﺎء ﻳ ُﻣﻛﻥ ﺍﺳﺗﺧﺩﺍﻡ ﻣﻧﻘﻲ ﺍﻟﻣﺎء ﻣﺛﻝ ﻣﻘﺎﻭﻡ ﺍﻟﺭﻭﺍﺳﺏ ﺍﻟﻛﻠﺳﻳﺔ، ﻟﻠﺣﺩ ﻣﻥ ﺍﺳﺗﺧﺩﺍﻡ .ﺍﻟﻣﻧﻅﻔﺎﺕ ﻓﻲ ﻣﻧﺎﻁﻖ ﻋﺳﺭ ﺍﻟﻣﺎء ﻳﺗﻌﻳﻥ ﻋﻠﻳﻙ ﺃﻭ ﻻ ً ﺇﺿﺎﻓﺔ ﺍﻟﻣﻧﻅﻑ ﺛﻡ ﻣﻧﻘﻲ ﺍﻟﻣﺎء. ﻭﻳﺗﻡ ﺍﻟﺗﻭﺯﻳﻊ ﻭﻓ ﻘ ً ﺎ ﻟﻠﻛﻣﻳﺔ •...
- Page 58 ar_main.book.book Page 19 Thursday, December 10, 2020 9:16 AM ﺍﻟﺗﺷﻐﻳﻝ ﻭﺟﻭﺩ ﺍﻟﻘﻠﻳﻝ ﻣﻥ ﺍﻟﻣﻳﺎﻩ ﺩﺍﺧﻝ ﺣﺟﻳﺭﺍﺕ ﺍﻟﻣﻭﺯﻉ ﻓﻲ ﻧﻬﺎﻳﺔ ﺍﻟﺩﻭﺭﺓ ﺃﻣﺭ • .ﺭﺍﺟﻊ ﻣﻠﺻﻖ ﺍﻟﻣﻼﺑﺱ، ﻗﺑﻝ ﺇﺿﺎﻓﺔ ﺍﻟﻣﻧﻅﻑ ﻭﺍﺧﺗﻳﺎﺭ ﺩﺭﺟﺔ ﺣﺭﺍﺭﺓ ﺍﻟﻣﺎء • .ﻁﺑﻳﻌﻲ :ﺍﺳﺗﺧﺩﻡ ﺍﻟﻣﻧﻅﻔﺎﺕ ﺍﻟﻣﺧﺻﺻﺔ ﻟﻛﻝ ﻧﻭﻉ ﻣﻥ ﺍﻟﻣﻼﺑﺱ •...
- Page 59 ar_main.book.book Page 18 Thursday, December 10, 2020 9:16 AM ﺍﻟﺗﺷﻐﻳﻝ ﺗﺟﻬﻳﺯ ﺣﻣﻭﻟﺔ ﺍﻟﻐﺳﻳﻝ ﻓﺣﺹ ﺍﻟﻣﻼﺑﺱ ﻗﺑﻝ ﻭﺿﻊ ﺍﻟﺣﻣﻭﻟﺔ ﺍﺟﻣﻊ ﺑﻳﻥ ﺍﻷﻏﺭﺍﺽ ﺍﻟﻛﺑﻳﺭﺓ ﻭﺍﻟﺻﻐﻳﺭﺓ ﻓﻲ ﺍﻟﺣﻣﻭﻟﺔ. ﻭﺿﻊ ﺍﻷﻏﺭﺍﺽ • ﺍﻓﺭﺯ ﺣﻣﻭﻟﺔ ﺍﻟﻐﺳﻳﻝ ﻟﺗﺣﺻﻝ ﻋﻠﻰ ﺃﻓﺿﻝ ﺍﻟﻧﺗﺎﺋﺞ، ﻭﺑﻌﺩﻫﺎ ﻗﻡ ﺑﺗﺟﻬﻳﺯ ﺍﻟﻣﻼﺑﺱ . ً ﺍﻟﻛﺑﻳﺭﺓ ﺃﻭ ﻻ .ﺣﺳﺏ...
- Page 60 ar_main.book.book Page 17 Thursday, December 10, 2020 9:16 AM ﺍﻟﺗﺷﻐﻳﻝ ﺍﻟﻭﺻﻑ ﺷﺎﺷﺔ ﺍﻟﻌﺭﺽ ﺗﻌﺭﺽ ﺷﺎﺷﺔ ﺍﻟﻌﺭﺽ ﺍﻹﻋﺩﺍﺩﺍﺕ، ﻭﺍﻟﻭﻗﺕ ﺍﻟﻣﺗﺑﻘﻲ ﺍﻟ ﻣ ُ ﻘﺩﺭ، ﻭﺍﻟﺧﻳﺎﺭﺍﺕ، ﻭﺭﺳﺎﺋﻝ ﺍﻟﺣﺎﻟﺔ. ﻋﻧﺩﻣﺎ ﻳﺗﻡ ﺗﺷﻐﻳﻝ ﺍﻟﺟﻬﺎﺯ، ﺳﺗﺿﻲء ﺍﻹﻋﺩﺍﺩﺍﺕ • .ﺍﻻﻓﺗﺭﺍﺿﻳﺔ ﻓﻲ ﺷﺎﺷﺔ ﺍﻟﻌﺭﺽ .ﺑﻳﻧﻣﺎ ﻳﺗﻡ ﺍﺳﺗﺷﻌﺎﺭ ﻭﺯﻥ ﺍﻟﺣﻣﻭﻟﺔ ﺗﻠﻘﺎﺋ ﻳ ًﺎ، ﺗﻭﻣﺽ ﺍﻟﺷﺎﺷﺔ ﺍﻟﻣﻭﺟﻭﺩﺓ ﻋﻠﻰ ﻟﻭﺣﺔ ﺍﻟﺗﺣﻛﻡ •...
- Page 61 ar_main.book.book Page 16 Thursday, December 10, 2020 9:16 AM ﺍﻟﺗﺷﻐﻳﻝ ﻟﻭﺣﺔ ﺍﻟﺗﺣﻛﻡ .ﻗﺩ ﺗﺧﺗﻠﻑ ﻟﻭﺣﺔ ﺍﻟﺗﺣﻛﻡ ﺍﻟﺣﻘﻳﻘﺔ ﻣﻥ ﻁﺭﺍﺯ ﻵﺧﺭ ﺧﻭﺍﺹ ﻟﻭﺣﺔ ﺍﻟﺗﺣﻛﻡ ﺍﻟﻭﺻﻑ ﺯﺭ ﺍﻟﺗﺷﻐﻳﻝ/ﺇﻳﻘﺎﻑ ﺍﻟﺗﺷﻐﻳﻝ ﺍﻟﻁﺎﻗﺔ .ﺍﺿﻐﻁ ﻋﻠﻰ ﻫﺫﺍ ﺍﻟﺯﺭ ﻟﺗﺷﻐﻳﻝ ﺍﻟﻐﺳﺎﻟﺔ • ﻣﻘﺑﺽ ﺍﻟﺑﺭﻧﺎﻣﺞ .ﺗﺗﻭﻓﺭ ﺍﻟﺑﺭﺍﻣﺞ ﻭﻓ ﻘ ً ﺎ ﻟﻧﻭﻉ ﺍﻟﻣﻼﺑﺱ •...
- Page 62 ar_main.book.book Page 15 Thursday, December 10, 2020 9:16 AM ﺍﻟﺗﺷﻐﻳﻝ ﺍﻟﺗﺷﻐﻳﻝ ﻧﻅﺭﺓ ﻋﺎﻣﺔ ﻋﻠﻰ ﺍﻟﺗﺷﻐﻳﻝ .ﺍﺧﺗﺭ ﺩﻭﺭﺓ ﺍﻟﻐﺳﻳﻝ ﺍﻟﻣﻁﻠﻭﺑﺔ ﺍﺿﻐﻁ ﻋﻠﻰ ﺯﺭ ﺍﻟﺩﻭﺭﺓ ﺑﺷﻛﻝ ﻣﺗﻛﺭﺭ ﺃﻭ ﻗﻡ ﺑﻠﻑ ﻣﻘﺑﺽ ﺍﺧﺗﻳﺎﺭ ﺍﻟﺩﻭﺭﺓ • .ﺣﺗﻰ ﻳﺗﻡ ﺍﺧﺗﻳﺎﺭ ﺍﻟﺩﻭﺭﺓ ﺍﻟﻣﻁﻠﻭﺑﺔ ﺍﺳﺗﺧﺩﺍﻡ ﺍﻟﺟﻬﺎﺯ ﺍﺧﺗﺭ ﺍﻵﻥ ﺩﺭﺟﺔ ﺣﺭﺍﺭﺓ ﺍﻟﻐﺳﻳﻝ ﻭﺳﺭﻋﺔ ﺍﻟﺩﻭﺭﺍﻥ. ﺍﻧﺗﺑﻪ ﺇﻟﻰ ﻣﻠﺻﻖ •...
- Page 63 ar_main.book.book Page 14 Thursday, December 10, 2020 9:16 AM ﺍﻟﺗﺭﻛﻳﺏ .ﻋﻧﺩ ﺗﺭﻛﻳﺏ ﺧﺭﻁﻭﻡ ﺍﻟﺗﺻﺭﻳﻑ ﻓﻲ ﺍﻟﺑﺎﻟﻭﻋﺔ، ﺃﺣﻛﻡ ﺗﺛﺑﻳﺗﻪ ﺑﺎﺳﺗﺧﺩﺍﻡ ﺳﻠﺳﻠﺔ • ﻣﻼﺣﻅﺔ ﺑﻌﺩ ﺍﻻﻧﺗﻬﺎء ﻣﻥ ﺍﻟﺗﻭﺻﻳﻝ، ﻭﻓﻲ ﺣﺎﻟﺔ ﻭﺟﻭﺩ ﺗﺳﺭﺏ ﻣﺎء ﻣﻥ ﺍﻟﺧﺭﻁﻭﻡ، ﻛﺭﺭ • ﺍﻟﺧﻁﻭﺍﺕ ﻧﻔﺳﻬﺎ. ﺍﺳﺗﺧﺩﻡ ﺍﻷﻧﻭﺍﻉ ﺍﻷﻛﺛﺭ ﺗﻘﻠﻳﺩﻳﺔ ﻟﺻﻧﺑﻭﺭ ﺇﻣﺩﺍﺩ ﺍﻟﻣﻳﺎﻩ. ﺇﺫﺍ ﻛﺎﻥ...
- Page 64 ar_main.book.book Page 13 Thursday, December 10, 2020 9:16 AM ﺍﻟﺗﺭﻛﻳﺏ ﺍﺩﻓﻊ ﺍﻟﻣﺣﻭﻝ ﺇﻟﻰ ﻁﺭﻑ ﺍﻟﺻﻧﺑﻭﺭ ﺑﺣﻳﺙ ﺗﺷﻛﻝ ﺍﻟﺳﺩﺍﺩﺓ ﺍﻟﻣﻁﺎﻁﻳﺔ ﻭﺻﻠﺔ ﺍﺩﻓﻊ ﺍﻟﻣﺣﻭﻝ ﺇﻟﻰ ﻁﺭﻑ ﺍﻟﺻﻧﺑﻭﺭ ﺑﺣﻳﺙ ﻳﺗﻡ ﺗﻭﺻﻳﻝ ﺍﻟﺳﺩﺍﺩﺓ ﺍﻟﻣﻁﺎﻁﻳﺔ .ﻣﻧﻳﻌﺔ ﻟﻠﻣﺎء. ﺃﺣﻛﻡ ﺭﺑﻁ ﻣﺳﺎﻣﻳﺭ ﺍﻟﺗﺛﺑﻳﺕ ﺍﻷﺭﺑﻌﺔ ﻭﺍﻟﻠﻭﺣﺔ ﺍﻟﺣﻠﻘﻳﺔ ﻟﻠﻣﺣﻭﻝ .ﻟﺗﺻﺑﺢ...
- Page 65 ar_main.book.book Page 12 Thursday, December 10, 2020 9:16 AM ﺍﻟﺗﺭﻛﻳﺏ ﻻ ﺗﺳﺗﺧﺩﻡ ﺍﻟﻣﻌﺩﺍﺕ ﺍﻵﻟﻳﺔ ﻣﺛﻝ ﺍﻟﻛﻣﺎﺷﺔ ﻹﺣﻛﺎﻡ ﺭﺑﻁ ﺧﺭﺍﻁﻳﻡ ﺍﻹﺩﺧﺎﻝ. ﺗﺣﻘﻖ • ﺇﺫﺍ ﻛﺎﻥ ﻣﻥ ﺍﻟﺻﻌﺏ ﻭﺿﻊ ﺍﻟﺷﺭﺍﺋﺢ ﺍﻟﻣﺎﻧﻌﺔ ﻟﻼﻧﺯﻻﻕ ﺗﺣﺕ ﺍﻷﺭﺟﻝ • .ﻣﻥ ﺗﻭﺻﻳﻝ ﺍﻟﻁﺭﻑ ﺍﻟﻣﻧﺣﻧﻲ ﻓﻲ ﺧﺭﻁﻭﻡ ﺇﺩﺧﺎﻝ ﺍﻟﻣﻳﺎﻩ ﺑﺎﻟﺟﻬﺎﺯ ﺍﻷﻣﺎﻣﻳﺔ،...
- Page 66 ﻻ ﺗﻘﻡ ﺑﺗﺭﻛﻳﺏ ﺍﻟﻐﺳﺎﻟﺔ ﻋﻠﻰ ﻗﺎﻋﺩﺓ ﻋﻣﻭﺩ ﺃﻭ ﻣﻧﺻﺔ ﺃﻭ ﺳﻁﺢ ﻣﺭﺗﻔﻊ ﻣﺎ ﻟﻡ ﺗﻘﻡ • .ﺑﺻﻧﺎﻋﺗﻪ ﻟ ﻳ ُﺳﺗﺧﺩﻡ ﻣﻊ ﻫﺫﺍ ﺍﻟﻁﺭﺍﺯ LG Electronics ﺍﺳﺗﺧﺩﻡ ﻗﻁﻌﺔ ﻗﻣﺎﺵ ﺟﺎﻓﺔ ﻹﺯﺍﻟﺔ ﺍﻷﺟﺳﺎﻡ ﺍﻟﻐﺭﻳﺑﺔ ﻭﺍﻟﺭﻁﻭﺑﺔ • ﻭﺗﻧﻅﻳﻔﻬﺎ. ﻭﺇﺫﺍ ﻅﻝ ﺑﺎﻟﻣﻛﺎﻥ ﺑﻌﺽ ﺍﻟﺭﻁﻭﺑﺔ، ﻓﻘﺩ ﺗﻧﺯﻟﻖ ﺍﻟﺷﺭﺍﺋﺢ...
- Page 67 ar_main.book.book Page 10 Thursday, December 10, 2020 9:16 AM ﺍﻟﺗﺭﻛﻳﺏ ﺍﻟﺗﻭﺻﻳﻼﺕ ﺍﻟﻛﻬﺭﺑﺎﺋﻳﺔ , ﺍﻟﻣﻭﺟﻭﺩﻳﻥ ﺑﺎﻷﺳﻔﻝ، ﺑﺎﺳﺗﺧﺩﺍﻡ ﻣﻔﺗﺎﺡ ﺍﻟﺭﺑﻁ ﺍﺑﺩﺃ ﺑﻣﺳﻣﺎﺭﻱ ﺍﻟﻧﻘﻝ )ﺍﻟﻣﺭﻓﻖ( ﻟﻔﻙ ﺟﻣﻳﻊ ﻣﺳﺎﻣﻳﺭ ﺍﻟﻧﻘﻝ ﺑﺎﻟﻛﺎﻣﻝ ﻋﻥ ﻁﺭﻳﻖ ﺗﺩﻭﻳﺭﻫﺎ ﻓﻲ ﻋﻛﺱ .ﻻ ﺗﺳﺗﺧﺩﻡ ﺳﻠﻙ ﺇﻁﺎﻟﺔ ﻭﻻ ﻣﺣﻭ ﻻ ً ﻣﺯﺩﻭ ﺟ ً ﺎ •...
- Page 68 ar_main.book.book Page 9 Thursday, December 10, 2020 9:16 AM ﺍﻟﺗﺭﻛﻳﺏ ﻣﺗﻁﻠﺑﺎﺕ ﻣﻛﺎﻥ ﺍﻟﺗﺭﻛﻳﺏ (ﺍﻷﺭﺿﻳﺎﺕ ﺍﻟﺧﺷﺑﻳﺔ )ﺍﻷﺭﺿﻳﺎﺕ ﺍﻟﻣﻌﻠﻘﺔ ﻋﻧﺩ ﺗﺭﻛﻳﺏ ﺍﻟﺟﻬﺎﺯ ﻋﻠﻰ ﺃﺭﺿﻳﺎﺕ ﺧﺷﺑﻳﺔ ﺍﺳﺗﺧﺩﻡ ﺃﻛﻭﺍ ﺑ ًﺎ ﻣﻁﺎﻁﻳﺔ ﻟﻠﺣﺩ ﻣﻥ ﺗﺣﻘﻖ ﻣﻥ ﺍﻟﻣﻌﻠﻭﻣﺎﺕ ﺍﻟﺗﺎﻟﻳﺔ ﻗﺑﻝ ﺗﺭﻛﻳﺏ ﺍﻟﺟﻬﺎﺯ ﻟﻠﺗﺄ ﻛ ّ ﺩ ﻣﻥ ﺗﺭﻛﻳﺑﻪ ﻓﻲ ﺍﻟﻣﻛﺎﻥ ﺣﺩﻭﺙ...
- Page 69 .ﺗﺧﺗﻠﻑ ﺍﻟﻣﻠﺣﻘﺎﺕ ﺍﻟﻣﺭﻓﻘﺔ ﺗﺑ ﻌ ً ﺎ ﻟﻠﻣﻭﺩﻳﻝ ﺍﻟﺫﻱ ﺍﺷﺗﺭﻳﺗﻪ ﺧﺭﻁﻭﻡ ﺇﻣﺩﺍﺩ ﺍﻟﻣﺎء ﺍﻟﺑﺎﺭﺩ ﺷﺭﺍﺋﺢ ﻣﺎﻧﻌﺔ ﻟﻼﻧﺯﻻﻕ ﺩﻋﺎﻣﺔ ﻣﺭﻓﻘﻳﺔ ﻟﺗﺛﺑﻳﺕ ﺧﺭﻁﻭﻡ ﺍﻟﺗﺻﺭﻳﻑ ﻣﻔﺗﺎﺡ ﺭﺑﻁ ﺃﻏﻁﻳﺔ ﻟﺗﻐﻁﻳﺔ ﻓﺗﺣﺎﺕ ﻣﺳﺎﻣﻳﺭ ﺍﻟﻧﻘﻝ ﺣﺯﺍﻡ ﺍﻟﺭﺑﻁ ﺍﻟﻣﻭﺍﺻﻔﺎﺕ WF0710WHN ﺍﻟﻁﺭﺍﺯ ﻫﺭﺗﺯ 50/60 ،~ﻓﻭﻟﺕ ﻣﺻﺩﺭ ﺍﻟﻁﺎﻗﺔ 06 ﻛﺟم ﻭﺯﻥ ﺍﻟﻣﻧﺗﺞ...
- Page 70 ar_main.book.book Page 7 Thursday, December 10, 2020 9:16 AM ﺍﻟﺗﺭﻛﻳﺏ ﺍﻟﺗﺭﻛﻳﺏ ﺍﻷﺟﺯﺍء ﻭﺍﻟﻣﻭﺍﺻﻔﺎﺕ ﻣﻼﺣﻅﺔ .ﻳ ُﻣﻛﻥ ﺗﻐﻳﻳﺭ ﺍﻟﺷﻛﻝ ﻭﺍﻟﻣﻭﺍﺻﻔﺎﺕ ﺩﻭﻥ ﺍﻹﺧﻁﺎﺭ ﺑﺫﻟﻙ ﻣﻥ ﺃﺟﻝ ﺗﺣﺳﻳﻥ ﺟﻭﺩﺓ ﺍﻟﺟﻬﺎﺯ • ﺷﻛﻝ ﺍﻟﺟﻬﺎﺯ ﻣﻥ ﺍﻟﺧﻠﻑ ﺍﻟﺷﻛﻝ ﺍﻷﻣﺎﻣﻲ ﻟﻭﺣﺔ ﺍﻟﺗﺣﻛﻡ ﻗﺎﺑﺱ ﺍﻟﻁﺎﻗﺔ ﻣﺳﺎﻣﻳﺭ ﺍﻟﻧﻘﻝ ﺩﺭﺝ...
- Page 71 ﺍﺣﺭﺹ ﺩﺍﺋ ﻣ ً ﺎ ﻋﻠﻰ ﻋﺩﻡ ﻓﺻﻝ ﺍﻟﻁﺎﻗﺔ ﻋﻥ ﺍﻟﺟﻬﺎﺯ ﻣﻥ ﺧﻼﻝ ﺷﺩ ﻛﺎﺑﻝ ﺍﻟﻁﺎﻗﺔ. ﺍﺣﺭﺹ ﺩﺍﺋ ﻣ ً ﺎ ﻋﻠﻰ ﺍﻹﻣﺳﺎﻙ • .ﺑﻪ ﺑﺈﺣﻛﺎﻡ ﻭﻗﻡ ﺑﺟﺫﺑﻪ ﻣﻥ ﻣﺄﺧﺫ ﺍﻟﺗﻳﺎﺭ ﺍﻟﻛﻬﺭﺑﻲ ﻓﻲ ﻭﺿﻌﻳﺔ ﻣﺳﺗﻘﻳﻣﺔ ﺑﺗﻔﻛﻳﻙ ﺍﻟﺟﻬﺎﺯ ﺃﻭ LG Electronics ﻳﺟﺏ ﺃﻥ ﻳﻘﻭﻡ ﻓﻘﻁ ﻣﻭﻅﻑ ﺧﺩﻣﺔ ﻣﺅﻫﻝ ﻣﻥ ﻣﺭﻛﺯ ﺧﺩﻣﺔ ﺷﺭﻛﺔ • ﻓﻲ ﺣﺎﻝ ﻛﻧﺕ ﺗﻧﻘﻝ...
- Page 72 .ﻻ ﺗﻘﺗﺭﺏ ﺃﺑ ﺩ ًﺍ ﻣﻥ ﺍﻟﺟﻬﺎﺯ ﻓﻲ ﺃﺛﻧﺎء ﺗﺷﻐﻳﻠﻪ. ﺍﻧﺗﻅﺭ ﺣﺗﻰ ﻳﺗﻭﻗﻑ ﺣﻭﺽ ﺍﻟﻐﺳﻝ ﺗﻣﺎ ﻣ ً ﺎ • .ﻳﺟﺏ ﻋﺩﻡ ﻟﻣﺱ ﺍﻟﺑﺎﺏ ﺃﺛﻧﺎء ﺍﻟﺑﺭﺍﻣﺞ ﺫﺍﺕ ﺩﺭﺟﺔ ﺍﻟﺣﺭﺍﺭﺓ ﺍﻟﻣﺭﺗﻔﻌﺔ • LG Electronics ﻓﻲ ﺣﺎﻝ ﺗﺳﺭﺏ ﺍﻟﻣﻳﺎﻩ ﺃﻭ ﻓﻳﺿﻬﺎ ﻣﻥ ﺍﻟﺟﻬﺎﺯ، ﺍﻓﺻﻝ ﻣﻘﺑﺱ ﺍﻟﻁﺎﻗﺔ ﻭﺍﺗﺻﻝ ﺑﻣﺭﻛﺯ • .ﻟﺗﻘﺩﻳﻡ ﺍﻟﻣﻌﻠﻭﻣﺎﺕ ﺇﻟﻰ ﺍﻟﻌﻣﻼء...
- Page 73 ar_main.book.book Page 4 Thursday, December 10, 2020 9:16 AM ﺇﺭﺷﺎﺩﺍﺕ ﺍﻟﺳﻼﻣﺔ .ﻛﻳﻠﻭ ﺑﺎﺳﻛﺎﻝ ﻛﻳﻠﻭ ﺑﺎﺳﻛﺎﻝ ﻭ ﻳﺟﺏ ﺃﻥ ﻳﺗﺭﺍﻭﺡ ﺿﻐﻁ ﺇﺩﺧﺎﻝ ﺍﻟﻣﻳﺎﻩ ﻣﺎ ﺑﻳﻥ • ﺍﻟﺳﻌﺔ ﺍﻟﻘﺻﻭﻯ ﻛﺟﻡ ﺗﺑﻠﻎ ﺍﻟﺳﻌﺔ ﺍﻟﻘﺻﻭﻯ ﻓﻲ ﺑﻌﺽ ﺩﻭﺭﺍﺕ ﺍﻟﻣﻼﺑﺱ ﺍﻟﺟﺎﻓﺔ ﺍﻟﻣﻘﺭﺭ ﻏﺳﻠﻬﺎ ،ﻗﺩ ﺗﺗﻔﺎﻭﺕ ﺍﻟﺳﻌﺔ ﺍﻟﻘﺻﻭﻯ ﺍﻟﻣﻭﺻﻰ ﺍﺳﺗﺧﺩﺍﻣﻬﺎ ﻟﻛﻝ ﺑﺭﻧﺎﻣﺞ ﻣﻥ ﺑﺭﺍﻣﺞ ﺍﻟﻐﺳﻳﻝ. ﻟﻠﺣﺻﻭﻝ ﻋﻠﻰ ﺃﻓﺿﻝ ﻧﺗﺎﺋﺞ .ﻟﻠﺣﺻﻭﻝ...
- Page 74 ar_main.book.book Page 3 Thursday, December 10, 2020 9:16 AM ﺇﺭﺷﺎﺩﺍﺕ ﺍﻟﺳﻼﻣﺔ ﺇﺭﺷﺎﺩﺍﺕ ﺍﻟﺳﻼﻣﺔ ﺍﻗﺭﺃ ﺟﻣﻳﻊ ﺍﻹﺭﺷﺎﺩﺍﺕ ﻗﺑﻝ ﺍﻻﺳﺗﺧﺩﺍﻡ ﻳﺗﻣﺛﻝ ﺍﻟﻐﺭﺽ ﻣﻥ ﺇﺭﺷﺎﺩﺍﺕ ﺍﻟﺳﻼﻣﺔ ﺍﻟﺗﺎﻟﻳﺔ ﻓﻲ ﺍﻟﺣﻳﻠﻭﻟﺔ ﺩﻭﻥ ﻭﻗﻭﻉ ﺍﻟﻣﺧﺎﻁﺭ ﻏﻳﺭ ﺍﻟﻣﺗﻭﻗﻌﺔ ﺃﻭ ﺍﻷﺿﺭﺍﺭ .ﺍﻟﻧﺎﺟﻣﺔ ﻋﻥ ﺍﻟﺗﺷﻐﻳﻝ ﻏﻳﺭ ﺍﻵﻣﻥ ﺃﻭ ﻏﻳﺭ ﺍﻟﺻﺣﻳﺢ ﻟﻠﻣﻧﺗﺞ .ﻳﺗﻡ...
- Page 75 ﺗﺟﻬﻳﺯ ﺣﻣﻭﻟﺔ ﺍﻟﻐﺳﻳﻝ ................... ﺇﺿﺎﻓﺔ ﺍﻟﻣﻧﻅﻔﺎﺕ ﻭﺍﻟﻣﻭﺍﺩ ﺍﻟﻣﻧﻌﻣﺔ ......................ﺟﺩﻭﻝ ﺍﻟﺑﺭﺍﻣﺞ ................... ﺧﻳﺎﺭﺍﺕ ﻭﻭﻅﺎﺋﻑ ﺇﺿﺎﻓﻳﺔ ﺍﻟﻭﻅﺎﺋﻑ ﺍﻟﺫﻛﻳﺔ ....................LG ThinQ ﺗﻁﺑﻳﻖ ................ ()ﺍﻟﺗﺷﺧﻳﺹ ﺍﻟﺫﻛﻲ Smart Diagnosis ﺍﻟﺻﻳﺎﻧﺔ ﺍﻟﺗﻧﻅﻳﻑ ﺑﻌﺩ ﻛ ﻝ ّ ﻏ ﺳ ْﻠﺔ ..............................ﺗﻧﻅﻳﻑ ﺍﻟﺟﻬﺎﺯ ﺑﺻﻭﺭﺓ ﺩﻭﺭﻳﺔ ﻭﺍﻟﻘﻳﺎﻡ ﺑﺎﻟﺗﻔﺭﻳﻎ ﺍﻟﻁﺎﺭﻱء ﻟﻠﻣﺎء...
- Page 76 ﻗﺑﻝ ﺍﻟﺑﺩء ﻓﻲ ﺗﺭﻛﻳﺏ ﺍﻟﺟﻬﺎﺯ، ﺍﻗﺭﺃ ﻫﺫﻩ ﺍﻟﺗﻌﻠﻳﻣﺎﺕ ﺑﻌﻧﺎﻳﺔ. ﺣﻳﺙ ﺳﻳﺑﺳﻁ ﺫﻟﻙ ﻋﻣﻠﻳﺔ ﺍﻟﺗﺭﻛﻳﺏ ﻭﻳﺿﻣﻥ ﺗﺭﻛﻳﺏ ﺍﻟﺟﻬﺎﺯ ﺑﺷﻛﻝ ﺻﺣﻳﺢ ﻭﺁﻣﻥ. ﻭﺍﺣﺗﻔﻅ ﺑﻬﺫﻩ ﺍﻟﺗﻌﻠﻳﻣﺎﺕ ﺑﺎﻟﻘﺭﺏ ﻣﻥ ﺍﻟﻣﻧﺗﺞ ﺑﻌﺩ .ﺍﻟﺗﺭﻛﻳﺏ ﻟﻠﺭﺟﻭﻉ ﺇﻟﻳﻬﺎ ﻓﻲ ﺍﻟﻣﺳﺗﻘﺑﻝ ﺍﻟﻌﺭﺑﻳﺔ WF0710WHN www.lg.com MFL71774438 ﺇﻝ ﺟﻲ ﻟﻼﻟﻛﺗﺭﻭﻧﻳﺎﺕ. ﻛﻝ ﺍﻟﺣﻘﻭﻕ ﻣﺣﻔﻭﻅﺔ...