
Related Manuals for Crosley CR7014A-BK


Summary of Contents for Crosley CR7014A-BK
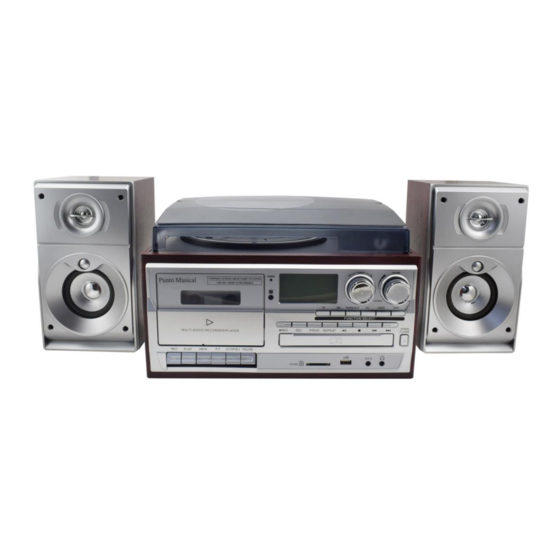
- Page 1 CLASSICAL TURNTABLE WITH AM/FM RADIO CD, CASSETTE RECORDER & USB/SD SLOT MODEL: CR7014A-BK Operating Instructions Manual...
-
Page 2: Important Safety Instructions
TO PREVENT FIRE OR SHOCK HAZARD, DO NOT USE THIS PLUG WITH AN EXTENSION CORD, RECEPTACLE OR OTHER OUTLET UNLESS THE BLADES CAN BE FULLY INSERTED TO PREVENT BLADE EXPOSURE. TO PREVENT FIRE OR SHOCK HAZARD, DO NOT EXPOSE THIS APPLIANCE TO RAIN OR MOISTURE. IMPORTANT SAFETY INSTRUCTIONS Please read these instructions and keep them for future reference. -
Page 3: Unpacking And Setup
Avoid installing this unit in places exposed to direct sunlight or close to heat radiating appliances such as electric heaters, on top of other stereo equipment that radiates too much heat, places lacking ventilation or dusty areas, places subject to constant vibration and/or humid or moist areas. Do not attempt to clean this unit with chemical solvents as this might damage the finish. -
Page 4: Location Of Controls And Indicators
LOCATION OF CONTROLS AND INDICATORS 1) Dust Cover 10) Function Selector Button 2) Cassette Door 11) CD/USB/SD Playback Control Button 3) Speaker 12) Disk Tray Door 4) Cassette Button 13) CD-Rom Open/close button 5) BT indication light 14) 3.5mm headphone socket 6) IR Remote Receiver 15) Auxiliary input 7) LCD Display Screen... -
Page 5: Remote Control
PHONOGRAPH 21) 45 rpm adaptor 22) Lift lever 23) Auto stop control 24) Tone arm lock 25) Speed selector (33/45/78 rpm) 26) Tone arm REMOTE CONTROL 27) Mute button 28) Program button 29) Repeat button 30) Function Mode button CD/USB/SD/BT 31) Skip down button 32) Play/Pause... -
Page 6: Listening To Radio
OPERATING INSTRUCTIONS Listening to radio Turn the volume knob in a clockwise direction to turn the equipment on. Use the function selector to select TUNER mode. Use the radio band selector to select the desired band (AM, FM or FM-Stereo). Turn and hold the tuning knob for a few seconds to tune into a radio station. -
Page 7: Phono Operation
Phono Operation 1. Open the dust cover and turn the volume knob clockwise to turn the equipment on. 2. Use the function selector to select PHONO mode. 3. Set the speed selector to the appropriate position: 33, 45 or 78, depending on the record to be played. -
Page 8: Phono Encoding
Phono encoding 1. Set the function button to PHONO mode and then insert a memory device (USB drive, SD or MMC card). 2. Put your record onto the turntable and get it ready for playback. 3. Press the record REC button. It will take about 3 - 4 seconds to read the memory device, then the USB or SD icon will be flashing on the LC display. - Page 9 3. Cassette PlayBack Control Operating 1) TAPE Play: a) Function Choose to “TAPE” mode---Push “EJECT” key under tape----Open cassette tape door-----put your tape into cassette dock----Manual close the tape door –Press “PLAYER” Key ------ To adjust the volume level for your preference, turn the volume knob to the right or left b) Press “PAUSE”...
- Page 10 Cassette encoding 1. Set the function button to TAPE/AUX mode and then insert a memory device (USB drive, SD or MMC card). 2. Press the record REC button, it will take 3 - 4 second to read the memory device, then the USB or SD icon will be flashing on the LC display.
- Page 11 CD Operation 1. Turn the volume knob clockwise to turn the equipment on. 2. Press the CD-Rom switch ,then the disk tray door opens . 3. Place the CD face up inside ,making sure it is fully placed .Then press the CD-Rom switch again ,the disk tray door closes .
-
Page 12: Playback Controls
2. Following the illustration below, insert a USB device face up into the USB port, making sure it is fully inserted. Alternatively, insert a memory card in the direction of the arrow (as shown on the label next to the memory card slot), making sure to insert it straight without bending. - Page 13 Important notes ⚫ The system can detect and read files in MP3 / WMA format only via the USB port or SD card slot. ⚫ You can connect an MP3 player to the system via the USB socket, however, some MP3 players may not be able to play via the USB socket.
-
Page 14: Copying A Folder
Copying a single file/track 1. Insert a USB storage device and SD/MMC card, then select USB/SD mode (as described previously). REC button during playback of the track you want to copy: “ONE” 2. Press the record will be flashing on the display. Press the record REC button again to confirm. - Page 15 Deleting files from the USB device / SD card The system is able to erase files stored on the USB drive or SD card. You can delete a single file/track, a folder of files/tracks, or all files/tracks on the storage medium. Deleting a single file/track 1.
- Page 16 NOTE: Pressing the delete DEL button will completely delete all files/tracks on the USB device or SD card. Removing the USB device / SD card ⚫ First move the function selector to another mode (tuner, phono, tape), then turn the volume knob counterclockwise to turn off the power.
- Page 17 3. Press the skip up or skip down button to select the desired mode (USB or SD) for encoding, then press the record REC button again to confirm. (You can skip this step if only a USB drive or an SD/MMC card is inserted.) 4.
- Page 18 Bluetooth searching automatically, if not, tap the relate selection to manually enter to searching mode. 4-Your Bluetooth device show “crosley” in list, and then select it for pairing. 5- You can start to music play on your Bluetooth device when the device is in paired and show connected.
-
Page 19: Troubleshooting Guide
Troubleshooting Guide If you are experiencing problems with your USB Turntable with Cassette Deck and Radio, check in the section below whether there are any quick and easy checks you can do that may help you solve the problem. If you cannot solve the problem by yourself, contact our after-sales support line for advice. -
Page 20: Fcc Warning Statement
FCC WARNING STATEMENT Changes or modifications not expressly approved by the party responsible for compliance could void the user’s authority to operate the equipment. This equipment has been tested and found to comply with the limits for a Class B digital device, pursuant to Part 15 of the FCC Rules.