LG LFC24770 Series Owner's Manual
French door refrigerator
Hide thumbs
Also See for LFC24770 Series:
- Owner's manual (99 pages) ,
- Service manual (66 pages) ,
- Owner's manual (50 pages)
Table of Contents
Advertisement
Available languages
Available languages
OWNER'S MANUAL
FRENCH DOOR
REFRIGERATOR
Please read this owner's manual thoroughly before
operating and keep it handy for reference at all times.
Model Name/Nombre del modelo
LFC22770**
LFC24770**
LFNS22520*
P/No.: MFL67851601-9
**
=color number/número de color
LFC24786**
GF24BGS
LFCS22520* GF22BGSK
GF22BGS
GM-B223RSNM
Copyright © 2013 - 2017 LG Electronics Inc. All Rights Reserved.
GF24BGSK
GF22BGSK1
ww w.lg.com
Advertisement
Chapters
Table of Contents

Related Manuals for LG LFC24770 Series


Summary of Contents for LG LFC24770 Series
- Page 1 Model Name/Nombre del modelo =color number/número de color GF22BGS GF24BGSK LFC24786** LFC22770** LFC24770** GF24BGS GF22BGSK1 GM-B223RSNM LFNS22520* LFCS22520* GF22BGSK ww w.lg.com P/No.: MFL67851601-9 Copyright © 2013 - 2017 LG Electronics Inc. All Rights Reserved.
-
Page 3: Table Of Contents
TABLE OF CONTENTS TABLE OF CONTENTS PRODUCT FEATURES HOW TO USE Before Use IMPORTANT SAFETY Control Pad INSTRUCTIONS - Control Pad Features Automatic Icemaker COMPONENTS Refrigerator Exterior - Normal Sounds You May Hear Refrigerator Interior - Preparing for Vacation Storing Food INSTALLATION - Food Preservation Location Installation Overview... -
Page 4: Product Features
PRODUCT FEATURES PRODUCT FEATURES * Depending on the model, some of the following functions may not be available. DOOR ALARM The Door Alarm function is designed to prevent refrigerator malfunctioning that could occur if a refrigerator door or freezer drawer remains open. If a refrigerator door or freezer drawer is left open for more than 60 seconds, a warning alarm sounds at 30 second intervals. -
Page 5: Important Safety Instructions
IMPORTANT SAFETY INSTRUCTIONS IMPORTANT SAFETY INSTRUCTIONS READ ALL INSTRUCTIONS BEFORE USING THE APPLIANCE. This guide contains many important safety messages. Always read and obey all safety messages. This is the safety alert symbol. It alerts you to safety messages that inform you of hazards that can kill or hurt you or others, or cause damage to the product. - Page 6 IMPORTANT SAFETY INSTRUCTIONS READ ALL INSTRUCTIONS BEFORE USING THE APPLIANCE. safety precautions should be followed, including the following: y This product is not to be used for special purposes such as the storage of medicine or test materials or for use on ships, etc. y Unplug the power plug before cleaning or repairing the refrigerator, when finished reconnects refrigerator and reset the control of thermostat (refrigerator or freezer) to the desire position.
- Page 7 If you notice a chemical or burning plastic smell or see smoke, unplug the refrigerator imme- diately and contact your LG Electronics Service Center. WARNING: This product contains chemicals known to the State of California to cause cancer and birth defects or other reproductive harm.
-
Page 8: Components
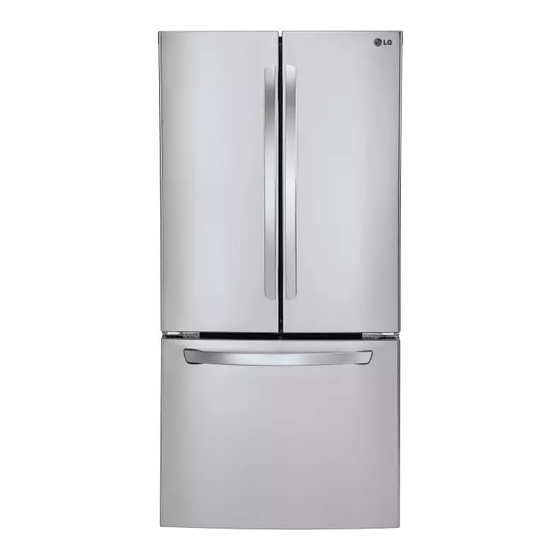
COMPONENTS COMPONENTS Use this page to become more familiar with the parts and features of your refrigerator. Page references are included for your convenience. Refrigerator Exterior Handle O p e n s a n d c l o s e s the door. -
Page 9: Refrigerator Interior
COMPONENTS Refrigerator Interior * Optional Parts : Not included with all models. LED interior lamps Adjustable Refrigerator Shelf The interior lamps light up the inside The shelves in your refrigerator are of the refrigerator. adjustable to meet your individual storage needs. (Half or full Type) Dairy Product Bin U s e d t o p r e s e r ve dairy products. -
Page 10: Installation
INSTALLATION INSTALLATION Installation Overview to another location. Unpacking your 2 Choosing the proper 3 Disassembling/Assembling refrigerator location 4 Connecting the water 5 Leveling and Door supply and water line Alignment “This appliance is intended to be used in household and similar applications such as: motels and others residential type environments. - Page 11 INSTALLATION Specifications The appearance and specifications listed in this manual may vary due to constant product improvements. 32 3/4" (W) X 35 1/2" (D) X 69 7/8" (H), 46" (D w/ door open) Width 32 3/4 in. 833 mm (W) X 901 mm (D) X 1775.5 mm (H), 1168.5 mm (D w/ (833 mm) door open) Dimensions...
-
Page 12: Unpacking Your Refrigerator
INSTALLATION Unpacking Your Refrigerator Choosing the Proper Location WARNING Select a place where a water supply can be easily connected for the automatic Use two or more people to move and icemaker. install the refrigerator. Failure to do so NOTE can result in back or other injury. -
Page 13: Ambient Temperature
INSTALLATION Ambient Temperature Removing/Assembling the Install this appliance in an area where the tem- Refrigerator Door Handles perature is between 55°F (13°C) and 110°F (43°C). If the temperature around the appliance NOTE is too low or high, cooling ability may be ad- versely affected. -
Page 14: Removing/Assembling The Freezer Drawer Handle
INSTALLATION Removing/Assembling the Removing/Assembling the Freezer Drawer Handle Doors and Drawers Removing the Handle When it is necessary to move the refrigerator through a narrow opening, removing the doors Loosen the set screws located on the is the recommended procedure. lower side of the handle with a 3/32 in. -
Page 15: Removing The Left Refrigerator Door
INSTALLATION Removing the Left Refrigerator Door R emove the top hinge cover screws . Lift Remove the three bolts using a 10mm or the hook (not visible), located at the bottom hinge. Set parts aside. of the front side of the cover head screwdriver. -
Page 16: Removing The Right Refrigerator Door
INSTALLATION Removing the Right Refrigerator Door R emove the top hinge cover screws . Lift Lift the door from the middle hinge pin and the hook (not visible), located at the bottom remove the door. of the front side of the cover . -
Page 17: Assembling The Right Refrigerator Door
INSTALLATION Assembling the Right Refrigerator Door Install the right-side door first. Make sure that the plastic sleeve is Replace the hinge cover . Insert and inserted in the bottom of the door. Lower tighten the cover screws the door onto the middle hinge pin as shown in the figure. -
Page 18: Assembling The Left Refrigerator Door
INSTALLATION Assembling the Left Refrigerator Door Install the left refrigerator door after the right door is installed. Make sure that the plastic sleeve is inserted Replace the grounding screw in the bottom of the door. Inst all the refrigerator door onto the middle hinge. Reconnect the wire harness Replace the hinge cover . -
Page 19: Removing The Freezer Drawers
INSTALLATION Removing the Freezer Drawers The top, middle and bottom drawers are all Slide out the bar. removed in the same way. In the following freezer drawer is not shown for clarity. CAUTION y Use two or more people to remove and install the freezer drawer. -
Page 20: Assembling The Freezer Drawers
INSTALLATION Assembling the Freezer Drawers The top, middle and bottom drawers are all Reinstall the bar in the drawer supports. assembled in the same way. Using t wo hands, pull out both rails simultaneously until they are fully extended. tighten the screws located on both sides. Grasp the drawer on each side and hook the drawer supports into the rail tabs located on both sides. -
Page 21: Connecting The Water Line
INSTALLATION Connecting the Water Line (Ice Maker installed only) Before You Begin CAUTION This water line installation is not covered by the Wear eye protection during installation to refrigerator warranty. Follow these instructions prevent injury. carefully to minimize the risk of expensive water damage. - Page 22 INSTALLATION y If your existing copper water line will need an adapter (available at plumbing supply stores) to connect the water line to the refrigerator OR with a tube cutter and then use a y Shutoff valve to connect to the cold water line.
-
Page 23: Water Line Installation Instructions
INSTALLATION Water Line Installation Instructions FASTEN THE SHUTOFF VALVE WARNING pipe with the pipe clamp. y When using any electrical device (such Pipe Clamp as a power drill) during installation, be sure the device is battery powered, double insulated or grounded in a manner that will prevent the hazard of Vertical Cold S a d d l e - Ty p e... - Page 24 INSTALLATION CONNECT THE TUBING TO THE VALVLE 0 TURN THE WATER ON AT THE SHUTOFF VALVE Place the compression nut and ferrule (sleeve) for copper tubing onto the end of Tighten any connections that leak. valve. Make sure the tubing is fully inserted into the valve.
-
Page 25: Turning On The Power
INSTALLATION Turning On The Power Leveling and Door Alignment Leveling Plug in the refrigerator. After installing, plug the refrigerator’s power cord into a 3-prong grounded outlet and push Your refrigerator has two front leveling legs— one on the right and one on the left. Adjust the legs to alter the tilt from front-to-back or side-to- side. -
Page 26: Door Alignment
INSTALLATION Door Alignment Identify your Refrigerator Doors alignment type according the accesory included in your owner’s manual. Door Alignment (Type 1) Door Alignment (Type 2) Both the left and right refrigerator doors have If the spacing between the doors is uneven, follow the instructions below to align them: an adjustable nut, located on the bottom hinge, to raise and lower them to align properly. -
Page 27: How To Use
HOW TO USE HOW TO USE Before use Clean the refrigerator. shipping. CAUTION y Do not scratch the refrigerator with a sharp object or use a detergent that tape or adhesive from the refrigerator,. information on the rear surface of the refrigerator. NOTE Connect the power supply. -
Page 28: Control Pad
HOW TO USE Control Pad * Depending on the model, some of the following functions may not be available. Control Pad Features LED Display Indicator Door Control Button Door Door Alarm Refrigerator Temperature y W h e n p o w e r i s c o n n e c t e d t o t h e Indicates the set temperature of the refrigerator refrigerator, the door alarm is initially set compartment in Celsius (°C) or Fahrenheit (°F). -
Page 29: Automatic Icemaker
HOW TO USE Automatic Icemaker (Ice Maker installed only). (Freezer Room) * Depending on the model, some of the following functions may not be available. Ice is made in the automatic icemaker and sent to the dispenser. The icemaker will produce Power Switch Automatic 12 cubes per cycle—approximately 120 cubes... -
Page 30: Normal Sounds You May Hear
HOW TO USE Automatic Icemaker (continued) When You Should Turn the Icemaker Off y When the water supply will be shut off CAUTION for several hours. y The first ice produced may include y When the ice bin is removed for more particles or odor from the water supply than one or two minutes. -
Page 31: Storing Food
HOW TO USE Storing Food Food Preservation Location Store your food in the optimal space to enjoy the freshest taste. Dairy product bin (In some models) Vegetable storage (Crispers) Adjustable refrigerator Preserve vegetables shelf (Half of full type) and fruit. Adjustable shelves to meet your individual storage needs. -
Page 32: Food Storage Tips
HOW TO USE Food Storage Tips Storing Frozen Food * The following tips may not be applicable NOTE depending on the model. Check a freezer guide or a reliable cookbook Wrap or store food in the refrigerator in airtight for further information about preparing food and moisture-proof material unless otherwise for freezing or food storage times. -
Page 33: Humidity Controlled Crisper And Glide'n'serve
HOW TO USE Storing Frozen Food (continued) Humidity Controlled Crisper and Glide’N’Serve Packaging Humidity Controlled Crisper Successful freezing depends on correct packaging. When you close and seal the package, it must not allow air or moisture in or * Depending on the model, some of the out. -
Page 34: Detaching And Assembling The Storage Bins
HOW TO USE Detaching and Assembling the To Remove the Glass Storage Bins (Pantry drawer not shown for clarity) Glide’N’Serve and Humidity Lift up the glass under the crisper cover, and Controlled Crisper pull up and out. To remove the Humidity Controlled Crisper and the Glide’N’Serve, pull out the Crisper and Glide’N’Serve to full extension, lift the front up, and pull straight out. -
Page 35: Adjusting The Refrigerator Shelves
HOW TO USE Adjusting the Refrigerator CAUTION Shelves y D o n o t c l e a n g l a s s s h e l v e s w i t h wa r m wa t e r w h i l e t h ey a r e c o l d . The shelves in your refrigerator are adjustable to S h e l ve s m ay b r e a k i f ex p o s e d t o meet your individual storage needs. -
Page 36: Maintenance
MAINTENANCE MAINTENANCE Cleaning y Both the refrigerator and freezer sections defrost automatically; however, clean both sections about once a month to prevent odors. y Wipe up spills immediately. y Always unplug the refrigeration before cleaning. General Cleaning Tips Inside Walls (allow freezer to warm up so the cloth will not stick) y Unplug refrigerator or disconnect power. -
Page 37: Smart Diagnosis
If you experience problems with your refrigerator, After you hear three beeps, release the call to the LG service center. Only use the Smart Diagnosis feature when instructed to do so by Freezer button. -
Page 38: Troubleshooting
TROUBLESHOOTING TROUBLESHOOTING Review the Troubleshooting section before calling for service; doing so will save you both time and money. Problem Possible causes Solutions Refrigerator The refrigerator control is Turn the control ON. Refer to the Setting the and Freezer set to OFF (some models). Controls section for proper temperature settings. - Page 39 TROUBLESHOOTING Problem Possible causes Solutions Refrigerator or Refrigerator was recently It may take up to 24 hours for each compartment Freezer section installed. to reach the desired temperature. is too warm. The air vents are blocked. Locate air vents by using your hand to sense Cold air circulates from the freezer to the fresh food section and back again...
- Page 40 TROUBLESHOOTING Problem Possible causes Solutions Interior Doors are opened often or When the doors are opened often or for long moisture for long periods of time. periods of time, warm, humid air enters the buildup. compartment. This raises the temperature and moisture level within the compartment.
- Page 41 TROUBLESHOOTING Problem Possible causes Solutions Frost or Condensation from food This is normal for food items with a high water ice crystals with a high water content content. on frozen has frozen inside of the food (inside food package. of sealed Food has been left in the Do not store food items with high water content in package).
- Page 42 TROUBLESHOOTING Problem Possible causes Solutions Icemaker is not Refrigerator was recently It may take up to 24 hours for each compartment to making enough installed or icemaker reach the desired temperature and for the icemaker ice (continued). recently connected. to begin making ice. (Ice Maker installed only).
- Page 43 TROUBLESHOOTING Problem Possible causes Solutions Clicking The defrost control will click when Normal Operation the automatic defrost cycle begins and ends. The thermostat control (or refrigerator control on some models) will also click when cycling Rattling Rattling noises may come from the Normal Operation on the back of the unit, or items stored on top of or around the...
- Page 44 TROUBLESHOOTING Problem Possible causes Solutions Doors will not Food packages are blocking Rearrange food containers to clear the door and close correctly the door open. door shelves. or pop open. Ice bin, crisper cover, pans, Push bins all the way in and put crisper cover, shelves, door bins, or pans, shelves and baskets into their correct baskets are out of position.
-
Page 45: Warranty
Should your LG Refrigerator (“Product”) fail due to a defect in materials or workmanship under normal home use, during the warranty period set forth below, LG will at its option repair or replace the product. This limited warranty is valid only to the original retail purchaser of the product and applies only when purchased and used within the United States including U.S. - Page 46 WARRANTY: Should your LG Refrigerator (“Product”) fail due to a defect in material or workmanship under normal home use during the warranty period set forth below, LG Canada will at its option repair or replace the Product upon receipt of proof of original retail purchase.
- Page 47 REFRIGERADOR DE PUERTA FRANCESA Lea cuidadosamente este manual del usuario antes de poner en funcionamiento el refrigerador, y téngalo a mano de referencia en todo momento. ww w.lg.com Copyright © 2013 - 2017 LG Electronics Inc. Todos los Derechos Reservados.
- Page 48 TABLA DE CONTENIDO TABLA DE CONTENIDO 24 Nivelación y alineación de las puertas FUNCIONES DEL PRODUCTO - Nivelación - Alineación de las puertas INSTRUCCIONES IMPOR- TANTES DE SEGURIDAD INSTRUCCIONES DE USO Antes de usar COMPONENTES Panel de control Parte exterior del refrigerador - Funciones del panel de control Parte interior del refrigerador Máquina de hielo automática...
-
Page 49: Funciones Del Producto
FUNCIONES DEL PRODUCTO FUNCIONES DEL PRODUCTO * Dependiendo del modelo, algunas de las siguientes funciones puede no estar disponible. ALARMA DE LA PUERTA La función de Alarma de la puerta está diseñada para prevenir el mal fun- cionamiento del refrigerador en caso de que una puerta del refrigerador o cajón del congelador permanecieran abiertos. -
Page 50: Instrucciones Importantes De Seguridad
INSTRUCCIONES IMPORTANTES DE SEGURIDAD INSTRUCCIONES IMPORTANTES DE SEGURIDAD LEA TODAS LAS INSTRUCCIONES ANTES DE UTILIZAR EL ELECTRODOMÉSTICO. Este manual contiene muchos mensajes de seguridad importantes. Lea y cumpla siempre todos los mensajes de seguridad. Este es el símbolo de alerta de seguridad. Le avisa de mensajes de seguridad que le informan de peligros de muerte o lesiones para usted o los demás, o que puedan dañar el producto. - Page 51 INSTRUCCIONES IMPORTANTES DE SEGURIDAD LEA TODAS LAS INSTRUCCIONES ANTES DE UTILIZAR EL ELECTRODOMÉSTICO. Para reducir el riesgo de incendio, descarga eléctrica o lesiones personales al utilizar el pro- ducto, se deben respetar una serie de precauciones básicas de seguridad, entre las que se incluyen las siguientes: riales de prueba, usar en barcos, etc.
- Page 52 Si nota olor de un producto químico, plástico quemado ó si ve humo, desenchufe el refrige- rador de inmediato y póngase en contacto con su Centro de Servicios de LG Electronics. ADVERTENCIA: Este producto contiene sustancias químicas conocidas por el Estado de California como causantes de cáncer, defectos de nacimiento u otros daños reproduc-...
-
Page 53: Componentes
COMPONENTES COMPONENTES Use esta página para familiarizarse con los componentes y funciones del refrigerador. Para su comodidad, se incluyen referencias a las páginas. Parte exterior del refrigerador Manija Abre y cierra la puerta Refrigerador Conserva los alimentos. Congelador Conser va los alimentos Manija Ez congelados. -
Page 54: Parte Interior Del Refrigerador
COMPONENTES Parte interior del refrigerador *Partes Opcionales: no incluidas en todos los modelos. Estante de refrigerador ajustable Lámparas interiores LED Los estantes del refrigerador son ajus- Las lámparas interiores iluminan el tables para satisfacer sus necesidades interior del refrigerador. personales de almacenamiento. (Medio tipo o completo) Bandeja para lácteos... -
Page 55: Instalación
INSTALACIÓN INSTALACIÓN Instrucciones generales de instalación Luego de comprar este producto o trasladarlo a otro lugar, lea primero las siguientes instrucciones de instalación. Desempaque del 2 Cómo elegir la ubicación 3 Montaje y desmontaje refrigerador más adecuada 4 Conexión del suministro 5 Nivelación y alineación de de agua y del conducto de las puertas... - Page 56 INSTALACIÓN Especificaciones La apariencia y especificaciones indicadas en este manual pueden variar debido a las constantes mejoras en el producto. 32 3/4" (ancho) X 35 1/2" (prof.) X 69 7/8" (alto), 46" (prof. c/ Ancho puerta abierta) 32 3/4 in. 833 mm (ancho) X 901 mm (prof.) X 1775,5 mm (alto), Dimensiones (833 mm)
-
Page 57: Desempaque Del Refrigerador
INSTALACIÓN Desempaque del refrigerador Cómo elegir la ubicación más adecuada ADVERTENCIA Seleccione un lugar en el que se pueda conectar fácilmente el suministro de agua El desplazamiento e instalación del para la máquina de hielo automática. refrigerador deben realizarse entre dos o más personas. -
Page 58: Temperatura Ambiente
INSTALACIÓN Temperatura ambiente Montaje y desmontaje de las manijas de la puerta del Instale este electrodoméstico en una zona donde la temperatura esté entre los 13°C (55°F) refrigerador y 43°C (110°F). Si la temperatura alrededor del NOTA electrodoméstico es demasiado baja o demasia- do alta, la capacidad de refrigeración se verá... -
Page 59: Montaje Y Desmontaje De La Manija De Las
INSTALACIÓN Montaje y desmontaje de la Montaje y desmontaje de las manija del cajón del congelador puertas y cajones Desmontaje de la manija Se recomienda desmontar las puertas cuando sea necesario trasladar el refrigerador a través ubicados de una abertura angosta. en la parte inferior de la manija con una llave Allen de 2,5 mm (3/32 pulg) y retire la ADVERTENCIA... -
Page 60: Desmontaje De La Puerta Izquierda Del Refrigerador
INSTALACIÓN Desmontaje de la puerta izquierda del refrigerador Retire los tres pernos con una llave de tubo de 10mm o 13/32 pulg. y extraiga hacia arri- R etire los tornillos de la cubierta de la bisa- ba la bisagra superior. Separe las piezas. gra superior . -
Page 61: Desmontaje De La Puerta Derecha Del Refrigerador
INSTALACIÓN Desmontaje de la puerta derecha del refrigerador Levante la puerta del pasador de la bisagra central y retire la puerta. R etire los tornillos de la cubierta de la bis- agra superior . Levante el enganche (no visible), ubicado en la parte inferior del lado frontal de la cubierta . -
Page 62: Montaje De La Puerta Derecha Del Refrigerador
INSTALACIÓN Montaje de la puerta derecha del refrigerador Instale primero la puerta del lado derecho. Asegúrese de que el mango plástico esté Vuelva a colocar la cubierta de la bisagra colocado en la parte inferior de la puerta. Inserte y apriete los tornillos de la cu- Baje la puerta sobre el pasador de la bisagra bierta central, tal como se muestra en la imagen. -
Page 63: Montaje De La Puerta Izquierda Del Refrigerador
INSTALACIÓN Montaje de la puerta izquierda del refrigerador Instale la puerta izquierda del refrigerador luego de instalar la puerta derecha. Asegúrese de que el mango plástico esté Apriete el tornillo de conexión a tierra colocado en la parte inferior de la puerta. Instale la puerta del refrigerador sobre la Reconecte el mazo de cables bisagra central. - Page 64 INSTALACIÓN D e s m o n t a j e d e l o s c a j o n e s d e l congelador Deslice la barra hacia afuera. Todos los cajones superior, medio e inferior se tes, no se muestra el cajón extraíble situado por encima del cajón del congelador para que la imagen sea más clara.
-
Page 65: Montaje De Los Cajones Del Congelador
INSTALACIÓN Montaje de los cajones del congelador Todos los cajones superior, medio e inferior se Vuelva a colocar la barra en los soportes del colocan del mismo modo. cajón. Con ambas manos, tire hacia afuera ambos rieles de manera simultánea hasta que se extiendan por completo. -
Page 66: Conexión De La Tubería De Agua
INSTALACIÓN Conexión de las tuberías de agua PRECAUCIÓN (Sólo con máquina de hielos instalada) Use gafas protectoras durante la instalación para evitar lesiones. Antes de empezar Esta instalación del conducto de agua no está Si la presión del agua procedente del sistema de cubierta por la garantía del refrigerador. - Page 67 INSTALACIÓN y Si el conducto de agua de cobre existente tiene una conexión abocinada en el ex- tremo, necesitará un adaptador (disponible en cualquier ferretería) para conectar el conducto de agua al refrigerador o puede cortar la conexión aboci- nada con un corta- tubos y, a despues, usar una tuerca de unión.
-
Page 68: Instrucciones Para La Instalación De
INSTALACIÓN Instrucciones para la instalación del . AJUSTE LA VÁLVULA DE CORTE tuberías de agua Ajuste la válvula de corte a la tubería de agua fría con la abrazadera para tubos. ADVERTENCIA Abrazadera para tubos y Si usa un dispositivo eléctrico (como un taladro) durante la instalación, asegúrese de que esté... - Page 69 INSTALACIÓN . CONECTE LA TUBERÍA A LA VÁLVULA ABRA EL PASO DE AGUA EN LA Coloque la tuerca de compresión y la VÁLVULA DE CORTE abrazadera para la tubería de cobre en el Apriete las conexiones que goteen. extremo de la tubería y conéctela a la vál- vula de corte.
-
Page 70: Encendido
INSTALACIÓN Encendido Nivelación y alineación de las puertas Enchufe el refrigerador. Nivelación Tras la instalación, enchufe el cable de aliment- ación del refrigerador en una toma de corriente de 3 clavijas con conexión a tierra y empuje el Su refrigerador tiene dos patas de nivelación delanteras: uno a la derecha y otro a la izquierda. -
Page 71: Alineación De Las Puertas
INSTALACIÓN Alineación de las puertas ó n de puertas según el accesorio incluido en el manual de usuario. Alineación de las puertas (Tipo 1) Alineación de las puertas (Tipo 2) Ambas puertas del refrigerador tienen una Si el espacio entre sus puertas es desigual, siga las siguientes instrucciones para la alineación de las puertas: tuerca ajustable, ubicada en la bisagra inferior, que puede levantar y bajar para alinearlas co -... -
Page 72: Instrucciones De Uso
INSTRUCCIONES DE USO INSTRUCCIONES DE USO Antes de usar Limpie el refrigerador. Limpie bien el refrigerador y quite todo el polvo acumulado durante el transporte. PRECAUCIÓN y No raye el refrigerador con un objeto punzante ni utilice un detergente cualquier cinta adhesiva o pegamento del mismo. y No retire la etiqueta de número de modelo ni de serie ni de la información NOTA Quite el residuo adhesivo limpiándolo con su dedo pulgar o con detergente... -
Page 73: Panel De Control
INSTRUCCIONES DE USO Panel de control * Dependiendo del modelo, algunas de las siguientes funciones puede no estar disponible. Funciones del panel de control LED Display Indicator Door Control Button Alarma de la puerta Temperatura del refrigerador Cuando se conecta el refrigerador a Indica la temperatura Door la corriente, la alarma de la puerta... -
Page 74: Encendido Y Apagado De La Máquina De Hielo Automática
INSTRUCCIONES DE USO Máquina de hielo automática (Compartimento del congelador) (Sólo con máquina de hielos instalada) * Dependiendo del modelo, algunas de las siguientes funciones puede no estar dis ponible. Interruptor de Brazo sensor El hielo se fabrica en la máquina de hielo alimentación automática y se envía al dispensador. -
Page 75: Cuándo Se Debe Apagar La Máquina De Hielo
INSTRUCCIONES DE USO Máquina de hielo automática Sonidos normales que se pueden escuchar (continuación) y La válvula de agua de la máquina de hielo emite un zumbido cuando la máquina se PRECAUCIÓN llena de agua. Si el interruptor de alimen- y La primera tanda de hielo podría incluir ON (I) tación está... -
Page 76: Almacenamiento De Alimentos
INSTRUCCIONES DE USO Almacenamiento de alimentos Lugar de conservación de los alimentos Cada compartimento del refrigerador está diseñado para almacenar diferentes tipos de alimentos. Almacene sus alimentos en el espacio óptimo para disfrutar de los sabores más frescos. Bandeja pa ra lácteos (En algunos modelos) Estante de refrigera-... -
Page 77: Sugerencias Para El Almacenamiento
INSTRUCCIONES DE USO Sugerencias para el almacenamiento A l m a c e n a m i e n t o d e a l i m e n t o s de alimentos congelados * Las siguientes sugerencias podrían no ser de NOTA aplicación en su caso dependiendo del modelo Consulte una guía de congelación ó... -
Page 78: Almacenamiento De Alimentos Congela
INSTRUCCIONES DE USO Almacenamiento de alimentos Cajón con control de congelados (continuación) humedad y Glide'N'Serve Empaquetamiento Cajón con control de humedad Una congelación correcta depende de un empa- * Dependiendo del modelo, algunas de las quetamiento adecuado. Cuando se cierra y sella siguientes funciones puede no estar dis- el paquete, no debe dejar que entre ni salga aire ponible. -
Page 79: Montaje Y Desmontaje De Los Depósitos De Almacenamiento
INSTRUCCIONES DE USO Montaje y desmontaje de los Para quitar el vidrio depósitos de almacenamiento (No se muestra Glide’N’Serve para mayor calidad de imagen.) Glide’N’Serve y Cajón para verduras Levante el vidrio que está debajo de la cubierta con control de humedad del cajón, y tire del mismo hacia arriba y hacia Para retirar el cajón para fruta y verdura fresca afuera. -
Page 80: Ajuste De Los Estantes Del Refrigerador
INSTRUCCIONES DE USO Ajuste de los estantes del PRECAUCIÓN refrigerador y No limpie los estantes de vidrio con Los estantes del refrigerador son ajustables para agua templada mientras aún están fríos. Los estantes podrían romperse si se ven satisfacer sus necesidades personales de alma- expuestos a cambios repentinos de tem- cenamiento. -
Page 81: Mantenimiento
MANTENIMIENTO MANTENIMIENTO Limpieza y Tanto las secciones refrigerador como congelador se descongelan de forma automática; sin embargo, se recomienda limpiar ambas secciones una vez al mes para evitar la aparición de olores. y Seque los derrames inmediatamente. y Siempre desenchufe el refrigerador antes de limpiarlo. Sugerencias generales de limpieza Paredes interiores (deje que el congelador se caliente para que el... -
Page 82: Smart Diagnosis (Diagnóstico Inteligente)
(Congelador) durante tres segundos mien- puede transmitir datos a través de su teléfono tras sostiene el teléfono frente al parlante. al centro de servicios LG. Esto le otorga la capa- cidad de hablar directamente con nuestros es- pecialistas capacitados. El especialista registra los datos transmitidos desde su máquina y los... -
Page 83: Solución De Problemas
SOLUCIÓN DE PROBLEMAS SOLUCIÓN DE PROBLEMAS Consulte la sección Solución de problemas antes de llamar al centro de servicios; hacerlo le hará ahorrar tiempo y dinero. El refrigerador El control del refrigerador está Ponga el control en posición ON (encendido). Consulte la y la sección en posición OFF (apagado) sección de Ajuste de los controles para ver los ajustes de... - Page 84 SOLUCIÓN DE PROBLEMAS La sección de El refrigerador se instaló Puede tomar hasta 24 horas para que cada compartimento refrigerador recientemente. alcance la temperatura deseada. o congelador Las ventilaciones de aire están Localice las ventilaciones de aire usando su mano para está...
- Page 85 SOLUCIÓN DE PROBLEMAS Acumulación de Las puertas se abren a menudo Cuando las puertas se abren a menudo o durante humedad en el o durante mucho tiempo. mucho tiempo, el aire cálido y húmedo ingresa en el interior. compartimento. Esto aumenta la temperatura y el nivel de humedad dentro del compartimento.
- Page 86 SOLUCIÓN DE PROBLEMAS Problema Causas posibles Soluciones Se forma escarcha La condensación de los alimentos Esto es normal para aquellos alimentos que tienen alto o cristales de con alto contenido de agua se contenido de agua. hielo sobre congeló dentro del envase. los alimentos congelados El alimento ha estado en el...
- Page 87 SOLUCIÓN DE PROBLEMAS Problema Causas posibles Soluciones La máquina de El refrigerador se instaló Puede tomar hasta 24 horas para que cada hielo no hace recientemente o la máquina de compartimento alcance la temperatura deseada y para hielo se conectó recientemente. que la máquina de hielo comience a hacer hielo.
- Page 88 SOLUCIÓN DE PROBLEMAS Clics El control de descongelamiento hará un Funcionamiento normal chasquido cuando comience y finalice el ciclo de automático de descongelamiento. El control del termostato (o control del refrigerador en algunos modelos) también hará un chasquido al encenderse y apagarse el ciclo.
- Page 89 SOLUCIÓN DE PROBLEMAS Las puertas Hay envases de alimentos Reordene los contenedores de alimento para dejar libre la no se cierran impidiendo que la puerta se puerta y los estantes. correctamente o cierre. se abren. El contenedor de hielo, la tapa Empuje todos los contenedores hacia adentro y ponga la del cajón para verduras, las tapa del cajón para verduras, las bandejas, los estantes y...
-
Page 90: Garantía
FRIGORÍFICO LG GARANTÍA LIMITADA - U.S.A. En caso de que su Frigorífico LG (“Producto”) falle por defectos de material o mano de obra bajo circunstancias de uso doméstico normal durante el período de garantía descrito a continuación, LG, a su criterio, reparará o reemplazará el producto. - Page 92 LG Customer Information Center For inquiries or comments, visit ww w.lg.com or call: 1-800-243-0000 USA, Consumer User 1-888-865-3026 USA, Commercial User 1-888-542-2623 CANADA Register your product Online! ww w.lg.com...