Table of Contents
Advertisement
Quick Links
Owner's Manual and
Safety Information ................................ 2-6
Installation Instructions
Coil Top and Ceramic Top Models
Surface Units ......................................... 7-8
Cookware .................................................. 9
Controls .................................................... 10
Oven ................................................... 11, 12
.............................................................. 13, 14
Timed Baking and Roasting ................. 15
Special Features ............................... 16-18
Sabbath Features ............................ 19, 20
Temperature Conversions .................... 20
Thermostat .............................................. 21
Self Clean .......................................... 22, 23
Care and Cleaning ......................... 24-30
Installation Instructions .................... 31-39
Troubleshooting Tips ......................... 40-44
Accessories ............................................. 45
Warranty .................................................. 47
Write the model and serial
numbers here:
Model #
Felix Storch, Inc.
An ISO 9001:2008 Registered Company
Serial #
Summit Appliance Division
Bronx, New York 10474
You can find them on a label
www.summitappliance.com
behind the storage drawer on
the oven frame.
222D9380P015
1
Advertisement
Table of Contents

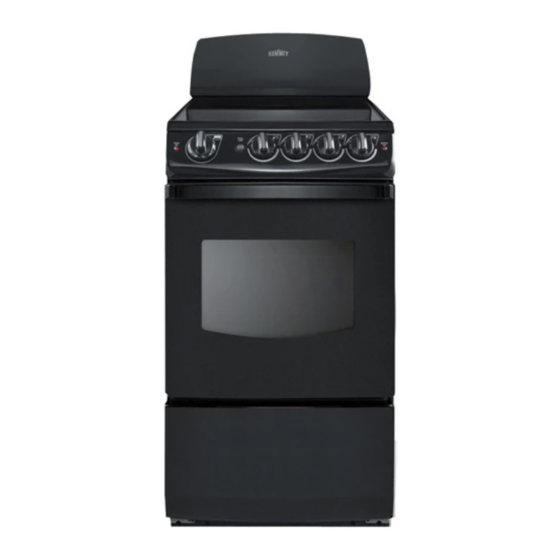
Related Manuals for Summit REX205W


Summary of Contents for Summit REX205W
-
Page 1: Table Of Contents
Write the model and serial numbers here: Model # Felix Storch, Inc. An ISO 9001:2008 Registered Company Serial # Summit Appliance Division Bronx, New York 10474 You can find them on a label www.summitappliance.com behind the storage drawer on the oven frame. -
Page 2: Safety Information
IMPORTANT SAFETY INFORMATION. READ ALL INSTRUCTIONS BEFORE USING. WARNING! READ ALL SAFETY INSTRUCTIONS BEFORE USING THE PRODUCT. FAILURE TO FOLLOW THESE INSTRUCTIONS MAY RESULT IN FIRE, ELECTRIC SHOCK SERIOUS INJURY OR DEATH. ANTI-TIP DEVICE WARNING Tip-Over Hazard A child or adult can tip the range and be killed. Verify the anti-tip bracket has been properly installed and engaged. - Page 3 COOK MEAT AND POULTRY THOROUGHLY... Cook meat and poultry thoroughly—meat to at least an INTERNAL temperature of 160° F and poultry to at least an INTERNAL temperature of 180°F. Cooking to these temperatures usually protects against foodborne illness. WARNING SAFETY PRECAUTIONS •...
- Page 4 IMPORTANT SAFETY INFORMATION. READ ALL INSTRUCTIONS BEFORE USING. OVEN • Stand away from the range when opening • When using cooking or roasting bags in the the oven door. Hot air or steam which es- oven, follow the manufacturer’s directions. capes can cause burns to hands, face •...
- Page 5 SURFACE UNITS-ALL MODELS Use proper pan size-select cookware having flat bottoms large enough to cover the surface unit heating element. The use of undersized cookware will expose a portion of the surface unit to direct contact and may result in ignition of clothing. Proper relationship of cookware to surface unit will also improve efficiency.
- Page 6 IMPORTANT SAFETY INFORMATION. READ ALL INSTRUCTIONS BEFORE USING. WARNING! RADIANT SURFACE UNITS (on some models) Use care when touching the cooktop. The glass surface of the cooktop will retain heat after the con- trols have been turned off. • Avoid scratching the glass cooktop. The cook- •...
-
Page 7: Operating Instructions Surface Units
Using the surface units. Throughout this manual, features and appearance may vary from your model. Surface Cooking Controls Your surface units and controls are de- In a quiet kitchen, you may hear slight signed to give you a variety of heat set- clicking sounds during cooking, indicating tings for surface unit cooking. - Page 8 Using the surface units. Throughout this manual, features and appearance may vary from your model. Indicator Lights (on radiant glass models only). A Hot indicator light will glow when any radiant el- ement is turned on, and will remain on until the surface is cool enough to touch.
-
Page 9: Cookware
Selecting types of cookware. The following information will help you choose cookware that will give good performance on glass cooktops. Stainless Steel: Glass-ceramic: recommended usable, but not recommended Poor performance. May scratch the sur- Aluminum: face. heavy weight recommended. Stoneware: Good conductivity. -
Page 10: Controls
Using the oven controls. (on some models) Throughout this manual, features and appearance may vary from your model. Oven Control, Clock and Timer Features and Settings 1. BAKE Pad 8. START Pad Touch this pad to select the bake function. Must be touched to start any cooking func- tion. -
Page 11: Oven
Using the oven. Clock and Timer (on some models) 1. TIMER Pad 4. SET +/- Pads Touch this pad to select the timer fea- These pads allow you to set the clock ture. and timer. 2. CLOCK Pad Touch this pad before setting the clock. 3. - Page 12 Using the oven. How to Set the Oven for Baking or Roasting 1. Touch the BAKE pad. NOTE: A cooling fan may automatically turn on and off to cool internal parts. This is 2. Touch the + or – pad to set the desired normal, and the fan may continue to run temperature.
-
Page 13: Clock, Timer And Convenience Outlet
Using the clock, timer and convenience outlet. (on some models) Not all features are on all models. To Set the Clock TIMER The clock must be set to the correct time 3. Touch the START/ON pad until the time MINUTERIE of day for the automatic oven timing func- of day shows in the display. - Page 14 Using the clock, timer and convenience outlet. (on some models) Not all features are on all models. To Reset the Timer If the display is still showing the time re- If the remaining time is not in the display maining, you may change it by touching (clock, delay start or cooking timer are in the TIMER pad, then touch the + or –...
-
Page 15: Timed Baking And Roasting
Using the timed baking and roasting features. (on some models) NOTE: Foods that spoil easily-such as milk, eggs, fish, stuffings, poultry and pork-should not be allowed to sit for more than 1 hour before or after cooking. Room temperature promotes the growth of harmful bacteria. Be sure that the oven light is off because heat from the bulb will speed harmful bacteria growth. -
Page 16: Special Features
Special features of your oven control. Your new touch pad control has additional features that you may choose to use. The following are the features and how you may activate them. The special feature modes can only be activated while the display is showing the time of day. They remain in the control's memory until the steps are repeated. - Page 17 Special features of your oven control. Tones at the End of a Timed Cycle BROIL BAKE HI/LO At the end of a timed cycle, 3 short beeps 2. Touch the BROIL HI/LO pad. The displays will sound followed by one beep every 6 shows CON BEEP (continuous beep).
- Page 18 Special features of your oven control. Cook and Hold BROIL Your new range has a cook and hold fea- 2. Touch the COOK TIME pad. The display BAKE HI/LO ture that keeps cooked foods warm for to will show Hld OFF. up to 3 hours after Timed Baking or Roast- Touch the COOK TIME pad again to ac- ing is finished.
-
Page 19: Sabbath Features
Using the Sabbath Feature. (Designed for use on the Jewish Sabbath and Holidays) (on some models). The Sabbath feature can be used for baking/roasting only. It cannot be used for broiling, self-cleaning, or Delay Start cooking. NOTE: The oven light comes on automatically (on some models) when the door is opened and goes off when the door is closed. -
Page 20: Temperature Conversions
Using the Sabbath Feature. (Designed for use on the Jewish Sabbath and Holidays) (on some models). How to Exit the Sabbath Feature CLEAR 1. Touch the CLEAR/OFF pad. 5. Touch the START pad. 2. If the oven is cooking, wait for a random NOTE: If a power outage occurred while BROIL delay period of approximately 30 sec-... -
Page 21: Thermostat
Adjust the oven thermostat – Easy to do yourself! You may find that your new oven cooks differently that the one it replaced. Use your new oven for a few weeks to be- come more familiar with it. If you still think your new oven is too hot or too cold, you can adjust the thermostat yourself. Do not use thermometers, such as those found in grocery stores, to check the temperature setting of your oven. - Page 22 Using the self-cleaning oven. (on some models) The oven door must be closed and all controls must be set correctly for the cycle to work prop- erly. Before a Clean Cycle The oven must be cool in order to set the Do not use abrasives or oven cleaners.
- Page 23 Using the self-cleaning oven. (on some models) The oven door must be closed and all controls must be set correctly for the cycle to work prop- erly. How to Delay the Start of Cleaning. SELF CLEAN 1. Touch the SELF CLEAN pad. The door locks automatically.
-
Page 24: Care And Cleaning
Care and cleaning of the range. Be sure electrical power is off and all surfaces are cool before cleaning any part of the range. WARNING Tip-Over Hazard A child or adult can tip the range and be killed. Verify the anti- tip bracket has been properly installed and engaged. - Page 25 Care and cleaning of the range. Lift-up Cooktop Clean the area under the cooktop often. and lift the cooktop up and prop it open Builtup soil, especially grease, may catch with the prop rod provided. on fire. After cleaning underneath the cooktop To make cleaning easier, the cooktop with hot, soapy water and a clean cloth, may be lifted up and propped open.
- Page 26 Care and cleaning of the range. Control Panel and Knobs It is a good idea to wipe the control panel The control knobs may be removed for after each use of the oven. Use a damp easier cleaning. cloth to clean or rinse. For cleaning, use Make sure the knobs are in the OFF posi- mild soap and water or a 50/50 solution of tions and pull them straight off the stems...
- Page 27 Care and cleaning of the range. Surface Units (on some models) Surface Unit Be sure all the controls are turned to OFF To replace a surface unit: and the surface units are cool before at- Replace the drip pan into the recess in the tempting to remove them.
- Page 28 Care and cleaning of the range. Oven Vent On glass cooktop models, the oven is Never cover the opening with aluminum vented through an opening at the rear of foil or any other material. the cooktop. On coil cooktop models, the oven is vented through an opening under the right rear surface unit.
- Page 29 Cleaning the glass cooktop. (on some models) Normal Daily Use Cleaning ONLY use Ceramic Cooktop Cleaner on 4. Use a paper towel for Ceramic Cook- the glass cooktop. Other types of cleaners tops to clean the entire cooktop sur- may not be as effective. face.
- Page 30 Cleaning the glass cooktop. (on some models) Metal Marks and Scratches 1. Be careful not to slide pots and pans 2. If pots with a thin overlay of aluminum across your cooktop. It will leave metal or copper are allowed to boil dry the markings on the cooktop surface.
-
Page 31: Installation Instructions
Installation 20" & 24" Electric Ranges Instructions BEFORE YOU BEGIN FOR YOUR SAFETY: Read these instructions completely and carefully. All rough-in and spacing dimensions must be met for safe use of your range. Electricity to the range can be IMPORTANT •... - Page 32 Installation Instructions PREPARE TO INSTALL THE RANGE TOOLS YOU WILL NEED PREPARE THE OPENING • Allow 2" spacing from the range to adjacent ver- tical walls above the cooktop surface. Allow 30" minimum clearance between the surface units and the bottom of unprotected wood or metal Drill with 1/8”...
- Page 33 Installation Instructions ELECTRICAL CONNECTIONS ELECTRICAL REQUIREMENTS CAUTION: For personal safety, do not use an extension cord with this appli- ance. Remove house fuse or open cir- cuit breaker before beginning installa- tion. This appliance must be supplied with the proper volt- age and frequency, and connected to an individual properly grounded branch circuit, protected by a cir- cuit breaker or fuse having an amperage as specified...
- Page 34 Installation Instructions ELECTRICAL CONNECTIONS ELECTRICAL REQUIREMENTS Use only a 3-conductor or a 4-conductor UL-listed range cord. These cords may be provided with ring ter- WARNING: For personal safety, do not minals on wire and a strain relief device. use an extension cord with this appli- A range cord rated at 40 amps with 125/250 minimum volt range is required.
- Page 35 Installation Instructions ELECTRICAL CONNECTIONS (CONT.) POWER CORD AND STRAIN RELIEF For power cord installations only (see the next step if using conduit), assemble the strain relief in the hole. INSTALLATION Insert the power cord through the strain relief and tighten. Allow enough slack to easily attach the cord Remove the wire cover (on the back of the range) by terminals to the terminal block.
- Page 36 Installation Instructions ELECTRICAL CONNECTIONS (CONT.) 3-WIRE POWER CORD INSTALLATION 4-WIRE POWER CORD INSTALLATION WARNING: The neutral or ground wire of WARNING: The neutral wire of the supply the power cord must be connected to circuit must be connected to the neu- the neutral terminal located in the cen- tral terminal located in the center of the ter of the terminal block.
- Page 37 Installation Instructions ELECTRICAL CONNECTIONS (CONT.) 3-WIRE CONDUIT INSTALLATION 4-WIRE CONDUIT INSTALLATION Loosen the three lower terminal screws from the Loosen the 3 lower terminal screws from the termi- terminal block. Remove the ground screw and nal block. Insert the center bare wire (white/ neu- ground plate and retain them.
- Page 38 Installation Instructions INSTALL THE RANGE ANTI-TIP DEVICE INSTALLATION REMOVE STORAGE DRAWER Pull the drawer out all the way. WARNING Lift the front of the drawer until the stops clear the guide. Remove the drawer. Lift the front of the drawer until the stops clear the guide.
- Page 39 Installation Instructions FINAL INSTALLATION CHECKLIST OPERATION CHECKLIST • Check to make sure the circuit breaker is closed • Turn on one of the surface units to observe that (RESET) or the circuit fuses are replaced. the element glows within 60 seconds. Turn the unit off when glow is detected.
-
Page 40: Troubleshooting Tips
Before you call for service... Troubleshooting Tips Save time and money! Review the charts on the following pages first and your may not need to call for ser- vice. Problem Possible Causes What To Do Radiant Cooktops Surface units will not Improper cookware being used. - Page 41 Before you call for service... Problem Possible Causes What To Do Coil Cooktops Surface units not func- The surface units are not • With the controls off, check to make sure the surface tioning properly plugged in solidly. unit is plugged completely into the receptacle. The surface unit controls improp- •...
- Page 42 Before you call for service... Problem Possible Causes What To Do Food does not broil Oven is not set to BROIL. • On models with a temperature knob, make sure you properly turn it all the way to the BROIL position. On models with a BROIL pad, make sure it is turned on.
- Page 43 Before you call for service... Problem Possible Causes What To Do Oven temperature too Oven thermostat needs adjust- • See the Adjust the oven thermostat-Easy to do your- hot or too cold ment. self! Section. Clock and timer do Plug on range is not completely •...
- Page 44 Before you call for service... Problem Possible Causes What To Do "Burning" or "oily" odor This is normal in a new oven and • To speed the process set a self-clean cycle for a mini- emitting from the oven will disappear in time. mum of 3 hours.
-
Page 45: Accessories
Accessories Looking For Something More? To inquire about purchasing a part or an accessory for your appliance, contact the authorized service cen- ter. Surface Elements & Drip Pans Oven Racks Broiler Pan Oven Elements Light Bulbs Knobs Cleaner Cleaning Pads Scraper... - Page 46 Notas/Notes...
-
Page 47: Warranty
Certain exclusions may apply. GENERAL PARTS AND LABOR WARRANTY Summit warrants, to the original purchaser of every new unit, that the cabinet and all parts thereof be free from defects in material or workmanship, under normal and proper use and maintenance service as specified by Summit and upon proper installation and start-up in accordance with the instruction packet supplied with each Summit unit. - Page 48 There are no other warranties which extend beyond the description on the face hereof. • OUTSIDE UNITED STATES: This warranty does not apply to, and Summit is not responsible for, any warranty claims made on products sold or used outside the United States.