
Related Manuals for TP-Link Deco XE75


Summary of Contents for TP-Link Deco XE75
- Page 1 Deco XE75 Superior Mesh Wi-Fi, Everywhere User Guide AXE5400 Tri-Band Mesh Wi-Fi 6E System 1910013097 REV1.0.0 © 2021 TP-Link...
-
Page 2: Table Of Contents
Contents About This Guide ···················································· 1 Shortcut ·····································································22 Appearance ······························································· 2 Automation ·······························································24 Set Up Your Deco ··················································· 3 HomeShield ·····························································28 Dashboard ·································································· 6 Wi-Fi Settings··························································29 Add More Decos ····················································· 7 Guest Network ·······················································31 Check Deco Status ··············································· 8 Blacklist ······································································33 Set Main Deco ························································10 Upgrade Your Deco ·············································34 Remove/Reboot Deco ·······································11... -
Page 3: About This Guide
• A Technical Community is provided for you to discuss our products at https://community.tp-link.com. • Our Technical Support contact information can be found at the Help center of the Deco app and the Contact Technical Support page at https://www.tp-link.com/support. -
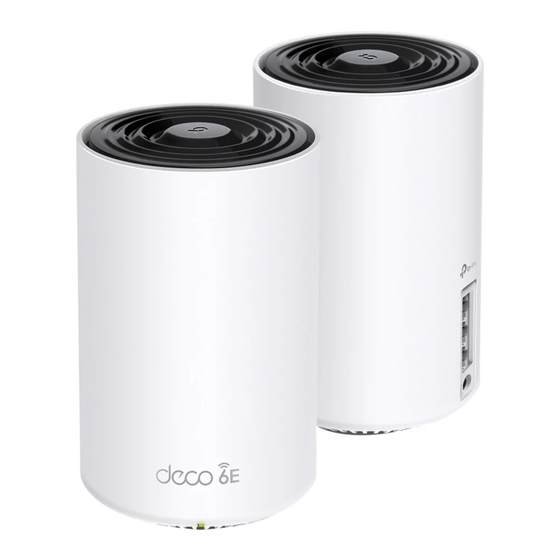
Page 4: Appearance
Appearance Each Deco has an LED that changes color according to its status, three RJ-45 Ethernet ports, a power slot, and a Reset button. See the explanation below: Tip: The product label can be found at the bottom of the product. Pulse Yellow: Deco is resetting. -
Page 5: Set Up Your Deco
2. Log in or sign up with TP-Link ID 3. Identify your Deco Scan the QR code below or go to Google Open the app. Use your TP-Link ID to log in. If Choose your Deco model. Play or the App Store to download the Deco you don’t have a TP-Link ID, sign up first. - Page 6 4. Plug in and power on Deco 5. Select a location 6. Set up internet connection Power off your modem. Connect your Deco to Select a location for this Deco. If its location Select the internet connection type and enter the modem and power them both on.
- Page 7 7. Create your Wi-Fi network 8. Connect to your Wi-Fi network 9. Setup complete Set a network name and a password. These Connect your phone/tablet to the Deco's Wi-Fi. Your Deco network is now up. Connect will be the name and password you use to all devices to the Deco network.
-
Page 8: Dashboard
After you successfully set up your Deco network, you will see the dashboard of the Deco app. Here you can get an overview of the network status, create shortcut and automation, customize your home network with enhanced security using a kit of features built to TP-Link HomeShield and set up various advanced features. -
Page 9: Add More Decos
Add More Decos After creating a Deco network, you can add more Decos to the network to expand the Wi-Fi coverage and manage them easily on your Deco app. 1. In Overview, tap > DECOS. 2. Select the Deco model you want to add, and follow app instructions to complete the setup. -
Page 10: Check Deco Status
Check Deco Status In Overview, you can check the working status (online/offline) of all the Decos, check the details (speed/Deco's IP address & MAC address/connected clients) of each Deco, change the Deco's location/name, and more. Tap a Deco unit to check more details. Check download/upload speed of the Deco. - Page 11 Change or customize the location/name of the Deco. Check the clients connected to the Deco. Enable the Mesh feature, then the client can seamlessly switch to the Deco that provides the fastest speed as you move around.
-
Page 12: Set Main Deco
Set Main Deco After setup, you can replace the main Deco with any satellite Deco without resetting or reconfiguring the whole network. Follow the steps below to complete the setup process. Note: The main Deco links all the others to the internet. After the main Deco finishes switching, you need to connect the new main Deco to the modem or Ethernet outlet for internet connection. For DSL Deco, connect it to the phone jack or DSL splitter. -
Page 13: Remove/Reboot Deco
Remove/Reboot Deco You can reset your Deco to factory default settings or reboot your Deco to clear cache and enhance running performance easily in the Deco app. Follow the steps below. Note: Rebooting your Deco will keep the current settings on it. Removing your Deco will reset it to factory default settings and you will need to set up your Deco again. -
Page 14: Manage Connected Devices
Manage Connected Devices In Overview, you can mange your connected devices easily, such as changing the device name/type/location, enabling automation, Mesh Technology and high priority for the device, setting a profile to manage its online activities, and more. Tap a connected device to check the details (e.g. real-time upload and Change the device name as needed. - Page 15 Automation to enable, disable, or edit it. If you have not set Enable High Priority and set the Duration time to prioritize the connection automation yet, follow Automation to create one. of this device during the time, such as a family member’s laptop for one hour during a video call.
- Page 16 to manage the device settings, including changing the device Location to sort the devices by customized locations so that you can name/type, viewing device detailed information (IP address, MAC quickly find and manage the devices. address, connected network, linked Deco, etc.), and more.
- Page 17 Belongs to to add a unique profile for the device and manage its online activities. For example, when Enable Mesh Technology and then the and for how long this device can access the internet, block inappropriate content, and pause the internet if device can seamlessly switch to the necessary.
-
Page 18: Sort Devices By Locations
Sort Devices By Locations After adding your devices to the Deco network, you can sort them by customized locations so that it will be more convenient and efficient to manage your devices. For example, you can add the lights and computer in your bed room to a location set as "Bed Room", so you can quickly find and manage these devices. -
Page 19: Create A New Network
Create a New Network In the Deco app, you can create different Deco networks with your TP-Link ID and manage them conveniently from the Deco app with one account. You can also help family or friends manage their networks with your Deco app. Two methods are provided as below to create a new network. - Page 20 Method 2. Create a new network from the Menu page 3. Follow app instructions to complete 1. Tap to open the menu. 2. Tap > CREATE NEW NETWORK. the setup.
-
Page 21: Change Network Owner
Owner. Follow app instructions to change the network owner. Then you will not be able to manage this network with your account anymore. The new owner needs to follow steps in an email sent from TP-Link to log in and manage the network. -
Page 22: Delete A Network
Delete a Network You can delete a Deco network if you don't need it anymore. Deleting a Deco network will reset all Decos in this network to factory default settings. 1. In Overview, tap 2. Tap > Delete. -
Page 23: Add Smart Devices
Add Smart Devices After creating a Deco network, you can add your smart home devices to the network and manage them conveniently on your Deco app. In Overview, tap > SMART DEVICES. Follow app instructions to add your smart devices to the network. Then the smart devices will display on the Overview page as shown below. -
Page 24: Shortcut
Shortcut Shortcut lets you achieve an action with a simple tap. For example, if you want to power on your living room light at one tap, follow the steps below. Note: If you want to create shortcuts for your smart devices, follow Add Smart Devices to add the smart devices to the Deco network first. - Page 25 5. Set how the action behaves when executed. For example, set as 6. Select an icon and set a name for 7. Tap the icon to execute the action. below then the living room light will turn on 1 minute after you tap the the shortcut to finish the settings.
-
Page 26: Automation
Automation Automation allows you to set interactions between your devices by adding triggers and actions. For example, when you get home and your smartphone is connected to the Deco network (which is a trigger), the living room plug automatically turns on (which is an action). Then the kettle plugged into the living room plug will start to boil water. - Page 27 5. Select the trigger device and set the trigger details. 6. Add an action.
- Page 28 7. Select the action device and set the action details. For example, set the action as below then the living room plug will turn on after you tap the shortcut icon, and will turn off automatically after 1.5 hours. Tip: If you have set Delay Action, you will need to wait for the time you set before the action takes effect. Turn on/off How long will the action last The waiting time before the...
- Page 29 8. Set a name for the automation. 9. Automation setup completed. The automation will take effect when the trigger is executed.
-
Page 30: Homeshield
Whether protecting your network from malicious attacks, managing your family's online activities, or prioritizing devices to get better performance, TP-Link HomeShield provides you a kit of basic (free) and Pro (charged) features to customize your whole home network with enhanced security. An overview of HomeShield features is shown below. -
Page 31: Wi-Fi Settings
Wi-Fi Settings You can change the network name and password of your main network at any time and share the network easily with family and friends. > Wi-Fi. Manage main network (e.g. change your main network's Wi-Fi name and Set a channel width for 5GHz Wi-Fi. 160MHz password, hide the network from Wi-Fi list, etc.). - Page 32 6 GHz Wi-Fi is used for dedicated backhaul by default. When it is used for your Wi-Fi network connection, you can change your 6 GHz network's Wi-Fi name and password, hide the network from Wi-Fi list, etc. Only Wi-Fi 6E-compatible devices can search for and join the 6GHz nework.
-
Page 33: Guest Network
Guest Network You can create and share a separate network for guests to guarantee the security and privacy of your main network. > Wi-Fi and enable Guest Network. Manage guest network (e.g. change the Wi-Fi name and password, hide the network from Wi-Fi list, set channel width for 5GHz Wi-Fi. - Page 34 Enable 6GHz for the guest network and set the network name and password.
-
Page 35: Blacklist
Blacklist Add devices to the blacklist to prevent the devices from accessing your network, ensuring the safety of your personal information shared in the network. > Blacklist. and add clients or other devices to the blacklist. Remove devices/clients from blacklist. -
Page 36: Upgrade Your Deco
Upgrade Your Deco TP-Link is dedicated to improving product features and providing a better customer experience. An up-to-date firmware provides better and more stable network performance. Always update your Deco to the latest firmware version when prompted in the Deco app. -
Page 37: Advanced Features
DHCP server, enable VLAN/IPTV/MAC Clone mode, reserve the same IP address for a specific device, set up port forwarding rules to make your local computers accessible to other devices over the internet, enable TP-Link DDNS/SIP ALG/UPNP/fast roaming/beamforming, control Deco's LED, change the operation mode, set connection alerts and notifications. - Page 38 Modify LAN IP to avoid IP address Change DHCP server settings. Enable IPTV/VLAN mode to support Enable MAC Clone if Deco fails to confict. IPTV services. connect to the internet. Tip: For more about MAC Clone, refer to https://www.tp-link.com/support/faq/2925/...
- Page 39 Reserve IP addresses for specific Set up port forwarding rules to Register a TP-Link DDNS domain Enable SIP ALG to communicate devices to recognize and manage enable devices in your network name to access your router and with SIP (Session Initiation Protocol) the device more easily.
- Page 40 Enable UPNP to allow your local Enable Fast Roaming to allow Enable Beamforming to concentrate Toggle off LED to turn off the light on network to dynamically open ports your wireless devices to switch Wi-Fi signal towards connected Deco. Configure the Night Mode to for applications like gaming.
- Page 41 Change the operation mode. Set connection alerts to receive Set notifications to receive alerts in notifications once the clients the notification bar. Note: When the Deco works in Access Point mode, advanced features such as IPv4, Address connect to or disconnect from Deco. Reservation, Port Forwarding, and DHCP server are not available.
-
Page 42: Wps
WPS (Wi-Fi Protected Setup) helps you to quickly and securely connect a client to the network with a tap without entering any password. 2. Tap the icon on Deco app and 3. Your device has connected to the network 1. Tap >... -
Page 43: Managers
Managers Add friends and family members to help manage your network. Each manager should have their own TP-Link ID. Note: Managers can not modify owner's account, add other accounts, or set manager privileges. > Managers, and follow app instructions to add other TP-Link ID accounts as managers. - Page 44 Set privileges for managers. Remove managers. Note: Privileges may vary slightly depending on the model, the current operation mode, and software version you have.
-
Page 45: Control Your Deco With Alexa
Follow the steps below to use Alexa voice commands to control your Deco network. Tip: To know more about how to set up Alexa Integration in Alexa app, refer to https://www.tp-link.com/support/faq/1571/. Note: This feature is currently available in English (US), English (UK), German and Japanese. -
Page 46: Troubleshooting
Solutions to common problems during setup or use are provided here for reference. Follow the steps and the provided link below to diagnose and solve problems you might experience with your Deco. If problems still exist, contact us: https://www.tp-link.com/support Q1. What should I do if I fail to configure the main Deco and get stuck on “We couldn't find Deco”? Refer to the guide https://www.tp-link.com/support/faq/2239/... -
Page 47: Authentication
Authentication FCC Compliance Information Statement Product Name: AXE5400 Tri-Band Mesh Wi-Fi 6E System Model Number: Deco XE75 Component Name Component Model I.T.E POWER SUPPLY T120200-2B4 Responsible party: TP-Link USA Corporation Address: 10 Mauchly, Irvine, CA 92618 Website: http://www.tp-link.com/us/ Tel: +1 626 333 0234 Fax: +1 909 527 6803 E-mail: sales.usa@tp-link.com... - Page 48 GHz band is prohibited for control of or communications with unmanned aircraft systems. We, TP-Link USA Corporation, has determined that the equipment shown as above has been shown to comply with the applicable technical standards, FCC part 15. There is no unauthorized change is made in the equipment and the equipment is properly maintained and operated.
- Page 49 FCC Compliance Information Statement Product Name: I.T.E POWER SUPPLY Model Number: T120200-2B4 Responsible party: TP-Link USA Corporation Address: 10 Mauchly, Irvine, CA 92618 Website: http://www.tp-link.com/us/ Tel: +1 626 333 0234 Fax: +1 909 527 6803 E-mail: sales.usa@tp-link.com This equipment has been tested and found to comply with the limits for a Class B digital device, pursuant to part 15 of the FCC Rules. These limits are designed to provide reasonable protection against harmful interference in a residential installation.
- Page 50 We, TP-Link USA Corporation, has determined that the equipment shown as above has been shown to comply with the applicable technical standards, FCC part 15. There is no unauthorized change is made in the equipment and the equipment is properly maintained and operated.
- Page 51 6105MHz—6425MHz (23dBm) EU Declaration of Conformity TP-Link hereby declares that the device is in compliance with the essential requirements and other relevant provisions of directives 2014/53/EU, 2009/125/EC, 2011 /65/EU and (EU) 2015/863. The original EU Declaration of Conformity may be found at https://www.tp-link.com/en/support/ce/ RF Exposure Information This device meets the EU requirements (2014/53/EU Article 3.1a) on the limitation of exposure of the general public to electromagnetic fields by way...
- Page 52 UKCA Mark UK Declaration of Conformity TP-Link hereby declares that the device is in compliance with the essential requirements and other relevant provisions of the Radio Equipment Regulations 2017. The original UK Declaration of Conformity may be found at https://www.tp-link.com/support/ukca/ National restrictions Attention: This device may only be used indoors in Great Britain.
- Page 53 Caution: The device for operation in the band 5150–5250 MHz is only for indoor use to reduce the potential for harmful interference to co-channel mobile satellite systems; DFS (Dynamic Frequency Selection) products that operate in the bands 5250- 5350 MHz. Avertissement: Le dispositif fonctionnant dans la bande 5150-5250 MHz est réservé...
- Page 54 注意防潮,請勿將水或其他液體潑灑到本產品上。 • 插槽與開口供通風使用,以確保本產品的操作可靠並防止過熱,請勿堵塞或覆蓋開口。 • 請勿將本產品置放於靠近熱源的地方。除非有正常的通風,否則不可放在密閉位置中。 • 不要私自拆開機殼或自行維修,如產品有故障請與原廠或代理商聯繫。 限用物質含有情況標示聲明書 設備名稱: 型號(型式): Equipment name: Type designation (Type) AXE5400 Tri-Band Mesh Wi-Fi 6E System Deco XE75 限用物質及其化學符號 Restricted substances and its chemical symbols 單元 鉛 汞 鎘 六價鉻 多溴聯苯 多溴二苯醚 Unit Lead Mercury...
- Page 55 備考1. 超出0.1 wt %” 及 “超出0.01 wt %” 系指限用物質之百分比含量超出百分比含量基準值。 Note 1:“Exceeding 0.1 wt %” and “exceeding 0.01 wt %” indicate that the percentage content of the restricted substance exceeds the reference percentage value of presence condition. 備考2.“○”系指該項限用物質之百分比含量未超出百分比含量基準值。 Note 2:“○” indicates that the percentage content of the restricted substance does not exceed the percentage of reference value of presence. 備考3.“ − ”系指該項限用物質為排除項目。...
- Page 56 Please read and follow the above safety information when operating the device. We cannot guarantee that no accidents or damage will occur due to improper use of the device. Please use this product with care and operate at your own risk. Explanation of the symbols on the product label Symbol Explanation...