Table of Contents
Advertisement
Quick Links
Belkin Tech Support
US: 877-736-5771
310-898-1100 ext. 2263
Europe: 00 800 223 55 460
Australia: 1800 235 546
New Zealand: 0800 235 546
Singapore: 800 616 1790
Belkin Corporation
501 West Walnut Street
Los Angeles, CA 90220, USA
310-898-1100
310-898-1111 fax
Belkin Ltd.
Express Business Park, Shipton Way
Rushden, NN10 6GL, United Kingdom
+44 (0) 1933 35 2000
+44 (0) 1933 31 2000 fax
© 2006 Belkin Corporation. All rights reserved. All trade names are registered trademarks of
respective manufacturers listed. The mark Wi-Fi is a registered mark of the Wi-Fi Alliance. The
"Wi-Fi CERTIFIED" logo is a certification mark of the Wi-Fi Alliance. Mac, Mac OS, Apple, and
AirPort are trademarks of Apple Computer, Inc., registered in the U.S. and other countries.
Wireless G Plus MIMO
Router
Belkin Ltd.
7 Bowen Crescent, West Gosford
NSW 2250, Australia
+61 (0) 2 4372 8600
+61 (0) 2 4372 8603 fax
Belkin B.V.
Boeing Avenue 333
1119 PH Schiphol-Rijk, The Netherlands
+31 (0) 20 654 7300
+31 (0) 20 654 7349 fax
P74880
Advertisement
Table of Contents

Related Manuals for Belkin F5D9230-4


Summary of Contents for Belkin F5D9230-4
- Page 1 +44 (0) 1933 35 2000 +44 (0) 1933 31 2000 fax © 2006 Belkin Corporation. All rights reserved. All trade names are registered trademarks of respective manufacturers listed. The mark Wi-Fi is a registered mark of the Wi-Fi Alliance. The “Wi-Fi CERTIFIED”...
- Page 2 Wireless G Plus MIMO Router Share your broadband Internet connection ������� ����� ����� User Manual User Manual ����� ���� F5D9230-4...
-
Page 3: Table Of Contents
Table of Contents Table of Contents 1 Introduction Advantages of a Wireless Network ....1 Placement of your Wireless G Plus MIMO Router ..2 2 Product Overview . -
Page 4: Introduction
Introduction Thank you for purchasing the Belkin Wireless G Plus MIMO Router (the Router). Following are two short sections—the first discusses the benefits of home networking, and the other outlines best practices that maximize your wireless home network range and performance. -
Page 5: Placement Of Your Wireless G Plus Mimo Router
To achieve the best wireless network coverage for your “wireless clients” (i.e., computers enabled by Belkin Wireless Notebook Network Cards, Wireless Desktop Network Cards, and Wireless USB Adapters): •... - Page 6 Introduction • Try not to place the Router (or access point) near a cordless 2.4GHz phone. Avoid Obstacles and Interference Avoid placing your Router (or access point) near devices that may emit radio “noise,” such as microwave ovens. Dense objects that can inhibit wireless communication include: •...
- Page 7 These guidelines should allow you to cover the maximum possible area with your Router (or access point). Should you need to cover an even wider area, we suggest the Belkin Wireless Range Extender/Access Point. Secure Connections, VPNs, and AOL Secure connections typically require a user name and password, and are used where security is important.
- Page 8 Introduction For more information regarding our networking products, visit our website at www.belkin.com/networking or call Belkin Technical Support at: USA: 877-736-5771 310-898-1100 ext. 2263 Europe: 00 800 223 55 460 Australia: 1800 235 546 New Zealand: 0800 235 546 Singapore:...
-
Page 9: Product Overview
In minutes you will be able to share your Internet connection and network your computers. The following is a list of features that make your new Belkin Wireless G Plus MIMO Router an ideal solution for your home or small office network. - Page 10 Product Overview Integrated 10/100 4-Port Switch The Router has a built-in, four-port network switch to allow your wired computers to share printers, data and MP3 files, digital photos, and much more. The switch features automatic detection so it will adjust to the speed of connected devices.
- Page 11 Product Overview Integrated G Plus MIMO Wireless Access Point G Plus MIMO is an exciting new wireless technology that achieves data rates up to 54Mbps. Actual throughput is typically lower than the connected data rate and will vary depending on your networking environment.
-
Page 12: Knowing Your Router
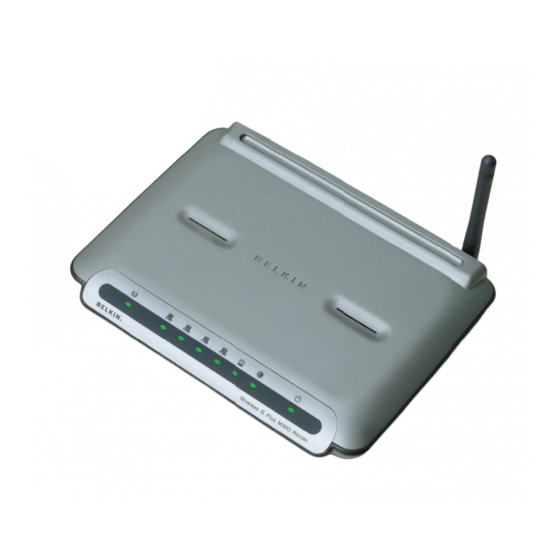
Knowing your Router Package Contents • Belkin Wireless G Plus MIMO Router • Quick Installation Guide • Belkin Easy Install Wizard Software CD • Belkin RJ45 Ethernet Networking Cable • Power Supply • User Manual System Requirements • Broadband Internet connection such as a cable or DSL modem with RJ45 (Ethernet) connection •... - Page 13 Knowing your Router The Router has been designed to be placed on a desktop. All of the cables exit from the rear of the Router for better organization and utility. The LED indicators are easily visible on the TOP of the Router to provide you with information about network activity and status.
- Page 14 Knowing your Router Wireless Network LED � � � Wireless network is OFF Green Wireless network is ready Blinking Indicates wireless activity Wired Computer Status LEDs � � � � These LEDs are labeled 1–4 and correspond to the numbered ports on the rear of the Router.
- Page 15 Knowing your Router Internet/Connected LED � � � This unique LED shows you when the Router is connected to the Internet. When the light is OFF, the Router is NOT connected to the Internet. When the light is blinking, the Router is attempting to connect to the Internet.
- Page 16 Knowing your Router Power/Ready LED � � � � When you apply power to the Router or restart it, a short period of time elapses while the Router boots up. During this time, the “Power/Ready” LED blinks. When the Router has completely booted up, the “Power/Ready”...
- Page 17 Knowing your Router Rear Panel � � � � � � � � Power Jack – GRAY Connect the included 12V/0.5A DC power supply to this jack. Connections to Computers (Wired Computer Ports) – YELLOW Connect your wired (non-wireless) computers to these ports. These ports are RJ45, 10/100 auto-negotiation, auto-uplinking ports for standard UTP category 5 or 6 Ethernet cable.
- Page 18 Knowing your Router Reset Button The “Reset” button is used in rare cases when the Router may function improperly. Resetting the Router will restore the Router’s normal operation while maintaining the programmed settings. You can also restore the factory default settings by using the “Reset” button.
-
Page 19: Connecting And Configuring Your Router
Ethernet Easy Install Wizard Belkin has provided our Easy Install Wizard software to make installing your Router a simple and easy task. You can use it to get your Router up and running in minutes. The Easy Install Wizard requires that your... - Page 20 Connecting and Configuring your Router Step 1 Run the Easy Install Wizard Software Shut down any programs that are running on your computer at this time. Make sure you have the following items at the computer that is now directly connected to the cable or DSL modem. DO NOT CONNECT THE ROUTER AT THIS TIME.
- Page 21 Connecting and Configuring your Router Mac OS Users: Insert the Easy Install Wizard software CD into your CD-ROM drive. Click on the CD icon; a folder will pop up. To begin, click on “start. osx” if you have Mac OS X. Follow the Easy Install Wizard to complete the installation.
- Page 22 Connecting and Configuring your Router 1.2 Multi-NICs Screen This screen will appear ONLY if you have more than one network adapter installed in your computer. If you have more than one network adapter installed in your computer, the Wizard will need to know which adapter is connected to your modem.
- Page 23 Connecting and Configuring your Router This step instructs you to locate the YELLOW cable that is included with your Router. Plug one end of this cable into ANY one of the YELLOW ports on your Router. Plug the other end of the cable into the networking port on your computer.
- Page 24 Connecting and Configuring your Router Step 3 Checking the Connection Once you have completed connecting the Router, the Wizard will check the connection to the Router then go on to determine what type of Internet connection you have. 3.2 User Name and Password Needed If you have a connection type that requires a user name and a password, the Wizard will ask you to type in your user name and password.
- Page 25 Connecting and Configuring your Router 3.3 Wireless Setup This Step Is Optional. Click “Next” if you want to skip it. Using this step, you can customize your wireless network settings if you want to. Follow the steps on the screen to complete this step.
- Page 26 Internet by opening your browser and going to your favorite web page. Congratulations! You have finished installing your new Belkin Router. You are ready to set up the other computers in your home. You can also add computers to your Router any time you want.
-
Page 27: Alternate Setup Method
Alternate Setup Method Step 1 Connecting your Gateway Router Turn off the power to your modem by unplugging the power supply from the modem. Locate the network cable that is connected between your modem and your computer and unplug it from your computer, leaving the other end connected to your modem. - Page 28 Alternate Setup Method Verify that your modem is connected to the Router by checking the lights on the TOP of the Router. The green light labeled “WAN” should be ON if your modem is connected correctly to the Router. If it is not, recheck your connections.
- Page 29 Alternate Setup Method Logging into the Router You will see the Router’s home page in your browser window. The home page is visible to any user who wants to see it. To make any changes to the Router’s settings, you have to log in. Clicking the “Login”...
- Page 30 Alternate Setup Method (10) Quick-Navigation Links You can go directly to any of the Router’s advanced UI pages by clicking directly on these links. The links are divided into logical categories and grouped by tabs to make finding a particular setting easier to find.
- Page 31 Alternate Setup Method (10) Login/Logout Button This button enables you to log in and out of the Router with the press of one button. When you are logged into the Router, this button will change to read “Logout”. Logging into the Router will take you to a separate login page where you will need to enter a password.
- Page 32 Alternate Setup Method LAN Settings Shows you the settings of the Local Area Network (LAN) side of the Router. Changes can be made to the settings by clicking on any one of the links (IP Address, Subnet Mask, DHCP Server) or by clicking the “LAN”...
- Page 33 Alternate Setup Method Configuring your Router for Connection to your Step 4 Internet Service Provider (ISP) The “Internet/WAN” tab is where you will set up your Router to connect to your Internet Service Provider (ISP). The Router is capable of connecting to virtually any ISP’s system provided you have correctly configured the Router’s settings for your ISP’s connection type.
- Page 34 Alternate Setup Method Setting your Connection Type From the “Connection Type” page, you can select the type of connection you use. Select the type of connection you use by clicking the button next to your connection type and then clicking “Next”...
- Page 35 Alternate Setup Method Setting your Internet Service Provider (ISP) Connection Type to Dynamic IP A dynamic connection type is the most common connection type found with cable modems. Setting the connection type to “dynamic” in many cases is enough to complete the connection to your ISP. Some dynamic connection types may require a host name.
- Page 36 Alternate Setup Method Setting your Internet Service Provider (ISP) Connection Type to Static IP A static IP address connection type is less common than other connection types. If your ISP uses static IP addressing, you will need your IP address, subnet mask, and ISP gateway address. This information is available from your ISP or on the paperwork that your ISP left with you.
- Page 37 Alternate Setup Method Setting your ISP Connection Type to PPPoE Most DSL providers use PPPoE as the connection type. If you use a DSL modem to connect to the Internet, your ISP may use PPPoE to log you into the service. If you have an Internet connection in your home or small office that doesn’t require a modem, you may also use PPPoE.
- Page 38 Alternate Setup Method User Name This space is provided to type in your User name that was assigned by your ISP. Password Type in your password and re-type it into the “Retype Password” box to confirm it. Service Name A Service name is rarely required by an ISP. If you are not sure if your ISP requires a service name, leave this blank.
- Page 39 Alternate Setup Method Setting your Internet Service Provider (ISP) Connection Type to Point-to-Point Tunneling Protocol (PPTP) [European Countries Only]. Some ISPs require a connection using PPTP protocol, a type of connection most common in European countries. This sets up a direct connection to the ISP’s system. Type in the information provided by your ISP in the space provided.
- Page 40 Alternate Setup Method My IP Address Provided by your ISP. Enter the IP address here. My Subnet Mask Provided by your ISP. Enter the IP address here. Connection ID (optional) Provided by your ISP. If your ISP did not give you a connection ID, leave this blank.
- Page 41 Alternate Setup Method Setting your Connection Type if You Are a Telstra BigPond User ® Your user name and password are provided to you by Telstra BigPond. Enter this information below. Choosing your state from the drop-down menu will automatically fill in your login server IP address. If your login server address is different than one provided here, you may manually enter the login server IP address by placing a check in the box next to “User Decide Login Server Manually”...
- Page 42 Setting Custom Domain Name Server (DNS) Settings A “Domain Name Server” is a server located on the Internet that translates Universal Resource Locators (URLs) like “www.belkin.com” to IP addresses. Many Internet Service Providers (ISPs) do not require you to enter this information into the Router. The “Automatic from ISP”...
- Page 43 Internet service. When you install the Router, its own MAC address will be “seen” by the ISP and may cause the connection not to work. Belkin has provided the ability to clone (copy) the MAC address of the computer into the Router.
- Page 44 Alternate Setup Method Cloning your MAC Address To clone your MAC address, make sure that you are using the computer that was ORIGINALLY CONNECTED to your modem before the Router was installed. Click the “Clone” button . Click “Apply Changes” .
-
Page 45: Using The Web-Based Advanced User Interface
Using the Web-Based Advanced User Interface Using your Internet browser, you can access the Router’s Web-Based Advanced User Interface. In your browser, type “192.168.2.1” (do not type in anything else such as “http://” or “www”) then press the “Enter” key. You will see the Router’s home page in your browser window. -
Page 46: Changing Lan Settings
Subnet Mask There is no need to change the subnet mask. This is a unique, advanced feature of your Belkin Router. It is possible to change the subnet mask if necessary; however, do NOT make changes to the subnet mask unless you have a specific reason to do so. The... - Page 47 Local Domain Name The default setting is “Belkin”. You can set a local domain name (network name) for your network. There is no need to change this setting unless you have a specific advanced need to do so.
-
Page 48: Viewing The Dhcp Client List Page
Using the Web-Based Advanced User Interface Viewing the DHCP Client List Page You can view a list of the computers (known as clients), which are connected to your network. You are able to view the IP address the computer, the host name (if the computer has been assigned one), and the MAC address of the computer’s network interface... -
Page 49: Configuring The Wireless Network Settings
To identify your wireless network, a name called the SSID (Service Set Identifier) is used. The SSID is your network name. The default network name of the Router is “Belkin G Plus MIMO_” followed by six digits that are unique to your Router. Your network name will look something like “Belkin G Plus MIMO_012345”. - Page 50 Using the Web-Based Advanced User Interface Using the Wireless Mode Switch This switch allows you to set the Router’s wireless modes. There are three modes. 802.11g-Only Mode Setting the Router to this mode will allow only G Plus MIMO and 802.11g-compliant devices to join the network, keeping out any slower 802.11b devices.
- Page 51 Using the Web-Based Advanced User Interface Changing the Wireless Channel There are a number of operating channels you can choose from. In the United States, there are 11 channels. In the United Kingdom and most of Europe, there are 13 channels. In a small number of other countries, there are other channel requirements.
- Page 52 G Plus MIMO network when 802.11b devices are present or when there is heavy 802.11b traffic in the operating environment. If you are using a mix of Belkin G Plus MIMO Wireless Cards and 802.11b or 802.11g cards on your network, protected mode should be used. If you are in an environment where there is no other (or very little) 802.11b...
- Page 53 IMPORTANT: You also need to ensure that all your wireless client cards/adapters support WPA2, and that you have downloaded and installed the latest driver. Most of the Belkin wireless cards have driver updates available for download from the Belkin support site: www.belkin.com/networking.
- Page 54 Using the Web-Based Advanced User Interface After you’ve set up your Router, go to the “Security” page under “Wireless” and select “WPA/WPA2-Personal (PSK)” from the “Security Mode” drop-down menu. For “Authentication”, select “WPA-PSK”, “WPA2-PSK”, or “WPA-PSK + WPA2-PSK”. This setting will have to be identical on the wireless clients that you set up.
-
Page 55: Setting Wpa Security
Using the Web-Based Advanced User Interface Setting WPA Security Note: To use WPA security, your wireless network cards must be equipped with software that supports WPA. At the time this User Manual was published, a security patch from Microsoft is available for free download. -
Page 56: Setting Wep Encryption
Using the Web-Based Advanced User Interface Setting WEP Encryption Note to Mac users: The “Passphrase” option will not operate with Apple AirPort . To configure encryption for your Mac computer, set ® ® the encryption using the manual method described in the next section. Select “128-bit WEP”... - Page 57 Using the Web-Based Advanced User Interface Encryption in the Router is now set. Each of your computers on your wireless network will now need to be configured with the same passphrase. Refer to the documentation of your wireless network adapter for information on making this change.
- Page 58 Using the Web-Based Advanced User Interface Using a Hexadecimal Key A hexadecimal key is a mixture of numbers and letters from A–F and 0–9. 64-bit keys are 10 digits long and can be divided into five two-digit numbers. 128-bit keys are 26 digits long and can be divided into 13 two-digit numbers.
-
Page 59: Using The Access Point Mode
Using the Web-Based Advanced User Interface Using the Access Point Mode Note: This advanced feature should be employed by advanced users only. The Router can be configured to work as a wireless network access point. Using this mode will defeat the NAT IP sharing feature and DHCP server. -
Page 60: Setting Mac Address Control
Using the Web-Based Advanced User Interface Setting MAC Address Control The MAC address filter is a powerful security feature that allows you to specify which computers are allowed on the wireless network. Note: This list applies only to wireless computers. This list can be configured so any computer attempting to access the wireless network that is not specified in the filter list will be denied access. - Page 61 Using the Web-Based Advanced User Interface Setting up a Deny Access List The “Deny Access” list lets you specify computers that you DO NOT want to access the network. Any computer in the list will not be allowed access to the wireless network. All others will. Select the “Deny”...
-
Page 62: Configuring The Firewall
Using the Web-Based Advanced User Interface Configuring the Firewall Your Router is equipped with a firewall that will protect your network from a wide array of common hacker attacks including: • IP Spoofing • Land Attack Ping of Death (PoD) •... - Page 63 Using the Web-Based Advanced User Interface Configuring Internal Forwarding Settings The Virtual Servers function will allow you to route external (Internet) calls for services such as a web server (port 80), FTP server (Port 21), or other applications through your Router to your internal network. Since your internal computers are protected by a firewall, computers outside your network (over the Internet) cannot get to them because they cannot be “seen”.
- Page 64 Using the Web-Based Advanced User Interface Setting Client IP Filters The Router can be configured to restrict access to the Internet, e-mail, or other network services at specific days and times. Restriction can be set for a single computer, a range of computers, or multiple computers.
- Page 65 Using the Web-Based Advanced User Interface Enabling the Demilitarized Zone (DMZ) The DMZ feature allows you to specify one computer on your network to be placed outside of the firewall. This may be necessary if the firewall is causing problems with an application such as a game or video conferencing application.
-
Page 66: Using Dynamic Dns
Using the Web-Based Advanced User Interface Using Dynamic DNS The Dynamic DNS service allows you to alias a dynamic IP address to a static host name in any of the many domains DynDNS.org offers, allowing your network computers to be more easily accessed from various locations on the Internet. - Page 67 Using the Web-Based Advanced User Interface Blocking an ICMP Ping Computer hackers use what is known as “pinging” to find potential victims on the Internet. By pinging a specific IP address and receiving a response from the IP address, a hacker can determine that something of interest might be there.
-
Page 68: Utilities
Using the Web-Based Advanced User Interface Utilities The “Utilities” screen lets you manage different parameters of the Router and perform certain administrative functions. Parental Control See the included Parental Control User Manual for more information on the Parental Control feature. -
Page 69: Restarting The Router
Using the Web-Based Advanced User Interface Restarting the Router Sometimes it may be necessary to restart or reboot the Router if it begins working improperly. Restarting or rebooting the Router will NOT delete any of your configuration settings. Restarting the Router to Restore Normal Operation Click the “Restart Router”... - Page 70 Using the Web-Based Advanced User Interface Restoring Factory Default Settings Using this option will restore all of the settings in the Router to the factory (default) settings. It is recommended that you back up your settings before you restore all of the defaults. Click the “Restore Defaults”...
- Page 71 Using the Web-Based Advanced User Interface Saving a Current Configuration You can save your current configuration by using this feature. Saving your configuration will allow you to restore it later if your settings are lost or changed. It is recommended that you back up your current configuration before performing a firmware update.
- Page 72 Using the Web-Based Advanced User Interface When the save is complete, you will see the window below. Click “Close”. The configuration is now saved. Restoring a Previous Configuration This option will allow you to restore a previously saved configuration. Click “Browse”. A window will open that allows you to select the location of the configuration file.
- Page 73 Using the Web-Based Advanced User Interface You will be asked if you want to continue. Click “OK”. A reminder window will appear. It will take up to 60 seconds for the configuration restoration to complete. Click “OK”. A 60-second countdown will appear on the screen. When the countdown reaches zero, the Router’s configuration will be restored.
-
Page 74: Updating The Firmware
Using the Web-Based Advanced User Interface Updating the Firmware From time to time, Belkin may release new versions of the Router’s firmware. Firmware updates contain feature improvements and fixes to problems that may have existed. When Belkin releases new firmware, you can download the firmware from the Belkin update website and update your Router’s firmware to the latest version. - Page 75 Using the Web-Based Advanced User Interface Downloading a New Version of Firmware If you click the “Check Firmware” button and a new version of firmware is available, you will see a screen similar to the one below: To download the new version of firmware, click “Download”. A window will open that allows you to select the location where you want to save the firmware file.
- Page 76 Using the Web-Based Advanced User Interface When the save is complete, you will see the following window. Click “Close”. The download of the firmware is complete. To update the firmware, follow the next steps in “Updating the Router’s Firmware”. Updating the Router’s Firmware In the “Firmware Update”...
- Page 77 Using the Web-Based Advanced User Interface The “Update Firmware” box will now display the location and name of the firmware file you just selected. Click “Update”. You will be asked if you are sure you want to continue. Click “OK”. You will see one more message.
- Page 78 Using the Web-Based Advanced User Interface Changing System Settings The “System Settings” page is where you can enter a new administrator password, set the time zone, enable remote management, and turn on and off the NAT function of the Router. Setting or Changing the Administrator Password The Router ships with NO password entered.
- Page 79 Router to contact the time servers on the Internet and get a response. You cannot set the clock yourself. Enabling Remote Management Before you enable this advanced feature of your Belkin Router, MAKE SURE YOU HAVE SET THE ADMINISTRATOR PASSWORD. Remote management allows you to make changes to your Router’s settings from anywhere on the Internet.
- Page 80 Using the Web-Based Advanced User Interface Advanced Feature: The “Remote Access Port” option allows you to configure the desired “Remote Access Port for Remote Management” feature. The default access port is set to port 80. Enabling/Disabling NAT (Network Address Translation) Note: This advanced feature should be employed by advanced users only.
- Page 81 Using the Web-Based Advanced User Interface Enabling/Disabling UPnP UPnP (Universal Plug-and-Play) is yet another advanced feature offered by your Belkin Router. It is a technology that offers seamless operation of voice messaging, video messaging, games, and other applications that are UPnP-compliant. Some applications require the Router’s firewall to be configured in a specific way to operate properly.
-
Page 82: Manually Configuring Network Settings
Manually Configuring Network Settings Set up the computer that is connected to the cable or DSL modem FIRST using these steps. You can also use these steps to add computers to your Router after the Router has been set up to connect to the Internet. - Page 83 Manually Configuring Network Settings Manually Configuring Network Adapters in Mac OS X Click on the “System Preferences” icon. Select “Network” from the “System Preferences” menu. Select “Built-in Ethernet” next to “Show” in the Network menu.
- Page 84 Manually Configuring Network Settings Select the “TCP/IP” tab . Next to “Configure” , you should see “Manually” or “Using DHCP”. If you do not, check the PPPoE tab to make sure that “Connect using PPPoE” is NOT selected. If it is, you will need to configure your Router for a PPPoE connection type using your user name and password.
- Page 85 Manually Configuring Network Settings Manually Configuring Network Settings in Windows 2000, NT, or XP Click “Start”, “Settings”, then “Control Panel”. Double-click on the “Network and dial-up connections” icon (Windows 2000) or the “Network” icon (Windows XP). Right-click on the “Local Area Connection” associated with your network adapter and select “Properties”...
- Page 86 Manually Configuring Network Settings Manually Configuring Network Adapters in Windows 98SE or Me Right-click on “My Network Neighborhood” and select “Properties” from the drop-down menu. Select “TCP/IP Settings” for your installed network adapter. You will see the following window. If “Specify and IP address” is selected, your Router will need to be set up for a static IP connection type.
-
Page 87: Recommended Web Browser Settings
Recommended Web Browser Settings In most cases, you will not need to make any changes to your web browser’s settings. If you are having trouble accessing the Internet or the advanced web-based user interface, then change your browser’s settings to the recommended settings in this section. Internet Explorer 4.0 or Higher Start your web browser. - Page 88 Recommended Web Browser Settings Make sure there are no check marks next to any of the displayed options: “Automatically detect settings”, “Use automatic configuration script”, and “Use a proxy server”. Click “OK”. Then click “OK” again in the “Internet Options” page. Netscape Navigator 4.0 or Higher Start Netscape.
-
Page 89: Troubleshooting
Troubleshooting Problem: Installation CD does not automatically start. Solution: If the CD-ROM does not start the Easy Install Wizard automatically, it could be that the computer is running other applications that are interfering with the CD drive. If the Easy Install Wizard screen does not appear within 15-20 seconds, open up your CD-ROM drive by double-clicking on the “My Computer”... - Page 90 Troubleshooting Problem: Easy Install Wizard cannot find my Router. Solution: If the Easy Install Wizard is not able to find the Router during the installation process, please check the following items: If the Easy Install Wizard is not able to find the Router during the installation process, there may be third-party firewall software installed on the computer attempting to access the Internet.
- Page 91 Troubleshooting Problem: Easy Install Wizard cannot connect my Router to the Internet. Solution: If the Easy Install Wizard is not able to connect the Router to the Internet, please check the following items: Use the troubleshooting suggestions within the Easy Install Wizard.
- Page 92 This will cause the Router to reattempt communication with the modem. If the “WAN” light on the Router is not lit after completing these steps, please contact Belkin Technical Support. Try shutting down and restarting your computer.
- Page 93 Please refer to the instructions provided by the publisher of your firewall software for instructions on configuring the firewall to allow Internet access. If you are still unable to access the Internet after disabling any firewall software, please contact Belkin Technical Support.
- Page 94 Solution: If you are unable to connect to the Internet from a wireless computer, please check the following items: Look at the lights on your Router. If you’re using a Belkin Router, the lights should be as follows: • The “Power” light should be on.
- Page 95 (as opposed to wirelessly), ensure that “Broadcast SSID” is enabled. This setting is found on the Router’s wireless “Channel and SSID” configuration page. If you are still unable to access the Internet after completing these steps, please contact Belkin Technical Support.
- Page 96 Troubleshooting Problem: • My wireless network performance is inconsistent. • Data transfer is sometimes slow. • Signal strength is poor. • Difficulty establishing and/or maintaining a Virtual Private Network (VPN) connection. Solution: Wireless technology is radio-based, which means connectivity and the throughput performance between devices decreases when the distance between devices increases.
- Page 97 Problem: I am having difficulty setting up Wired Equivalent Privacy (WEP) security on a Belkin Router (or Belkin Access Point). Solution: Log into your Wireless Router (or Access Point). Open your web browser and type in IP address of the Wireless Router (or Access Point).
- Page 98 The “Advanced” button will allow you to view and configure more options of the card. Once the “Advanced” button is clicked, the Belkin Wireless LAN Utility will appear. This Utility will allow you to manage all the advanced features of the Belkin Wireless Card.
- Page 99 For example: C3030FAF4BB2C3D44BC3D4E7E4 = 128-bit key Click “OK”, and then “Apply” to save the settings. If you are NOT using a Belkin wireless client card, please consult the manufacturer’s user manual for that wireless client card. Problem: Do Belkin products support WPA?
- Page 100 Troubleshooting Problem: I am having difficulty setting up Wireless Protected Access (WPA) security on a Belkin Wireless Router (or Belkin Access Point) for a home network. Solution: From the “Security Mode” drop-down menu, select “WPA-PSK (no server)”. For “Encryption Technique”, select “TKIP” or “AES”. This setting will have to be identical on the clients that you set up.
- Page 101 Router (or access point). Click “OK, then “Apply” to save the settings. Problem: I am NOT using a Belkin client card for a home network and I am having difficulty setting up Wireless Protected Access (WPA) security. Solution: If you are not using a Belkin Wireless Desktop or Wireless Notebook Network Card that is not equipped with WPA-enabled software, a file from Microsoft called “Windows XP Support Patch for Wireless...
- Page 102 Troubleshooting Under Windows XP, click “Start > Control Panel > Network Connections”. Select the “Wireless Networks” tab will display the following screen. Ensure the “Use Windows to configure my wireless network settings” check box is checked. Under the “Wireless Networks” tab, click the “Configure” button and you will see the following screen.
- Page 103 Troubleshooting Select “TKIP” or “AES” under “Date Encryption”. This setting will have to be identical to the Wireless Router (or access point) that you set up. Type in your encryption key in the “Network key” box. Important : Enter your pre-shared key. This can be from eight to 63 characters and can be letters, numbers, or symbols.
- Page 104 Troubleshooting Wireless Comparison Chart 11Mbps link 5x faster than 10x faster 10x faster 15x faster rate/baseline 802.11b* than 802.11b* than 802.11b* than 802.11b* Common Common Common Common Common household household household household household devices such devices such devices such devices such devices such as cordless as cordless...
- Page 105 Troubleshooting Technical Support www.belkin.com You can find technical support information at www.belkin.com/networking . If you want to contact technical support by phone, please call: US: 877-736-5771 310-898-1100 ext. 2263 Europe: 00 800 223 55 460 Australia: 1800 235 546 New Zealand: 0800 235 546...
-
Page 106: Information
Information FCC Statement DECLARATION OF CONFORMITY WITH FCC RULES FOR ELECTROMAGNETIC COMPATIBILITY We, Belkin Corporation, of 501 West Walnut Street, Compton, CA 90220, declare under our sole responsibility that the product, F5D9230-4 to which this declaration relates, complies with Part 15 of the FCC Rules. Operation is... - Page 107 Modifications The FCC requires the user to be notified that any changes or modifications to this device that are not expressly approved by Belkin Corporation may void the user’s authority to operate the equipment. Canada-Industry Canada (IC) The wireless radio of this device complies with RSS 210 Industry Canada.
- Page 108 (except for shipping charges for the product). What is not covered by this warranty? All above warranties are null and void if the Belkin product is not provided to Belkin Corporation for inspection upon Belkin’s request at the sole expense of the purchaser, or if Belkin Corporation determines that the Belkin product has been improperly installed, altered in any way, or tampered with.
- Page 109 Belkin Corporation reserves the right to review the damaged Belkin product. All costs of shipping the Belkin product to Belkin Corporation for inspection shall be borne solely by the purchaser. If Belkin determines, in its sole discretion, that it is impractical to ship the damaged equipment to Belkin Corporation, Belkin may designate, in its sole discretion, an equipment repair facility to inspect and estimate the cost to repair such equipment.
- Page 110 Information Wi-FI Interoperability Certificate ®...
- Page 111 Information IC statement Operation is subject to the following two conditions: 1) This device may not cause interference and 2) This device must accept any interference, including interference that may cause undesired operation of the device. IMPORTANT NOTE: IC Radiation Exposure Statement: This equipment complies with IC radiation exposure limits set forth for an uncontrolled environment.