Table of Contents
Advertisement
Quick Links
Advertisement
Table of Contents

Related Manuals for Simrad RS35

Summary of Contents for Simrad RS35
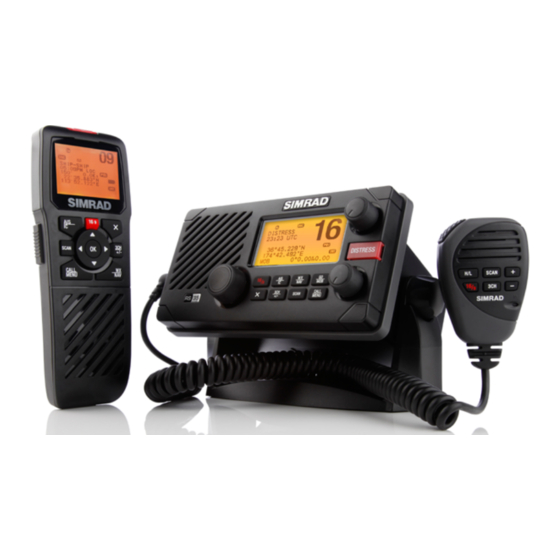
- Page 1 RS35 VHF HS35 handset Installation Instructions ENGLISH simrad-yachting.com...
-
Page 2: Table Of Contents
2.3.1 Mounting bracket installation ....................8 2.3.2 Recessed installation ........................9 Simrad Electronics may find it necessary to change or end our policies, regulations, 2.4 RS35 dimensions ..........................10 and special offers at any time. We reserve the right to do so without notice. All features and specifications subject to change without notice. - Page 3 Increase the separation between the equipment and receiver. DSC functions will not operate on the RS35 until your MMSI has been entered. Refer to DSC Connect the equipment into an output on a circuit different from that to which the receiver is Setup section for details.
-
Page 4: Installation Preparation
+/-20 deg from the front of the display. 20˚ Note: If unsure, temporarily power up the Note: A VHF antenna is not provided by Simrad. Consult your Simrad dealer for advice if radio and check for a suitable location. necessary. -
Page 5: Mounting Bracket Installation
(The screws should not be visible from the front of the radio). You can adjust the viewing angle at any time. The viewing angle has a 20º tilt range. Now install the microphone wall hanger. Now install the microphone wall hanger. Simrad - RS35 Installation Instructions Simrad - RS35 Installation Instructions... -
Page 6: Rs35 Dimensions
• metallic, use the 2 flat screws, 2 spring washers and 2 nuts to attach the handset mic wall hanger to the mounting surface. Hang the handset mic on the handset mic wall hanger. Now connect the radio. 0.96" (24.5 mm) Simrad - RS35 Installation Instructions Simrad - RS35 Installation Instructions... -
Page 7: Vhf Electrical Installation
A suitable radio antenna (not supplied) must be mounted and connected before you can Socket color (NMEA 0183) (NMEA 0183 HS) operate the radio. Consult your Simrad dealer for advice, if necessary. GROUND, Always mount the VHF antenna as high as possible and at least 37” (96 cm) from the base Shield 4800bps RS232 OUT (-) 38.5 kbps... -
Page 8: Wiring Diagram - Nmea 2000 Connections
The vessels battery negative must be common to the boat’s Ground. (Optional) You can connect the base station to the boat’s Ground. Use the Ground screw and Ground plain washer supplied to make this connection. Simrad - RS35 Installation Instructions Simrad - RS35 Installation Instructions... -
Page 9: Wiring Diagram - External Speaker And Hailer
3.4 Wiring diagram - NMEA 0183 connections VHF Antenna GPS Plotter VHF Antenna External Speaker Hailer Speaker RS35 VHF Link8 VHF Fuse Switch Black Shield White 12 VDC Power 12 VDC only Simrad - RS35 Installation Instructions Simrad - RS35 Installation Instructions... - Page 10 Red wire to battery (+), Black wire to battery (-). completely through the mounting surface. Note: If you are drilling into fiberglass, use a small drill bit to drill pilot holes before drill- ing the screw holes. Simrad - RS35 Installation Instructions Simrad - RS35 Installation Instructions...
-
Page 11: Setup Your Radio - Your User Mmsi
You must enter your User MMSI before the DSC functions of this radio will work. See the Setup section in the RS35 User Guide for full setup details. CAUTION Under extreme operating conditions, the temperature of the rear heat-sink on this radio may exceed normal surface temperatures.