Advertisement
Quick Links
·
Please read these instructions carefully to familiarize
yourself with the required tools, materials, and installation
sequences. Follow the sections that pertain to your
particular installation. This will help you avoid costly
mistakes. In addition to proper installation, read all
operating and safety instructions.
·
All information in these instructions is based upon the
latest product information available at the time of
publication. Kohler China reserves the right to make
changes in product characteristics, packaging, or
availability at any time without notice.
·
These instructions contain important care, cleaning, and
warranty information -
consumer
.
ORDERING INFORMATION
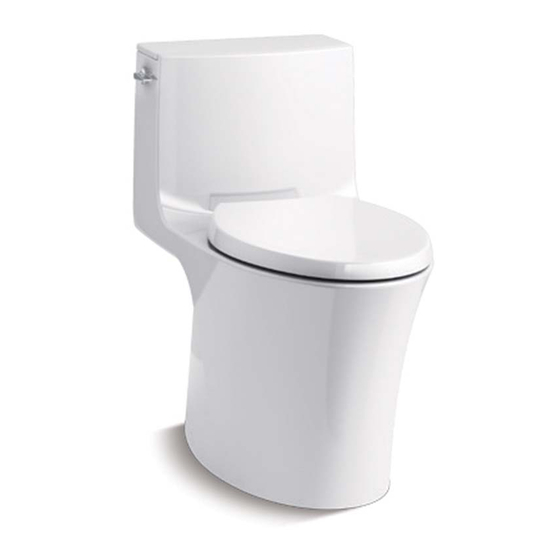
VEIL 3/4.5L Class Five 1PC Toilet 305mm ............K-1381T-S
Includes Quiet-close Toilet Seat ..............................K-4141T
VEIL 3/4.5L Class Five 1PC Toilet 305mm...........K-1381T-SL
Includes
Elongated Slim Seat ...............................K-77070T
VEIL 3/4.5L Class Five 1PC Toilet 400mm.............K-1382T-S
Includes Quiet-close Toilet Seat .............................K-4141T
VEIL 3/4.5L Class Five 1PC Toilet 400mm ...........K-1382T-SL
Includes Elongated Slim Seat ................................K-77070T
NOTES
·
Observe all local plumbing and building codes.
·
Shut off the water supply.
·
Seat post holes are on 140mm (5-1/2") centers.
·
Ensure that the new drain has the correct roughing-in
dimension. This toilet has a 305mm /400mm roughing-in
dimension.
See Fig. #1
·
Closet flange must be 305mm/400mm on-center from wall.
·
Carefully inspect the new fixture for any sign of damage.
·
For new construction, refer to the dimensions in
and Fig. #3
for locating the shut-off valve.
·
Fixture dimensions are nominal and conform to tolerances
established by ASME Standards (A112.19.2-2013).
·
The product complies with GB 6952-2015.
No.2 KOHLER ROAD, SANSHUI CENTRAL INDUSTRIAL PARK, LEPING TOWN, SANSHUI DIST., FOSHAN, GUANGDONG, PRC POST CODE 528137
8# MENGSHAN RD, ECONOMIC DEVELOPMENT ZONE OF HUANTAI, ZIBO, SHANDONG, CHINA POST CODE: 256410
1262233-T01-B
please leave instructions for the
.
Fig. #1
S-TRAP 305mm K-1381T-S/K-1381T-SL
S-TRAP 400mm K-1382T-S/K-1382T-SL
·
·
·
3/4.5L
3/4.5L
3/4.5L
3/4.5
L
·
·
·
140mm
·
305mm/400mm(
·
·
·
·
2013.
·
GB 6952-2015
2
528137
8
256410
©
Copyright Kohler China Investment Co., Ltd. 2018
-1-
©
VEIL
INSTALLATION INSTRUCTIONS
3/4.5L CLASS FIVE 1PC TOILET
3/4.5L
305mm........K-1381T-S
..............................K-4141T
305mm ......K-1381T-SL
...........................................K-77070T
400mm ........K-1382T-S
...............................K-4141T
400mm ......K-1382T-SL
...........................................K-77070T
1)
305mm/400mm
1
3
ASME
A112.19.2-
-
2018
Advertisement

Related Manuals for Kohler VEIL K-1381T-S


Summary of Contents for Kohler VEIL K-1381T-S
- Page 1 The product complies with GB 6952-2015. GB 6952-2015 No.2 KOHLER ROAD, SANSHUI CENTRAL INDUSTRIAL PARK, LEPING TOWN, SANSHUI DIST., FOSHAN, GUANGDONG, PRC POST CODE 528137 528137 8# MENGSHAN RD, ECONOMIC DEVELOPMENT ZONE OF HUANTAI, ZIBO, SHANDONG, CHINA POST CODE: 256410 256410 ©...
-
Page 2: Tools And Materials Required
If the existing toilet does not have a supply shut-off valve below the tank, install one before installing the new toilet. Reference Value Unit: mm Finished Wall 305/400 Fig.#1 Kohler reserves the right to change marked dimensions without prior notice. 1262233-T01-B... -
Page 3: Installation
The expansion of cement due to a rise in temperature may make the toilet crack or cause damage. Kohler is not responsible for any damage caused by installation with the use of cement. TO INSTALL SUPPLY... - Page 4 Install brackets. Fig.#6 Firmly press the toilet gasket onto the toilet outlet of plastic trap. Plastic Trap Outlet Toilet Gasket NOTE 1: Wax ring type toilet gasket should not be installed at temperatures less than 21 C. NOTE 2: If you are using a toilet gasket with an integral plastic sleeve, make sure the gasket is positioned with the sleeve facing away from the...
- Page 5 Apply caulk around base. Fig.#11 TO CONNECT WATER SUPPLY Supply Shank* * Flexible hose (not provided) are recommended to connect the supply Supply Shut-Off Valve line to the fill valve. If you use a rigid connection(not provided), take care not to apply side forces to the bottom of the fill valve.
- Page 6 FILL FLOAT WITH BALLAST Adjust the float by the cross-shaped thread and sliding it up or down on the float rod until the water level is at the marked water line. Test flush the toilet. Check all connections for leakage for several days.
- Page 7 1262233-T01-B...
-
Page 8: Consumer Responsibilities
CAUTION: Don t use any cement while installing the toilet. Heat expansion of the toilet may damage the feet of the toilet. Kohler will not be responsible for any damage because of using cement. WARNING: Risk of product damage. Do not throw into the toilet what is easy to block it, such as newspaper, paper pilch, sanitary towel.