
Related Manuals for Philips 221P3LPEB/00


Summary of Contents for Philips 221P3LPEB/00
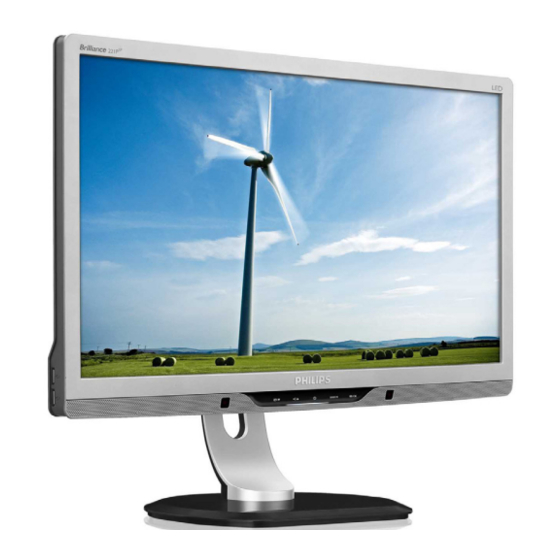
- Page 1 EN User manual Customer care and warranty Troubleshooting & FAQs 221P3...
-
Page 2: Table Of Contents
5.1 Resolution & Preset Modes...27 6. Power Management ...28 7. Regulatory Information ...29 8. Customer care and warranty ...35 8.1 Philips’ Flat Panel Monitors Pixel Defect Policy ...35 8.2 Customer Care & Warranty ...37 9. Troubleshooting & FAQs ...40 9.1 Troubleshooting ...40 9.2 SmartControl Premium FAQs ...42... -
Page 3: Important
DC power cord for normal operation. • Please use approved power cord provided by Philips all the time. If your power cord is missing, please contact with your local service center. (Please refer to Customer Care Consumer Information Center.) -
Page 4: Notational Descriptions
1.Important Temperature: 0-40°C 32-95°F Humidity: 20-80% RH • IMPORTANT: Always activate a moving screen saver program when you leave your monitor unattended. Always activate a periodic screen refresh application if your monitor will display unchanging static content. Uninterrupted display of still or static images over an extended period may cause "burn in", also known as "after-imaging"... -
Page 5: Disposal Of Product And Packing
Recycling Information for Customers Your display is manufactured with high quality materials and components which can be recycled and reused. To learn more about our recycling program please visit www.philips.com/about/sustainability/ recycling . -
Page 6: Setting Up The Monitor
2. Connect the VGA or DVI or Display Port 3. Connect the Audio cable for audio 4. Connect the USB upstream port on Register your product and get support at www.philips.com/welcome 221P3 LP Quick Start 5. Plug the power cord into a nearby AC 6. -
Page 7: The Osd Menu
Description of the On Screen Display What is On-Screen Display (OSD)? On-Screen Display (OSD) is a feature in all Philips Monitors. It allows an end user to adjust screen performance or select functions of the monitors directly through an on-screen instruction window. - Page 8 2. Setting up the monitor Resolution notification This monitor is designed for optimal performance at its native resolution, 1920 x 1080 at 60 Hz. When the monitor is powered on at a different resolution, an alert is displayed on screen: Use 1920 x 1080 at 60 Hz for best results.
-
Page 9: Remove Base Stand And Base
2. Setting up the monitor 2.3 Remove Base Stand and Base Remove the Base 221P3 1. Push the release button. 2. Remove the base from the monitor. -
Page 10: Image Optimization
How does it work? SmartImage is an exclusive, leading edge Philips technology that analyzes the content displayed on your screen. Based on a scenario you select, SmartImage dynamically enhances the contrast,... -
Page 11: Smartcontrast
3. Image Optimization • Office: Enhances text and dampens brightness to increase readability and reduce eye strain. This mode significantly enhances readability and productivity when you’re working with spreadsheets, PDF files, scanned articles or other general office applications. • Photo: This profile combines color saturation, dynamic contrast and sharpness enhancement to display photos and other images with outstanding clarity in vibrant... -
Page 12: Philips Smartcontrol Premium
3. Image Optimization 3.3 Philips SmartControl Premium The new SmartControl Premium software by Phillips allows you to control your monitor via an easy to use on-screen graphic interface. Complicated adjustments are a thing of the past as this user friendly software guides you... - Page 13 3. Image Optimization Color menu • Color Menu allow you to adjust RGB, Black Level, White Point, Color Calibra- tion, and SmartImage (Please refer to SmartImage section). • You can follow the instruction and do the adjustment. • Refer to below table for sub-menu item base on your input.
- Page 14 3. Image Optimization 1. "Show Me" starts color calibration tutorial. 2. Start - starts the 6-step color calibration sequence. 3. Quick View loads the before/after images. 4. To return to Color home pane, click the Cancel button. 5. Enable color calibration - by default is on. If unchecked, does not allow for color calibration to happen, dimes out start and quick view buttons.
- Page 15 3. Image Optimization SmartImage Allows user to change setting for better display setting based on content. When Entertainment is set, SmartContrast and SmartResponse are enabled. Theft Deterrence Pane will only be active when selecting Theft Deterrence Mode from the drop-down Plug Ins menu. To enable Theft Deterrence, clicking Enable Theft Deterrence Mode button brings up the following screen:...
- Page 16 3. Image Optimization After creating PIN, the Theft Deterrence pane will indicate Theft Deterrence Enabled and provide PIN Options button: • Theft Deterrence Enabled is displayed. • Disable Theft Deterrence Mode opens pane screen on next page. • PIN Options button only available after user creates PIN, button opens secure PIN web site.
- Page 17 3. Image Optimization Options>Input - Will only be active when selecting Input from the drop-down Options menu. On a non-supported display capable of DDC/CI, only the Help and Options tabs are available. All other SmartControl Premium tabs are not available. • Display the Source instruction pane and current input source setting.
- Page 18 3. Image Optimization Help>User Manual - Will only be active when selecting User Manual from the drop-down Help menu. On a non-supported display capable of DDC/CI, only the Help and Options tabs are available. Help>Version - Will only be active when selecting Version from the drop- down Help menu.
-
Page 19: Smartdesktop Guide
3. Image Optimization The task tray has five entries: • Help - Access to User Manual file: Open User Manual file using the default browser window. • Technical Support - displays the tech sup- port page. • Check for Update - takes the user to PDI Landing and checks the user’s version against the most current available. - Page 20 3. Image Optimization Drag and Drop Windows Once the partitions are configured and Align to partition is selected a window can be dragged into the region and it will automatically align. When the window and mouse cursor are within the region, the region will become highlighted. Note If the outline of the region is not visible when dragging the window, “Show windows contents...
- Page 21 3. Image Optimization Note If more than one display is attached, the user can select the targeted display to change the partition. The highlighted icon represents the current active partition. • Identify Partition – Displays the outline grid on the desktop for the current parti- tion.
- Page 22 3. Image Optimization SmartDesktop Partition Definitions Name Description Full Desktop Applies all settings to the entire desktop. Vertical Assesses the screen resolution and divides the display into two evenly sized vertical regions. For 90/270 maintain vertical configuration. Horizontal Assesses the screen resolution and divides the display into two evenly sized horizontal regions.
- Page 23 3. Image Optimization Name Description Horizontal Split Top Assesses the screen resolution and divides the display into two evenly sized horizontal regions, the top region is single, the bottom region is spilt into two evenly sized regions. For 90 Partition 1 on right side Vertical Partition 2&3 on left side Vertical.
-
Page 24: Power Sensor
4. Power Sensor 4. Power Sensor™ PowerSensor is a unique environmentally friendly technology from Philips which enables user to save up to 80% of power consumption. In line with Philip’s Sense and Simplicity drive, this user friendly technology works for you right out of the box without any hardware or software installation, and without any user intervention in the default mode. - Page 25 4. Power Sensor Custom settings If you prefer to be in a position outside the perimeters listed above, choose a higher strength signal for optimal detection efficiency: The higher the setting, the stronger the detection signal. For maxi- mum PowerSensor efficiency and proper detection, please position yourself directly in front of your monitor.
-
Page 26: Technical Specifications
5. Technical Specifications 5. Technical Specifications 221P3 Picture/Display Monitor panel type Backlight Panel size Aspect ratio Pixel Pitch Brightness SmartContrast Contrast ratio (typ.) Response time (typical) Optimum Resolution Viewing angle Picture Enhancement Display colors Vertical refresh rate Horizontal Frequency sRGB Connectivity Signal input Input Signal... - Page 27 5. Technical Specifications Power Sensor Heat Dissipation* Normal Operation Sleep (Standby) Off (DC switch) Power LED indicator Power Supply 221P3 LPY Power On mode On mode (ECO mode) Energy Consumption (EnergyStar 5.0 test method) Normal Operation (typcial) Sleep (Standby) Off (DC switch) Power Sensor Heat Dissipation* Normal Operation...
- Page 28 Color Finish Note 1. EPEAT Gold or Silver is valid only where Philips registers the product. Please visit www.epeat.net for registration status in your country. 2. This data is subject to change without notice. Go to www.philips.com/support to download the latest version of leaflet.
-
Page 29: Resolution & Preset Modes
5. Technical Specifications 5.1 Resolution & Preset Modes Maximum Resolution 1920 x 1080 at 60 Hz (analog input) 1920 x 1080 at 60 Hz (digital input) Recommended Resolution 1920 x 1080 at 60 Hz (digital input) H. freq (kHz) Resolution 31.47 720x400 31.47... -
Page 30: Power Management
6. Power Management 6. Power Management If you have VESA DPM compliance display card or software installed in your PC, the monitor can automatically reduce its power consumption when not in use. If an input from a keyboard, mouse or other input device is detected, the monitor will 'wake up' automatically. -
Page 31: Regulatory Information
RoHs directive mandating restrictions on hazardous substances in electrical and electronic equipment have been adhered to in order to make Philips monitors safe to use throughout its life cycle. Congratulations! This display is designed for both you and the... - Page 32 7. Regulatory Information EPEAT (www.epeat.net) “The EPEAT (Electronic Product Environmental Assessment Tool) program evaluates computer desktops, laptops, and monitors based on 51 environmental criteria developed through an extensive stakeholder consensus process supported by US EPA. EPEAT system helps purchasers in the public and private sectors evaluate, compare and select desktop computers, notebooks and monitors based on their environmental...
- Page 33 7. Regulatory Information Energy Star Declaration (www.energystar.gov) As an ENERGY STAR ® Partner, we have determined that this product meets the ENERGY STAR ® guidelines for energy efficiency. Note We recommend you switch off the monitor when it is not in use for a long time. Federal Communications Commission (FCC) Notice (U.S.
- Page 34 7. Regulatory Information d'interférences dans le cadre d'une installation particulière. Si cet appareil est la cause d'interférences nuisibles pour la réception des signaux de radio ou de télévision, ce qui peut être décelé en fermant l'équipement, puis en le remettant en fonction, l'utilisateur pourrait essayer de corriger la situation en prenant les mesures suivantes:...
- Page 35 7. Regulatory Information North Europe (Nordic Countries) Information Placering/Ventilation VARNING: FÖRSÄKRA DIG OM ATT HUVUDBRYTARE OCH UTTAG ÄR LÄTÅTKOMLIGA, NÄR DU STÄLLER DIN UTRUSTNING PÅPLATS. Placering/Ventilation ADVARSEL: S Ø R G V E D P L AC E R I N G E N F O R , AT NETLEDNINGENS STIK OG STIKKONTAKT ER NEMT TILGÆNGELIGE.
- Page 36 7. Regulatory Information China RoHS The People's Republic of China released a regulation called "Management Methods for Controlling Pollution by Electronic Information Products" or commonly referred to as China RoHS. All products including CRT and Monitor which are produced and sold for China market have to meet China RoHS request.
-
Page 37: Customer Care And Warranty
No manufacturer can guarantee that all panels will be free from pixel defects, but Philips guarantees that any monitor with an unacceptable number of defects will be repaired or replaced under warranty. This notice explains the different types of pixel defects and defines acceptable defect levels for each type. - Page 38 In order to qualify for repair or replacement due to pixel defects during the warranty period, a TFT Monitor panel in a Philips flat panel monitor must have pixel or sub pixel defects exceeding the tolerances listed in the following tables.
-
Page 39: Customer Care & Warranty
8.2 Customer Care & Warranty For warranty coverage information and additional support requirement valid for your region, please visit www.philips.com/support website for details. You may also contact your local Philips Customer Care Center number listed below. Contact Information for WESTERN EUROPE region:... - Page 40 8. Customer care and warranty Contact Information for CENTRAL AND EASTERN EUROPE region: Country Call center BELARUS BULGARIA CROATIA ESTONIA LATVIA LITHUANIA ROMANIA SERBIA & MONTENEGRO SLOVENIA UKRAINE Russia Slovakia Turkey Czech Rep. Hungary Contact Information for LATIN AMERICA region: Country Call center Brazil...
- Page 41 PT. Gadingsari elektronika Prima PCS One Korea Ltd. After Market Solutions (CE) Sdn Bhd Philips Consumer Service Philips Electronics Singapore Pte Ltd (Philips Consumer Care Center) FETEC.CO Axis Computer System Co., Ltd. Sylvara Technologies Pty Ltd AL SHAHD COMPUTER L.L.C...
-
Page 42: Troubleshooting & Faqs
Visible signs of smoke or sparks. • Do not perform any troubleshooting steps. • Disconnect the monitor from mains power source immediately for safety. • Contact with Philips customer service representative immediately. Imaging Problems Image is not centered. • Adjust the image position using the “Auto”... - Page 43 The "power on" light is too strong and is disturbing. • You can adjust “power on” light using the power LED Setup in OSD main Controls. For further assistance, refer to the Consumer Information Centers list and contact Philips customer service representative.
-
Page 44: Smartcontrol Premium Faqs
Attention Theft mode enabled I forgot my PIN for Theft Deterrence Function. How can I do? Ans.: Philips Service center has a right to ask for legitimate identification and authorization, in order to establish ownership of the monitor. -
Page 45: General Faqs
• Restart your computer and repeat step 2 and 3 to verify that your PC is set at 1920 x 1080 @60Hz. • Shut down your computer, disconnect your old monitor and reconnect your Philips Monitor. • Turn on your monitor and then turn on your PC. - Page 46 6504K. Can I connect my Monitor to any PC, workstation or Mac? Ans.: Yes. All Philips Monitors are fully compatible with standard PCs, Macs and workstations. You may need a cable adapter to connect the monitor to your Mac system.
- Page 47 2011 © Koninklijke Philips Electronics N.V. All rights reserved. Philips and the Philips Shield Emblem are registered trademarks of Koninklijke Philips Electronics N.V. and are used under license from Koninklijke Philips Electronics N.V. Specifcations are subject to change without notice.