Advertisement
Available languages
Available languages
Quick Links
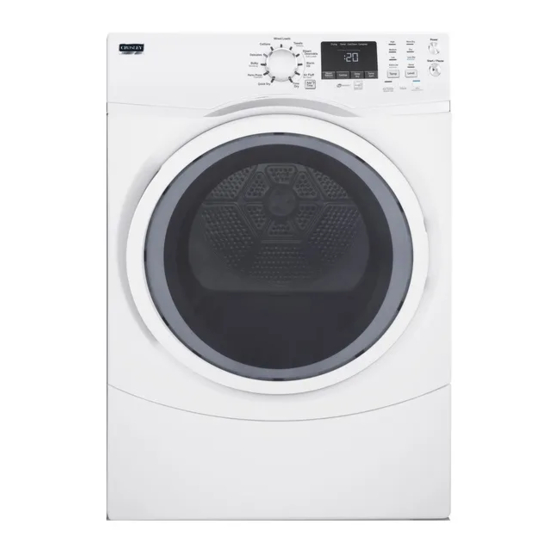
Dryer
Model: YFD45
Contents
Safety Information . . . . . . . . . . . . . . . . .3
Using The Dryer
Getting Started . . . . . . . . . . . . . . . . . . .5
Loading . . . . . . . . . . . . . . . . . . . . . . . .9
Care And Cleaning . . . . . . . . . . . . . . . .9
Venting . . . . . . . . . . . . . . . . . . . . . . . . .10
Optional Instructions
Reversing The Door Swing . . . . . . . .11
Stacking . . . . . . . . . . . . . . . . . . . . . . .15
Troubleshooting Tips . . . . . . . . . . . . .18
Limited Warranty . . . . . . . . . . . . . . . . .21
Consumer Support . . . . . . . . . . . . . . .22
Write the model and serial numbers here:
Model # _______________________________
Serial # _______________________________
They are on the label on the front of the dryer
behind the door .
49-3000063
Rev 0
08-18 GEA
Owner's Manual
English/Español
Advertisement

Related Manuals for Crosley YFD45


Summary of Contents for Crosley YFD45
- Page 1 Dryer Owner’s Manual Model: YFD45 English/Español Contents Safety Information . . . . . . . . . . . . . . . . .3 Using The Dryer Getting Started .
- Page 2 America's iconic brand, backed by America's best appliance warranty! 10 Year Limited Warranty FREE on all Crosley Appliances! MANUFACTURER'S CROSLEY'S EXTENDED APPLIANCE COMPONENT LIMITED WARRANTY LIMITED WARRANTY Refrigerator or Compressor 1 Year Freezer Gearcase/ Top-Load Washer 1 Year Transmission Front-Load...
- Page 3 IMPORTANT SAFETY INFORMATION READ ALL INSTRUCTIONS BEFORE USING THE APPLIANCE To reduce the risk of fire, explosion, electric shock, or injury to persons when using your appliance, WARNING follow basic precautions, including the following: ■ Read all instructions before using the appliance . ■...
- Page 4 IMPORTANT SAFETY INFORMATION READ ALL INSTRUCTIONS BEFORE USING THE APPLIANCE ADDITIONAL GAS DRYER WARNINGS - Fire or Explosion Hazard WARNING Failure to follow safety warnings exactly could result in serious injury, death, or property damage. - DO NOT store or use gasoline or other flammable vapors and liquids in the vicinity of this or any other appliance.
- Page 5 Getting started To reduce the risk of fire, electric shock, or injury to persons, read the IMPORTANT SAFETY WARNING INFORMATION before operating this appliance . WARNING - Fire Hazard • Keep flammable materials and vapors, such as • Items containing foam, rubber, or plastic must be dried gasoline, away from dryer .
- Page 6 Getting started Power Press to “wake up” the display . If the display is active, press to turn the dryer off . NOTE: Pressing Power does not disconnect the appliance from the power supply . Dry Cycles The dry cycle controls the cycle time for the drying process . The chart below will help you match the dry setting with the loads .
- Page 7 Getting started Level The sensor continuously monitors the amount of moisture in the load . When the moisture in your clothes reaches your selected dry level, the dryer will stop . NOTE: Sensor dry Level only works with Cottons, Normal, Perm Press, Delicates, Quick Dry, Bulky, Towels/Sheets, Dewrinkle and Steam Dewrinkle cycles .
- Page 8 Getting started Volume Alerts you that the cycle is complete . The beeper will continue to sound every minute for the next 5 minutes, until the clothes have been removed . The clothes should be removed when the beeper goes off so wrinkles don’t set in . Press Volume to select low, medium or high volume, or to turn the beeper off .
- Page 9 Loading Always follow fabric manufacturer’s care label when laundering . Sorting and Loading Hints WARNING - Fire Hazard • DO NOT dry anything that has ever had any type of oil • Keep flammable materials and vapors, such as gasoline, away from dryer . on it (including cooking oils) .
- Page 10 Venting Venting the Dryer For the best drying performance, the dryer needs to be properly vented . The dryer will use more energy and run longer if it is not vented to the specifications below . Carefully follow the details on Exhausting in the Installation Instructions . Correct Incorrect Venting...
- Page 11 Optional Instructions REVERSING THE DOOR SWING (if desired) IMPORTANT NOTES • Read the instructions all the way through IMPORTANT: Once you begin, do not move the before starting . cabinet until door-swing reversal is completed . • Handle parts carefully to avoid scratching paint . These instructions are for changing the hinges •...
- Page 12 Optional Instructions REVERSING THE DOOR SWING (if desired) REMOVE THE DOOR ASSEMBLY REMOVE HINGE AND COVER A. Open the door to approximately 130 degrees . IMPORTANT: Note the location of the hinge (left or right) before removing . A. Remove the 6 machine screws from the hinge and the 2 machine screws from the hinge cover .
- Page 13 Optional Instructions REVERSING THE DOOR SWING (if desired) REINSTALL HINGE ASSEMBLY REINSTALL HINGE COVER (cont.) B. Hold the hinge cover in place and turn the B. Hold the hinge in place and turn the door door over . Install the hinge cover using the 2 over .
- Page 14 Optional Instructions REVERSING THE DOOR SWING (if desired) MOVE STRIKE BRACKET (cont.) REINSTALL DOOR ASSEMBLY A. Install the door on the dryer . To ease this B. Switch the strike bracket and its cover to step, the hinge has keyholes that allow a the opposite side by removing the screws .
- Page 15 Optional Instructions STACKING THE WASHER AND DRYER (if desired) If you are planning to stack the washer and dryer, order Stacking Kit number GEFLSTACK to be used for this dryer . Kit sold separately . BEFORE YOU BEGIN REQUIREMENTS FOR ALCOVE OR CLOSET INSTALLATION Read these instructions completely and carefully.
- Page 16 Optional Instructions INSTALLING THE STACK BRACKET KIT REMOVE THE DRYER INSTALL BRACKET TO DRYER LEVELING LEGS A. Align the holes in the left bracket with the holes in A. Carefully lay the dryer on its side . Use the packing the bottom left corner of the dryer .
- Page 17 Optional Instructions INSTALLING THE STACK BRACKET KIT INSTALL DRYER AND FINALIZE THE INSTALLATION BRACKET ON WASHER Do not push on the dryer once CAUTION installed to top of the washer . Disconnect power before installing . WARNING Pushing on the dryer may result in pinched fingers . Failure to do so could result in serious injury or death .
- Page 18 Troubleshooting Tips... Before you call for service Problem Possible Cause What To Do Dryer shakes or Some shaking/noise is normal. Move dryer to an even floor space, or adjust leveling legs as makes noise Dryer may be sitting unevenly. necessary until even . Clothes take Improper or obstructed Check the Installation Instructions to make sure the dryer...
- Page 19 Troubleshooting Tips... Before you call for service Problem Possible Causes What To Do Dryer doesn’t Fuse is blown/circuit breaker Check the building’s fuse/circuit breaker box and replace both heat is tripped; the dryer may fuses or reset both breakers . Your dryer may tumble if only one tumble but not heat fuse is blown or one breaker tripped .
- Page 20 Troubleshooting Tips... Before you call for service Problem Possible Causes What To Do Static occurs No fabric softener was used Try a fabric softener . Bounce Fabric Conditioner Dryer Sheets have been approved for ® use in all GE Appliances dryers when used in accordance with the manufacturer’s instructions .
- Page 21 Your appliance is covered by a limited warranty, as listed below, by GE Appliances . All warranty service is provided by our GE Appliances Factory Service Centers, or an authorized service technician . To schedule service, call Crosley at 800 .544 .4780 . Please have your serial number and your model number available when calling for service .
- Page 22 Consumer Support Crosley Website Have a question or need assistance with your appliance? Try the Crosley Website 24 hours a day, any day of the year at Crosley.com . You can also shop for more great Crosley products on our website.
-
Page 23: Table Of Contents
Manual del Secadora Propietario Modelo: YFD45 Contenido Información de Seguridad . . . . . . . . . .3 Como usar la Secadora Puesta en Marcha . . . . . . . . . . . . . . . .5 Carga . - Page 24 1 Año Motor/Elemento de Secadora a Gas/Eléctrica 1 Año Calefacción Elementos para Cocina Eléctrica Hornear/ Asar/ de la 1 Año Superficie Arrancadoras y Cocina a Gas 1 Año Módulos de Chispa Visite Crosley.com/mycrosley y registre la garantía limitada extendida . 49-3000063...
- Page 25 INFORMACIÓN IMPORTANTE DE SEGURIDAD LEA TODAS LAS INSTRUCCIONES ANTES DE USAR Para reducir el riesgo de incendio, explosión, descargas eléctricas o lesiones sobre las ADVERTENCIA personas al usar su electrodoméstico, siga las precauciones básicas, incluyendo lo siguiente: ■ Lea todas las instrucciones antes de usar este electrodoméstico . ■...
- Page 26 INFORMACIÓN IMPORTANTE DE SEGURIDAD LEA TODAS LAS INSTRUCCIONES ANTES DE USAR ADVERTENCIAS ADICIONALES SOBRE LA SECADORA A - Riesgo de incendio o de explosión ADVERTENCIA El incumplimiento estricto de las advertencias de seguridad podría resultar en lesiones graves, la muerte o daños a la propiedad. - NO guarde ni use gasolina u otros vapores y líquidos inflamables cerca de éste ni de otros electrodomésticos.
-
Page 27: Puesta En Marcha
Puesta en Marcha Para reducir el riesgo de incendios, descargas eléctricas o heridas, lea las INFORMACIÓN ADVERTENCIA IMPORTANTE DE SEGURIDAD antes de utilizar este electrodoméstico . ADVERTENCIA - Riesgo de incendio • Las prendas con gomaespuma, goma, o plástico • Mantenga cualquier material y vapores inflamables, deberán ser secadas en un tendedero . - Page 28 Puesta en Marcha Power (Encendido/apagado) Pulse este botón para “activar” la pantalla . Si la pantalla está activa, presione para apagar la secadora . NOTA: Al pulsar el botón de Power (encendido/apagado) no se desconecta la lavadora de la corriente . Ciclos de secado El ciclo de secado controla el tiempo del ciclo para el proceso de secado .
- Page 29 Puesta en Marcha Level (Nivel) El sensor continuamente monitorea la cantidad de humedad de la carga . Cuando la humedad de sus ropas alcanza su nivel de secado seleccionado, la secadora se detendrá . NOTA: El Nivel de secado por sensor sólo funciona con los ciclos Cottons (Algodones), Normal (Normal), Perm Press (Presión Permanente), Delicates (Prendas Delicadas), Quick Dry (Secado Rápido), Bulky (Abultado), Towels/ Sheets (Toallas/ Sábanas), Dewrinkle (Desarrugar) y Steam Dewrinkle (Desarrugar al Vapor) .
- Page 30 Puesta en Marcha Volume (Volumen) Le indica que el ciclo ha finalizado . El pito seguirá sonando cada minuto durante los 5 minutos siguientes, hasta que retire las prendas . Las prendas deben retirarse cuando el pito deja de sonar para que no se fijen las arrugas . Presione Volume (Volumen) para seleccionar volumen bajo, medio o alto, o para apagar el pito .
-
Page 31: Carga
Carga Siempre siga las instrucciones del fabricante de la ropa cuando lave . Consejos de clasificación y carga ADVERTENCIA - Riesgo de incendio • Mantenga cualquier material y vapores inflamables, • NO seque nada que alguna vez haya tenido algún tales como gasolina, alejados de la secadora . -
Page 32: Ventilación
Ventilación Ventilación de la Secadora Para un mejor funcionamiento del secado, es necesario que la secadora sea ventilada de forma apropiada . La secadora usará más energía y funcionará durante más tiempo si no está ventilada de acuerdo con las especificaciones siguientes . -
Page 33: Instrucciones Opcionales
Instrucciones Opcionales CÓMO INVERTIR LA APERTURA DE LA PUERTA (si así se desea) NOTAS IMPORTANTES • Lea todas las instrucciones antes de comenzar . IMPORTANTE: Una vez que haya comenzado, no mueva el gabinete hasta haber finalizado la • Manipule las piezas con cuidado para no rayar inversión de la apertura de la puerta . -
Page 34: Puerta
Instrucciones Opcionales CÓMO INVERTIR LA APERTURA DE LA PUERTA (si así se desea) RETIRE EL ENSAMBLE DE LA QUITE LA BISAGRA Y LA TAPA PUERTA IMPORTANTE: Observe la ubicación de la bisagra (izquierda o derecha) antes de retirar la misma . A. - Page 35 Instrucciones Opcionales CÓMO INVERTIR LA APERTURA DE LA PUERTA (si así se desea) REINSTALE EL CONJUNTO DE REINSTALE LA TAPA DE LA BISAGRAS (cont.) BISAGRA (cont.) B. Sostenga la bisagra y dé vuelta la puerta . B. Sostenga la tapa de la bisagra y dé vuelta Instale la bisagra usando los 6 tornillos para la puerta .
- Page 36 Instrucciones Opcionales CÓMO INVERTIR LA APERTURA DE LA PUERTA (si así se desea) MUEVA EL SOPORTE DE REINSTALE EL CONJUNTO DE IMPACTO (cont.) PUERTA B. Cambie el soporte de impacto y su cubierta A. Instale la puerta en la secadora . Para facilitar al lado opuesto al quitar los tornillos .
- Page 37 Instrucciones Opcionales CÓMO APILAR LA LAVADORA Y LA SECADORA (si así lo desea) Si planea apilar la lavadora y secadora, solicite el kit de apilado número GEFLSTACK para usar con esta secadora . El kit se vende por separado . ANTES DE COMENZAR REQUERIMIENTOS - INSTALACIÓN EN NICHOS O ARMARIOS...
-
Page 38: Apilado
Instrucciones Opcionales CÓMO INSTALAR EL KIT DE SOPORTE DE APILADO CÓMO INSTALAR EL SOPORTE CÓMO QUITAR LAS PATAS NIVELADORAS DE LA SECADORA EN LA SECADORA A. Con cuidado coloque la secadora sobre su lado . A. Alinee los orificios del soporte izquierdo con Utilice el material de empaque para no rayar el los orificios del extremo inferior izquierdo de la acabado de la secadora . - Page 39 Instrucciones Opcionales CÓMO INSTALAR EL KIT DE SOPORTE DE APILADO INSTALAR LA SECADORA Y EL FINALICE LA INSTALACIÓN SOPORTE EN LA LAVADORA No empuje la secadora una PRECAUCIÓN vez que se haya instalado Desconecte la energía ADVERTENCIA sobre la lavadora . Si empuja la secadora puede antes de instalar .
- Page 40 Consejos para la solución de problemas Problema Causas posibles Solución La secadora se El movimiento/ruido es normal. Desplace la secadora a un lugar nivelado, o ajuste las patas niveladoras mueve o hace ruido La secadora puede estar según sea necesario . colocada en un lugar desnivelado Las prendas Conducto inadecuado u obstruido Controle las Instrucciones de instalación para verificar que la...
- Page 41 Consejos para la solución de problemas Problema Causas posibles Solución Mensaje “Clean Se activó el botón Power Presione Start/Pause (Inicio/Pausa) para iniciar un ciclo de secado y Filter” (Limpie filtro (Encendido/Apagado) desaparecerá el mensaje . de pelusa) La secadora no Fusible quemado/disyuntor Revise la caja de fusibles/disyuntores y reemplace ambos fusibles y calienta...
- Page 42 Consejos para la solución de problemas Problema Causas posibles Solución Ocurre estática No se utilizó ningún tipo de Intente utilizar un suavizador de telas . suavizador de telas Bounce® Fabric Conditioner Dryer Sheets ha sido aprobado para ser usado con todas las Secadoras GE Appliances y cuando se usen de acuerdo con las instrucciones del fabricante .
-
Page 43: Garantía Limitada
Además de la garantía que figura más arriba, solicítele a su vendedor minorista o en Crosley.com/warranty la Garantía Limitada Extendida por 10 Años de Crosley, la cual es provista sin costo adicional . Esta garantía cubrirá su producto cuando la garantía inicial del fabricante caduque luego de 10 años . Para conocer detalles específicos, por favor comuníquese con Crosley a través de Crosley.com o llame a Crosley al 800 .356 .5268 . - Page 44 . Servicio Programado El servicio de reparación de Crosley está a sólo un paso de su puerta . Para programar el servicio técnico, comuníquese al 800 .544 .4780 durante el horario de atención comercial .