Table of Contents
Advertisement
Quick Links
Table of Contents ............................1
Usage Notice ...................................2
Safety Information ...............................2
Precautions .........................................3
Eye Safety Warnings ..........................5
Product Features ................................5
Introduction ......................................6
Package Overview ..............................6
Product Overview ...............................7
Main Unit .............................................. 7
Control Panel ....................................... 8
Input/Output Connections .................... 9
Remote Control .................................. 10
Installation ..................................... 11
Connecting to the Projector ..............11
Connecting a Computer/Notebook .... 11
Connecting a Video source ................ 12
Connect to 3D Video Devices ...........13
Using the 3D glasses ........................15
Powering On/Off the Projector ..........16
Powering On the Projector ................. 16
Powering Off the Projector ................. 17
Warning Indicator ............................... 18
Adjusting the Projected Image ..........19
Adjusting the Projector's Height ........ 19
Adjusting the Projector's Focus ......... 20
Adjusting Projection Image Size ........ 20
User Controls ................................23
Control Panel ..................................... 23
Remote Control .................................. 24
On-screen Display Menus ................27
How to operate .................................. 27
Menu Tree .......................................... 28
IMAGE ............................................... 35
IMAGE | Advanced ............................ 38
DISPLAY ............................................ 43
DISPLAY | 3D ................................... 48
SETUP ............................................... 50
Table of Contents
SETUP | Audio Settings ..................... 53
SETUP | Security ............................... 55
SETUP | Network ............................... 57
SETUP | Network|LAN Settings ......... 58
SETUP | Network|Control Settings .... 60
SETUP | Signal (RGB) ....................... 70
SETUP | Signal (Video) ..................... 72
SETUP | Advanced ............................ 73
OPTIONS ........................................... 75
OPTIONS | Lamp Settings ................. 79
OPTIONS | Advanced ........................ 81
OPTIONS | Remote Settings ............. 83
OPTIONS | Filter Settings .................. 84
Appendices ....................................85
Troubleshooting ................................85
Image Problems ................................. 85
Other Problems .................................. 87
Remote Control Problems ................. 87
LED Lighting Messages ..................... 88
On Screen Messages ........................ 89
Replacing the Lamp ..........................90
Dust Filter .........................................92
Compatibility Modes .........................93
Protocol Function List .......................95
RS232 Pin Assignments .................... 95
RS232 Protocol Function List ............ 96
Ceiling Mount Installation ................104
Optoma Global Offices ...................105
Regulation & Safety Notices ...........107
FCC Notice ...................................... 107
EU countries .................................... 108
1
English
Advertisement
Table of Contents

Related Manuals for Optoma W320ust


Summary of Contents for Optoma W320ust
-
Page 1: Table Of Contents
RS232 Protocol Function List .... 96 User Controls ........23 Ceiling Mount Installation ....104 Control Panel & Remote Control ..23 Optoma Global Offices ....105 Control Panel ........23 Regulation & Safety Notices ...107 Remote Control ........24 FCC Notice ........107 On-screen Display Menus ....27... -
Page 2: Usage Notice
Do not attempt to service the unit yourself. Opening or removing covers may expose you to dangerous voltages or other hazards. Please call Optoma before you send the unit for repair. 7. Do not let objects or liquids enter the projector. They may touch danger- ous voltage points and short out parts that could result in fire or electric shock. -
Page 3: Precautions
Usage Notice Precautions Please follow all warnings, precautions and mainte- Please follow all warnings, precautions and mainte- nance as recommended in this user’s guide. nance as recommended in this user’s guide. Warning- Do not look into the projector’s lens when the lamp is on. - Page 4 Usage Notice Turn off and unplug the power plug from the AC outlet before ™ cleaning the product. Use a soft dry cloth with mild detergent to clean the display hous- ™ ing. Disconnect the power plug from AC outlet if the product is not be- ™...
-
Page 5: Eye Safety Warnings
Usage Notice Eye Safety Warnings Avoid staring/facing directly into the projector beam at all ™ times. Keep your back to the beam as much as possible. When projector is used in a classroom, adequately super- ™ vise students when they are asked to point out something on the screen. -
Page 6: Introduction
Introduction Package Overview Unpack and inspect the box contents to ensure all parts listed below are in the box. If something is missing, please contact Optoma customer service. Standard Accessories Power Switch Freeze Enter Page- Laser Page+ Keystone Volume Menu... -
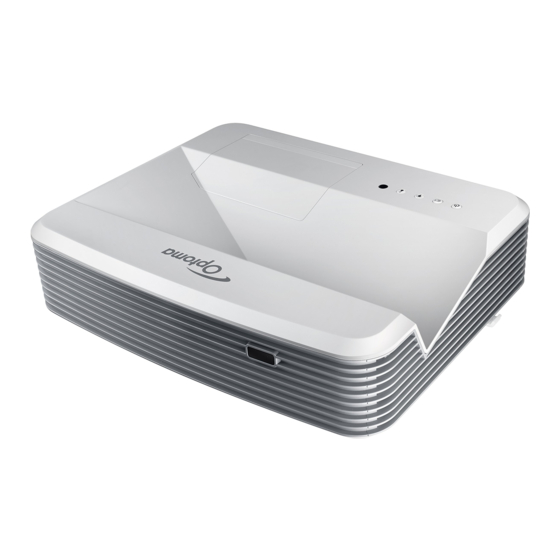
Page 7: Product Overview
Introduction Product Overview Main Unit Do not block ™ projector in/out air vents. Lamp Cover Lens Control Panel Power Socket Focus Switch Speaker IR Camera (Only for IR Receiver interactive version) Input/Output Connections English... -
Page 8: Control Panel
Introduction Control Panel Power Source Lamp Indicator Temperature (Temp) Indicator IR Receiver English... -
Page 9: Input/Output Connections
Introduction Input/Output Connections Power Socket Kensington Lock Port RJ45 Connector USB Power Connector (5V/2A Max.) 3D Sync Connector (5V) RS-232C Connector (9-pin DIN Type) 12V Audio Out Connector USB Connector (Connect to PC for Remote Mouse function) VGA-Out/VGA2-In Connector VGA1-In/YPbPr Connector (PC Analog Signal/Component Remote mouse ™... -
Page 10: Remote Control
Introduction Remote Control Some keys may ™ have no function for models which do not support these features. Power on / off Power Switch Freeze Display blank / audio mute Freeze Mouse left click Enter Laser Page - Keystone - / + Menu Enter Aspect ratio... -
Page 11: Installation
Installation Connecting to the Projector Connecting a Computer/Notebook MOLEX Due to the ™ Audio output difference in applications for each country, 3D glasses some regions may Microphone input have different accessories. Optional ™ accessory 1....................RS-232C cable 2................Remote Mouse USB cable 3..................VGA1-In/YPbPr cable 4....................*HDMI cable 5.....................Audio 2 In cable... -
Page 12: Connecting A Video Source
Installation Connecting a Video source DVD player, Blu-ray player, Set-top box, HDTV receiver, Games console Due to the ™ difference in applications for 3D glasses each country, Audio output some regions may have different accessories. Optional ™ accessory DVD player, Set-top box, HDTV receiver 1................*3 RCA Component cable 2....................*HDMI cable... -
Page 13: Connect To 3D Video Devices
Installation Connect to 3D Video Devices Once you have connected your devices together with HDMI cables, as shown in the diagram, you are ready to begin. Power ON your 3D video source and your 3D projector. The 3D video ™ source device ®... - Page 14 Installation 3D Broadcast 3D Blu-ray™ Disc 3D Console Games SKY+HD, cable/satellite 3D Blu-ray™ Player PlayStation ® 3D DLP Link™ Glasses ® Full 3D 1080p DLP Projector ® 3D RF Glasses 3D Emitter English...
-
Page 15: Using The 3D Glasses
Installation Using the 3D glasses To turn ON 3D glasses. For more de- ™ Verify that 3D content is being sent to the projector and tailed informa- signal is compatible with projector specifications. tion, please Turn on the “3D Mode” (Off/DLP-Link/VESA 3D - depend- refer to 3D ing on which type of glasses you are using) of the 3D glasses user’s... -
Page 16: Powering On/Off The Projector
Installation Powering On/Off the Projector Powering On the Projector 1. Securely connect the power cord and signal cable. When connected, the On/Standby LED will turn Red. 2. Turn on the lamp by pressing “ ” button either on the top of the projector or on the remote. -
Page 17: Powering Off The Projector
Installation Powering Off the Projector 1. Press the “ ” button on the remote control or on the Control Panel to turn off the projector. The following message will be displayed on the screen. Power Off? Power Off? Press Power again Press Power again Press the “... -
Page 18: Warning Indicator
Installation Warning Indicator When the warning indicators (see below) come on, the projector will automatically shutdown: Contact the ™ nearest service “LAMP” LED indicator is lit red and if “On/Standby” indicator ™ center if the flashes red. projector displays “TEMP” LED indicator is lit red and if “On/Standby” indicator ™... -
Page 19: Adjusting The Projected Image
Installation Adjusting the Projected Image Adjusting the Projector’s Height The projector is equipped with elevator feet for adjusting the image height. 1. Locate the adjustable foot you wish to modify on the underside of the projector. 2. Rotate the adjustable ring clockwise to raise the projector or counter clockwise to lower it. -
Page 20: Adjusting The Projector's Focus
Installation Adjusting the Projector’s Focus To focus the image, slide the focus switch until the image is clear. Standard throw series (XGA): The projector will focus at dis- tances from 1.55 to 2.21 feet (0.47 to 0.68 meters) counted from the center of lens.. - Page 21 Installation Variables: “a”: Image Offset (m) from the center of the lens to the top of the vertical image. “b”: Distance from the center of the lens to the bottom of the projector. “c”: Distance between the wall (projection surface) to the back of the projector. “d”: Image Diagonal.
- Page 22 Installation Standard throw XGA (4:3) Distance between Image Offset Distance between Distance between Width of Image Height of Im- the center from the center Distance from center the wall(projection Distance from top the wall (projection Image Diagonal Size age Size of lens and of the lens to the of lens to the bottom...
-
Page 23: User Controls
User Controls Control Panel & Remote Control Control Panel Using the Control Panel Refer to the “Power On/Off the Projector” section on POWER pages 16-17. SOURCE Press to select an input signal. Lamp LED Indicate the projector’s lamp status. Temp LED Indicate the projector’s temperature status. -
Page 24: Remote Control
User Controls Remote Control Using the Remote Control Power Switch Power Press to turn on / off the projector. Freeze Switch Press to switch the USB mouse on / off. Display Press to hide / unhide the screen picture blank / Enter and turn off / on audio. - Page 25 User Controls Using the Remote Control Power Switch Press to manually select a 3D mode that 3D / 3 matches your 3D content. Freeze Use as numeric keypad number “3”. Press to choose HDMI source. HDMI / 4 Use as numeric keypad number “4”. Enter Press to choose VGA source.
- Page 26 User Controls Installing Batteries Two size AAA batteries are supplied for Remote Control. Replace only with the same or equivalent type recommended by the manufacturer. CAUTION Improper use of batteries can result in chemical leakage or explo- sion. Be sure to follow the instructions below. Do not mix batteries of different types.
-
Page 27: On-Screen Display Menus
User Controls On-screen Display Menus The Projector has multilingual On-screen Display menus that allow you to make image adjustments and change a variety of settings. The projector will automatically detect the source. How to operate 1. To open the OSD menu, press “Menu” on the Remote Control or Control Panel. -
Page 28: Menu Tree
User Controls Menu Tree Main Value or Sub Menu Advanced Menu Parameter Single Item in the Menu Notes Menu Default Presentation / Bright / Each mode can Display Mode Movie / sRGB / Blackboard adjust and save to / DICOM SIM. / 3D / User user mode. - Page 29 User Controls Main Value or Sub Menu Advanced Menu Parameter Single Item in the Menu Notes Menu Default Hue/ Saturation /Gain/ Cyan -50~ +50 Exit Hue/ Saturation /Gain/ Magenta -50~ +50 Exit Hue/ Saturation /Gain/ Yellow -50~ +50 Color Matching Exit Advanced White...
- Page 30 User Controls Main Value or Sub Menu Advanced Menu Parameter Single Item in the Menu Notes Menu Default English / Deutsch / Français / Italiano / Español / Português / Polski / Nederlands / Svenska / Norsk/Dansk / Suomi / Ελληνικά/ Language English / 日本語...
- Page 31 On/Off Mute On/Off Audio 1 (RCA) for Audio 0-10 Composite Volume Auto Settings Audio 2 (Mini jack) 0-10 for VGA Audio Input Default/Audio 1/Audio 2 Default Exit Logo Optoma/ Neutral /User Optoma Logo Capture Advanced Closed Captioning CC1/CC2/Off Exit English...
- Page 32 User Controls Main Value or Sub Menu Advanced Menu Parameter Single Item in the Menu Notes Menu Default Network Read-Only Status DHCP On/Off IP Address Subnet Never time-out on Mask this page. LAN Settings Gateway Apply Yes/No SETUP Network Read-Only Address Exit Crestron...
- Page 33 User Controls Main Value or Sub Menu Advanced Menu Parameter Single Item in the Menu Notes Menu Default Direct Power On On/Off Signal Power on On/Off Auto Power Off 0~180 (min) Sleep Timer (min) 0~990 Power Mode Active/ Eco. Eco. ( Standby) Quick Resume On/Off...
- Page 34 User Controls Main Value or Sub Menu Advanced Menu Parameter Single Item in the Menu Notes Menu Default The definition of Current: To reset all OSD settings to be default for current source and current OPTIONS Reset Current/All timing. The definition of All: To reset all OSD settings to be default for all source and all...
-
Page 35: Image
User Controls IMAGE DIsplay Mode Presentation IMAGE Brightness Contrast Sharpness Color Tint Advanced Display Mode There are many factory presets optimized for various types of images. Presentation: This mode is suitable for showing in front of public in connection to the PC. Bright: Maximum brightness from PC input. - Page 36 User Controls Presentation Bright Movie User Blackboard DICOM SIM. sRGB User Brightness Adjust the brightness of the image. Press the to darken image. Press the► to lighten the image. Brightness Contrast The contrast controls the degree of difference between the light- est and darkest parts of the picture.
- Page 37 User Controls Sharpness Adjust the sharpness of the image. Press the to decrease the sharpness. Press the to increase the sharpness. Sharpness Color Adjust a video image from black and white to fully saturated color. Press the to decrease the amount of saturation in the im- age.
-
Page 38: Image | Advanced
User Controls IMAGE Advanced IMAGE | Advanced Noise Reduction Gamma Film Brilliant Color RGB Gain/Bias Color Temp. Cool Color Matching Color Space Auto Exit Noise Reduction Selects a filter sensitivity to noise. A higher value may improve noisy sources, but it will soften the image. Press the to decrease the noise in the image. - Page 39 User Controls BrilliantColor™ This adjustable item utilizes a new color-processing algorithm and enhancements to enable higher brightness while providing true, more vibrant colors in picture. Press the to stronger enhance the image. Press the to less enhance the image. Brilliant Color RGB Gain/Bias This settings allows to configure the brightness (gain) and contrast (bias) of an image.
- Page 40 User Controls Color Matching Press the into the next menu and then use to select the item. Color Matching Cyan Green Magenta Blue Yellow White Reset Exit : Press the to select Hue, Saturation and Gain Colors. Then press the to decrease or increase the value respectively.
- Page 41 User Controls Green : Press the to select Hue, Saturation and Gain Colors. Then press the to decrease or increase the value respectively. Green Saturation Gain Exit Magenta Press the to select Hue, Saturation and Gain Colors. Then press the to decrease or increase the value respectively.
- Page 42 User Controls White Press the to select Hue, Saturation and Gain Colors. Then press the to decrease or increase the value respectively. White Saturation Gain Exit Reset: Choose “ Reset” to return the factory default settings for color adjustments. Color Space Press the select an appropriate color matrix type from the following:...
-
Page 43: Display
User Controls DISPLAY Format DISPLAY Zoom Edge Mask Image Shift V. Keystone Exit Format Press the to choose your desired aspect ratio between 4:3, 16:9/16:10 (WXGA), LBX, Native, and Auto. Format 4:3: This format is for 4:3 input sources. 16:9: This format is for 16:9 input sources, like HDTV and enhanced for Wide screen TV. - Page 44 User Controls WXGA 4:3: This format is for 4:3 input sources. 16:9: This format is for 16:9 input sources, like HDTV and enhanced for Wide screen TV. 16:10: This format is for 16:10 input sources, like widescreen laptops. LBX: This format is for non-16x9, letterbox source and for us- ers who use external 16x9 lens to display 2.35:1 aspect ratio using full resolution.
- Page 45 User Controls 16:10 Screen 480i/p 576i/p 1080i/p 720p Scale to 1066 x 800 16:10 Scale to 1280 x 800 Scale to 1280 x 960, in order to get the central 1280 x 800 image displayed on the screen. 1:1 map- 1:1 mapping 1280 x 720 1:1 mapping...
- Page 46 User Controls Zoom Press the to reduce the size of an image. Press the to magnify an image on the projection screen. Zoom Edge Mask Edge mask the image to remove video encoding noise on the edge of video source. Press the to decrease the edge mask in image.
- Page 47 User Controls V Keystone Press the to adjust image distortion vertically and make a squarer image. V. Keystone Exit Choose “Exit” to exit the menu. English...
-
Page 48: Display | 3D
User Controls DISPLAY DISPLAY | 3D DLP - Link 3D Mode 3D Format Frame Sequential 3D Sync. Invert Exit 3D Mode Off: Select “Off” to turn off 3D mode. Press the to select the 3D mode. 3D Mode DLP - Link 3D Format is only ™... - Page 49 User Controls 3D Format Press the to select 3D format. 3D Format Frame Sequential Auto: When a 3D identification signal is detected, the 3D for- mat is selected automatically. SBS: Display 3D signal in “Side-by-Side” format. Top and Bottom: Display 3D signal in “Top and Bottom” format. Frame Sequential: Display 3D signal in “Frame Sequential”...
-
Page 50: Setup
User Controls SETUP Language English SETUP Projection Menu Location Audio Settings Sceen Type Security Projector ID Signal (RGB) Advanced Network Exit Signal (Video) Advanced Network Exit English... - Page 51 User Controls Language Choose the multilingual OSD menu. Press into the sub menu and then press the ►key to select your pre- ferred language. Press “Enter” to finalize the selection. Language Exit Projection Press the ►key to select the preferred pro- jection.
- Page 52 User Controls Menu Location Press the key to select the preferred menu location. Menu Location Exit Screen Type Press the choose the screen type from16:10* or 16:9. Screen Type *This screen type ™ applies to WXGA only. Projector ID ID definition can be set up by menu (range 0-99), and allow user control an individual projector by RS232.
-
Page 53: Setup | Audio Settings
User Controls SETUP Audio Settings SETUP | Internal Speaker Mute Audio Settings Volume Audio Input Default Exit Internal Speaker Choose the “On” or “Off” to turn on or off the internal speaker. “Mute” function ™ Internal Speaker affects both internal and external speaker Mute volume. - Page 54 User Controls Audio Input The default audio settings are on the back panel of the projector. Use this option to reassign any of the Audio Inputs (1 or 2) to the current image source. Each Audio input can be assigned to more than one video source.
-
Page 55: Setup | Security
User Controls SETUP Security SETUP | Security Security Security Timer Change Passwords Exit Security On: Choose “On” to use security verification when the turning on the projector. Off: Choose “Off” to be able to switch on the projector without password verification. Security Security Timer Can be select the time (Month/Day/Hour) function to set the... - Page 56 User Controls Change Password First time: Press “Enter” key to set the password. Pass-code default ™ The password has to be 4 digits. value is “1234” (first Use number button on the remote or on-screen numeric key- time). pad to enter your new password and then press “Enter” key to Enter Security Code (4 digits) confirm your password.
-
Page 57: Setup | Network
User Controls SETUP Network SETUP | Network LAN Settings Control Settings Exit LAN Settings Loading network configuration Please wait... For more information on LAN Settings, refer to page 58-59, and 62-69 Control Settings For more information on Control Settings, refer to page 60-69. English... -
Page 58: Setup | Network|Lan Settings
User Controls SETUP Network LAN Settings SETUP | Connected Network Status MAC Address Network|LAN DHCP Settings IP Address Subnet Mask Gateway Apply Exit Network Status Display the network connection status (read-only). MAC Address Display the MAC address (read-only). DHCP DHCP On: Projector will obtain an IP address automatically from your network. - Page 59 User Controls Subnet Mask Subnet Mask Display subnet mask number. Gateway Gateway Display the default gateway of the network connected to the projector. Display DNS number. Apply Press and then choose “Yes” to apply the selection. Apply Exit Choose “Exit” to exit the menu. English...
-
Page 60: Setup | Network|Control Settings
User Controls SETUP Network: Control Settings SETUP | Crestron Extron Network|Control PJ Link Settings AMX Device Discovery Telnet Exit Crestron Crestron Use this function to select the network function (port: 41794). For more information, please visit http://www.crestron.com and www.crestron.com/getroomview. On: The Crestron function is active. Off: The Crestron function is inactive. - Page 61 User Controls AMX Device Discovery AMX Device Discovery Use this function to select the network function (port: 1023). On: The AMX Discovery function is active. Off: The AMX Discovery function is inactive. Telnet Telnet Use this function to select the network function (port: 23). On: Telnet is enabled.
- Page 62 User Controls LAN_RJ45 Function For simplicity and ease of operation, the W320UST projector provides diverse networking and remote management features. The LAN/RJ45 function of the projector through a network, such as remotely manage: Power On/Off, Brightness and Contrast Use Ethernet Nor- ™...
- Page 63 User Controls This projector supports all commands of PJLink Class1 (Version 1.00). http://pjlink.jbmia.or.jp/english/ For more detailed information about the various types of exter- nal devices which can be connected to the LAN/RJ45 port and remote/control the project, as well as the supported commands for these external devices, please contact the Support-Service directly.
- Page 64 User Controls Right-click on the Local Area Connection, and select Property. In the Properties window, select the General tab, and select Internet Protocol (TCP/IP). Click “Properties”. English...
- Page 65 User Controls Type in the IP address and Subnet mask, then press “OK”. Press the “Menu” button on the projector. keys to select SETUP > Network > LAN Settings. After getting into LAN Settings, input the following connection parameters: DHCP: Off IP Address: 10.10.10.10 Subnet Mask: 255.255.255.255 Gateway: 0.0.0.0...
- Page 66 User Controls Press “Enter”. The projector is setup for remote management. The LAN/RJ45 function displays as follows: Information Page Main Page English...
- Page 67 User Controls Tool Page Contact IT Helpdesk RS232 by Telnet Function There is alternative RS232 command control way, in projector so called “RS232 by TELNET” for LAN/RJ45 interface. English...
- Page 68 User Controls Quick Start-Guide for “RS232 by Telnet” Check and get the IP address on OSD of the projector. Make sure that the PC/laptop can access the web-page of the projector. Make sure that "Windows Firewall" setting is set disabled in case of "TELNET"...
- Page 69 User Controls Specification for “RS232 by TELENT”: Telnet: TCP. Telnet port: 23 (for more detail, kindly please get contact with In Windows XP ™ the service agent or team). built-in “TELNET. Telnet utility: Windows “TELNET.exe” (console mode). exe” utility, “Enter” Disconnection for RS232-by-Telnet control normally: Close key pressed will Windows Telnet utility directly after TELNET connection ready.
-
Page 70: Setup | Signal (Rgb)
User Controls SETUP Signal (RGB) SETUP | Automatic Disable Phase Signal (RGB) Frequency H. Position V. Position Exit Automatic “Signal” is only sup- ™ ported in Analog SETUP VGA (RGB) signal. Signal (RGB) If “Signal” is auto- ™ Automatic matic, the phase, Disable frequency items are Exit... - Page 71 User Controls Frequency Frequency Change the display data frequency to match the frequency of your computer’s graphic card. Use this function only if the image appears to flicker vertically. Press the to decrease the frequency. Press the to increase the frequency. H.
-
Page 72: Setup | Signal (Video)
User Controls SETUP Signal (Video) SETUP | White Level Black Level Signal (Video) Exit White Level White Level Adjust the overall white level of the projected image by applying a gain to the input image. Press the to decrease the white level. Press the to increase the white level. -
Page 73: Setup | Advanced
Neutral: Logo is not displayed on startup screen. does not exceed Optoma: Optoma logo is displayed on startup screen. the projector User: User-defined background is shown on startup screen. native resolution. Logo Capture (1280 x 800). - Page 74 User Controls Choose “On” and “Yes” to capture an image of the picture cur- rently displayed on screen. Closed Captioning Closed Captioning Closed Captioning is a text version of the program sound or other information displayed on the screen. If the input signal contains closed captions, you can turn on the feature and watch the chan- nels.
-
Page 75: Options
User Controls OPTIONS Input Source OPTIONS Source Lock High Altitude Information Hide Keypad Lock Test Pattern None 12V Trigger Input Source Use this option to enable/disable input sources. Press ► to enter the sub menu and select which sources you require. Press “Enter” to finalize the selection. - Page 76 User Controls Information Hide On: Choose “On” to hide the info message. Off: Choose “Off” to show the “searching” message. Information Hide Keypad Lock When the keypad lock function is “On”, the Keypad will be locked however, the projector can be operated by the remote control. By selecting “Off”, you will be able to unlock the Keypad.
- Page 77 User Controls OPTIONS Background Color Black OPTIONS VGA2 Switch Lamp Settings Advanced Filter Settings Reset Exit Background Color Use this feature to display a “Black”, “Red”, “Blue”, “Green” or “White”, screen when no signal is available. Background Color White VGA2 Switch When the “VGA2 Switch”...
- Page 78 User Controls Reset Current: Choose “Yes” to return the display parameters on this menu to the factory default settings. All: Choose “Yes” to return the display parameters on all menus to the factory default settings. Reset ? Reset Processing ... Exit Choose “Exit”...
-
Page 79: Options | Lamp Settings
User Controls OPTIONS Lamp Settings OPTIONS | Lamp Hour Lamp Reminder Lamp Settings Dynamic Brightness Mode Lamp Reset Exit Lamp Hours Display the projection time. Lamp Reminder Choose this function to show or to hide the warning message When ambient ™... - Page 80 User Controls Lamp Reset Resets the lamp hour counter after replacing the lamp. Lamp Reset Lamp Reset ? Exit Choose “Exit” to exit the menu. Lamp Behavior in different mode and function: Brightness Mode Bright Dynamic Eco+ White Pattern 100% 100% Dimming range 100%~30%...
-
Page 81: Options | Advanced
User Controls OPTIONS Advanced OPTIONS | Direct Power On Signal Power On Advanced Auto Power Off (min) Sleep Timer (min)) Quick Resume Eco. Power Mode (Standby) Remote Settings Exit Exit Direct Power On Choose “On” to activate Direct Power mode. The projector will automatically power on when AC power is supplied, without pressing the “... - Page 82 User Controls Auto Power Off (min) Sets the countdown timer interval. The countdown timer will start, when there is no signal being sent to the projector. The projector The value of ™ will automatically power off when the countdown has finished (in sleep timer will minutes).
-
Page 83: Options | Remote Settings
User Controls OPTIONS Remote Settings OPTIONS | Remote USER 1 USER 2 Settings USER 3 Test Pattern Exit USER 1 The default value is HDMI2. USER 1 HDMI2 Press the into the next menu and then press the select HDMI2/VGA2/Test Pattern/LAN/Brightness/Contrast/Sleep Timer/ Color Matching/Color Temp/Gamma/ Source Lock /Projec- tion/Lamp Settings/Zoom/Freeze. -
Page 84: Options | Filter Settings
User Controls OPTIONS Filter Settings OPTIONS | Filter Filter Usage Hours Filter reminder 1000 hrs Settings Filter Reset Exit Filter Usage Hours Display the filter time. Filter Reminder “Filter Usage ™ Hours / Filter Choose this function to show or hide the warning message when Reminder / Filter the changing filter message is displayed. -
Page 85: Appendices
Appendices Troubleshooting If you experience a problem with your projector, please refer to the following information. If a problem persists, please contact your local reseller or service center. Image Problems No image appears on-screen Ensure all the cables and power connections are correctly and securely connected as described in the “Installation”... - Page 86 Appendices Image has slanted sides: If possible, reposition the projector so that it is centered on the screen and below the bottom of the screen. Use “Display-->V Keystone” from the OSD to make an adjust- ment. Image is reversed Select “Setup-->Projection” from the OSD and adjust the pro- jection direction.
-
Page 87: Other Problems
Appendices Other Problems The projector stops responding to all controls If possible, turn off the projector, then unplug the power cord and wait at least 20 seconds before reconnecting power. Lamp burns out or makes a popping sound When the lamp reaches its end of life, it will burn out and may make a loud popping sound. -
Page 88: Led Lighting Messages
Appendices LED Lighting Messages Message Power LED Temp-LED Lamp-LED (Red/Green/Blue) (Red) (Red) Standby state (Input power cord) Power on (Warm- Flashing Blue ing) Lamp lighting Blue Flashing Blue. Power off (Cooling) Red (cooling fan has turned off) Steady light ™ ... -
Page 89: On Screen Messages
Appendices On Screen Messages Power off: ™ Power Off? Press Power Key again Lamp warning: ™ Lamp Warning Lamp life exceeded. Temperature warning: ™ Warning TEMPERATURE TOO HIGH Please 1. Make sure air in and outlets are not blocked. 2. Make sure the environment temperature is under 45 degree C. If the problem persists in spite of the above. -
Page 90: Replacing The Lamp
Appendices Replacing the Lamp The projector automatically detects the lamp life. When the lamp life is nearing the end of use, you will receive a warning message. Lamp Warning Lamp life exceeded. When you see this message, please contact your local reseller or service center to change the lamp as soon as possible. - Page 91 Appendices The screw on the ™ lamp cover and the lamp cannot be removed. The projector ™ cannot be turned on if the lamp cover has not been placed back on the projector. Do not touch the ™ glass area of the lamp.
-
Page 92: Installing And Cleaning The Dust Filter
Appendices Installing and Cleaning the Dust Filter We recommend you clean the dust fi lter every 500 hours of operation, or more often if you are using the projector in a Dust fi lters are ™ dusty environment. only required/sup- plied in selected When the warning message appears on the screen, do the regions with... -
Page 93: Compatibility Modes
Appendices Compatibility Modes HDMI Compatibility Digital B0/Established timing B0/Standard timing B0/Detail timing: 720 x 400 @ 70Hz XGA / WXGA Native timing: 640 x 480 @ 60Hz 1440 x 900 @60Hz XGA: 1024 x 768 @60Hz 640 x 480 @ 67Hz 1024 x 768 @120Hz WXGA: 1280 x 800 @60Hz 640 x 480 @ 72Hz... - Page 94 Appendices True 3D Video Compatibility Input Input timing resolution 1280 x 720p @ 50Hz Top-and-Bottom 1280 x 720p @ 60Hz Top-and-Bottom 1280 x 720p @ 50Hz Frame packing 1280 x 720p @ 60Hz Frame packing HDMI 1.4b 3D Input 1920 x 1080i @ 50 Hz Side-by-Side (Half) 1920 x 1080i @ 60 Hz Side-by-Side (Half)
-
Page 95: Rs232 Commands And Protocol Function List
Appendices RS232 Commands and Protocol Function List RS232 Pin Assignments ™ RS232 shell is grounded. Spec. Pin no. (from projector side) English... -
Page 96: Rs232 Protocol Function List
Appendices RS232 Protocol Function List Baud Rate : 9600 Data Bits: 8 1. There is a <CR> Parity: None after all ASCII Stop Bits: 1 commands. Flow Control : None UART16550 FIFO: Disable 2. 0D is the HEX Projector Return (Pass): P code for <CR>... - Page 97 Appendices ~XX327 n 7E 30 30 33 32 37 20 a 0D Color Matching Red Hue n = -50 (a=2D 35 30) ~ 50 (a=35 30) ~XX328 n 7E 30 30 33 32 38 20 a 0D Green Hue n = -50 (a=2D 35 30) ~ 50 (a=35 30) ~XX329 n 7E 30 30 33 32 39 20 a 0D Blue Hue...
- Page 98 Appendices ~XX37 1 7E 30 30 33 37 20 31 0D Color Space Auto ~XX37 2 7E 30 30 33 37 20 32 0D RGB\ RGB(0-255) ~XX37 3 7E 30 30 33 37 20 33 0D ~XX37 4 7E 30 30 33 37 20 34 0D RGB(16 - 235) ~XX73 n 7E 30 30 37 33 20 a 0D...
- Page 99 7E 30 30 38 39 20 33 0D Audio2 ~XX82 1 7E 30 30 38 32 20 31 0D Logo Optoma ~XX82 2 7E 30 30 38 32 20 32 0D User ~XX82 3 7E 30 30 38 32 20 33 0D...
- Page 100 Appendices ~XX88 2 7E 30 30 38 38 20 32 0D ~XX87 1 7E 30 30 38 37 20 31 0D Network Status(Read only Return :Oka, a=0/1 Disconnected/ Connected ~XX87 3 7E 30 30 38 37 20 33 0D IP Address(Read only) Return: “Okaaa_bbb_ccc_ddd” ~XX454 0/2 7E 30 30 34 35 34 20 30(32) 0D Crestron ~XX454 1...
- Page 101 Appendices ~XX115 1 7E 30 30 31 31 35 20 31 0D Quick Resume On ~XX115 0 7E 30 30 31 31 35 20 30 0D Off (0/2 for backward compatible) ~XX114 1 7E 30 30 31 31 34 20 31 0D Power Active (<=0.5W) Mode(Standby)
- Page 102 Appendices READ from projector 232 ASCII Code HEX Code Function Projector Return Description ~XX121 1 7E 30 30 31 32 31 20 31 0D Input Source Commands a = 0 None a = 2 VGA-1 a = 3 VGA-2 a = 5 Video a = 7 HDMI1 a = 8 HDMI2 ~XX122 1...
- Page 103 Appendices ~XX351 0 7E 30 30 33 35 31 20 30 0D Fan1 speed(blower) a=0000~9999 ~XX352 1 7E 30 30 33 35 32 20 31 0D System temperature a=000~999 ~XX353 1 7E 30 30 33 35 33 20 31 0D Serial number Okaaaaaaaaaa a=serial number string...
-
Page 104: Ceiling Mount Installation
Appendices Ceiling Mount Installation If you wish to use a third party ceiling mount kit, please ensure the screws used to attach a mount to the projector meet the following specifications:: Screw type: M4*3 Maximum screw length: 11mm Minimum screw length: 8mm ... -
Page 105: Optoma Global Offices
Appendices Optoma Global Offices For service or support please contact your local office. 3178 Laurelview Ct. 888-289-6786 Fremont, CA 94538, USA 510-897-8601 www.optomausa.com services@optoma.com Canada 3178 Laurelview Ct. 888-289-6786 Fremont, CA 94538, USA 510-897-8601 www.optomausa.com services@optoma.com Latin America 3178 Laurelview Ct. - Page 106 Appendices Deutschland Wiesenstrasse 21 W +49 (0) 211 506 6670 D40549 Düsseldorf, +49 (0) 211 506 66799 Germany info@optoma.de Scandinavia Lerpeveien 25 +47 32 98 89 90 3040 Drammen +47 32 98 89 99 Norway info@optoma.no PO.BOX 9515 3038 Drammen...
-
Page 107: Regulation & Safety Notices
Appendices Regulation & Safety Notices This appendix lists the general notices of your projector. FCC Notice This device has been tested and found to comply with the limits for a Class B digital device pursuant to Part 15 of the FCC rules. These limits are designed to provide reasonable protection against harmful interference in a residential installation. -
Page 108: Declaration Of Conformity For Eu Countries
Appendices Declaration of Conformity for EU countries EMC Directive 2004/108/EC (including amendments) Low Voltage Directive 2006/95/EC R & TTE Directive 1999/5/EC (if product has RF function) Disposal instructions Do not throw this electronic device into the trash when discarding. To minimize pollution and ensure utmost protection of the global environment, please recycle it.