Table of Contents
Advertisement
Quick Links
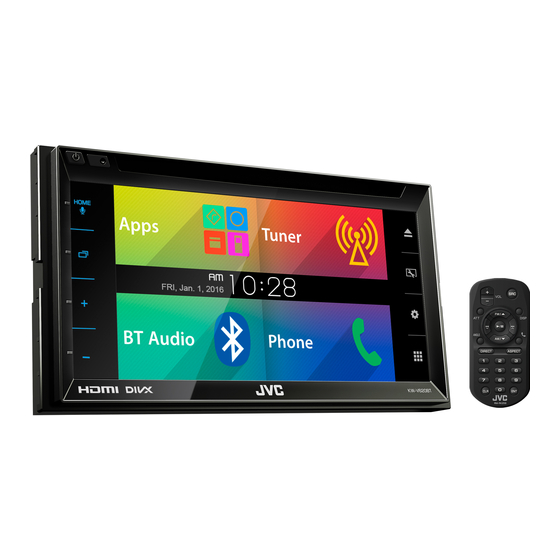
KW-V620BT
KW-V620BTM
MONITOR WITH DVD RECEIVER
INSTRUCTION MANUAL
This instruction manual is used to describe models listed below. Model availability and features
(functions) may differ depending on the country and sales area.
• Region 2 (DVD Region Code 2 area)
• Region 3 (DVD Region Code 3 area)
• Region 5 (DVD Region Code 5 area)
© 2016 JVC KENWOOD Corporation
B5A-1063-00 (MN/M2N/NN)
Advertisement
Table of Contents

Related Manuals for JVC KENWOOD KW-V620BTM


Summary of Contents for JVC KENWOOD KW-V620BTM
- Page 1 (functions) may differ depending on the country and sales area. • Region 2 (DVD Region Code 2 area) • Region 3 (DVD Region Code 3 area) • Region 5 (DVD Region Code 5 area) © 2016 JVC KENWOOD Corporation B5A-1063-00 (MN/M2N/NN)
-
Page 2: Table Of Contents
Using an external monitor— Rear Source ....27 driving. Using the external navigation unit (Only for KW-V620BTM) ..........28 The marking of products using lasers How to read this manual: • Illustrations of KW-V620BT Region 3 are mainly used for explanation. The displays and panels shown in this manual are examples used to provide clear explanations of the operations. -
Page 3: How To Reset Your Unit
Hereby, JVC KENWOOD declares that this unit operations. For Israel “KW-V620BTM” is in compliance with the essential Temperature inside the car... requirements and other relevant provisions of Directive 1999/5/EC. If you have parked the car for a long time in hot or cold weather, wait until the temperature in the car Türkçe... -
Page 4: Initial Settings
INITIAL SETTINGS INITIAL SETTINGS Finish the procedure. Select the time display format (1), then set Initial setup the calendar and the clock time (2). When you power on the unit for the first time or • Press [Set] to set the second to “00”. reset the unit, the initial setting screen appears. -
Page 5: Basics
(Press) (Page 20) – For KW-V620BTM: The screen switched to depends on the <DISP Key> setting in the Press + to increase, and press − to decrease. <Navigation> screen (Page 28). -
Page 6: Common Screen Operations
BASICS BASICS ❏ Turning on/off the AV source Gesture control on the source control screen: Common screen operations You can also control playback by moving your finger You can activate the AV function by selecting a ❏ Common screen descriptions on the touch panel as follows (for some sources, the source on the Home screen. - Page 7 BASICS BASICS Home screen <Settings> screen ❏ Touch screen operations Displays the source control screen and settings Changes the detailed settings. (Page 46) screen. • To display the Home screen, press HOME on the monitor panel. • You can change the Home screen design on the <User Customize>...
-
Page 8: Selecting The Playback Source
BASICS BASICS [HDMI MHL] To return to the Home screen Plays a device connected to Selecting the playback source the HDMI/MHL input terminal. (Page 27) On the Home screen: [BT Audio] Plays a Bluetooth audio player. (Page 36) [Phone] Switches to the phone control screen. -
Page 9: Using The Pop-Up Short-Cut Menu
BASICS BASICS ❏ Selecting the playback source on the Select an item to jump to. Using the pop-up short-cut menu Home screen While displaying the source control screen, you can jump to the other screen from the pop-up short-cut menu. Display the pop-up short-cut menu. -
Page 10: Discs
DISCS DISCS ❏ Ejecting a disc Playing a disc Playback operations On the Home screen: • If a disc does not have a disc menu, all tracks on When the operation buttons are it will be played repeatedly until you change the not displayed on the screen, touch source or eject the disc. - Page 11 DISCS DISCS Operation buttons For audio playback Operation buttons • Available buttons on the screen and operations • Available buttons on the screen and operations 3 4 5 differ depending on the type of disc/file being differ depending on the type of disc/file being played back.
- Page 12 DISCS DISCS ❏ Selecting a folder/track on the list ❏ Video menu operations Displays the picture size selection screen. (Page 42) You can display the video menu screen during video Display the folder/track list. Selects the aspect ratio. (Page 42) playback. • The operation buttons disappear when the screen Displays the picture adjustment is touched or when no operation is done for about screen.
- Page 13 DISCS DISCS For VCD ❏ Selecting playback mode Settings for disc playback Display the <Mode> screen. ] Selects Repeat playback mode. ] Selects Random playback mode. Displays the picture size selection screen. • The location of the buttons differ depending on (Page 42) the type of disc/file being played back.
- Page 14 DISCS DISCS ❏ Setting items Setting the parental lock <Screen Select the monitor type to watch a The parental lock cannot be set during DVD Ratio>* wide screen picture on the external <Menu Select the initial disc menu language. playback. monitor.
-
Page 15: Usb
[FNC J] Displays the pop-up short-cut menu. ❏ Indications and buttons on the source Connecting a USB device (Page 9) control screen • To close the menu, press [K]. You can connect a USB mass storage class device [S] [T] • Selects a track. (Press) 2 3 4 such as a USB memory, Digital Audio Player etc. - Page 16 ❏ Setting picture display time ❏ Selecting a track in the list From the <Category List> screen: Select the category (1), then the item in the Select the interval between slides during slide-shows Display the list selection screen. selected category (2). of the picture files.
-
Page 17: Ipod/Iphone
iPod/iPhone iPod/iPhone ❏ Selecting the iPod/iPhone device to Select the connection method (1), then Preparation play and connection method press [Next] (2). ❏ Connecting iPod/iPhone When connecting the iPod/iPhone device for the • For details about connecting iPod/iPhone, see first time, the setup screen (for connection, etc.) page ... - Page 18 iPod/iPhone iPod/iPhone ❏ Selecting preference settings for iPod/ When selecting <HDMI + Bluetooth> or Playback operations <Bluetooth> as the connection method, iPhone playback the paired device list appears. Select the When the source is “iPod”... When the operation buttons are target device (1), then press [Next] (2).
- Page 19 iPod/iPhone iPod/iPhone Operation buttons ❏ Selecting an audio/video track from the Video menu: Displays the other operation button menu window. Display the menu screen. • To hide the window, press [ Displays the audio/video track menu. (See the right column.) [FNC J] Displays the pop-up short-cut menu.
-
Page 20: Apps
❏ Operation buttons on the source listening to another source Select the iPod touch/iPhone/Android control screen • For KW-V620BTM: Select [Apps] for <DISP Key> in device to use and connection method on the <Navigation> screen beforehand. (Page 28) the <APP Settings> screen. (Page 38) To return to the source control screen: Press on the monitor panel. -
Page 21: Tuner
TUNER TUNER Operation buttons • To display all available operation buttons, press Listening to the radio ] to display the other operation button Displays the other operation button ❏ Indications and buttons on the source window. window. control screen • To hide the window, press [ * Appears only when FM is selected as the source. - Page 22 [Wide] is selected, but ❏ Setting the antenna control (Only for (Hold) sound quality will not be degraded and the stereo KW-V620BT Region 3/KW-V620BTM) effect will remain. The local stations with the strongest signals are You can store the antenna automatically when the found and stored automatically.
- Page 23 TUNER TUNER ❏ Selecting a preset station ❏ Activating/deactivating TA/News FM Radio Data System features Standby Reception Display the <Preset List> screen. ❏ Searching for FM Radio Data System TA Standby Reception programs—PTY Search You can search for your favorite programs being broadcast by selecting the PTY code for your favorite programs.
- Page 24 TUNER TUNER News Standby Reception ❏ Tracing the same program [AF] Switches to another station. The —Network-Tracking Reception program may differ from the one Display the <Mode> screen. (Page 21) currently received (the AF indicator When driving in an area where FM reception is not lights up).
-
Page 25: Other External Components
OTHER EXTERNAL COMPONENTS OTHER EXTERNAL COMPONENTS ❏ Changing the AV-IN name Using external audio/video Using the rear view camera You can change the AV-IN name displayed on the players—AV-IN • To connect a rear view camera, see page 56. “AV-IN” source control screen. •... - Page 26 OTHER EXTERNAL COMPONENTS OTHER EXTERNAL COMPONENTS ❏ Displaying the rear view camera screen ❏ Using the parking guidelines on the Display the <Display> settings screen. rear view screen (See the left column.) The rear view screen is displayed when you shift the gear to the reverse (R) position.
-
Page 27: Using A Smartphone-Hdmi/Mhl
OTHER EXTERNAL COMPONENTS OTHER EXTERNAL COMPONENTS Select the rear source. Using a smartphone—HDMI/MHL Using an external monitor— Rear Source ❏ What is HDMI/MHL? You can enjoy the rear source playback on an HDMI stands for High Definition Multi-media external monitor connected to the AV-OUT VIDEO Interface. -
Page 28: Using The External Navigation Unit
OTHER EXTERNAL COMPONENTS OTHER EXTERNAL COMPONENTS ❏ Settings for the navigation unit Using the external navigation unit (Only for KW-V620BTM) Display the <Input> settings screen. On the Home screen: You can connect a navigation unit (commercially available) to the NAV input terminal so that you can view the navigation screen. -
Page 29: Bluetooth
BLUETOOTH BLUETOOTH Auto pairing Information for using Bluetooth® Connecting Bluetooth devices When <Auto Pairing> is set to [ON], iOS devices devices ❏ Registering a new Bluetooth device (such as iPhone) are automatically paired when connected via USB. (Page 37) When you connect a Bluetooth device to the unit for the first time, pair the unit and the device. - Page 30 BLUETOOTH BLUETOOTH Pairing a Bluetooth device using a PIN code (for Pairing a Bluetooth device from this unit using a Change the PIN code. Bluetooth 2.0) PIN code (for Bluetooth 2.0) • If you wish to skip changing the PIN code, go Display the <Bluetooth Setup>...
- Page 31 BLUETOOTH BLUETOOTH ❏ Connecting/disconnecting a registered ❏ Deleting a registered Bluetooth device Select [ON] or [OFF] for the target. Bluetooth device Display the <Bluetooth Setup> screen. Two devices can be connected simultaneously. (Page 30) Display the <Bluetooth Setup> screen. (Page 30) Mobile phone Audio device •...
- Page 32 BLUETOOTH BLUETOOTH ❏ Ending a call ❏ Switching between handsfree mode Using a Bluetooth mobile phone and phone mode While talking... ❏ Receiving a call While talking... When a call comes in... ❏ Adjusting the volume of calls/earpiece/ Each time you press the button, the talking method •...
- Page 33 BLUETOOTH BLUETOOTH ❏ Sending text during a call ❏ Making a call Select a method to make a call. You can send text during a call using the DTMF (Dual Display the phone control screen. Tone Multi Frequency) function. On the Home screen: While talking...
- Page 34 BLUETOOTH BLUETOOTH From the preset list/phone book/call lists • To use the A to Z search in the phone book: • To display other phone numbers: When the phone book list is displayed, you can When the phone book list is displayed, you can search by initial.
- Page 35 BLUETOOTH BLUETOOTH Direct number entry Voice dialing ❏ Presetting phone numbers You can enter up to 31 numbers. Voice dialing is available only when the connected You can preset up to 5 phone numbers. mobile phone has a voice recognition system. Display the phone control screen.
- Page 36 BLUETOOTH BLUETOOTH Operation buttons ❏ Selecting a track from the menu Using the Bluetooth audio player Displays the other operation button Display the menu screen. window. • To register a new device, see page 29. • To hide the window, press [ •...
- Page 37 BLUETOOTH BLUETOOTH ❏ Setting items < Auto • ON (Initial): Establishes pairing Settings for Bluetooth devices Pairing> automatically with the connected <Paired Press [Enter] to show the list of You can change various settings for using Bluetooth iOS device (such as iPhone) Device List>...
-
Page 38: Settings
SETTINGS SETTINGS Display the <APP Setup> screen. Check the current device status, then press Settings for using applications of On the Home screen: [Change]. iPod/iPhone/Android Before using applications of iPod/iPhone/Android , select the device to use and connection method. Preparation: Connect iPod touch/iPhone/Android device. - Page 39 SETTINGS SETTINGS For iPod/iPhone: • You can delete the Bluetooth registration of a Select the connection method (1), then device. Press [Remove], then press [Yes] after <USB + Select this when the iPod/ press [Next] (2). a confirmation message appears. AV-IN>...
-
Page 40: Sound Adjustment
SETTINGS SETTINGS • You can change the page to display more Adjust the sound. Sound adjustment items by pressing [J]/[K]. ❏ Using the sound equalization Storing your own adjustments—Customizing • The adjustment is memorized for each source until preset sound mode you adjust the sound again. -
Page 41: Adjustment For Video Playback
SETTINGS SETTINGS ❏ Adjusting the crossover frequency Adjust the picture. Adjustment for video playback Display the <X’over> screen. ❏ Adjusting the picture On the Home screen: You can adjust the picture quality. Display the picture adjustment screen. On the source control screen: <Bright>... - Page 42 SETTINGS SETTINGS ❏ Changing the aspect ratio <Full>* For 16:9 original pictures Display the magnification level selection 4:3 signal 16:9 signal screen. You can change the aspect ratio for video playback. • You cannot change the aspect ratio while playing On the source control screen: a USB device.
-
Page 43: Changing The Display Design
SETTINGS SETTINGS To change the panel color: Select an item to change, then select the Changing the display design Display the panel color selection screen (1), design or color. You can change the Home screen design, select the dimmer setting ([ ]: dimmer on or To change the Home screen design: background and panel color. -
Page 44: Customizing The Home Screen
SETTINGS SETTINGS ❏ Storing your favorite image for the Select the file for the background image Customizing the Home screen background (1), then confirm the selection (2). You can arrange the items to display on the Home You can set your favorite image stored on the screen. -
Page 45: Customizing The System Settings
SETTINGS SETTINGS ❏ Adjusting the touch position Touch the center of the marks at the lower Customizing the system settings left and at the upper right as instructed. You can adjust the touch position on the touch ❏ Memorizing/recalling the settings panel if the position touched and the operation You can memorize the following settings: performed do not match. -
Page 46: Setting Menu Items
SETTINGS SETTINGS ❏ Updating the system Setting menu items You can update the system by connecting a USB ❏ Displaying the <Settings> menu screen device containing an update file. • To update the system, visit <http://www.jvc.net/ Display the <Settings> screen. cs/car/>. - Page 47 SETTINGS SETTINGS ❏ <Audio> setting screen <Volume Offset> <Scroll> Adjust and store the auto-adjustment volume level • Auto: Scrolls the displayed information <Fader/Balance> for each source. (For discs, the adjustment is stored repeatedly. for each of the following categories: DVD/DVD-VR/ •...
- Page 48 Displays the version information of the software. such as connection and other general operations. You can update the software. (Page 46) (Page 37) <Open Source Licenses> <Beep> Shows the Open Source Licenses. • ON (Initial): Activates the key-touch tone. • OFF: Cancels. * Only for KW-V620BTM.
-
Page 49: Remote Controller
REMOTE CONTROLLER REMOTE CONTROLLER V Caution: Preparation The unit is equipped with steering wheel remote • Keep the battery out of reach of children and in control function. (Page 51) ❏ Removing the battery sheet original package until ready to use. Dispose of •... - Page 50 REMOTE CONTROLLER REMOTE CONTROLLER ❏ Searching for an item directly Operations using the remote 1 – 6 Enters preset station number. Tuner frequency controller (RM-RK258) ANGLE Not used for this unit. 1 Press DIRECT to enter the search mode. Changes the aspect ratio. ❏...
- Page 51 REMOTE CONTROLLER REMOTE CONTROLLER ❏ Initializing the steering remote Press a steering remote controller button Using the steering remote controller settings to register/change. controller Select a function to assign. Display the <System> setting screen. (See You can assign the functions to the keys of the the far left column.) remote controller on the steering wheel.
-
Page 52: Connection/Installation
CONNECTION/INSTALLATION CONNECTION/INSTALLATION • If your car’s ignition does not have an ACC • This unit has a cooling fan to decrease the Before installing the unit position, connect the ignition wires to a power internal temperature. Do not mount the unit V WARNING source that can be turned on and off with the in a place where the cooling fan of the unit is... - Page 53 8 Screws for fixture (M2.6 x 6 mm) x 1 • Make sure that the unit is installed securely * Only for KW-V620BT Region 3/KW-V620BTM. in place. If the unit is unstable, it may malfunction (e.g., the sound may skip).
- Page 54 10 A fuse White ª / White with black stripe · : To front speaker (left) Only for KW-V620BTM. Gray ª / Gray with black stripe · : To front speaker (right) If no connections are made, do not let the cable come out from the tab.
- Page 55 CONNECTION/INSTALLATION CONNECTION/INSTALLATION ❏ Connecting a USB device ❏ Connecting an iPod/iPhone iPod/iPhone (30-pin connector models) iPod/iPhone (Lightning connector models) USB device (commercially available) (commercially available) (commercially available) 1.0 m USB 2.0 cable (accessory of the iPod/iPhone) Lightning-Digital AV adapter (accessory of the iPod/iPhone) KS-U62 KS-U59...
- Page 56 Contact your JVC dealer for details. (commercially available) (commercially available) Only for KW-V620BTM. When connecting an external amplifier, connect its ground wire to the chassis of the car; otherwise the unit may be damaged. Steering Remote cable is supplied only for KW-V620BT Region 3/ KW-V620BTM.
-
Page 57: References
REFERENCES REFERENCES ❏ To keep discs clean Maintenance More information Dirty discs may not play correctly. ❏ Caution on cleaning the unit ❏ File playback If a disc does become dirty, wipe it with a soft cloth Playing DivX files (for discs only) Do not use any solvent (for example, thinner, in a straight line from center to edge. - Page 58 REFERENCES REFERENCES Playing H.264/WMV files (for USB only) Playing audio files (for discs: MP3/WMA/AAC, for • This unit cannot play back the following files: USB: MP3/WMA/WAV/AAC/FLAC) • This unit can play back files with the extension – MP3 files encoded with MP3i and MP3 PRO code <.mp4>, <.wmv>, <.avi>...
- Page 59 REFERENCES REFERENCES ❏ Disc playback ❏ About data stored in the connected Unplayable discs • Unplayable disc types and formats are as follows: USB device/iPod/iPhone Playable disc types – DVD-Audio/DVD-ROM discs • We bear no responsibility for any loss of data in Disc type Recording format, –...
- Page 60 REFERENCES REFERENCES • Connect only one USB device to the unit at a time. ❏ Notes on playing iPod/iPhone • When operating an iPod/iPhone, some operations Do not use a USB hub. may not be performed correctly or as intended. In •...
-
Page 61: Error Message List
REFERENCES REFERENCES ❏ Language codes (for DVD/DVD-VR language selection) Error message list Afar Galician Maori Somali If an error occurs while using the unit, a message Abkhazian Guarani Macedonian Albanian appears. Take appropriate action according to the Afrikaans Gujarati Malayalam Serbian following message/remedy/cause list. -
Page 62: Troubleshooting
REFERENCES REFERENCES ❏ Discs “Connection Error”: Troubleshooting • The device is registered but the connection has Recordable/Rewritable discs cannot be played failed. Connect the registered device. (Page 31) What appears to be trouble is not always serious. back. Check the following points before calling a service •... - Page 63 REFERENCES REFERENCES ❏ USB ❏ Bluetooth Videos cannot be played. • Connect with USB Audio and Video cable JVC “Now Reading...” does not disappear from the Phone sound quality is poor. KS-U59 (optional accessory) for iPod/iPhone 30- screen. • Reduce the distance between the unit and the pin connector model or JVC KS-U60 (optional •...
-
Page 64: Specifications
REFERENCES REFERENCES ❏ DVD player section The unit does not pair with the Bluetooth device. Specifications • For devices compatible with Bluetooth 2.1: D/A Converter 24 bit Register the device using a PIN code. (Page 30) ❏ Monitor section Audio Decoder Linear PCM/Dolby Digital/MP3/ •... - Page 65 MHL2 531 kHz to 1 611 kHz (9 kHz) Input Resolution VGA (640 × 480p@59.94 Hz/ For KW-V620BTM: 60 Hz), 480p (720 × 480p @59.94 Hz/60 Hz) 531 kHz to 1 611 kHz (9 kHz) Input Audio Type 32 kHz, 44.1 kHz, 48 kHz, 16-bit Usable Sensitivity 28.5 dBμ...
- Page 66 REFERENCES REFERENCES ❏ LW tuner section (Only for ❏ Trademarks and licenses Speaker Impedance 4 Ω to 8 Ω KW-V620BTM) • Manufactured under license from Dolby Equalizer 3 bands Laboratories. Dolby and the double-D symbol are Frequency Range (9 kHz) trademarks of Dolby Laboratories.
- Page 67 Bluetooth SIG, Inc. and any • DivX®, DivX Certified® and associated logos are use of such marks by JVC KENWOOD Corporation is trademarks of DivX, LLC and are used under under license. Other trademarks and trade names license.
- Page 68 0116EHHMDWJEIN...
- Page 69 Spotify Spotify With Spotify, your music is everywhere. Working out, Operation buttons Playback operations partying or relaxing, the right music is always at your Displays the other operation fingertips. There are millions of songs on Spotify— button window. You can operate Spotify using the remote from old favorites to the latest hits.
- Page 70 Spotify Spotify ❏ Creating your station (Start Radio) ❏ Selecting a track • Connect iPod touch/iPhone to this unit with a cable or via Bluetooth. Display the list selection screen. – When connecting with a cable: Use KS-U59/ KS-U62 (optional accessory) or USB 2.0 cable (accessory of the iPod/iPhone).